Wall with imitation of brickwork. Imitation of brick masonry from plaster with their own hands: instruction
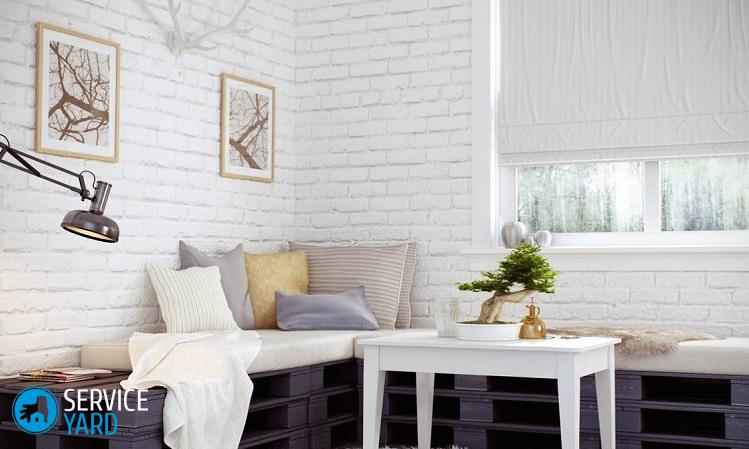
Brick wall - fashionable element of the interior. It looks spectacularly in luxury apartments, and in a modest small apartment. In order to create it, it is not necessary to be a professional mason or finishing - in construction stores you will find a lot of materials that allow you to create a spectacular imitation. Now we will tell you how to make a brick wall in the interior with their own hands.
Use options
Before making a wall under a brick with your own hands, decide what kind of room you are going to be separated in this way. Brick or natural stone will look nicely practically in any room:
- in the kitchen;
- in the living room;
- in the bedroom;
- in the hall;
- in the bathroom.
Important! Perhaps this option is not very suitable for the nursery, but everything depends on age. For the baby, the wall under the brick, of course, is not suitable, but in the teenager's room, this method of finishing can be quite appropriate if the young owner agrees with this. In some cases, the brick partition is suitable for both a preschooler or younger schoolboy. For example, a low border can be distinguished by a corner for creativity or games with building material.
Kitchen
It is not necessary to separate all the walls with brick, although this option is also possible - for example, for medieval or ethnic style. But in any case you will have to combine this material with others, much more modern. So it is better to separate one of some kind of plot by making an emphasis on it. It may be:
- dinner Zone;
- apron;
- niche;
- workshop if it is.
To materials from which other items will be made, it is necessary to take much carefully. Brick organically combines:
- with decorative plaster;
- with wood;
- with natural stone.
Important! Very interesting option, when one wall is brick, and the rest of the upholstered wooden panels. As for the plumbing equipment, in this case the stone shell, trimmed under the stone, or brilliant metallic is suitable.

Living room
In the living room decoration of walls under the brick or natural stone will look good next to the present or electric fireplace. You can lay out the whole wall or separate it. It is very suitable for such an option for zoning. But you need to carefully consider how you will allocate other zones:
- The brick laying on the side of the window will look original. You can add it with cast or wooden decorations.
- If your room has a medieval or non-neutic style, then you can lay out the brick and all the walls. But we need suitable doors and windows - white windows and plastic doors will look not very good, in such a situation there are better noble wood species. In extreme cases, you can pick up plastic under the tree.
- An interesting option can give a brick partition. This is especially important for the studio apartment or a very large living room. The partition is better to do low, it simply denotes some kind of plot. It can accommodate figurines or pots with plants.
- Always beautifully niche laid out by brick or natural stone. This is a natural zone that can be arranged at all as the rest of the room, so in this case the brick wall is perfectly combined with almost all finishing materials.
Bedroom
In this room, you should not lay out all the walls with red bricks. There are several reasons for this:
- walls that look as if there are no finishes on them, create a feeling that in the room is colder than it is in fact;
- dark walls in many cause an alarming and gloomy mood.
Important! If you do not fail to apply this method, it is at your service shopping stores, where you will always find wallpapers "under the brick" of a wide variety of shades. It is better to choose those that turn.
Parishion
Here is this room you can separate white, red, gray and as brick completely. Ideal for the appropriate option, regardless of how you achieve the desired result. The main thing is to choose furniture suitable in style. She may be:
- from wood;
- from metal;
- with leather upholstery.
Important! Plastic cabinets and shelves are not suitable for such walls. They will be knocked out of the overall style.

Bathroom
Fashion trend - leave without trim brick walls in the bathroom. This is not a very good idea, besides, only the inhabitants of brick houses can afford it. In all other cases, it is better to choose a tile or wallpaper with an appropriate pattern. If you like the walls under the brick in the interior - how to do so that they do not look like Lamo in the eye? As in all other rooms, choose the right to choose the remaining finishing materials and equipment:
- As with the cuisine, preferably plumbing equipment under natural stone - marble or granite, for example. Manufacturers offer now a lot of options - you will find both baths and toilets, and shells.
- Cabinets are more suitable wooden or metal, and the technique is better to embed. However, on sale you can find washing machines that will not be knocked out of the "brick" style.
Application options a lot:
- you can separate all the walls, and even make a "apron" from the decorative brick, and not from the tile, as is usually done;
- one wall can be separated - for example, the one where the mirror hangs (it is better if it is "under ancient";
- if the bathroom is combined, you can make a low brick partition between the bathroom and the toilet, and in a large room with several sinks - separating the wash zone;
- if you chose Provencal style, you can leave the brick in the corner of the imitation window, or - on the contrary, near the door.
Advantages and disadvantages
Like any material, brick has its undoubted advantages:
- it can be thoroughly saved on the finish;
- with material easy to work;
- all other items are very clearly visible;
- brick provides good sound insulation;
- brick is resistant to moisture;
- wall "breathe".
Important! For finishing, the brick wall is not necessary to align. This material is perfectly hiding small and not even very small flaws of the surface.
As for the interior itself, on a background, all other items are distinguished brightly, they are attracted by them, and not the wall. Finishing brick gives excellent sound insulation - however, not all materials with this quality have this quality with which you can make a "brick" wall.
Several flaws
Any interesting idea is not so attractive as it seemed at the very beginning, because any material has its own characteristics and disadvantages. What are the "pitfalls" in the decision to make a brick wall in the interior with your own hands?
- the real brick perfectly accumulates dust, which is clogged in the seam;
- the room seems less than it is;
- red brick absorbs a lot of light.
Of course, dust will not accumulate if you use not natural brick, but wallpaper. As for the size of the room and light, there are the same laws here as for other finishing materials: dark walls reduce the space and make the room darker, bright - on the contrary. Of all this, it is necessary to proceed when developing the interior.
We understand with styles
Wall under the brick in the apartment - how to make it look good and did not get out of the interior? Of course, first you need to decide on the style itself. This option is hardly suitable for classics or baroque. But in many cases, the brick wall is simply necessary if the room is decorated in such styles:
- Romanticism;
- Gothic or neoochik;
- Minimalism;
- Ethno;
- Scandinavian;
- Pop Art.
Romanticism
For an interior in a romantic style, mysteriousness and some non-infractions leaving space for fantasy are characteristic. Natural materials, including brick, are suitable for this.
Important! The brick wall will be complemented by decorative plants in forged caspets, ceramic panels, porcelain plates.
Gothic
The gothic style room will discard you for a few centuries ago. Brick or stone walls are the usual phenomenon for this direction. They are combined with coarse wooden or metal furniture, embroidered panels or carpets made in tapestry technique.
Important! In general, drapets need to pay special attention in this case. The tapesto on the wall may not be enough. We need heavy curtains, and a carpet on the floor. By the way, the floor itself can be finished "under the stone."
Minimalism
Very popular now a design version that do not require special efforts. The main thing is that the items in the room are as little as possible, as well as jewelry.
Important! The brick wall can be at all without any decorative panel, cass and suspensions. She is good in itself.

Ethno
Natural materials - a mandatory element of ethnic style:
- In this case, "under the brick", for example, you can separate the bottom of the wall or even pave the border throughout the perimeter. The top is better to do under the tree - from natural panels or wallpaper of the corresponding view. The impression will be created that the house is wooden, but stands on a stone foundation.
- The furniture is better rustic - from an unpainted material without polishing.
- Suitted sewn covered and curtains, merchant floor mats, folk toys as decorations, ceramic and wooden dishes.
Scandinavian
Laconicity and space - here is the motto of the Scandinavian style. It is a cross between ethnic and minimalism, but more modern. Brick is better to separate one wall or even part of it, the rest - almost from any materials, one-photon or small, low-wave pattern. The furniture should be easy and elegant, and as for home appliances - it can be any.
Pop Art
Rolly brick wall, and on it - posters or graffiti. The original way to solve the interior is now quite popular. Furniture - ultramodern, like decorations. Any household appliances, plastic dishes and abstract paintings and figurines.
Registration of walls under the brick
Make a brick wall in the house in a few ways. Cement mortar is not always needed. There are four main options:
- the brick from which the wall is composed;
- decorative brick;
- wallpaper with the corresponding pattern;
- decorative tile.
Natural brick
The first way is possible, naturally, only in brick houses. There is no particular effort for this, it is enough just to remove the whole finish and how to clean the wall. In the panel house you will have to lay an extra layer, that is, to reduce the space.
The main drawback - the brick will be the color from which the house is folded, and surprises can expect you when removing the decoration. For example, there are cases when a part of the wall is composed of red bricks, and some of the white. This, of course, can be beat.
The processing method will be as follows:
- With the help of acid-containing solutions (sold in construction stores), clean the wall from salts and cement residues.
- Wash it with water.
- Stick up the surface with a skin.
- Start the seams with putty.
- You can cover a water-based lacquer wall.
Wallpaper under brick
The easiest way to make the wall "under the white brick" in the apartment is to salary the selected surface with wallpaper with the corresponding pattern. By the way, wallpaper can be not only white, but also gray, and red. They work with them as well as with all other wallpaper.
Clinker tile
It is a narrow strip. They are glued by rows. You can originally to separate intercutric seams - a complete imitation of brick masonry is created.
Finishing brick
If you think how to make a white brick wall in the interior with your own hands, pay attention to the finishing brick. It happens different colors. In addition, you can meet different types of:
- matte;
- artificially aged;
- glazed.
Important! Such a brick is much thinner than usual. Put it on special glue.
What instruments need?
To separate the wall with decorative brick, you will need some tools:
- metal Cornel;
- building level;
- roulette;
- putty knife;
- bucket;
- a hammer;
- lighthouses.
Preparation of the Wall
You need to cook the wall in the same way as under any other finish:
- Remove the remains of the old finish, if possible, removing all fragments.
- Get out of irregularities - for this serves a putty.
- Give the wall to dry.
- Stick up unevenness.
- Apply the soil layer - it will provide the best grip of the decoration with the wall.
- Dry the surface.
Facing
Clinker tiles and decorative brick are glued with special glue. This happens like this:
- Watch a part that will be adjusted to the wall, a metal brush to ensure the best clutch.
- Apply glue on the same side according to the instructions.
- Stick strips of the bottom row.
- Check the process level.
- Attach a long and smooth wooden bar stripes and gently hit in several places with a hammer.
Brick made of plaster
The "brick" wall can be made of plaster plaster. The wall is prepared in the same way as under another finish, that is, clean, close defects and grind. Next is superimposed by a soil layer. After that, the sequence of work will be like this:
- Marking is performed.
- Lighthouses are put.
- Malyary Scotch is glued to the place of the junction of future "bricks" - first horizontal, and then the vertical stripes of the mustache.
- A solution of tile glue and plaster in the ratio of 1: 1 is made.
- The solution is applied to the wall with a thick layer (you can in several receptions) - where the tape is pasted, there will be seams.
- Scotch is removed.
- The chisel or spatula of each fragment attaches a brick form.
- The wall can be painted or covered with varnish.
Important! Scotch must be taken until the wall has never dried!
Stock foot
In this article we offered you a few ideas, how to make a brick wall in the interior with your own hands. As you can see, solutions are a lot and this trend is in fashion. What exactly to give preference - now understand yourself, based on how much you are willing to allocate for this time, forces and money. Good repair!
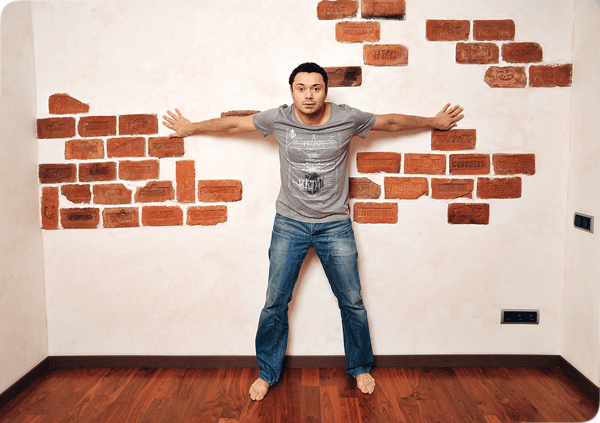
»From the master class presented by the author, you will learn how to independently make the imitation of a brick wall in your city apartment or a private house. To date, this type of wall decoration is very popular, both among young people and middle-aged. At the sight of such imitation, it seems that the wall was left untouched after the house was built, very interesting and unusual.
And everything is pretty simple, the first thing is prepared the wall and cleaned from wallpaper, it is placed irregularities, hesitated by sandpaper. Next, the markup is applied using a pencil in the form of a brick masonry, after it is ground and the tape seams are pasted, first horizontal, and then vertical. A solution is preparing in a ratio of 50% tiled adhesive and 50% of plaster, applying hands (in gloves) in order to create an uneven natural relief of bricks.
And so, let's look at carefully what exactly will need the author to work?
Materials
1. Stucco for walls
2. Tile glue
3. Malyary Scotch
4. Groundovka
5. Paint
6. Water
Instruments
1. Capacity for the preparation of the solution
2. Spatula
3. Drill with a mixer
4. Construction pencil
5. Valik
6. Brush
7. LINEK
8. Brick template (cardboard or linoleum)
9. Scissors.
10. Rubber or polyethylene gloves
Step-by-step instructions for creating a brick wall imitation with their own hands.
First of all, you need to make a template from cardboard, or a linoleum, according to the standard dimensions of 25x6.5 having it should be marked with the wall. Before applying markup, you must prepare the wall, namely, we can wear wallpaper and clean it, if you need to align and sharpen.
The template should be equal to standard brick size.

Wall marking should start from the angle and bottom up, while on the template it is necessary to spend the line exactly in the middle.

So it will be necessary to put markup.


Bricks are marked with a cross.

After the prepared surface is applied primer, for better clutch with a wall with a wall.

As soon as everything dies, you can begin to stick the painting tape, it is glued to the place of the suture, first horizontally, and then vertically peaks.


Many advise to apply the finished solution on the wall directly with their hands, but necessarily in gloves, so the surface will turn out natural and uneven, which will create an effect of aged brick.

The solution needs to be applied from the bottom up, as well as tighten the work, so that the solution is not frozen) otherwise the tape is then impossible to be removed.

And so, the most responsible moment, withdrawal of painting scotch. The first thing is removed horizontal stripes, thereby produces seam 1.5 cm.

Do this all need careful smooth movements without acceleration and jerks.

This is such a wonderful wall it turns out, but it is still not all.

After the tape was removed and the solution is still soft and supportive need to cause irregularities, with the help of a chisel, spatula, or even a tablespoon.

Then you need to give dry to complete hardening, after which the dust and remove the excess mixture.

A layer of primer is applied to the prepared surface, seams can also be covered with soil.

Brick masonry appears in many fashionable interior styles. Imitation brick for interior decoration is a spectacular way to create a cozy and harmonious design of the room. Reception allows designers to gently accentuate attention on all walls or subtly emphasize a certain area of \u200b\u200bthe apartment.
Introduction
Natural brick has a lot of weight and volume. It creates too strong load on the bearing overlaps, which is unsafe for the tenants of the multi-storey house. And also, such a laying is not easy for a newcomer in construction work.
Sometimes partitions are laid out of bricks in large rooms, which leave "live" in the draft finish. You can apply a stone in the point elements of the decor. For the internal finishing works, it is almost not used.
See also: What makes a apron in the kitchen: choose a durable and beautiful option (150+ photos & video) + reviews
Stone masonry as the main accent in the kitchen interior
There are a lot of methods to create an artificial brick wall, visually indistinguishable from the present. Depending on the financial capabilities, preferences or fancy of tenants, you can choose different textures, color, cell size. Pick up the optimal view for the selected interior style in accordance with the building design.
In the modern market for finishing materials there are dozens of decorative tiles with different levels of rigidity, ready-made flat panels or dense wallpapers with simulation characteristic pattern. If you wish, you can not buy special products at all, using ordinary plaster, scotch tape or plastic stencil.
Methods for creating a brick wall with the help of finished finishing materials
The main advantages of product imitating brick are the lack of pressure on the plates Due to light weight and small thickness, thanks to which the volume does not steal the space. And also it is much cheaper than a real stone. It is much more convenient and faster with it.
See also: Door opening without a door: arrangement, ideas of finishing and decoration in the kitchen, balcony, in the hall (105+ photo video) + reviews
Spectacular view of ceramic tiles
In stores there are different options for finishing materials. Among them are several types of tiles, rolled wallpapers, wide panels. Each decor element has its advantages and disadvantages.
The laboriousness and speed of the laying process in each method differ.Carefully learn all the instructions and select the best option. Be sure to consider the physical properties of materials.
Soft tile
It leads the simplicity of laying and processing. It has bright decorative qualities, it is almost impossible to distinguish from the original texture. It is not only suitable for internal rooms, but also for design balconies, loggias, terraces, external columns or building walls.
See also:
Flexible tile is represented in a wide palette of colors
Due to the elastic, banging structure, it is convenient to lay it on rounded planes, in the corners, For lining of small architectural forms. The goods are sold in a wide variety of colors, which makes it interesting to combine shades, create catchy compositions.
Benefits of facing material
See also:Fibro cement panels for outdoor finishing: high-quality facing with unique properties (65+ photos & video) + reviews
Consider the advantages of the soft tile and find out the reasons for its incredible popularity among finishing craftsmen:
The ideal "fake"
Products are resistant to high temperatures, practically do not burn, immediately melted and fucked.This is the most important factor in terms of security in case of unforeseen fire.
What do you need
See also:Popular options for finishing window slopes outside and inside: Materials and technologies (photos & video) + Reviews
First of all prepare everything you need:
- Flexible tile (check the quantity of the seller consultant, pre-measuring the area)
- Primer
It is best to buy a bucket with a finished mass for tiles that you do not have to breed and bring to the desired consistency. However, the dry mixture will also be borne, if there is good bases in its favor. Be sure to consult in the store, which glue is best to use to work with the selected material, and read the recommendations in the instructions for tiles.
Universal adhesive for flexible stone
- 2 spatula: smooth and gear, 15-20 cm wide. The depth of the latter's cloves must be 4-8 mm. The first is needed for applying glue to the surface, and the second will help evenly distribute the substance, which will provide better adhesion
- Construction level and long line (1-1.5 m). If you allow the slightest irregularity or the scope away from the direct angle, after a couple of three rows they will be visually obvious. Accuracy and impeccability of the form will be hopelessly spoiled
- Marking cord
- Brush 1 cm width for circuit seams
- Simple pencil and scissors
Stages of mounting
See also:Cabinet on the balcony: what kind of types, device, instruction how to make your own hands (100+ photos & video) + reviews
1 In the first stage, carefully prepare the wall. It is aligned, grind, clean from the old coating.
2 Next, passes the primer, which has antiseptic qualities. It will save your decor from mold and fungus. Provide more chain fastening tiles and walls.
Wait until the primer dry completely. It is started in the room, the air temperature in which is not lower than 5 ° C.
3 On the entire surface, a simple pencil is markdown. Be sure to determine the lower and top row of masonry. Use the ruler and level.
Visual simplicity of facing with soft tiles of corners and external edges of walls
4 stir the glue with a flat tool and apply it to a portion of 1 m wide and 0.5 m high. The layer thickness must be no more than 3-4 mm.
5 Gently smash the adhesive mass with a toothed spatula.
6 lay out the first row, work-up. If the first started with a whole tile, then the second continues from half or a third depends on the desired type of masonry. Cut the tile with simple scissors.
7 Soft pressed the material to the wall and carefully smoothed across the area.
8 Make sure that the distance between the rows was the same. So the seams will look neatly.
9 Before processing the glue of the next site, walk along the seams of a thin brush dipped in water. Blank and vertical and horizontal furrows.
Before starting the masonry, remove all the tiles from the packages and thoroughly stir them with each other.So you evenly dispense the products, the shades of which can be minimally different.
Volume panels with brick imitation
See also:How to hang rolled curtains on plastic windows without drilling: all about installation and selection of products (photos & video) + reviews
The finished panels have a large size, so their laying occurs much faster. They are glued to jack, rows, by type of puzzles. They close at once a large portion of the surface, so such a cladding is easily managed with their own hands.
Facing panels with a characteristic cell
Varieties of products
There are different types of panels, depending on the material from which they produced:
- Orolete (compressed woodworking waste)
- Fiberglass
- Glassfibobreton (cement with fibers glass fibra). Very durable but heavy material
- Polyvinyl chloride (PVC)
- Modified Wood-Fiber Plates (TIR)
PVC Sheet Panel Instance
For the interior decoration, the last two varieties are most often used. PVC is high-quality plastic, and TIR is wood plates with plastic elements.
We analyze the benefits of such designs:
- Strength and resistance to environmental impacts
- Plastic is not afraid of chemical detergents, not subject to mold, corrosion
- Easy cleansing from dust, dirt, fat, yellow plaque
- Provides excellent sound insulation
- In the case of mechanical damage to a certain area, the unit is easy to replace, without destroying the whole masonry
- Material is very easy
- Installation technology is simple and fast
- Low prices. At the expense of a large area required less plates
- Optimal room for rooms with high patency, which is subject to temperature and humidity drops: kitchen, bathroom, loggia, hallway
- Panels easy to build electric jigsaw or hacksaw
- They perfectly mask the irregularities and disadvantages of the wall, do not require their preliminary training.
- In the case of mounting on the frame, the panel masks engineering communications perfectly: pipes, wires, recesses
Facing balcony MDP panels
There are models with insulation, which from the opposite side are supplemented with foam or mineral wool.They are suitable for facing balconies or cold veranda in country houses.
Laying on the wall
See also:Create a cozy workplace with your own hands: Creative, ergonomically and without harm to health (100 photos & video)
Depending on the direction of the panel pattern, they are attached to the wall vertically or horizontally directly on screws or screws. On the flat surface of the sheets are perfectly glued on liquid nails or any other polymer glue. Heavy blocks can be placed on cement adhesive mass.
There are structures that are installed on special frames that are attached to the wall of the dowels. If the surface is not even, a special subsystem of metal plates or wooden bars will be required. Many panel manufacturers sell ready-made crochet frames, which blocks are hung.
Sample fastening on the frame subsystem
If you buy panels separately from the frame, make sure that they correspond to each other, and can be used for a single installation. It is best to acquire designs from one manufacturer.
Gypsum tile
See also:Latex paint or acrylic: what is different and what better to choose for various types of work (photos & video) + reviews
It refers to the varieties of tough facing materials and is considered the most advantageous economically option. It is very lightweight and aesthetically attractive, it allows you to reliably imitate brickwork.
Elegant appearance of gypsum tiles
The disadvantage is the impossibility of making decoration in rooms with high humidity, Since the gypsum is considered a strongly hygroscopic rock. However, there are specimens on sale with additional moisture protection layers from the inner and outer side of the stone. Such tiles can be mounted even in the bathrooms.
In addition to conventional rectangular tiles on sale, you can find curly copies in the form of corners, squares, triangles. It is necessary to glue such a material on the composition with the inclusion of plaster. To create aesthetic seams, it is necessary to acquire a grout, which fill the space between the rows.
Cement tile
See also:Dual-pipe system of heating of the private house: device, types of systems, schemes, layout, wiring, installation and starting system (photo & video) + reviews
This material is very durable, durable, resistant to low temperatures. It consists of sand, cement and water. Presents a variety of textures and shades.
By the way, such a tile can be made independently if you find a silicone form. Check the solution with water and two identical parts of sand and cement to consistency thick sour cream. Fill it into shape and wait for complete drying.
Cement tiled disguised by "Wild Stone"
Homemade tile requires external decoration, as well as paint or varnishing layer. It can be covered with a kelper and apply a protective coating.
Clinker tile
See also:The best antiseptics for wood: how to choose a protective impregnation against fungus (photos & video) + reviews 2018
The most expensive option, but also the most spectacular. This finish looks expensive, noble, exquisitely. Tile has the highest operational qualities.
Impeccable interior with clinker tiles at the head of the ensemble
It is made from natural, plastic clay, which is pressed and burned at high temperatures. As a result, it turns out to be environmentally friendly and natural material that can be facing the acting fireplaces, furnaces, internal and external walls. It will last a long time without losing a bright appearance.
Clinker tile decorate the most in different ways. Its surface can be smooth, rough, glazed or "unprocessed". There are dozens of colors and textures.
How to stick hard material on a vertical surface
Decorative Tile Sticking Process
Solid tiles mounted on the wall following the same algorithm. Only the type of adhesive composition can differ. Choose one that is preferable to the material from which the tile is made: plaster, cement, clay, etc.
Process technology:
From the inventory prepare the same tools that are listed in the section on the installation of soft tiles. Add a grinding machine with a disk intended for cutting a stone or a manual circular saw.
Due to the severity of the material, the procedure is considered more complex. It also includes an additional final stage on the sealing of the seams.
1 wall align, clean, covered with primer
2 Carefully produce marking a simple pencil. Denote the upper and lower boundary of the masonry, calculate the number of rows between them, stick perfectly flat lines
Holding the distance between the rows do not forget about the gaps for the seams. The average seam thickness in the brickwork is 8-12 mm.
3 prepare glue
4 carefully study the instructions for packaging with tiles. Some heavy materials also need to handle glue from the inside.
5 apply glue on the wall and smash it with a toothed spatula
Installation of clinker
6 Press the tile to the surface for 10 seconds. Begin to work from below-up
Do not be lazy to check the evenness and symmetry of each row level.
7 To perform the same seams temporarily inserted between rows wooden rails or special calibrators. After grappling the adhesive composition, they are removed and transferred to the next row
8 When the masonry is completed, the seams are filled with a special grout. It is placed in a plastic bag with a cut corner, and neatly squeeze into the hole. Work carefully so that the mass does not hit the outer side of the tile
Brick Wallpaper
Wallpaper with a brick pattern is an inexpensive and easy way to add a charm and sophistication interior. Especially winning they look in the office, in the kitchen, in the hallway. The appearance of the rooms is changing quickly and irrevocably.
Wallpaper with such a pattern look stylish and catchy
Please note if wallpapers are covered with the whole room, such a print visually reduces the space. Therefore, registration is permissible only in large rooms.
Glue wallpaper in the traditional way, without special recommendations and additional instructions.
Imitation of brick masonry with their own hands

People always seek to improve their home. The desire to update the furnishings of the premises always finds a proposal in the field of various design developments. Imitation of a brick wall in the interior of the dwelling causes live interest from the population. To decorate the room with walls in the form of brickwork, you do not need to do this from a natural material. It is enough to create its imitation. Few know how to make a brick wall imitation. Inventive people invented many ways to create various wall coverings depicting a brick wall.
Decorative walls of walls in the form of brickwork
Brick in the interior may look not only in the form of convex elements of the correct geometric shape. It can be imitated laying of wild stone or other natural materials.
You can create a brick masonry imitation with your own hands or purchase a ready-made decorative brick in the form of tiles. Building stores offer similar material in a wide range.
Whatever the imitation of brick masonry is selected in the interior of the room, it is necessary to prepare the bases of the walls.
Preparation of walls for decorative finish
Before starting to decorate the walls under the brick with your own hands, you need to prepare the surface of the fences. Preparations are made in several stages:
- The walls are purified from old finish coating, dust and dirt.
- Surfaces are equalized by putty. The putty is applied on a plaster basis.
- After complete drying, the walls are covered with primer.
Methods of imitation of brickwork
There are various ways to make a brickwork imitation. Here are the most popular of them:
Coloring method
One of the cheapest options to portray the view of the brick masonry on the wall - the surface of the vertical fencing surface. This can be done by 2 ways.
Option 1 implies the following actions:
- the prepared surface is painted with roller;
- the painted wall is discharged on a variety of rectangles; Rectangles must depict the side surface of the brick;
- "Bricks" are separated by horizontal and vertical stripes that should look like laying seams;
- the seams are isolated in dark paint.

With the second version of the seams need to be done differently. Over the crude shplatovka, you pledge vertical and horizontal grooves. Make it with a suitable girlfriend tool.
Then the entire surface is ground and stained in the desired color.
Grooves are isolated by different color, and sometimes left in the same color as the entire wall is painted.
Walking walls in the form of masonry
Brickwork can be depicted from plaster. Such an imitation of a brick wall attracts with their own simplicity. For this method, you need to be unreasonable with adhesive tape (scotch). Act as follows:
- The prepared surface of the wall is covered with scotch strips. Strips glued so that they look like the seams between bricks.
- The plaster layer is thrown onto the wall. Some experts claim that it is better to make hands. Hands should be in rubber gloves.
- Depending on the taste of the host, the surface, finished by plaster, is embossed or smoothed by a spatula to an even state.
- As soon as the layer of plaster on the wall becomes half the frozen, the tapes of the scotch begin to pull up the top.
- Pull adhesive tape in such a way that after it remained smooth grooves.
- As a result, the wall acquires a kind of brickwork.
- Made from plaster Bricks on the wall do with their own hands and paint.
- On the brick wall of the stucco, the grooves in the form of seams are covered with more dark paint.
- The spatula adjusts the decorative relief of the raw plaster.
- The brick wall of plaster is ground and stained in the desired color.
Video:
In some cases, do without adhesive tape. The grooves are premined for a wooden stick line.
For greater strength, the plaster solution is prepared by mixing cement mortar with adhesive composition for tiles in proportion 1: 1.

Making homemade tiles under the brick
Imitation of a brick wall with your own hands can be made using homemade tiles. For the manufacture of tiles under the brick, you need to make a form for casting a gypsum decor.

At home, you can independently make a silicone form for casting decorative elements. To make it, come as follows:
- acquire liquid silicone and hardener in the store;
- make a wooden box; It can be made from construction plywood;
- products harvest or buy ready-made decorative tiles;
- mix liquid silicone with hardener and pour the mixture to the bottom of the box;
- in liquid silicone, lower decorative tiles or patterns face down;
- when the mixture is frozen, the tile is taken from the box; Silicone form is ready for the casting of homemade bricks.
Making decorative bricks
Having received the finished shape, proceed to the manufacture of decorative bricks. Make homemade tiles like this:
- To obtain a decorative coating without damage, the working surface of the shape is lubricated with a fat composition (vaseline, machine oil or similar substance).
- Prepare liquid plaster or alabaster.
- The solution is poured into a silicone form.
- After 2 - 3 hours, the finished tile is removed from the form.
- The extrusion of finished products does not create difficulties. Silicone is good, and bricks easily fall out of the form.
Before filling, the bottom of the form can be coated with a layer of coloring substance. As a result, the finished tile will be painted in the desired color.

Also cast a gypsum decor in polyurethane forms. Polyurethane is more hard material and practically no nervous.
Mixed tiles and wooden formwork. The method allows to obtain material only with a flat facial surface.
Technique laying gypsum tiles under the brick
Brickwork with their own hands from the plaster tile is made in the same way as styling on the walls of ceramic tiles:
- bricks are placed on a cement adhesive mixture or liquid nails; Wooden rails are used to form smooth seams;
- long planks are investing in horizontal seams; Vertical rails make a length equal to the height of the tile, or apply plastic liners;
- after the masonry of the next row of rail bricks take out; The seams are filled with the same adhesive composition or apply a special mixture for the bulk of intercutric gaps;
- at the end of the work, the wall under the brick is painted with their own hands or varnished;
Sometimes the laying of decorative elements is performed without seams. Small gaps between the tiles are watched by putty.

Wallpaper
Imitation of bricks on the walls can be framed in the form of wallpaper. The building materials market offers a large selection of wallpapers with a brickwork.
Paper
Rolled wallpapers on a paper basis can be decorated in the form of brickwork of various shapes and colors with a latch and without it. Family laying on a paper basis One of the cheapest options for decorating walls under the brick.
Roll wallpapers on a paper basis are sold 50 cm wide and 10 m long. They are easy to cut on comfortable segments. Of all the types of finishing of the inner walls, paper wallpapers are the cheapest material.
Vinyl
Brick wall with their own hands can be made of vinyl wallpaper. Vinyl embossed coating well transmits the structure of the masonry. Convex forms create a full-fledged visual perception of a natural brick wall.
The main advantage of vinyl coatings is their high moisture resistance, so vinyl surfaces can not only be covered with wet cleaning, but also to wash.
Liquid wallpaper
Material is easy to handle. With the help of a girlish tool, the surface of the liquid wallpaper is formed as a relief of brickwork. A fatty soft material allows you to create imitation of masonry elements of the most diverse shape and color.
Wallpaper is glued to the prepared walls quickly, and the process of pasting does not particularly clog the room, with the exception of small wallpapers.
Styrofoam
An interesting solution is offered designers in the design of wall decor in the form of foam bricks. Polyfoam - soft unusually lightweight material with low thermal conductivity and high sound insulation. Decorate the walls of the foam so:
- A cutting tool on the surface of the foam is easily cut out any relief of masonry. Also form facial planes of bricks.
- Processed foam plates are ground and stained.
- Polyfoam has high adhesion, so it can be mounted on the walls on any glue. Often use PVA glue.
However, it should be noted that the main disadvantage of this type of finishing is its softness and fragility. In case of careless circulation, the surface of the foam is easily damaged.
Repair damaged areas from foam plastic is quite simple:
- the foam crumb is mixed on PVA glue;
- the spatula is filled with a mixture of damage;
- the renovated area is ground and stained;
- if damage is more ambitious, then an unsuitable fragment of the finish is cut out; A new foam is inserted into his place.

Wooden plate
The surface of the body of corporal color excellently conveys flavoring the surface of the burned brick. As a decor use a parquet board.
If the farm has an appropriate woodworking equipment, then the plank can be made independently.
Skulls are best made from coniferous wood. "Brick masonry" in the interior of any room in the form of wooden bricks will give the interior of a special sister.
Wooden elements are attached to the walls with special glue for wood. Other adhesive compositions (PVA, liquid nails, etc. can be used.
To emphasize the texture of the tree, the skull is opened with furniture varnish.
Seams between elements of masonry are best made from wooden plates. In no case can not apply wet compositions. Moisture can impregnate wood and disrupt its structure.
It doesn't matter what material make a brickwork imitation with their own hands. The main thing is that the decorative wall decoration brought aesthetic pleasure from the perception of the interior of the entire premises. All the above materials are environmentally safe and will decorate any interior in accordance with the tastes of the owners of the home.
How to make a brick wall imitation think many. After all, it is not always possible to make a wall of the brick. For this you need a durable and wide foundation or high-quality bearing walls. After all, brick is quite much weighs. But today there are many options to make imitation of brickwork and not much to increase the weight of the structure.
Today we will tell you what is made by the imitation of the brick wall and you can choose the most optimal option. Also you can see visual examples on the video in this article and choose the most suitable design.
If the room has a brick wall, it is enough to remove the top layer of the finish, slightly modify and the brickwork is ready. At the same time, it will be really "real" folded by the builders of the wall. It will remain easy to paint and cover with varnish (see how to paint the brick wall: two options for impeccable repair).
- The surface is enough to clean from the finish, take the grinder and the sandpaper and seal. Seams between bricks are embarrassed by a special mixture, it will help to remove visible irregularities and defects.
- At the end of the finishing works, it is possible to cover the surface with wax or special varnish, these materials are perfectly suitable for finishing a natural wall. If you do not want a brilliant surface, it is enough to take a fine-grained emery and stick to the matte state.
You should not forget that, removing the finish, you can rarely detect the perfect brickwork. But there is an output - imitation under natural brick. This is an excellent option that will not require grinding and additional finishes.
What is a brick simulation finish
How to imitate a brick wall in an apartment or on the facade? Is it possible to make masonry imitation itself?
Let's look at a few options that are easy to implement at home, because they will not require special skills and special tools, it will be able to make a simulation with your own hands. Then the ultimate price will not be high
Decorative surface decoration
The use of decorative plaster gives a quick result, and it is not difficult to apply it. The main advantage can be considered that you will not need to carry out painstaking work on the smoothing of the surface, everything will hide under the layer of plaster.

You will have to get the following tools:
- Primer;
- Roller or wide brush;
- Decorative plaster;
- Wide spatula;
- Paint;
- Several rags;
- Small handle or ordinary stick.
Using the batch in the natural masonry, seams are created, we will not need this device for plastering enough handles, stack or hash (sushi wand), in general, of any long item that is easy to spend smooth and shallow seam.
So:
- It is worth starting imitation from the preparation of the plane: Be sure to delete the previous finish, whatever all the holes, clean the wall from dust and boot. The decorative mixture is prepared after drying the soil layer: on the package, the manufacturer specifies the necessary proportions, dial the desired amount of water, fall asleep the powder and add a dye. The latter is not necessary if you want to just paint the wall after applying plaster.
- It is not necessary to knead the entire pack right away, it is enough to divide the composition on certain portions, so that it is in order to process each meter of the wall, before the apparent mass hardens. The perfect solution does not slide from the wall, there should be no clots. Having achieved good consistency - proceed to work. Using the trowel and the spatula (see Spatula Construction - Types and Differences), the decorative mixture is applied to the plane, level and remove the excess solutions from the wall. No need to try to achieve smoothness, because brick, in itself with roughness and small chips.
- Then proceed to the most important stage - we make the visibility of brickwork. Naturally, their size can be arbitrary, but still it is better that they do not differ too much from ordinary, then the wall will look more realistic. If you are not confident in yourself, feel free to take a ruler, it will help in creating a geometrically verified pattern.
- According to the still empathous mass, the dry stick is drawn lines, therefore, a masonry pattern appears, an excess solution that is allocated due to lines can be easily removed with a rag. Go further to a new site and so until the entire surface is processed. Let it harden the treated part, since further impact will affect the pattern.
- The snap mixture is easy to clean the sandpaper, so you not only remove the excess material, but also adjust the seams, at the end necessarily erase dust. If you want to paint the resulting wall, do not forget to predict, so the paint will stay longer. To make the wall of maximum similarity, you can choose different shades.
- There is one more way: first the wall is covered with a layer of gray plaster and only then levels and smoothed. A dye is added to the solution, the resulting mixture is evenly applied to the wall and the seams are stuck on it. Thanks to the addition of the dye, color plaster remains in the resulting lines, it must be cleaned and end up with imitation under the natural wall of the brick.
I imitate the laying with the help of foam
Also easily decorative brick can be made independently of foam or expanded polystyrene foam.

But before the work, you must get the following tools:
- Large sheets of foam;
- Marker;
- Long line;
- Stationery knife;
- Tile glue;
- Several paint cans (see Paints for foam: what can be used).
During the preparation, it is worth marking the foam sheets: with the help of a long line and marker, we draw standard 7x15 cm bricks, do not forget to make a seam allowance.
- Then the stationery knife is cutting the placed foam and prepare the plane.
- We remove the decoration layer, smear the holes and scratches, be sure to flatter and do not forget about the soil layer. Glue smears on the prepared wall, then bricks are gradually glued; Do not forget about the gaps, it is enough to leave 2 mm between each brick. After all the elements are fixed, proceed to painting the wall, be sure to fill the seams of paint and do not forget to remove the drums.
- To achieve maximum similarity, you can apply chaotic chips and scratches to the foam, the painted wall will look somewhat lured, but such a similar to the original laying. It is quite simple to achieve a unique texture with the help of canned, tin strips. Also stands some of the bricks to paint another paint. We select the most similar shades and forward.
Textured wallpaper
There are special wallpapers imitating natural masonry. If a couple of years ago, it was the usual wallpapers, now modern technologies allow you to get real textured wallpapers, of course, from afar not to distinguish them from brickwork, but it's noticeable near that it is imitation.

Textual wallpapers have several advantages:
- Low cost in comparison with the methods described above;
- High installation speed;
- Light in care - wallpaper can be washed, and dust does not accumulate on the surface.
ATTENTION: If you decide to punish exactly the wallpaper, now there are special options for applying a foamed polymer on paper - such wallpaper is very realistic.
Finished simulation panel
Under these words, the prepared plastic variant is meant, where the surface is identical to the natural masonry.

- It is enough to buy a panel and ordinary wallpaper glue to remake your wall in a few hours. At the same time, they are equally well used in the outer finish. In order for the glove panel well to keep needed to prepare the wall in advance, do not forget about the primer.
- If the wall is not smooth then you make the alignment of the plane. This can be done by plaster. If it is an inner surface, then it can be done with drywall.
- The second option is beneficial and in the fact that you can immediately make the insulation of the wall.
For the crate, the choice will have to do from two materials. This is a metal and wood.
| The tree is better to apply for finishing internal surfaces. It is quite simple processed and you can easily make transitions even in several levels. |
Installation of wooden crate | In the first case, the metal will be the most optimal for the outer finish. A coating is made on the metal, which prevents the occurrence of rust.
|


Stencil embossing
The process passes through the still plastered surface. The finished stencil is taken (usually from rubber or polymers) with the embedded masonry. Here we will look at how to draw brick imitation on the wall.

- The work side must be pouring out with water, you can simply spray from the sprayer. After that, it is necessary to carefully, but tightly press the design to the plane.
- To delay it for a few seconds, then take carelessly, ideally the sutures of the seams will remain on the wall.
Having finished part of the wall, repeat the same operation again. It is extremely important to move the stencil on a new part of the wall, taking into account the lines of imitation masonry already made, otherwise the whistle will turn out.
- The hardened layer of plaster should be further primed, or to cover with wax. After the surface is driving, proceed to painting. Of course, you can do without it, then you should add several color additives in the plaster in advance. If you did, then you need to apply plaster in several layers and do not forget to smooth it out. As a result, it will be very similar to the color of real bricks. Do not forget about the additional color of the seams.
Choosing paint, do not forget that dried, it will become darker!
Figured tiled masonry
This option is notable for the installation method. In fact, you take ready-made ceramics and just glue it on a pre-prepared wall. The process is completely similar to the usual tip cladding, except that it is thicker and in the process of laying leave a wide opening.

- The gap between the tiles must be lifted with any adhesive mixture. As soon as the seam is completely dry, it must be primed or covered with varnish. Due to what, in the process of painting, it will save its color.
- It is not necessary to buy ready-made tiles if you have a lot of unnecessary bricks and Bulgarian, if you wish, it is easy to cut the tile yourself.
- In principle, you can make tiles and wood, drywall, tiled glue, corrugated cardboard, we will tell you more.
Drawn tile
The process of something resembles the application of an impression by means of a stencil, here we will also need fresh plaster.
- We apply to the plane plaster and smoothing it, thus, it turns out a random relief, which will be like something like a texture of bricks. As soon as the wall dried a little - proceed to work. You need to draw contours of bricks. The easiest all this is done for a ruler, but then it turns out too strictly, it is better to draw contours without any devices, it will turn out to be much natural and chaotic.
- Having finished with the conduction of the contour, you need to take a narrow scraper and clean the plaster, thereby highlighting the contours of the brick. The result is a small recess, it must be cleared with a conventional cloth or brush. This is done in order to remove crumbs of plaster before it becomes.
- The subsequent finish is completely similar to the stencil-described method.
Brick on putty
If there is a prepared wall, boldly choose this option. On the plane you need to apply a light layer of putty with a color additive. And then we do in the previous method, simply draw the laying contour to a slightly frozen surface.

By the way, the relief can be done quickly and simply using construction tape.
You need to act like this:
- Having a dry placard plane, you need to armed markers or marker, place the seams. Consider that each next row should shift in relation to the previous one, otherwise, you will have a prison lattice, but not laying.
- Scattered seam needs to paint and wait until the paint gets up.
- Once the paint is driving, you need to stick the scotch bands along the seams, and then stick to the tight strip of the tape. This is necessary for subsequent easy removal of tape.
- Then we put a light layer of putty, it is not necessary to smooth out, you can leave everything as it is, then it turns out an interesting and original structure.
- As soon as the putty is grabbed, we begin to pull the scotch strips. Because they are glued together, it will be easily removed.
- Now we wait until the wall is completely dry.
- As soon as the plane dries up, you can begin to finish the surface with the method specified above.
Imitation corrugated cardboard
Imitation with the help of this material is the most profitable and easy way to decorate the wall.

The following things will be needed:
- Corrugated cardboard - in principle, it is not necessarily a buyer, it is enough to take all cardboard boxes from under shoes, household appliances, and so on.;
- A couple of packs of paper napkins, be sure to be dense;
- Several PVA cans and wide brushes;
- Adhesive gun, thermoclay;
- A sharp narrow knife (the stationery is suitable);
- Pencil and large ruler;
- Paint, varnish.
Now let's talk about the process itself:
- If there were wallpaper on the wall - necessarily ground the surface, and if the paint - believes and degrease.
- Cut the corrugated cardboard in size for the side plane of the brick, it will take some time.
- We are placing the wall, it will be more convenient to glue our "bricks", but note that the rows should be shifted to make a laying, not a lattice.
- Further smearing the PVA cardboard, but there is a trick, the corrugated cardboard should be dry, glue from the gun is applied there. Due to such a simple combination, you can quickly fix cardboard;
- Now the most difficult stage. We take paper napkins and decorate cardboard bricks by sizing. It is not so difficult, as it seems, you need to apply glue to the surface of the rectangle, and then stick the napkin there, which should be lubricated by glue.
- At the stage of sticking the napkins, it is important to form seams, there will be no special tool here, you can take a pencil, or simply push your finger, so they will be slightly recessed into the wall. It must be done to smooth the sharp edges of the "bricks", thereby achieving the maximum similarity with the real wall.
- At the final stage, when the whole wall is dried, decorative coloring and varnish applying. Laco will help protect the imitation from mechanical damage. Drying out, the decorated wall will be as similar to the brick.
ATTENTION: Only tight napkins are used in the work, otherwise they will simply be splashing from glue.
Before sticking to the surface, they are a bit in a palm of the palm, thus get the folds, which will eventually repeat the random texture of the brick. It is better to choose white wipes, otherwise, it may turn out that it will come from the paint.
Nuances and design examples
Choosing a masonry imitation, it is necessary to take into account that it can not only bring a highlight to the interior, but also to fully suppress the rest of the design with its cordiality.
Before the start of work, you need to fully represent how the room will look like with the imitation of the brick wall. Thanks to the wall trimmed under the brickwork, you can make your home original and cozy, and what to choose how to solve only you, because any of the options described above, perfectly imitates natural masonry.
By the way, the technology discussed above can be used to obtain brickwork not only on the walls, many decorate vases, furniture items, thereby adding several more elements to "brick" design.
With the help of imitation you can create unique drawings. They can be pretty original and decorate any room.

It will also be quite acceptable to look and sewing openings, it can be windows or doors.

Also, with the help of imitation, you can find interesting solutions and useful.

With such a decorative trim, you can always make and add-ons. Which is not always possible to do on the walls.

Decorative trim under the brick may look good and be useful when simulating the working part of the kitchen. After all, if you take the panel, then he will not just protect the wall from moisture, but also look good.

Also you can and zonate the room, highlighting the most attractive places in the room.

Imitation of the brick wall with your own hands the case is not a complex, but creative. With a fantasy, you can make just masterpieces and instructions will help you with this.