How to glue liquid wallpaper on various surfaces. Description of the process with photos and videos
Not so long ago, a finishing material for interior walls appeared on the construction markets, which is able to give a room an aesthetic modern look and at once even out minor defects. At the same time, the cladding process will not be difficult and will be subject to even a beginner.
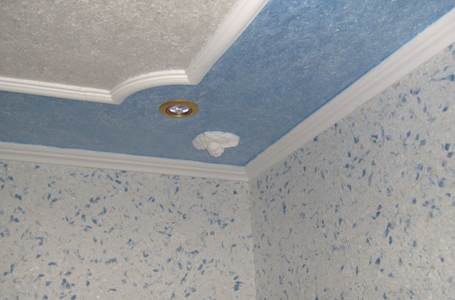
Liquid is a kind of decorative plaster. This is a new milestone in design and renovation. They are distinguished by their practicality and versatility, and include many advantages. The powdery mixture is presented in a wide assortment with a rich palette.
An assortment for every taste, with a variety of decorative additives, such as:
- stone chips;
- sequins;
- beads;
- wood shavings;
- color.
Wall decoration with liquid wallpaper: advantages and features
 If we compare this type of facing material with rolled competitors, then the former have a number of positive points. For example:
- simplicity of material preparation. No need to roll out paper sheets throughout the room, measure and cut to height;
- the main component is cellulose fiber, which is natural and therefore environmentally friendly;
- ease of workflow. There is no need to hire a master, to really cope with the task on your own;
- seamless even result that does not require the selection of a pattern;
- "Breathable" material due to its vapor-permeable qualities;
- good thermal conductivity and sound insulation;
- preparation of the base does not require the elimination of minor defects;
- easy replacement of the damaged area, it is enough to remove the damaged fragment with a clerical knife and apply a new solution to the cleaned area;
- easy and quick removal of the cladding with water;
- the possibility of using the considered wallpaper plaster for the second time.
The main disadvantage is the high price for this. Also, due to the low moisture resistance, the coating is not suitable for finishing a kitchen or bathroom without additional processing.
Preparing the walls: requirements
 Before applying the finishing coat, you need to prepare the base.
If this is not done, the result will be poor quality and short-lived.
The preparatory stage includes several operations:
- if there is an old cladding, it must be removed;
- clean the wall, get rid of the remnants of glue, peeling plaster;
- cover the base with 3 coats of primer.

Before applying a new coat of primer, it is necessary to completely dry the previous one.
- apply plaster putty to the base surface;
- make sure that there are no tangible irregularities;
- roughen the base with a hammer or a special hatchet for better adhesion of the material;
- cover the base with white water-based paint in several layers.
For better adhesion, PVA glue is added to the paint.
What is the do-it-yourself application technology
Decorative plaster is applied by hand: with a spatula, trowel or roller, depending on certain conditions and the personal convenience of the master. It is advisable to fill large areas with wallpaper using a mechanical method, namely using a special-purpose gun, the so-called hopper.
How to glue: step by step instructions
 to finish, arm yourself with special tools, mix the powder correctly and adhere to a proven application technique - the way to a successful and high-quality repair result.
Tools for the job
Nowadays, the process of covering a wall with decorative plaster is simplified by a variety of special work accessories. Some tools are simply irreplaceable, while others can be completely dispensed with. Below is the main inventory:
- large container for mixing the composition;
- a spatula made of plexiglass or stainless steel for applying a finishing coating to the surface;
- special corner spatulas are used when filling corner sections. Some craftsmen still believe that such places are more convenient to handle with your fingers.
- a small-width metal spatula (8-10 cm) for applying the solution to the main tool;
- trowel - an alternative to a spatula, it is a flat device with a handle in the middle;
- a special roller - an alternative to a spatula and a trowel;
- a transparent float for grouting the resulting result, eliminating bulges, giving an even effect;
- The hopper gun will save time and is suitable for cladding large rooms.
Application: all methods
 At the beginning of work, it is necessary to prepare the material in accordance with the instructions. Dry powder is mixed with clean water in the desired consistency (on average, 5 liters of water are added to one package).
The mixture is poured into a container and water is gradually poured in, while the mass is thoroughly mixed by hand until a homogeneous composition is obtained. As a result, the solution turns out like thick sour cream.
It is recommended to shake the bag with the contents before pouring the powder into the container.
For better mixing, the mixture should be diluted with water one packet at a time. Then the ready-made solution should be left to “ripen” for 20-40 minutes.
After preparing the decorative solution with a smooth spatula at a slight angle, 10-15 degrees, with smooth movements of the hands, you need to apply it to the surface. You can also perform this procedure with a trowel or roller. The layer thickness should not exceed 2-3 mm.
The work cannot be left for tomorrow or another day, since different drying times can provoke the appearance of seams.
After applying the material, it is important to pay attention to the evenness of the result. If there are bumps, remove them with a moistened float when the composition has set, but has not yet had time to dry.
The use of powder of different colors is practiced. They are mixed and combined. Creative owners will be able to paint an interesting drawing on the wall with the help of a thick solution. To do this, before drawing, the sketch is transferred with a pencil to the base surface, then painted over with the composition.
When using a hopper, it should be borne in mind that not all types of dry mix are suitable for this. Spraying the composition is required carefully, without long delays in one area.
You need to apply the solution first to one area, and then smoothly move to another. The decorative finish dries up after 1-3 days.
Can I paint
 If desired, you can update the appearance and change, lined with solutions from dry mixtures, painting them with a roller with a fur attachment. This procedure can be repeated an unlimited number of times. You cannot find special types of paint for this type of coating, therefore paints are used:
- water-based;
- acrylic;
- latex;
- silicone.
If you adhere to certain rules, decorative plaster will not deteriorate as a result of painting. Renovation of the interior will not require large financial investments and will not take much time. The work will seem easy enough.
Possible disadvantages include the fact that after applying the paint, the surface will already be hard, the patterns will become invisible. In addition, it will no longer be possible to remove the decorative cladding with plain water.
 For a long service life, the wall surface is coated with acrylic varnish. After that, the contaminated sections of the wall are cleaned with a damp sponge.
If the wall was not varnished after finishing, it is absolutely impossible to wash it with water. In this case, you need to use a vacuum cleaner. You can restore the damaged area by removing the damaged fragment. It is necessary to soak it in water and reapply it to its original place.
How long do they serve
The decorative material has good wear resistance and durability. Subject to the conditions of application, use and maintenance, the cladding will last for years.
High-quality finishing of a room with solutions from dry mixes is an excellent design solution. Even in the absence of skills, repairs will not seem time-consuming, but will certainly delight the owners. The ability to mix colors, complement the composition with various blotches and create unique images gives freedom to fantasies and interesting ideas.
Useful video
Liquid wallpaper has rapidly burst into the finishing materials market and has also rapidly won the hearts of millions of housewives around the world. They are amazingly beautiful, practical and environmentally friendly. They are easy to glue, if, of course, this word can be applied to the method of applying liquid wallpaper to the walls, it is easy to take care of them. In general, this material deserves a huge number of praises in its address. However, many are afraid to mess with liquid wallpaper. And all why? Because they know little about them, and even more so they do not know how to glue liquid wallpaper. But everything is much simpler than it might seem.
- What is liquid wallpaper?
- Benefits of liquid wallpaper
- Disadvantages of liquid wallpaper
- Preparing the walls
- Preparation of the mixture
What is liquid wallpaper?
Before you learn how to properly glue liquid wallpaper, you should take a closer look at their composition, properties, advantages and disadvantages.
Liquid wallpaper is a plastic material very similar in structure to flakes or sawdust. It is sold in transparent plastic bags weighing from 1 kilogram. The composition of such a finishing material includes natural cellulose or cotton fibers, acrylic components, adhesive and dyes. In addition, you can find other "ingredients" in the package: sequins, mica, silk fibers, quartz chips, gold and silver threads.
After drying, the composition turns into something resembling solid foam in its texture: the surface of the walls is the same rough, soft and warm.

There are several types of liquid wallpaper, and they do not have any special differences, except that according to the thickness of the finished layer, one can conclude what type of material was used during the repair. Some are thin and smooth, having a dense, but not too textured surface, others are voluminous with clearly noticeable "chipped" - more like fabric.
Benefits of liquid wallpaper
- Since liquid wallpaper contains only natural ingredients that have a neutral electric charge, they have excellent antistatic properties. What does it mean? This means that such wallpapers will not turn into a dust collector and will create a favorable atmosphere in the room.
- Liquid wallpaper is versatile. They can be used to decorate a living room, bedroom, children's room, kitchen, hallway and even a bathroom.
- Such a finishing material perfectly hides minor wall defects, cracks, cracks in the places where skirting boards, platbands, frames, switches and sockets fit. In addition, they have no seams, which means that the surface of the walls will always look perfectly flat in any weather.
- You can decorate the walls of new apartments with liquid wallpaper and not be afraid of shrinkage. They do not deform, which makes it possible not to wait 3-4 years for the house to "settle down", but to immediately start a full-fledged renovation.
- Liquid wallpaper can be glued to almost all surfaces: concrete, drywall, wood, putty, plaster, fiberboard, plywood, MDF, paint and even metal.
- Such wallpapers are easily subject to cosmetic repairs: they do not need to be torn off completely from the wall, it is enough to soak the damaged or contaminated area with water and remove the mixture with a spatula. Apply a new one to the place of the old coating, level it and the wall will again delight you with beauty and perfection.
- Liquid wallpaper breathes, it provides heat and sound insulation properties to your walls, in general, this material is ideal from all points of view.
Disadvantages of liquid wallpaper
Unfortunately, such a wonderful coating also has drawbacks, however, there are only two of them, and even those can be classified as insignificant.
Liquid wallpaper is quickly washed off with water, so if you decide to decorate the bathroom with them or want to periodically wipe them with a damp cloth (to maintain cleanliness), then you will have to protect the surface of the walls with a colorless varnish. At the same time, the beauty of the decoration will remain, but the effect of the "breathing" walls will disappear forever.
And the second drawback is the high price, but globally speaking, beauty costs much more than 200 rubles per kilogram, so you can safely delete the cost of liquid wallpaper from the list of vices.
How to properly glue liquid wallpaper?
Preparing the walls
Naturally, you need to start with the preparation of the walls. To do this, remove the remnants of old wallpaper and paint, and if there are metal objects (nail heads, bolts, etc.) on the surface of the walls, paint them with white enamel or water emulsion.

If the walls have an intense color, then it is better to get rid of it too with the help of special primers, enamel, oil paint or white water-based paint. In old houses, such as stalinka or Khrushchev, the walls do not differ in perfect evenness and it is generally not clear what they are made of, so they will need to be impregnated with a solution of FG or ordinary impregnation. After that, the surface of the walls must be painted over with water-based paint in two layers - this will protect against the appearance of yellow spots - insidious companions of old apartments.
Drywall will have to be putty completely, and not just the joints. What for? It's just that after the liquid wallpaper dries, the white streaks of the putty will become noticeable. In addition, it will be necessary to additionally cover the walls with a water-based emulsion, since the putties are not waterproof and can get wet during the application of liquid wallpaper. If you use a gypsum putty, then PVA glue can be added to the paint in a ratio of 3: 1 - this will strengthen the surface of the wall and prevent it from absorbing moisture.
Wooden surfaces can also absorb moisture, so before applying liquid wallpaper to them, make sure that they are not too thin (the thinner the sheet, the more it deforms). To protect such surfaces, either oil paint or FG in 2-3 layers is used, followed by painting with an aqueous emulsion.
Preparation of the mixture
Pour warm water into a suitable container and gradually (in small portions) add the dry composition to the vessel, while stirring the solution with a drill mixer. As a result, you should get a mixture in its consistency similar to thick-thick sour cream. It is better to remove all large unmixed particles - when applied to walls, these lumps will create difficulties for you.

After kneading, the solution must be left alone for 15-20 minutes, and then mixed again with the same construction mixer. To achieve a uniform shade, prepare a mixture from several packages and mix the required amount of material in advance, since the entire prepared surface will need to be coated in one go. Not in two days, but in one!
Applying liquid wallpaper to walls
If you do not know how to glue liquid wallpaper, a video story about this process will help you understand all its intricacies. And after watching, be sure to read our instructions.
So, to work you will need:
- large capacity for diluting dry mix
- trowel or wallpaper roller
- spray gun - if possible
- knurled roller with textured relief - if you want to give the surface a certain texture
- colorless topcoat varnish
Take some of the mixture and spread it over the wall surface with a spatula or roller. Wallpaper should tightly cover the base, there should be no bald spots, voids or bulges. Having finished with the first section and the first portion of the mixture, go to the second, just make sure that there are no special boundaries between the adjacent sections that have already been rolled out - they should flow smoothly into each other.


If you do not like something (a lump, unevenness, bald spot formed), then you can slightly wet the wallpaper and remove the defective area, and then fill it again with the mixture and level it. Just do not get too carried away with adjustments - you can wet the wallpaper already applied to the walls no more than 3 times.
If you have a special hopper gun for applying liquid wallpaper, then the speed of applying the composition will increase several times, but such a device is quite expensive. It can be rented if the time for repair work is limited. The rental price is about 300-400 rubles, however, you will also have to take a compressor to the gun, which will create pressure inside the device. In this case, the rental price will increase to 600-700 rubles per day.

In general, applying liquid wallpaper to walls is not a difficult process, but it requires accuracy and care. This coating dries from 12 hours to 3 days, depending on the level of humidity and temperature in the room. To cover the wallpaper with colorless varnish, you only need to completely dry it, otherwise the coating may deform.
Liquid wallpaper is a versatile finishing material that can be used to create interesting interior solutions. They are perfectly combined with each other, allowing you to embody the wildest fantasies in reality: stripes and flowers, geometric shapes and ornaments. Creating and expressing your creativity is not a problem with them.


And if you are still afraid to use a new modern type of finishing materials, then in vain, because creating coziness in an apartment using liquid wallpaper is easy and simple.

From the author: hello dear readers. Sooner or later, we all have to update the look of our apartment. And the main role in this large-scale production is assigned, of course, to wallpaper. There are many types of them: vinyl, paper, non-woven, textile, and this is not a complete list.
A source: vip-1gl.ru
But there is one category that differs from those listed both in the method of application and in the final appearance of the surface. We are talking about liquid wallpaper, which, after its appearance on the market, quickly gained high popularity, and absolutely deservedly so.
But, like any novelty, not everyone liked them. First of all, ordinary ignorance and, as a consequence, various fears play a role here. As a result, many people deny themselves the pleasure of using this wonderful and comfortable finishing material. That is why we decided to raise this topic today, telling in detail how to glue liquid wallpaper on the wall.
What is liquid wallpaper, and what are they made of
This mysterious material is a mixture of cellulose or cotton fibers, acrylic, adhesives and dyes. Sometimes additives are added to it to make it more original: sequins, silk particles, silver and golden threads, mica, quartz chips and others.
When dry, the mixture looks about like sawdust and does not generate much enthusiasm. But after application to the wall and complete drying, the nondescript composition turns into a beautiful, warm, usually rough coating. However, the roughness depends on the type of mixture, the result can be both a smooth and textured surface.
 A source: weareart.ru
Like any other material, liquid wallpaper has certain advantages and disadvantages. And now we will definitely list them so that you have an objective picture. Let's start with the merits:
- naturalness. Thanks to this quality, the composition can be used both in the nursery and in the bedroom, without fear of a negative effect on the body. In addition, all components of the mixture are antistatic. This means that the surface of the walls will not attract dust to itself;
- versatility. Liquid wallpaper will be appropriate in any room, with their help you can create any design;
- creating a flat surface. When applied, the diluted mass perfectly fills in all small cracks in the walls and masks small defects. As a result, the coating looks absolutely even, and the initial flaws do not manifest themselves in any way;
- are not deformed. Unlike ordinary wallpaper, which, when the walls shrink, can wrinkle and peel off, liquid wallpaper can be applied even in a newly built house;
- adhere perfectly to almost any surface. Concrete, wood, plaster, plywood, paint, putty, fiberboard, MDF, metal - all these bases can be coated with our mixture;
- easily restored. If any part of the wallpaper is damaged or stained, it is very easy to remove it after soaking it. Then, in its place, you can apply a little of the same mixture, smooth it, wait until it dries, and then no one can say that something is wrong here;
- and also liquid wallpaper gives the walls sound and heat insulation, and also breathes well.
And now about the cons. Fortunately, there are only two of them:
- complete lack of waterproof qualities. The coating is easily soaked and washed off. But this problem is solved with the help of colorless varnish. They need to spray the dry surface. The appearance will remain the same, but the "breathing" ability will be lost. If it is important, then it is still better not to use this material in rooms with high humidity. For example, in bathrooms and kitchens;
- price. It is quite high compared to the cost of conventional ones. However, not enough to completely abandon the use of this type.
Now we have an objective view of liquid wallpaper. The list of advantages is not small, but in order to fully enjoy them and not ask questions like “why don't they stick?”, You need to know how to properly handle this material. In particular, you need to competently prepare the surface, and then apply the mixture to it according to the instructions. We will talk about this now.
How to use liquid wallpaper correctly
We will begin, of course, with the preparation of the premises and the base on which our composition will be applied. With the room, everything is simple: we take out the furniture, or move it to the center and cover it with foil. Shelves, lamps, paintings - in general, everything that hangs on the walls - we remove. It is desirable to cover the floor too. However, if you are going to change it soon, then you can leave it that way.
When the room is ready for great things, we can start preparing the walls:
- we remove all nails, screws, dowels and other foreign bodies from them. This is especially important for metal things. Otherwise, ugly rust spots may appear on the ground around them after coating;
- bright paint from the walls must be washed off, otherwise it can distort the shade of the final coating. Removal can be done with special primers. But you don't have to bother, but just apply a layer of white water-based paint on top;
- if you live in a Stalin era, Khrushchev or some other old house, then the walls in the apartment probably have a lot of irregularities. Therefore, they must be treated with a special impregnation (for example, with a solution of FG) and then painted twice with a white water emulsion. Skipping this step is fraught with the appearance of yellow spots later on already dried wallpaper;
- drywall walls must be putty, and completely, and not only those places where the sheets are connected. If you apply the putty only to the joints, you will get distinct white areas, which will then be visible even through the finished coating. So we putty the wall completely, and cover it with water-based paint on top so that the putty does not deteriorate when applying liquid wallpaper. Additionally, you can add PVA glue to the paint (proportion 3: 1). This will increase the water resistance and make the surface stronger;
- if the walls are wooden, then only the same waterproof qualities are of concern. Therefore, first we process them with oil paint, which can be replaced with two or three layers of FG, and then we cover, again,.
Making a mixture
 A source: gid-str.ru
So, our room is ready and waiting. We check the list whether we have all the necessary tools and materials:
- a bucket or basin in which we will breed the material;
- trowel for application;
- roller or spatula, with which we will level the applied coating;
- sprayer (spray gun);
- directly dry mix.
In addition to the main list, you can prepare a special patterned roller if you plan to make some kind of clear texture on the surface and colorless varnish - in the case when the room is humid and the walls require a final treatment with a waterproof agent.
We start kneading, the process is carried out in stages. The proportions of water and dry mixture must be strictly observed according to the instructions on the package.
- Pour water into a prepared large container, the temperature of which is close to room temperature (25–35 ° С).
- If a decorative component is attached to the dry mixture - shiny threads, mica, silk, etc. - then first stir these additives in water. This is necessary for their even distribution.
- Lightly beat the dry material in the bag with your hands, fluff it up.
- Pour it into water and mix thoroughly. It is advisable to do it with your hands. A construction mixer is okay too, but it can damage long fibers. Therefore, it is better to treat with care.
If you need more than one bag of the mixture for placement, but several, then you need to mix them dry, and then dilute in 2-3 portions. The fact is that the shade in each package may differ slightly. To prevent noticeable transitions from one to another on the walls, it is better to mix everything in advance.
After mixing, let the material swell and stand for at least 6 hours. The optimal time for a specific wallpaper is indicated in the instructions on the package. In this case, the mixture should be in a tight, well-tied bag. By the way, in this form, it can not only be kept until ready, but then stored for several weeks.
Apply liquid wallpaper to the wall
The mixture stood for the allotted time, and now, finally, we come to the most important thing. We mix our mixture and get to work. It is advisable to start applying wallpaper either from the corner or from sockets and switches. It's not critical, but it's more convenient this way. The sequence of work is absolutely simple and straightforward.
- We scoop up a handful of the mixture with our hand.
- We put it on a trowel.
- Apply the mixture to the wall with a trowel.
- And rub up and down, right and left. The trowel should be kept slightly at an angle to form a layer 2-3 mm thick.

Modern realities are forcing more and more people to think that it is quite possible to carry out finishing work on their own. One of the most important questions is how to glue liquid wallpaper to various materials. Indeed, this variety is significantly different from their paper or non-woven counterparts and requires a special approach.
First of all, you need to understand that working with liquid wallpaper is significantly different from the sticker roll-up options. The process is much more like wall cladding with plaster or putty. There is a simple explanation for this: the material is a set of components, including shredded fibers of cellulose, cotton and silk. Various environmentally friendly additives serve as binding elements. Distinctive decorative effects are achieved through all kinds of inclusions.
Thus, a mixture of amazing properties is obtained, which makes it very popular. The only significant drawback is the high price, which is largely due to the complexity of production.

Sticker or application
Currently, there is a lot of controversy about whether it is worth doing the work completely yourself. Many masters insist that only professionals who are well acquainted with the application technique can perform this work with high quality. This leads to the fact that many turn to specialists for gluing liquid wallpaper.
In reality, there are no restrictions, you can stick such wallpaper yourself. The technological features of the product do not require special experience and the use of special tools. The main thing is to clearly follow the required order of work, which includes several interrelated stages.
 The technology for applying liquid wallpaper is quite simple and with proper skill, you can do the work yourself
 It is also worth making a reservation that the term "stick" is more understandable for perception, but does not characterize this procedure at all, the concept of "application" or "styling" will be more accurate.
On a note! These products are sold as dry mix packed in polyethylene bags. Each of them contains instructions for use, which you must definitely familiarize yourself with in order to understand what conditions must be observed in the process of work.
The feasibility of high-quality wall preparation
Of course, this material can be glued to any surface, but it looks more advantageous on the walls. With a little time and effort, you can get an effect that will surpass all expectations, because there are many options for the manifestation of imagination.
But gluing liquid wallpaper requires careful preparation, which depends on the base material. It will be a mistake to take into account the frequently encountered advice that the prepared solution will hide all existing defects.
 It is best to apply decorative material on pre-prepared walls.
 Working with old or plastered walls
This option is found in most cases. A wall is a surface that has already been finished many times. Therefore, you should follow these steps:
- Completely remove the previous decorative coating. Particular attention must be paid to the painted areas, they cannot be left, therefore the only correct solution is a complete cleaning.
- Check the quality of the plaster or putty. Due to the fact that defects and shedding are unacceptable, all defects are eliminated. If required, complete finishing is carried out.
- It is obligatory to impregnate the surfaces with a primer. She must have deep penetration.

GKL surfaces
Plasterboard is increasingly used for leveling walls, so it is not surprising that it will serve as the basis for decorative cladding. But you need to take into account some of the nuances:
- Much attention is paid to the joints. This is the most problematic area. The fact is that liquid wallpaper creates a solid canvas, so cracks will immediately be reflected on the front side of the coating. To avoid such troubles, all seams must be reinforced with reinforced tape.
- Difficulties can arise with an untreated cardboard surface. This will lead to two problems. Firstly, the water will be absorbed too quickly, which will cause unevenness and compression. Secondly, if it is necessary to remove the decorative layer, then the plate itself will suffer. Therefore, it is advisable to cover the boards with a putty.
- We must not forget about the use of a primer, this is a mandatory procedure.
A similar scenario for working with wooden surfaces that have been pre-faced with plywood or OSB.
Technology for applying liquid wallpaper
First of all, it is worth clarifying how to work with liquid wallpaper while preparing the mixture. It is this stage that can have a significant impact on the final result. It is important to remember the basic rule: stirring must be very gentle, so it is carried out by hand, this will avoid damage to the base.
 Kneading silk plaster by hand
Required tools:
- A set of spatulas. This tool must be flexible enough.
- Trowel. It will be needed to distribute the mixture in a given area.
- Grater. With its help, it is possible to form the necessary texture, so it is better to choose transparent options.
On a note! In view of the fact that some tool may have been previously used, it is advisable to make sure that its working surfaces are completely clean.
Although the work itself is not difficult, applying the composition will require concentration and care. This will avoid oversights.
VIDEO: how to glue liquid wallpaper on the wall
Step-by-step instruction:

Summarizing the above, it becomes clear how to glue the liquid wallpaper yourself and get the desired texture. The main thing is to practice a little to understand the basic principles. And then unforeseen difficulties will not arise in the process of work.
Liquid wallpaper is a material that is one of the varieties of decorative plaster. The mixture contains cellulose fibers. Silk fibers are used as additives in some species. To add color saturation, dyes and various fillers, for example, glitter, are a part of liquid wallpaper. In order for the wallpaper to be easily glued to the wall, one of the components is KMS glue. This glue is already familiar to many, since it can be used to glue roll wallpaper.
It is because of the structure that this material is called liquid wallpaper. But if you analyze the gluing technique, then they are close precisely to decorative plasters.
According to its composition, wallpaper is divided into the following types:
- based on silk;
- based on cellulose;
- combined base: silk together with cellulose.
Silk liquid are shown in the photo:

The most reliable and durable in use is silk-based wallpaper material.
Tools that are used to apply the mixture to the walls: trowel and grater.
Advantage of liquid wallpaper
Let's take a closer look at liquid wallpaper and start with the positive characteristics:
Important! Liquid wallpaper has few drawbacks, but it is still there. They are very afraid of water. Therefore, in rooms where it is necessary to wash the walls, you should not use liquid wallpaper.
By watching the video below, you can find out how to choose the right liquid wallpaper and glue them on the walls:
Surface preparation
Before gluing the wallpaper on the walls, you must carefully prepare the surface. If they are able to hide minor roughness, then spots, especially dark ones, can show through. This material is diluted with water, and it can become a solvent for various surface contaminants that will be visible after the wallpaper is completely dry. Surface preparation consists of several important stages. The type of walls is determined, and only then they begin to prepare them.

Important! At the stage of surface preparation, one should not save on primer. It is thanks to this procedure that the strength and durability of liquid wallpaper can be ensured.
Mix preparation
Prepare the wallpaper mixture in advance. This process must be given at least 12 hours. All components of the mixture are already well mixed and packed in plastic bags. Shake the bag well and empty the contents into a plastic bowl. Stir thoroughly again, do not press the mixture strongly and crumple. The amount of water to be poured must be specified in the instructions. The photo shows the initial stage of wallpaper mixing.

Important! First, water is poured into the container, and then the dry wallpaper mixture is gradually poured.
Each bag must be kneaded separately. It is strictly forbidden to knead only part of the bag. In such cases, the proportion is violated, and the structure of the wallpaper material will differ. After the water has been added, the mixture must be kneaded by hand, as in the photo.

It is unacceptable to carry out this process with a mixer. In this case, all the components that make up the wallpaper material may deform. In principle, it is worth making sure that the metal does not come into contact with the mixture. After the mixing process, when the components are completely saturated, it is best to put it in a plastic bag, close it tightly and leave it for a long time (12 hours).
The video provides instructions for diluting the components and then gluing liquid wallpaper:
Applying wallpaper to walls
We begin the process of gluing wallpaper on the walls. To do this, we take out a small amount of the prepared mass from a bag or container with our hands, put it on a trowel and distribute it on the wall. The layer thickness should be about 3 mm. Apply in small areas, gradually distribute centimeter by centimeter. After a certain part of the mass has been applied to the wall, smooth it with a grater. This process is shown in the photo.

Consider the main points in applying wallpaper material to the surface:
- when smoothing the wallpaper, the fibers will lie in the direction of the grater. Therefore, it is necessary to drive the grater in different directions. Circular motions are best;
- if the general view will be separated by a pattern or columns, then to give symmetry, apply liquid wallpaper in opposite directions. Proceed in the same way with a grater;
All described processes can be seen in the video:


How to prepare the walls and glue the liquid wallpaper yourself is shown in the video:
Liquid wallpaper can be glued to any surface. With proper preparation of the walls and the material itself, all gluing work can be done by yourself, and the result will be extremely positive.