Samples of metal gates and wickets. Metal wickets
Metal wickets and gates are the most common type of fence arrangement in a suburban area. Metal as a material has a number of undeniable advantages. This is an opportunity to make a unique design, and an affordable price, and the durability of the product. Choosing a gate made of metal, you can bring to life the most original design solutions. Your wicket can be the one and only that will make you stand out from the rest.
It is possible to make a metal gate with your own hands
You can try to install a metal gate with your own hands. This process is quite simple and straightforward if you approach it responsibly. The main thing that is required of you is the ability to use a welding machine. Stock up on the necessary tools, materials, choose the time and feel free to proceed with the installation.
Preparatory work
Choose a location and measure carefully. Decide on the pillars. They can also be metal, or they can be made of bricks. If a brick will be used, then its thickness is important.
The drawing of the gate must be done in detail on paper.
Please note that wickets with forging elements look very impressive. Models of such gates can be seen on the photo on the Internet. But you cannot make such a gate yourself; here you will have to turn to specialized firms. With your own hands it will turn out to make a gate from a metal profile.

Forged metal wicket
Tools and materials
To work, you will definitely need the following tools:
- welding machine
- protective mask or welder's mask
- angle grinder
- cutting and grinding discs for metal of the required size
- hammer, chisel, crowbar
- goggles, respirator, protective gloves
Be sure to use the protective equipment listed above to protect you from unwanted injury and burns.

Metal gates and wickets
Manufacturing and installation process
First, install the posts with your own hands. If you have them made of bricks, then special metal inserts are made in the masonry for welding the wicket hinges. If the pillars are metal, then each pillar must be poured with concrete separately. Do not forget to tamp thoroughly. This will help to avoid unwanted rolls and distortions of the wicket in the future.
Using a grinder, we cut off the side posts of the wicket from the profile pipe. Then we cut off the upper and lower parts, as well as a piece of pipe that will be attached in the middle. Let's start the welding process. The cut pieces must be placed on a flat surface and carefully welded together. You can see a photo of the finished frame below.

Creative forged wicket
Then we weld the hinges to the resulting frame or frame. Divide the loop into two parts. We weld the part with the pin onto the gate, the other part - onto the fence posts. The hinges must be perfectly parallel to the wicket and fit flush with the profile pipe. Use a hammer to beat off the excess weld and clean the weld with a grinder with a grinding disc.
To prevent metal corrosion, the gate must be treated with a degreaser and then with a primer. Attach a profiled sheet or weld a profiled pipe. Insert the lock and handles. In the photo you can see samples of ready-made metal gates made by hand.
And finally, we will give some useful tips from professionals.
- The minimum width of the wicket should be at least 1 m. Be guided by the fact that you should freely pass through the opening, even with bulky things. For example, with a construction wheelbarrow.
- If you will be using electrical wires, run the cable inside the pipes. There he will be protected more reliably.
- Leave a gap of at least 10 cm between the gate and the ground plane. This is necessary for free opening in winter, when snow falls outside.
- Fasten the corrugated board only with self-tapping screws. Do not use rivets, they will loosen very quickly.

Do-it-yourself metal gate is a reality
Well, we hope that this article will be useful for you if you decide to install a metal gate with your own hands. If you did not receive answers to all your questions, then we suggest that you carefully look at the photos and videos at the end of the article. Good luck!
Probably, there is not a single person who would remain completely indifferent when looking at an openwork metal pattern. Even more admiration is caused by the massive pattern with which they are decorated, which are part of the entrance group.
The presence of massive metal gates, decorated with graceful patterns, is not a sign of a desire to isolate oneself from others, but serves as an indicator that the owner has taste and thinks about his own image. At the same time, forged gates are very well able to fulfill their main function - to protect the site from the penetration of uninvited guests, which is facilitated by the height, the presence of sharp tips and strength. Also, almost any modern gate can be equipped with video surveillance systems, which will only improve their protective properties.
Assortment of gates and wickets - from classic to exclusive
There are a large number of firms offering high-quality forging services, which will make it possible to manufacture gates according to the available sketches. Also, almost any manufacturer of forged gates accepts sketches and drawings of the customer, which contributes to the realization of any fantasy when decorating your own personal plot and enclosing it with a fence.
Timeless classics

The most popular are gates and fences made in classical style. The presented sketch gives a complete idea of how the entrance group will look like. A smooth fence with rare twigs, which does not create the impression of being fenced off from the world, will become the choice of a person who is used to combining laconicism with practicality, but at the same time has taste. Arched vaults of the gate and a similar design of the wicket give a certain sophistication to the presented option.

Another reading of the classics, which practically does not differ from the previous version. The main difference of this model will be a greater number of decorative elements, which gives the whole ensemble massiveness, which is hidden by rare twigs. The line of openwork patterns skipped along the top and bottom visually limits the height of the wicket and gate, making them complete. 
A sketch of a gate that combines the sophistication and beauty of a forged product and provides an increased level of security achieved by the sharp tips that end the bars of the gate and fence. The arched vault visually enlarges the entire structure, and a large number of patterned inserts are also a weighting element. Rolled rods can add beauty and originality to the whole ensemble.

For those who are not used to experimenting and are more inclined towards classic, straight lines, manufacturers are ready to offer the options presented in the photo above. Such fences are in constant demand, since they are simple in execution, and they look very presentable.
Another advantage of such options is the ability to mount the wicket directly on the gate, in contrast to the arched versions, where the wicket door does not fit. These types of gates can be decorated with patterns of varying degrees of complexity, have pointed peaks at the top, or be completely smooth, which, of course, will deprive them of the brutality that the appearance of a wrought-iron gate causes. 

For those homeowners who value privacy and personal space, a gate closed with sheet metal is recommended. At the same time, there is the option of completely covering the door leaf and fence, or closing only the lower part in the form of a forged fine mesh. Both options are distinguished by their massiveness, monumentality, which speaks of the seriousness of the owner of this site and his concern for his own intimacy. The manufacture of such gates will require more metal, which will affect the cost and lead to higher prices. But it is worth it, because these gates look beautiful and solid at the same time, but the openwork top and bottom do not create the impression of a “concrete wall”.
Exclusive models
For people with sufficient financial resources or building solid country houses, we can recommend paying attention to more expensive models of gates and fences, which by most manufacturers belong to the elite category.

The main feature of these varieties, the question, as can be seen in the picture above, is their massiveness and closeness. In all models, sheet metal is used, which completely closes the front of the gate, the fence is similarly designed to create a solid ensemble. Also, an obligatory element that gives the gate status and exclusivity is the presence of forged or cast volumetric design elements that play the role of decoration placed on the gate. Another important detail is the complete set of ready-made gates with bolts and strips.

Another option for the exclusive design of arch-type gates with the possibility of placing a wicket due to the flat foot of the arch. This model is distinguished by its rich decoration, many flowing lines of the pattern, creating airiness, which gives the gate a regal look and does not create a feeling of massiveness. It should be remembered that such options, when most of the gate and fence are covered with a sheet of metal, are distinguished by their high weight, which requires a preliminary calculation for the manufacture of the corresponding support pillars.
Wood and metal - a good combination


A separate place among the forged gates is occupied by models in which successfully rallied b wood and metal... The gates themselves in this case are made of wood, a material that has been used since ancient times to decorate a country house, and all fasteners, edging, platbands and just decoration elements are made by forging. Also, the tips are made in the same way, if you decide to create them.
Such a solution in the manufacture of gates allows you to get not only reliable protection, but gives the entire entrance group a certain touch of eclecticism and adherence to the roots.
Making forged gates with your own hands - the impossible is possible
If you want to get an original gate that will be exclusive and will not be repeated by anyone else in the area, there is a possibility make them yourself... Despite the seeming complexity, this process is quite simple and straightforward.
The first step is to come up with a sketch of the future gate. It is best to draw pictures to help visualize the future result.

A preliminary prepared sketch of the future gate will facilitate the work in the future.
When developing a sketch, you should focus on two postulates - durability and reliability... But we shouldn't forget about beauty. It is important to preliminarily think over the geometry of the leaves of the future gates and fully calculate the overall dimensions of the future structure.

Drawing - the first assistant in the manufacture of gates with your own hands
Tool required to make a gate
When choosing a tool, you should choose which gate will be. Either the entire manufacturing process will be independent, including the forging of metal, or the forged elements will be purchased ready-made.
In the first case, you will additionally need forge, hammer, anvil... This path should be chosen only if you have practical skills in blacksmithing. Otherwise, it is better to prefer the second option.
To make a gate you will need:
- welding machine and a set of electrodes;
- powerful yews;
- angle grinder;
- brick;
- I-beam and profile pipe;
- metal sheets, at least 1 mm thick;
- cement mortar.
The first stage - support pillars
The first step will be the installation of support pillars, which must be strong enough to withstand the entire structure, which is notable for its considerable weight. The central part of the post will be a pipe with a diameter of at least 25 mm; facing brick will also be required.

Correctly installed posts will guarantee the reliability of the entire structure.
It is important to remember that it is first necessary to calculate the thickness of the material, since the pipe will be bricked. It is also necessary when digging a hole to leave a gap between the edge and the pipe no more than 10 cm, so as not to cause the base to skew under the weight of the shutters.

The final stage of installing the pillar will be bricking it
The installation of the post consists in digging in the pipe, ramming the base using crushed stone and laying the pipe with bricks. Also, at this stage, you will need to weld on the tires, special fasteners for the back curtains of the gate leaves. It happens that only two tires are enough, but if the gate is supposed to be heavy, you can weld on three for fidelity.
Sash - an important stage
For welding the flaps, a flat area should be chosen in order to prevent twisting of the frame parts. The prepared profile must be cut in accordance with the drawing, after which the frame is laid out on a flat area and all parts of the alignment are tacked by spot welding.

When welding the frame, all parts must be placed on a flat surface to prevent twisting and deformation
After that, it is necessary to carry out control measurements, only then proceed to the finishing welding with a continuous seam. Also, in the manufacture of sashes, it is necessary to weld all decorative elements in accordance with the drawing, while it is necessary to try to weld in such a way as to make the seam as less noticeable as possible.
Painting
After welding the flaps, the resulting structure must be painted before final installation. Pre-treat the metal with an anti-corrosion compound, clean up all visible welding seams, cover the gate with a layer of primer after degreasing and apply a layer of paint. It is best to use a spray gun to ensure that the paint is applied evenly.
Gate assembly - home stretch
The final stage is the installation of the gate. To do this, hinges should be welded to the ends of the flaps, which should be located at the same distance as the counter loops on the posts. There is a small nuance of welding the hinges. The lower ones should be fastened in one direction, and the upper hinges in the opposite direction. This is necessary to protect against further removal of the gate.

At the final stage of manufacturing, decorative elements are welded and painted
On the back of the sashes, it is necessary to weld on brackets to accommodate the lock or to provide for the placement of modern locking elements.
The final step is to hinge the gate, which will require the help of a partner to speed up and facilitate the process.
Making a forging machine
The video below provides instructions for making a do-it-yourself cold forging machine. Simple, fast and cost effective. The video is hugely popular.
Each summer resident tries to make his site well-groomed and comfortable for relaxation. The easiest way to "revive" and distinguish your summer cottage from the rest of the gardens is to equip a beautiful gate. It is the entrance composition that attracts attention in the first place and creates the impression of the site as a whole. You will hardly surprise anyone with the same type of factory structures, and experienced summer residents prefer to design and equip the entrance complex with their own hands.
Consider the features of various gates, as well as provide detailed instructions for planning and assembling fences made of wood and metal.
What should be a country gate
There are no clear requirements and norms for the placement and dimensions of the wicket. When designing, it is important to take into account the purpose of the door, the presence of a fence on the site, the size and design of the site itself.

The nuances of arranging a gate for entering a garden and summer cottage:
The width of the canvas is about 1 m. As a rule, this is enough to carry bulky things and pieces of furniture onto the estate. A large fence requires reinforcement of the support beams and the use of more durable hardware.
The height of the structure is limited to 2-2.2 m. This value depends on the height of the existing fence and the purpose of the sash.
Experienced summer residents agree that the optimal placement of the front entrance is close to a residential building, so that the gate is visible from the window.
The main criteria for choosing a wicket
Consider the types of gates for summer cottages based on their main design characteristics: purpose, device and material of manufacture.
Purpose of the enclosing door
Conventionally, all country wickets can be divided into three groups:

Design features of the wicket
Based on the design of the frame and the relationship with the fence, the following types of country gates are distinguished:
- freestanding fences;
- wickets that are part of the gate;
- fences adjacent to the entrance gate.
According to the degree of openness of the door leaf, they are distinguished: curtains, free and combined.
Blind gates protect the dacha estate from prying eyes and drafts. This option is very popular. To make the fence attractive, the canvas is framed with decorative elements made of wood or metal.
Free wickets partially block the view of the territory of the site. To create an openwork canvas, artistic forging is used - the elements are made in the same style. Simpler products are made of a wooden picket fence or a chain-link metal mesh. Translucent models of wickets are made of polycarbonate.

Combined entrance gate are created from several different canvases. The gate is made deaf at the bottom, and the upper part is decorated with forged inserts.
Fabric material
The most demanded materials for the arrangement of gates: metal, wood and polycomosite. Let's consider the features of the application of each of them.
Metal gate for giving is considered self-lasting, wear-resistant and mechanically strong. The disadvantage of the model is the complexity of making it with your own hands. To implement the project, you will need specialized equipment and skills of a welder.
Varieties of metal fences: wickets made of corrugated board, forged products or the use of sheet metal cloth.
Features of corrugated board fences:
- the profiled sheet is made of steel, covered with a protective layer of zinc and polymer - this ensures the material is resistant to corrosion;
- rigidity of the canvas due to the presence of square waves;
- ease of fixing sheets to a metal frame - fastening is carried out using special rivets;
- affordability and ease of use.

Certain disadvantages are inherent in professional flooring:
- there is a high probability of the appearance of dents with mechanical damage;
- the formation of corrosion due to a violation of the integrity of the upper layer;
- "Rustic" appearance.
Forged Products on the contrary, they are distinguished by sophistication and exclusivity. But for the presentable design, you will have to pay a relatively high cost. Forged elements make the wicket heavier. Some summer residents are alarmed by the transparency of such a fence, but this drawback can be easily eliminated by installing a "curtain" made of polycarbonate.
Sheet metal wickets are practical to operate, but the material is difficult to process independently.
Wooden gate for a summer residence is appropriate if the fence on the site is also made of wood. The fence is organically combined with gabions, natural stone and brick. Advantages of wooden models:
- ease of wood processing;
- the possibility of self-manufacturing of the wicket;
- availability and environmental friendliness of the material;
- beautiful appearance.

Disadvantages of wood products:
- susceptibility to moisture, decay and combustion processes;
- the need for regular processing with protective agents and paintwork materials;
- service life - about 5-8 years.
Polycomposite and plastic models appeared on the market recently, but have already gained popularity among summer residents. Wickets of various sizes, textures and colors are on sale. The assembly and installation of the fence does not cause any difficulties.
Manufacturing technology of a wooden gate
For work, you will need a hacksaw, a screwdriver with bits and drills, a level and a tape measure. From the materials you need to prepare:
- corners;
- loops;
- self-tapping screws;
- door trim boards;
- thick wooden beams for the frame;
- support beams.
Advice. It is better to buy lumber ready-made - dry, planed boards of the same thickness on a thicknessing machine
When choosing wood, it is advisable to give preference to:
- larch and cedar - a dense material that is resistant to weather conditions;
- spruce or pine - affordable wood, easy to process;
- oak is a durable, solid raw material with a beautiful texture;
- laminated veneer lumber, assembled from hardwood.
Step-by-step instructions for making a wicket for a summer residence:

Step-by-step installation of a corrugated gate
The requirements for a summer cottage gate are fully met by a fence made of a professional sheet. You will be able to prepare a drawing and assemble a gate with your own hands.
Drawing development and procurement of materials
Having considered the ready-made drawings of the wicket for a summer residence, you can easily draw up your own plan, based on the parameters of the site and personal preferences.
The diagram should indicate:
- the total length of the support pillars;
- the depth of the foundation for the racks;
- distance from the ground to the door leaf;
- the width of the wicket;
- frame design, number of jumpers;
- the location of the hinges and bolt.
Important! Support pillars must be buried below the level of soil freezing. On heavy soils, a depth of 0.7 m is permissible, and on light, heaving soils, at least 1 m.

Based on the developed drawing, materials are selected:
- metal profile for pillars - two cuts of 3.3 m each;
- cover plates for supports - two squares 80 * 80 mm;
- wall profiled sheet - 1 * 2 m;
- metal profile for the frame 40 * 40 mm - 5.5 m;
- two hinges, lock and latch.
Additional consumables: waterproofing film, sand-cement mortar, primer for metal and paint, rivets for fixing the profiled sheet.
To assemble and install the gate with your own hands, you will need the following tools:
- grinder and drill;
- welding machine;
- hacksaw for metal;
- drill for digging a hole.
Installation of support legs
Pre-clean and level the area, mark the place for the support beams - the distance between them should be 4-5 cm more than the width of the wicket.
Procedure:
- Drill holes with a diameter of 40-50 cm.
- Cover the bottom of the boulders with a waterproofing film.
- Equip a crushed stone "pillow".
- The edges of the metal posts, which will be immersed in the ground, must be cleaned of rust and treated with a primer.
- Place the beams in the pits, level the supports and secure the position with stones.
- Fill the pit with a cement-sand mortar.

After a day, check the parallelism of the beams by measuring the dimensions of the opening from above and below.
Create frame and canvas
Sequence of work:
- Prepare the components of the frame - cut the pipe with a section of 40 * 40 mm according to the drawing.
- Lay out the segments on a flat surface and fix the structural elements with clamps.
- Check the evenness of the assembly.
- Tack the elements with a weld seam and once again check the evenness of the diagonals and the perpendicularity of the corners.
- Install the cross bar and reinforce the frame with metal corners.
- If the assembly is correct, carry out the final welding.

"Try on" the frame by exposing the frame to the support legs. Mark the places for the hinges - the distance to the edges of the canvas should be about 25-30 cm. After welding the hinges to the frame, grind the welding seams, cover the frame with a primer and paint.
Frame trim:
- Cut the profiled sheet.
- Fix the metal sheet with rivets. A weak fastening will lead to loosening of the canvas during the wind, and a strong fastening will lead to its deformation. Therefore, the screw must be screwed in carefully.
Final assembly of the structure
Hanging the finished canvas on the support posts is carried out after the foundation has completely solidified.
Wicket assembly procedure:
- Place the fence in the opening, placing a wooden beam 10 cm thick under the canvas.
- On the beam, it will mark the places for the mating loops.
- Weld the hinges and hang the wicket.
- Check door movement. Spontaneous opening or closing of the gate is unacceptable.
- Place a stopper on the back of the hinges so that the door only works in one direction.
Gates for summer cottages: photo ideas for decorating the entrance ensemble
The gutter and the fence act as a single decorative element thanks to the pattern applied across the entire fence fabric.

A low Provence style fence is suitable for separating the garden from the backyard suburban area. The white gate looks great against the backdrop of lush greenery and natural stone.

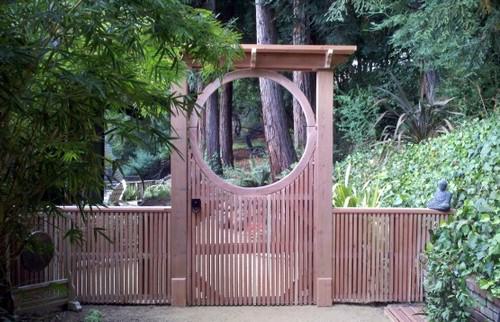
The original and at the same time simple form of the entrance door emphasizes the laconicism and sophistication of the Japanese-style garden.
An unusual solution is a combination of forged elements and natural materials. Skillfully crafted bunches of grapes are complemented by a natural branch of the vineyard.

Eco-decor made of untreated wood is appropriate for a small country estate. The doors of the gate, like the fence, are designed in a rustic style.