What are the repairs done in the kitchen. Kitchen renovation: features, design, decoration, equipment
Inexpensive, but high-quality kitchen repairs can be done by everyone. To do this, you need to draw up a budget plan and select all the necessary finishing materials.
Any renovation, regardless of whether the object is an apartment or a private house, requires a significant investment of funds. The kitchen deserves special attention in residential buildings: it should be beautiful, clean and fresh here, so it is so important to make a choice in the direction of practical and solid materials. How to organize an inexpensive kitchen renovation so that the quality of the coating does not suffer? In this case, it is important to be smart, opting for simplicity, cheapness, safety and functionality.
Beginning of work
Before making repairs, it is important to think over the general concept of the future room. In determining the style of the room, the personal preferences of the residents play the main role, then a list of the main materials and fixtures for installation is sketched out. This item allows you to significantly save your own budget. When purchasing cheap materials, it is important to be careful, it is advisable to consult with specialists who will advise on any issue.
Independent activities during repair work will help minimize costs. So, getting rid of the old coating, adding or removing the material is within the power of every person. It is better to entrust complex types of work requiring professionalism to specialists. They can easily repair the kitchen inexpensively.
Making a list of events
To simplify the actions will help the designation of the list of to-do items required for the restoration work.
Highlights included in the checklist:
- Elementary work such as cleaning the base surface, gouging holes, dismantling old coatings.
- It is better to entrust the measures for leveling the surface, laying electrical wiring, replacing pipes to experienced craftsmen.
- Surface priming, painting is carried out on its own.
- Laying tiles, linoleum is not difficult, so it can be done by anyone.
In the photo you can see the process of self-assembly.

Advice! Analysis of the list of works allows us to conclude that the bulk of the cases can be done without seeking outside help.
Functionality is the main purpose of the kitchen, therefore, taking care of reducing the cost of repairs, it is important not to forget about its main purpose. It is important to remember that excessive simplicity in the future can turn into continuous inconveniences and discomfort. Therefore, inexpensive, if properly planned, will add value, convenience and originality to the room.
Competent repair planning
Before making repairs indoors, it is important to find out what type it will be: current or major. If the first option involves a superficial change in external data, then the second is associated with a full-fledged transformation of the room. In connection with this moment, the planning of the future kitchen is being carried out:
- Zonal delimitation of the room into a work area and a place for eating.
- Dismantling of old coatings, sinks, windows, doors, communications.
- Designation of points for future installation of household appliances, installation of sockets.
- Determination of the placement of kitchen furniture.
- Marking the location of the kitchen apron on the wall, facing the working area with tiles.

How to meet the minimum amount?
Organizing a budget kitchen renovation will help clear planning of expenses, the acquisition of the essentials and a perfect match to the overall environment.
How to properly purchase materials for subsequent repairs?
- be patient and prudent, buying only the necessary things;
- to purchase building materials in one place in order to exchange goods if necessary;
- small details, minor cladding elements, accessories are purchased last.
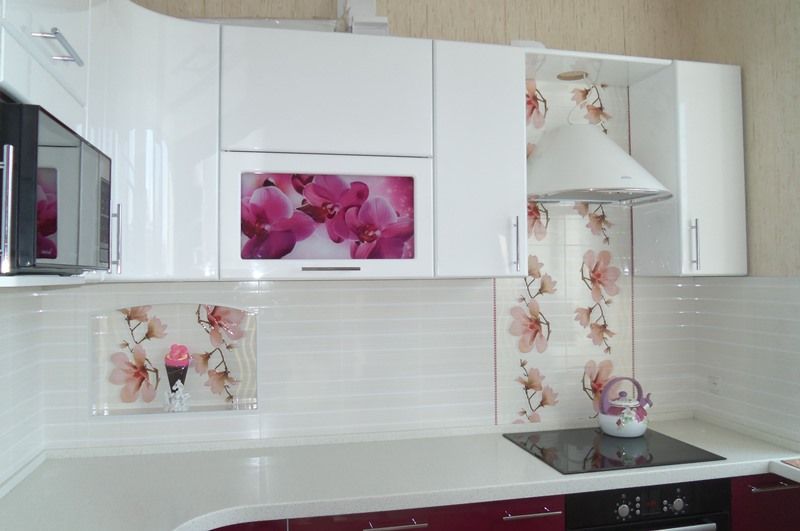
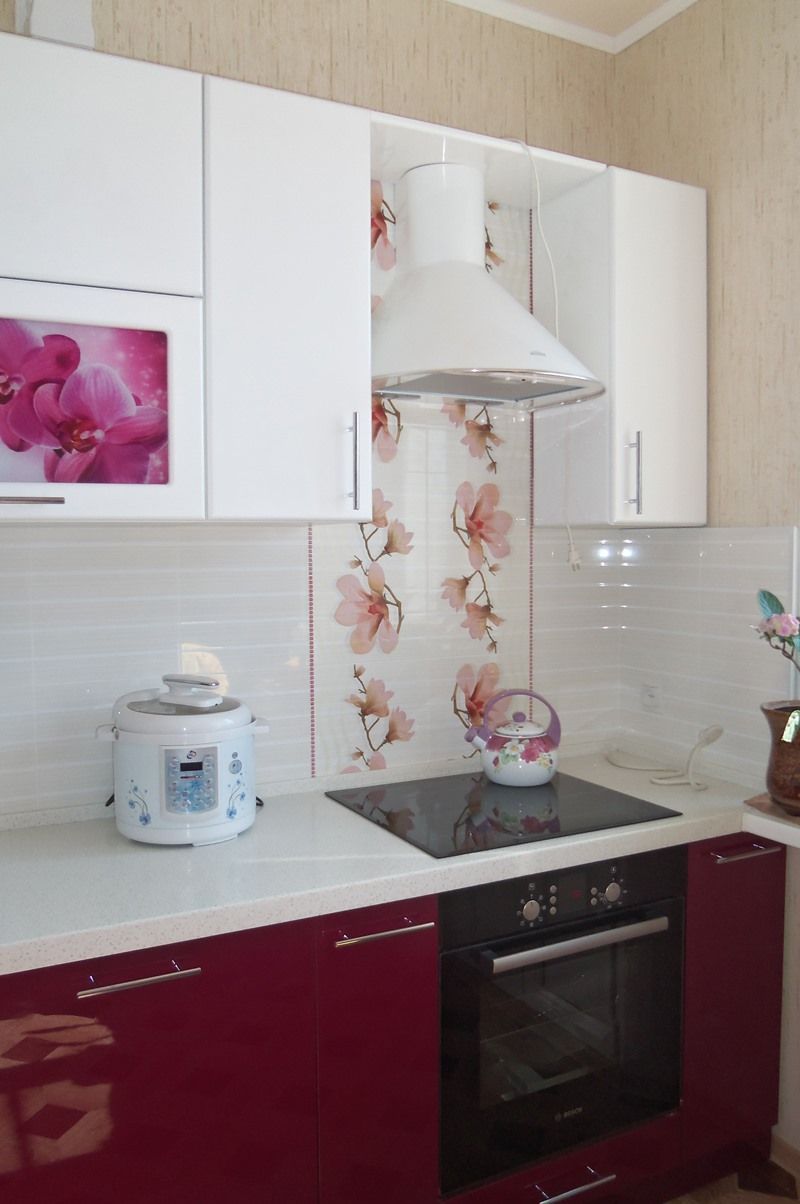
Some types of materials are demonstrated by a vivid photo. Attributes are selected according to the color scheme of the room. To make repairs that are accessible to everyone, you can use simple, inexpensive materials for the decoration. So, inexpensive types of linoleum are suitable for floor decoration. Samples of such floor coverings are clearly visible in the photo. Upon completion of the restoration work, the kitchen is furnished with furniture and household appliances.

Inexpensive materials for decorating kitchen areas
You can also update the room with cheap materials that are optimal for the installed part of the room. When finishing the ceiling, the following are allowed: drywall, plastic, putty. For the floor, coverings in the form of laminate, tiles, linoleum are suitable. It is better to decorate the walls with tiles, treat the remaining surfaces with putty or stick wallpaper. The photo successfully demonstrates the decoration of the kitchen.
Cheap materials have both strengths and weaknesses. The clear use of plastic elements will allow to carry out repairs of the kitchen inexpensively. This material is quick to install, durable and easy to maintain. However, such coatings quickly deteriorate when exposed to bulky objects and melt at high temperatures. Examples of such materials can be seen in the photo.
- GKL sheets will perfectly align the base, but this material is not entirely practical: the high moisture content in the kitchen will quickly warp the coating.
- Laying tiles can only be a person who is well acquainted with all the intricacies of the process.
- It is much easier to make repairs using laminate and linoleum, but any types of damage during operation are not excluded.
- To reduce the cost of updating the walls will allow self-application of putty in the event that the base coat is even and a person who knows the basic nuances of the work.
- When choosing wallpaper, you should focus on vinyl sheets: they will simplify the gluing process, which is especially important for a beginner. The photo shows the cladding with this type of material.

How to use your own hands and not make a mistake with the repair?
You need to start restoration work from the ceiling. Finishing of this area without the use of additional structures will make repairs cheaper. The base base is carefully leveled, cleaned, primed, puttyed. As the layers dry, the procedure is repeated, after which the ceiling is painted with light paint. A chandelier or fluorescent lamp is selected as a lighting device. The photo shows the results of such a finish.
For lining the walls of the kitchen, it is better to choose washable wallpaper in discreet shades, to match the interior. The working area is finished with tiles, because it is not afraid of heat and soot, and any splashes can be easily cleaned.
First, it is important to prepare the surface: clean, level, prime, putty. Usually glue is applied to the canvases and work starts from the window.
Making floor repairs the cheapest will allow the purchase of discounted types or remnants of the corresponding coating. When choosing a laminate, the degree of its durability and moisture resistance, so necessary for the kitchen, is taken into account. At the time of laying this material, it is important to prepare a high-quality substrate.
Like any other room in an apartment, the kitchen often needs renovation. And sometimes more often than bedrooms, hallways or living rooms. In the kitchen they prepare food, eat, communicate, in general, the kitchen is one of the most popular places in the house. Therefore, the frequency of renewal of kitchen rooms increases.
Surface preparation
Where to start renovating a kitchen? First of all, you need to level the walls and floor. The walls should be leveled with plaster so that the cabinets of the kitchen set hang straight during installation, without noticeable distortions.
The floors, if they are concrete, are leveled with a screed and a finishing leveler. Subsequently, you can lay any covering on them, for example, tiles.
If the floors are wooden, then slight distortions are not very terrible, it is enough to fasten the boards with plywood. It is not recommended to lay tiles on a wooden floor; it is better to use linoleum, PVC tiles or laminate.
The final stage of kitchen renovation is the installation of a kitchen set. But before that, it is necessary to carry out a number of preparatory work and the decoration of the entire room.
Preparation works include:
- In the wiring for the hob, oven and microwave.
- In the distribution of water pipes for connecting a dishwasher and fine filters.
- In laying tiles between upper and floor cabinets, that is, the so-called apron.
Kitchen renovation step by step
Using the example of one kitchen, the article will tell you about all the stages of repair.
1. First, a kitchen set was ordered. While it was being made, according to the finished sketch, the places for future outlets were marked. The dimensions of the future tile apron were also applied.
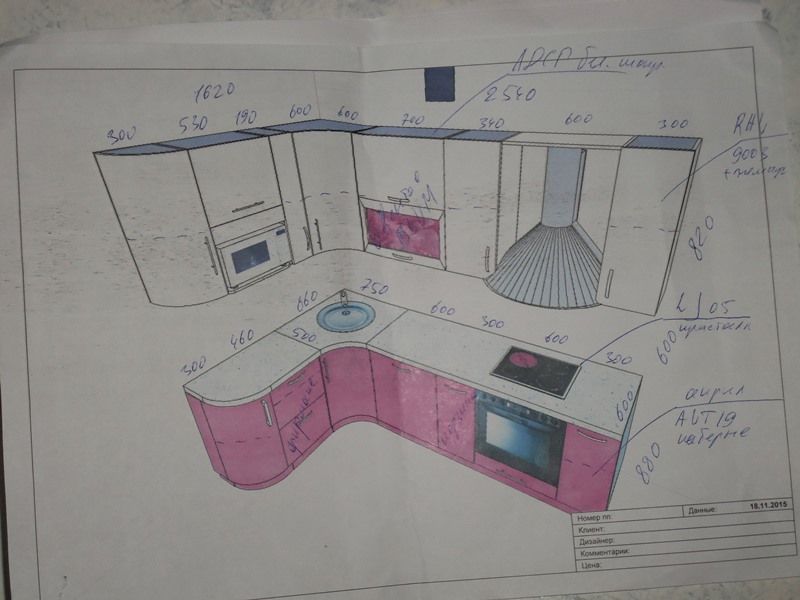
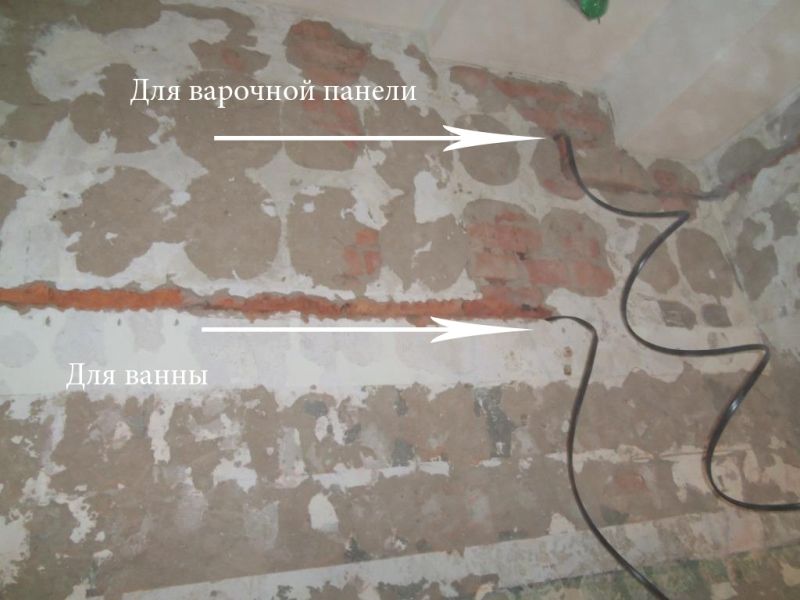
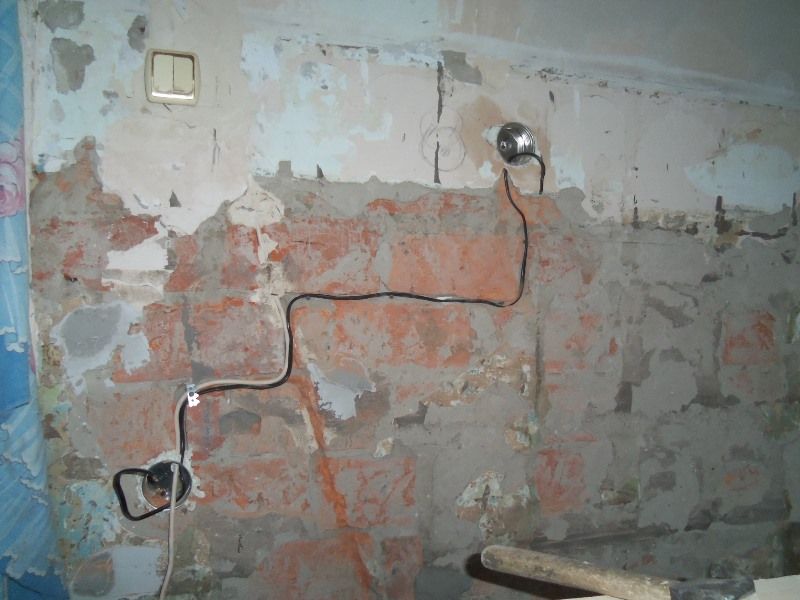
2. Then two power cables were laid from the electrical panel in the hallway. They had to be laid through the bathroom and toilet, making punches in bricks. One of the cables (VVG 3 × 2.5) was intended for powering the bathtub with hydromassage.

3. A more powerful power cable (VVG 3 × 6) was used to connect the hob and oven. He went to the kitchen to the place where the sockets were installed.
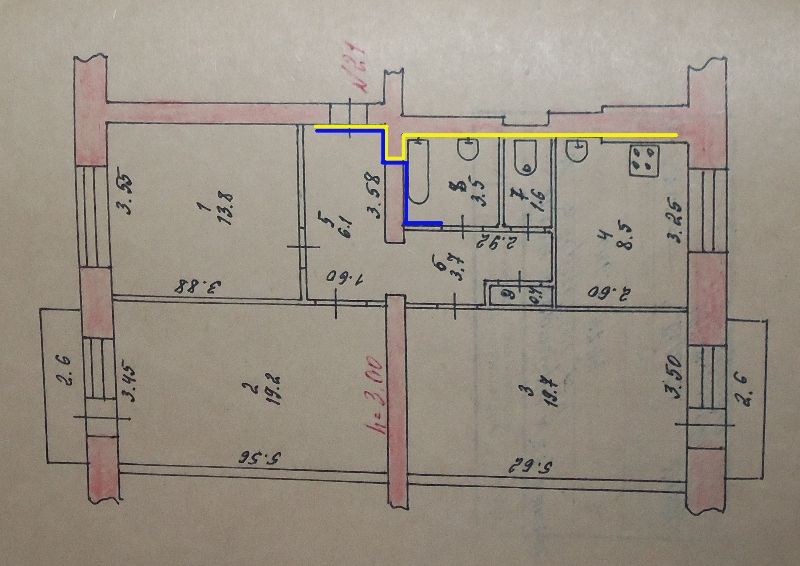
4. These cables are shown schematically on the plan of the apartment. The wire to the kitchen is shown with a yellow line, and the bath cable is shown in blue (Figure 4).
5. Subsequently, the wires were laid in corrugated plastic pipes and covered with tiles.
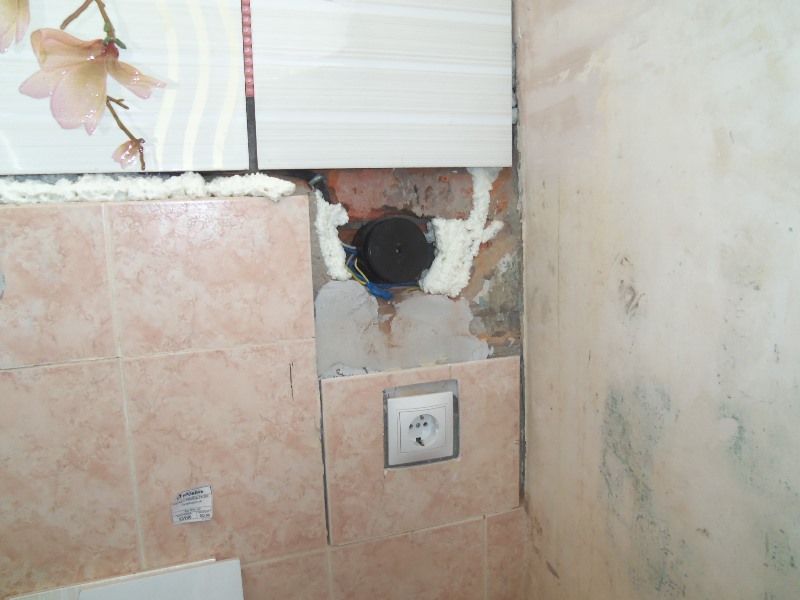
6. The sockets for the panel and oven had to be recessed into the wall so that they would not interfere with the later installation of the headset. I had to chisel, install sockets, plaster and lay the old tiles back in their old place.
7. Then, on the wall between the kitchen and the bathroom, a branch was made from the outlet for an additional point, to which the microwave oven was then connected.
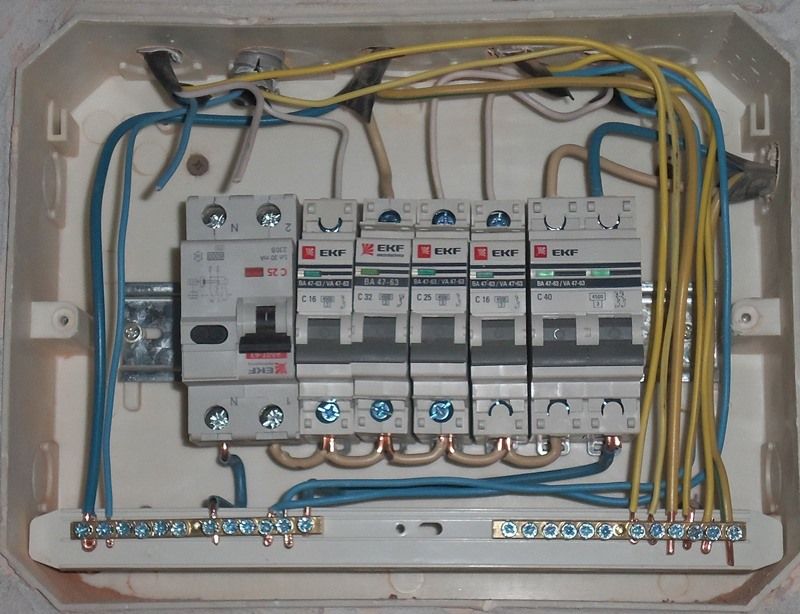
8. Two new circuit breakers were installed in the apartment's electrical panel. A hob was connected to a 32 A machine, and an oven was connected to a 25 A machine.
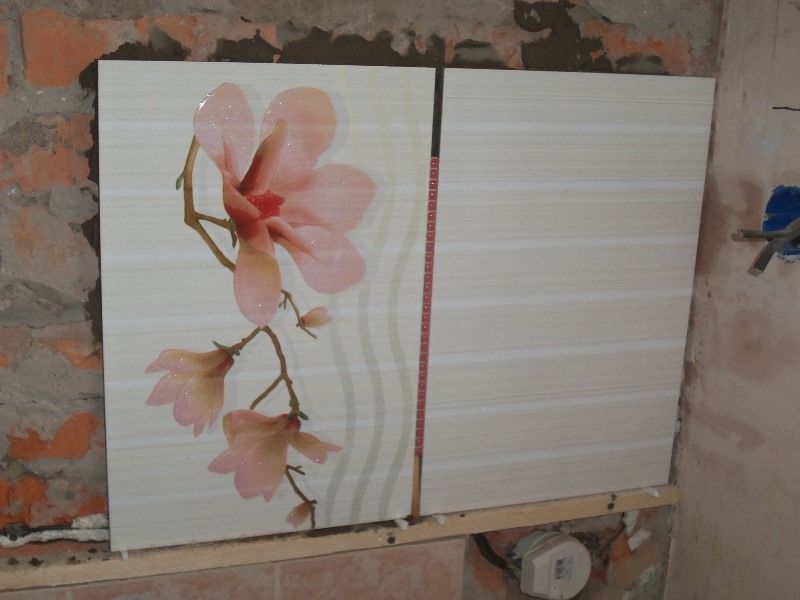
9. Then the tiles were laid along the entire perimeter of the future kitchen set.
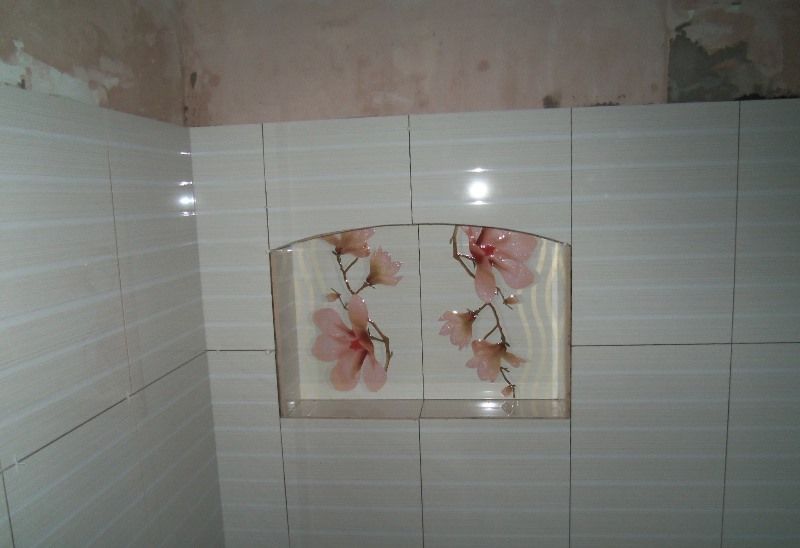
10. A decorative niche was made and also finished with ceramics.
11. The place for the future ventilation hood was laid out separately, according to the sketch.

12. Since the floor in our kitchen was originally made of wood, it was decided to lay a laminate.
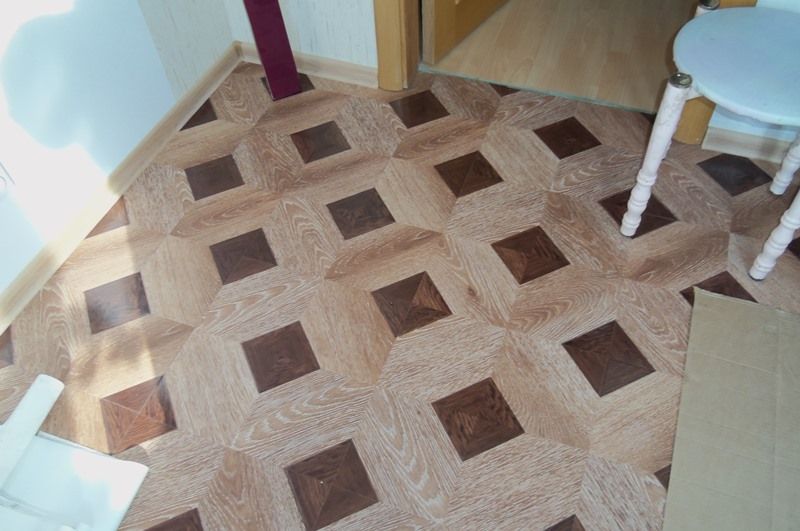
13. A little earlier, the floor was covered with plywood sheets, and they were fixed with self-tapping screws.
14. After wallpapering and installing the skirting board, the kitchen was finally installed.
15. The microwave took its place in the niche intended for it, was connected and tested.

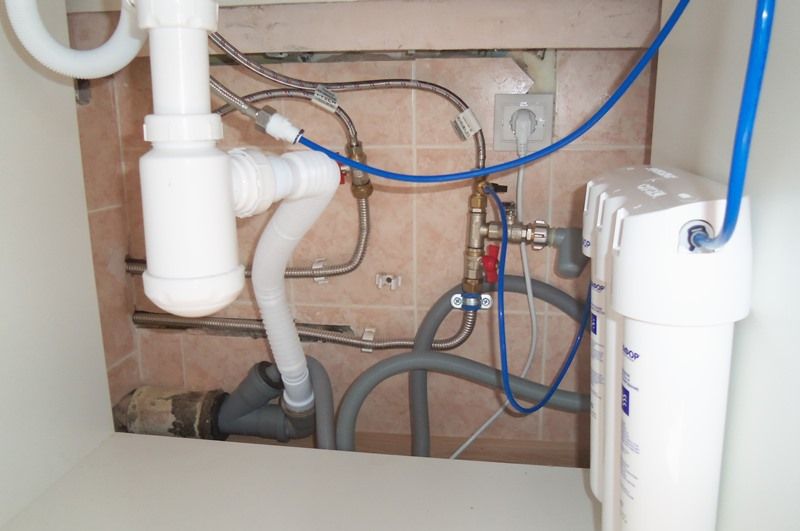
16. When a sink with a mixer and a tap for clean water was installed, it was time to connect fine filters and a dishwasher. This operation was done to the previously connected pipelines using tees and adapters.
17. Then we connected and tested the hob and oven.

18. The final stage was the installation of ventilation. The hood was connected to the ventilation stack using adapters.
Many of us today prefer to do repair work in the kitchen, at least most of them, with our own hands, and then the question becomes: what are the main stages of kitchen renovation, and in what sequence should all work be performed.
Taking the necessary measurements
To create a kitchen design project, calculate the amount of materials required, you first need to be very accurate know all the parameters of the room... First of all, the width, length and height of the room are measured, then the dimensions of the window and door openings, as well as the distance from them to the floor and ceiling, adjacent walls. It is also necessary to measure the mezzanine, if any.
In addition, measurements are taken of the location of all existing outlet groups, inlet and outlet, and ventilation vents. If there are any protrusions in the floor slabs in the kitchen, then this must also be taken into account and appropriate measurements must be taken. If you want to spend redevelopment, to demolish some partitions, then you need to measure the adjacent room with which the kitchen will be combined.
Accuracy of measurements should be as high as possible, and the error should be no more than 0.5 cm. Otherwise, you can end up with an unclosed, too inconvenient passage between and, especially when it comes to a small kitchen, where every centimeter is registered.
Creation of a design project
The location of all the lockers on the plan should be noted in advance. If you plan to order a certain one, then it is better to measure all its parameters in advance and estimate how much it fits into the kitchen. You can use simple ones to draw up a design project programs and even mobile applications, in which all actions are simplified as much as possible: you only need to enter the parameters of the room and the parameters of the desired furniture.
There is an original way to think over the arrangement of all pieces of furniture... A box is created from cardboard, which will be a model of the kitchen. Naturally, you need to stick to scale. Figurines of furniture and equipment are also made of foam on a scale, and then all these parts are placed in a box until the ideal option is found. Whatever the method, as a result, you should get a clear visual representation of how the future kitchen should look like.
At this stage, it also does not hurt to think over kitchen color scheme, used accessories, decoration materials and other details. If the kitchen is small, then it does not interfere with the selection. If planned create partitions, other structures, then their location must be noted in the project.
Location of communications
 When creating a project, you also need to clearly foresee where all communications will be located. First of all, you need think over where the sockets should be: they must necessarily be near the dining table, as well as in the work area, where a lot of equipment items that are constantly present in the kitchen (refrigerator, microwave oven, hood, etc.), as well as small household appliances, such as a blender, a mixer will be connected , juicers. You need to think in advance and, after all, you will need to bring electrical wiring, and arrange switches for them.
If you want completely change location and sinks, then you need to consider a few rules. So, flexible gas hoses should not be more than 4 meters in length, and water supply hoses should not be more than 1.5 meters. All these pipes should be accessible for inspection in order to simplify repair work and not provoke conflicts with special services. An excellent way out - hide pipes behind kitchen cabinets without back walls: so communications are disguised, do not spoil the appearance, and you can quickly and easily access them.
Location of equipment

 If the project provides for the presence, and at the same time you have a gas boiler installed, then you cannot bring them out into one ventilation duct - this is life-threatening. Depending on your own preferences and the characteristics of the kitchen, you can choose a flow-through or circulation hood. The latter does not need to be connected to the ventilation outlet.
If the kitchen will be located several gas appliances, for example, a stove and a boiler, then the distance between them must be at least 80 cm. Fridge must be located at least 60 cm from the stove. Otherwise, electricity consumption will increase significantly, and the likelihood of a refrigerator breakdown becomes much higher.
 As for the refrigerator, then many experts advise placing it outside the kitchen, in cooler rooms: on the loggia, if it is adjacent to the kitchen, or in. Thus, you can significantly save on consumed electricity: in summer the refrigerator will use 1.5-2 times less energy, and in winter - 6 times less. But such an arrangement of the refrigerator is not very successful, and it is not very convenient to run constantly with food from the kitchen to it.
The rest of the items of technology are at their own discretion. So, if you need a microwave, then it is better to hang it or install it on a shelf above the work surface so as not to take up useful space.
Calculation of the required building materials
 In order not to face the problem of shortage or excessive surplus, you need to calculate in advance their required number as accurately as possible. After the design project is ready, finishing methods are chosen, it is necessary to calculate how much and what materials will be needed for preparatory work, rough and final finishing. If difficulties arise, then at this stage you can contact the specialists.
The estimate includes the necessary facing materials, primer, putty, possibly new sockets, wires, etc. It does not hurt to think in advance not only the amount needed, but and the price of all materials... This will help you plan your budget correctly and can indicate the need to save.
Preparatory work
 Preparing a kitchen for renovation means it cleaning and disposal of old finishes, pieces of furniture and equipment. removal of appliances and furniture from the kitchen, then we dismantle the ceramic tiles, remove the baseboards, flooring.
It is not so easy to remove from the ceiling, so you will have to spend a lot of effort on cleaning the surface. The same applies to painted walls: in this case, a special paint thinner helps. You need to work with him with extreme caution, wearing a respirator, protective clothing and goggles. you can use a spatula, you can first moisten them a little with cool water.
 At this stage also demolish extra partitions, if these actions do not contradict the norms, but in general, any redevelopment must be agreed in advance. If the plan includes replacing the door, then it is better to remove it at this stage. After all the old finishes have been dismantled, it is best to wipe the surfaces with a solution of detergent, and then with plain water. This removes all residues of dust and accumulated grease. are performed taking into account all points of electricity consumption, they also equip and redo, if necessary, water supply and sewerage system... They start with the electrical wiring, for the arrangement of which three-wire cables in double insulation with a diameter of 2 mm are required. The walls are grooved in the necessary places so that the cable can then be laid there, then the wire itself is fixed with masking tape and plaster. Cables are only laid at right angles. At this stage, it is necessary to clearly know the kitchen lighting scheme and the location of the outlets.
The water supply and sewerage system must be made of metal-plastic or: they are easy to install, durable, not afraid of temperature changes. After that, you can supply the gas hoses.
Installation of windows
After installing all communications, perform replacement of windows if necessary. After installing a new window, protect it from possible contamination during further repair work. hidden with plastic film and masking tape... In principle, the window can be installed before all communications are carried out - this is not so important.
Rough finish
 At this stage, all surfaces are leveled and prepared for subsequent finishing. Ceiling must be putty, cleaned and primed. If it will take a lot of time and effort to put it in order, it is better to think about the system suspended or... In this case, you just need to eliminate the biggest defects, such as crumbling plaster.
The same work is carried out with walls, and they can be more uneven than ceilings, and this applies to those areas where there was a tile. After dismantling it, pits and depressions may remain, so it is better plaster mix, and preferably moisture resistant. In this case, you can also use sheets moisture resistant drywall: the work will be carried out much faster, but at the same time you will steal several centimeters of usable space from the kitchen, which must be taken into account in the design project. Such measures can be taken without hesitation when it comes to a spacious dining room, but such a decision is unacceptable. The walls in the kitchen should be perfectly flat, especially if you plan to use ceramic tiles. The prepared surface of the walls and ceiling is finally necessary prime for better adhesion to the finishing material.
 , but the tie was not dismantled, you can use the system
Is it time to make repairs, but are you afraid to start? It's scary to even imagine how much effort and money will be required? Down and Out trouble started!
To help you, we have developed a plan for the renovation of the kitchen. And it doesn't matter if you have a new building or a “Khrushchev” building: the procedure is almost the same.
But first things first.
So, you need to start by thinking about what we want from the renovation, in which house we want to live.
1. We estimate the scope of work
Do you want to make a complete renovation of the apartment, or is a cosmetic renovation enough for you?
Overhaul will require more effort and money, but you will also feel the effect of it for 10-15 years. If a new building is to be finished, then this is definitely work from scratch. For some reason, the builders are limited only to the construction of walls.
At the same stage, decide on the design of the kitchen. The ideal option is a ready-made design project, drawn up independently or, even better, with the help of a professional.

You should already imagine where and what equipment will stand. This information will be needed in the next step.
2. We assess the state of communications: electrical wiring, water, gas, sewerage
We decide whether it is necessary to change any communications.
If the house is new, there is no need to change communications. They are new. But making the wiring of water pipes, installing sockets (with grounding!) - these are mandatory works.
If your apartment has not been renovated for twenty years, then the situation is more serious: heating, sewerage and water pipes in houses aged 15 and older require your attention.

Pay special attention to your electrician. There are a lot of household appliances in our homes. The electrical wiring must be modern and withstand high loads. Sockets should be installed so that it is convenient to work with kitchen appliances.

Do not regret working with communications of forces and means: your safety is more important than money! Invite qualified professionals to these jobs.
3. Assess the condition of walls, floors, ceilings, windows
In a new apartment, we make the floor, walls and ceiling from scratch. In an old apartment, you first need to determine the state of the floor, walls, ceiling and window. Write down what from this list you will dismantle and change to new ones.
Think and decide what finishing materials you will use for the floor, walls and ceiling.
The floor can be either tile or laminate, parquet or linoleum. The walls can be plastered and painted, or after plastering, wallpaper can be pasted over. The ceiling - what will it be? Stretch, drywall or just whitewash? The choice is yours.
4. We draw up the final order of work
- We are laying new electrical wiring, installing sockets;
- We change water supply and sewerage pipes, install meters;
- We put new windows;
- We put the screed on the floor;
- We plaster and level the walls;
- We plaster and paint the ceiling or install a stretch;
- We put the floor covering (linoleum, laminate, linoleum);
- We install furniture and doors
This is a complete list of works, it can be shortened, unnecessary steps removed. For example, if the windows are in good condition, why change them?
Important! Hire a sizing specialist from the kitchen showroom immediately after the walls have been plastered. The specialist will make an accurate measurement and check the location of the outlets. If you have to move the outlet to another place, it is at this stage that you will do it at no extra cost.
In order not to miss anything important and not to regret the missed stage, we advise you to develop your own repair map. Mind mapping software will help you with this.
Use our help, come to us at, we will make a design project for you. He will help to competently plan the wiring and all communications. After plastering the walls, call our specialist for a professional measurement.
After measuring, you can immediately order the kitchen: while we are making it, you are completing the renovation in the kitchen. And on day X - you have a stylish comfortable kitchen. Now your meals will be even more delicious!
Your repost will change the internet :)
It was possible to start repairs, sending the whole family to their historical homeland. In order not to be so boring to be engaged in repairs, I decided to take pictures along the way. What if my experience is useful?
So, it WAS: an ordinary smoky gray room with an area of 6.5 sq. m (I forgot to take a picture, excuse me).
I wanted something cool and loft, but money was running out.
The first two days I studied the assortment of Ikea, Leroyamarlene and Obi and tried to compare my desires and possibilities. The results were not very encouraging, so first I decided to dismantle everything old.
To start repairs, you need to disassemble everything old, unscrew and drag the necessary one into the next room.


I took out 5 heavy bags to the trash heap. As luck would have it, the elevator was not working.
Tried to get close to the wiring to do it the way I need it.

Finally, we managed to clear the last wall of wallpaper. The war was fought for every centimeter: the hellish mixture of glue, which becomes terribly slippery from water, left me practically without hands.
This wealth of textures of the peeled wall, on which time has worked great, inspires me terribly. I would live alone - I would ask the designer to arrange such walls.


I started to make holes for 4 - all the neighbors came running. As I remember, I will shudder.

The ceiling has already been made, the walls and furniture remain. I decided to leave the working area above the stove as it is.

And our ceilings are crooked. The door frame is level.

Having cleared the paint from the windowsill, I saw such a stunning color that my hand did not go up to paint it back. And I will choose the color of the laminate to match the color of the window sill.

I could not find a lamp suitable in size and price in stores. Converted an old chandelier. Here is the result.

Fit new doors to the mezzanine

I'm starting to laminate the floor.

The most interesting thing is that the last stage of the repair was the most protracted and costly. Hanging furniture, connecting a washing machine, shelves, hooks and other little things took more time and money than the repair itself.
To be honest, the impetus for the start of the repair was the dream of such a faucet (switching modes, retractable spray) and a sink.

This is how our kitchen began to look after renovation:


The concrete was thoroughly washed and covered with wax from Ikea

I decided not to glue the wallpaper, I painted the walls with water-based paint. Covered on top with mother-of-pearl enamel from Leroy. And it feels nice and washes perfectly.
