Drawing and dimensions of a hand tornado cultivator. How to make a cultivator with your own hands: a few simple manufacturing options
There is a lot of work in the garden and in the garden, but the most exhausting one is digging the land, cultivating it and removing weeds. They begin to dig ahead of time, in small sections, since the load is too large. The miracle of a shovel will help to reduce the complexity several times and at the same time speed up the process at least twice. This relatively inexpensive and uncomplicated tool really works, even on difficult soils.
What is different and what can
To be precise, this is not a shovel, but a ripper, since it not only digs, but also breaks up clods. The miracle shovel consists of two (sometimes one) slats with pins, movably connected. Some models also have a backgauge - for easier digging of dense, heavy soil. So it actually looks more like a double pitchfork (see photo below).
Miracle shovel and its components
It is clear from the figure that this tool does not have a shovel as such, but the differences from the classic bayonet shovel do not end there. She also has a handle much higher - it should reach your shoulder. It is also convenient if there is a crossbar at its top - you can operate with two hands.
The miracle shovel performs three operations at once:
- loosens the soil;
- breaks clods;
- "Extracts" the roots of weeds, without tearing or cutting them (in any case, damaging them much less);
- easily digs root crops - you can dig carrots, potatoes, etc.
But its main advantage is that it greatly facilitates the digging of the earth, and the main load falls not on the back, as when using a conventional bayonet shovel, but on the legs (driving the forks into the ground) and on the hands (turning the forks out of the ground). The back during work is in an upright position and is almost unloaded.

The only minus of this tool is the weight. It is indeed much larger than that of a bayonet. But the super shovel can be rearranged, it does not need to be lifted. Rather, it is raised only a few times: when it is set on the ground at the beginning of the row. Then, by pulling the handle, it is simply overtightened a little.
There is another very attractive point in using a miracle shovel - the garden is digging at least twice as fast. This is due to the wider working part - up to 50-60 cm. With little physical activity, this is very good.
How to work
Although this is not a particularly complicated structure, working with it has its own peculiarities. Firstly, you need to start from the far edge of the bed, then move back, gradually dragging the pitchfork back. Well, the general procedure is as follows:
- Grasping the handle, put the miracle shovel, support it on the front ripper.
- Stick a pitchfork into the ground. Drive them so that the backgauge touches the ground. If the ground is hard, compact, extra force may be needed - push your foot against the front forks bar.
- Pull the handle towards you. With this movement, the forks will begin to move upward. As they rise, they pass through the forks of the front stop, breaking the lumps.
- Drag the device back a little, repeat all actions (plug in, press, pull the handle).
In reality, everything is very simple. It is worth trying a couple of times and then everything is repeated "automatically".
Constructions
In addition to the option that is shown above (under the name "Tornado", "Excavator" or "Plowman"), there are several more options for the designs of the miracle shovel under different names.

Soil cultivator without front stop
This design also has working and support forks, but does not have a front stop. Therefore, it is less bulky, weighs a little less. But the front stop provides increased stability when working. And the drag weight is not that important.
The handle is attached to the working forks, the back stop is welded to the comb of the second forks. Both of these structures are movably interconnected (even door hinges can be used).

Ripper miracle shovel for easy tillage
The photo shows one of the implementations, which is made on the basis of a corner and a round pipe. When working, they drive the pins into the ground by pressing on the crossbar, and not on the stop, as in most models.
Digger
The Digger version is essentially a wide forks with a stop for easier turning out and a high, powerful handle.

Miracle shovel "Digger"
The peculiarity of this design is the stop and the adjustable handle. It is fixed with two bolts, matched to the height of the working person.
The emphasis is not stationary, but movable. It is fixed to the frame. When the pins are immersed in the ground, they press on it with their foot, then, without removing the leg, they twist it by pressing the handle of the pitchfork out of the ground.

Physical activity during work is low, work is progressing quickly. But this miracle shovel will not work for hard and lumpy soils: it does not crush the soil. She, under her own weight, is pressed through the pitchfork. But this is possible only on loose soils. On clay or black soil, it is better to have a second comb with pins.
How to make a miracle digger, see the next video.
Easycop
This design of the miracle shovel is slightly different from the previous one. The stops in it are rounded, the handle is arched, but the basis of the structure is the same. Some drawback - there is no way to adjust the handle, but otherwise everything is the same - a movable stop and working forks.

Two options called "Legkokop". The simplest ripper for the garden, garden and cottage
It is difficult to say whether this variation is better or worse. It would be possible to evaluate only by comparing the work of both copies on the same site.
If you watch the next video, you will see that you can dig with such a miracle shovel not only loose soils, but also heavy ones. And the second thing you can pay attention to - after all, for such a soil it is better to have a second comb of pins, against which you can crush the inverted clods.
What and how to make
The designs, as you have seen, are different, but the set of materials will be about the same. Their number differs, but the section and characteristics remain unchanged.

You can use a round or profiled pipe, metal rods or "parts" from the forks
Materials for making
Basically, they start with the manufacture of the frame. It is often made from a profiled pipe, the optimal section is 30 * 30 mm or so. In this case, the wall thickness is important - at least 3 mm. Some models used a corner. The shelf width is also about 30 mm, the metal thickness is at least 3 mm.
The handle can be made from the same profile pipe, you can use a round one. The wall thickness is also important. In principle, having made a retainer, you can use a wooden shovel holder. Some purchased models provide for the installation of a wooden holder.

The focus should be on the material used for the fork teeth. It should be good structural steel. Forks are made from a bar of at least 8 mm in diameter.
What do their craftsmen make of:
- Cut off from an ordinary pitchfork, welded onto a miracle shovel.
- Straighten the suspension springs.
- Automobile springs are cut into narrow strips.
If you can find a good bar - round, square or hex - it doesn't matter, it will be much easier for you. Not a bad option, by the way, with a pitchfork. But you have to take good ones, and that is not cheap. And one more thing: calculate the dimensions of the miracle shovel so that the working forks have 8 pins. Then you will need to buy two common pitchfork jokes.
If the design is chosen with two forks - working and persistent, you can put segments of a suitable length of a metal bar on the persistent forks. The loads are not so high here, so there should be enough strength. The diameter of the bar is 10 mm, you can use ribbed reinforcement, which is used when reinforcing the foundation.
Dimensions (edit)
Most firms that produce miracle shovels have a range of sizes for this product. Our people are different in build and physical fitness. For men, you can make more massive models, and for women and older people - smaller and lighter. On average, the dimensions are:

All other dimensions are selected depending on the design and the material used.
Blueprints


Detail of the stop and stop forks


As you know, in order to prepare the soil for sowing, it must first be well processed. It is for these purposes that such an irreplaceable and necessary device as a cultivator was created in the last century. This mechanism will perfectly cope with the functions assigned to it and will greatly facilitate the work of the owners. However, modern devices of this type cost a lot, so it will not be superfluous to think about how to make a cultivator with your own hands. But first you need to figure out what advantages this device has.
Advantages of hand cultivators
Such mechanisms have recently become quite widespread. Moreover, it is much more profitable and, of course, more pleasant to design a cultivator with your own hands, without spending extra funds on factory equipment.
These devices have a number of advantages. So, with their help, you can work the soil even in the most inaccessible places, where any other equipment will be unable to fulfill its task. With the help of a cultivator, you can perfectly loosen the soil in the area of fences, on flower beds and alpine slides. Such treatment will allow the plants to receive a sufficient amount of oxygen and, of course, will have a positive effect on their growth.
A hand cultivator is perfect for a small area. It will not be difficult to make this mechanism with your own hands, and there will be a lot of benefits from such a device, since the sharp teeth will easily cope with the hardened crust where heavy equipment cannot pass. This will be a great addition to your garden equipment and will allow you to forget about tedious work forever.
Types of cultivators
The main parameters by which these mechanisms are usually divided are weight and power. In accordance with this, there are several varieties of cultivators:
Criteria for choosing a cultivator
In order to design a cultivator with your own hands, it is important to take into account the factors that will affect the functionality of the equipment itself.

So, the main criteria for choosing these mechanisms are as follows:
- Power... The higher this indicator is, the faster and deeper the cultivator will work. In addition, you shouldn't forget about such a factor as the capture bandwidth. If it is wide, then labor productivity will increase and less processing time will be required.
- The weight... As a rule, the weight of the equipment is directly proportional to the power of the cultivator.
- The material from which the knives are made. This element is the main cutting part of the device, so you should not save on its quality. In addition, good steel significantly increases the service life of this functional part of the cultivator.
- Equipment reliability. Depending on the type, the model may have its own advantages and disadvantages, and the most reliably convinced of the practicality of a particular device is possible only during its use.
Making a hand cultivator
You can make a homemade cultivator with your own hands in two ways: using a pitchfork and using a bicycle frame. Both of these methods are not particularly difficult and quite easy to perform.
The first option involves the use of a fork, the teeth of which should be bent like a corkscrew, and then mounted on a holder made of plastic. As a handle, you can use a pipe made of the same material, fixed on the upper side.

To create a cultivator with your own hands from a bicycle frame is somewhat more difficult, but absolutely real. In order to build this mechanism, you will need to use:
- bicycle frame;
- wheel;
- material intended for the head device; it can be sharp rods, a part of a plow, a part of an old cultivator, etc.
First you need to fix the wheel and head, and the part responsible for controlling the mechanism can be made from the steering wheel. All parts of the device must be welded together and tightly fastened with bolts. With such a sample, there will be no problems in operation, and its repair is very simple.
Creation of the tine cultivator
To build such a mechanism, you will need to have the following materials available:
- 5 steel discs with a diameter of 30-35 cm;
- a rod made of the same material with a diameter of 10 mm;
- special axle 32 cm long and 15 mm in diameter;
- holder made of wood or plastic.

The discs need to be equipped with special holes designed for sharp teeth. These cutting elements are made from steel bar. Then the discs need to be mounted on the axle, from the edges of which pins and bearings must be equipped.
The work of such a cultivator proceeds according to the following principle: the sharp teeth of the device, plunging into the ground, remove the soil layer, thereby loosening it. This not only allows the oxygen to penetrate deeper, but also helps to remove small weeds. In the event that one of the teeth of the mechanism is damaged, it can always be dismantled and a new one can be installed in its place using a welding machine.
Rotary disc cultivator device
Making, for example, a cultivator for, you can design a special disc apparatus that serves to remove weeds, break up clods of earth, loosening, etc. The main difficulty in the installation process can arise with the device of disks, which should not have a flat, but a convex shape. To achieve this, you can use a hammer to hit the work piece several times to give it the look you want.

The process of creating such equipment is non-standard, it differs in some peculiarities and should take place according to the following scheme:
- The discs must be welded to the bushings fitted on the axle, and their ends must be tightly fixed in the brackets.
- In the largest of them, it is necessary to equip a protrusion through which a pipe equipped with a crossbar must pass.
- Next, the stem is welded to the smaller of the brackets. It is necessary to screw a rod into it, part of which must necessarily protrude above the crossbar.
Having completed all the steps correctly, creating such a cultivator with your own hands will not be difficult.
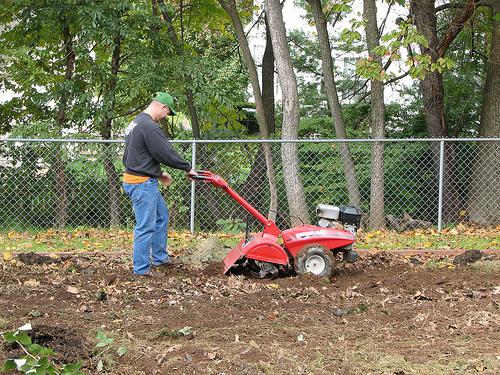
The process of making a cultivator for a walk-behind tractor
Very often this mechanism is used on such an economic vehicle as a walk-behind tractor. Thanks to this, the process of soil cultivation will become easy and will not take much time.
In order to design a cultivator for you must have the following construction tools available:
- disk type complete with disks for it;
- welding machine;
- 2 emery elements with varying degrees of abrasiveness;
- drill.
Materials for manufacturing should be as follows:
- made of a plate, having a square shape and a section of 15x15 cm;
- rectangular elements with parameters 12x4 cm, made of the same material (for the cutters of the mechanism);
- steel pipe;
- fasteners (bolts and nuts).
You need to design a cultivator with your own hands for a reduced-type tractor as follows:
- Each of the squares should be equipped with a hole, and then connect it on both sides with cutters using bolts and nuts.
- The resulting structure must be fixed to the base, and welding is not recommended, since it will not be possible to achieve the desired strength of the joints with its help.
- Similar actions are required to be performed with all squares.
- After manufacturing the working part, you need to make a hole that will match the diameter of the steel pipe.
- The part needs to be cut in half and then, using welding, fix the elements of the running gear with cutters on each of its sides.

On this, the manufacture of a cultivator for a walk-behind tractor can be considered complete. As it becomes clear, there is no particular difficulty in such work, but it is extremely important to strictly follow the procedure and to acquire all the necessary tools and materials in advance.
Cultivator maintenance rules
We figured out how to make a cultivator with our own hands. However, it is important to know not only the algorithm of actions for its manufacture, but also the rules of operation. So, the main task is to maintain the performance of the driving mechanism. Before starting to work with the device, first check the oil level. Here, also, do not forget that the quality of the fluid used for lubricating engine parts largely affects the operation of the equipment, therefore it is important to replace it in a timely manner, avoiding clogging of the internal parts of the device.
In the event that the equipment will not be used for more than one month, it needs to provide good storage conditions. To do this, you first need to run out all the gasoline, thoroughly clean the engine surface and all functional parts of the mechanism. To avoid damage to electrical parts of the cultivator, it is not recommended to use a strong pressure of water for cleaning. To protect against corrosion, the metal elements of the device must be lubricated with a small amount of oil, and the cutters must be wiped with a cloth soaked in it. Storage conditions include keeping the device in a dry and clean room.
Compliance with all the above operating rules will allow the equipment to serve for a long time, properly and without any serious breakdowns.
7 dacha miracle helpers!
Unusual manual gardening tool (photo, video, drawings)
The plane cutter is a great achievement of the agricultural mind. This is the first truly versatile garden tool. Not just for tillage, but a tool for all-round cohabitation with the cultivated plant community and soil.
Ploskorez Fokin "Strizh"
2. Ripper Miracle shovel "Plowman"
Ripper Miracle-shovel "Plowman" blueprints:
A shovel, which can be classified as ripper-cultivators - “Plowman”. Ripper Mechanism The Plowman is simple and efficient enough. Raising the earth is carried out by the work of a simple lever. The main load falls on the legs, which push the working forks into the ground. Raising the soil comes from the effort of the hands, which relieves the back and therefore is attractive for the elderly and gardeners with low back pain. Two opposite forks, passing one through the other, loosen the soil without wrapping it, providing a loosening depth of 15-20 cm.
Advantages of the design of a shovel or soil ripper or potato digger
1.Deep tillage without seam turnover.
2. High labor productivity.
3. No significant physical effort is required when processing the formation.
4.Available in production.
Mode of application:
A feature of soil cultivation with a miracle shovel is that the garden does not dig across, but along. With both outstretched hands, we take the miracle shovel by the edges of the upper bar, step on the platform (step) and it easily enters the ground. With a light movement (it can be combined with a light shaking), stepping back two steps, we transfer the shovel from a vertical position to an almost horizontal position. After that, we take a step forward, pull the shovel back 30 cm, give the shovel a vertical position, drive it into the ground and repeat the cycles until the row ends. Then we proceed to processing the next row.
Materials: half-inch labor, round timber (or hexagon) with a diameter of 15 mm.
For ease of transportation, a collapsible structure can be made.
Miracle shovel Prokopenko blueprints:
The miracle pitchfork allows you to dig up the ground without loading your back at all due to the unique rotary way of working. The Miracle Pitchfork does not require you to bend over or crouch down. Efforts are applied only to the "rudder". At the same time, the digging productivity increases 3-4 times.
Wonderful pitchfork is adjustable in height over a wide range, which allows you to perfectly adjust the tool to your height.
Miracle pitchfork turning photos:
Miracle shovel of a monk - father Gennady photos and drawings:
The Miracle Cleaver is a tool for easy and safe splitting of wood. You can chop three times the amount of wood in the same amount of time and effort as with a conventional cleaver. At the same time, even women and children will be able to chop wood, because the main work consists only in raising and lowering a kettlebell weighing 3.3 kg.
One Wonder Cleaver replaces four tools: cleaver, ax, hammer and chisel. If you follow the instructions for use, the tool is absolutely safe.
The miracle cleaver allows you to chop even very thick logs. Moreover, it does not require any special skills and is very easy to operate.
Miracle cleaver photo:
6. Wonderful potato hiller
The miracle hiller is intended for loosening the soil on potato ridges and hilling up the risen potatoes.
Thanks to the optimally calculated design, the new invention contributes to high-quality soil cultivation (loosening and hilling) and the correct formation of the potato ridge
The manual cultivator is a tool for gardening work related to the cultivation and loosening of the soil. We will talk about several design options for this tool, from the simplest manual option to the option with an electric motor.
Do-it-yourself manual cultivator
The simplest option is the Tornado cultivator
The Tornado cultivator, which is the simplest in its structure, is a bit like a corkscrew on a vertical handle, ending in a horizontal handle.
"Tornado" - hand-held cultivator for processing light soil
It is done on its own simply, from ordinary pitchforks. Pre-buy a plastic attachment for the handle of a shovel in the form of a handle at the household store - they are used both on forks and on shovels for ease of use. Since the handle of the original "Tornado" is a long horizontal tube, our handle also needs to be modified.
To do this, we use a piece of plastic pipe about half a meter long and with a diameter slightly larger than the thickness of the plastic shovel attachment we purchased. We carefully cut the pipe lengthwise, then turn the edges of the cut to the sides and put it on the purchased nozzle. It is advisable to wind the pipe to the handle of the nozzle so that it does not fidget during operation and does not move from its original position. As a result, our horizontal cultivator arm will protrude approximately 25 cm on both sides.
Making a handle for a hand-held cultivator Tornado
Now you can do the fun part and bend the forks into a corkscrew shape. To do this, we will use an ordinary hammer, from the blows of which the metal teeth will bend in any direction. At the same time, it is necessary to check the result with a photograph of the original model of such a cultivator and carefully repeat all the bends of the teeth on it.
Cultivator option from bike parts
Another manual cultivator offered to your attention has a more complex device and one might even say that it is partly mechanized. To make it we will need a frame and a wheel from any old bike.
Manual cultivator from bicycle parts

We attach a cultivator head to the bicycle frame, which can be a ready-made head from any cultivator or a self-made construction from sharpened steel bars. If you have a cultivator head, you can use a small plow.
The comfortable handle for reliable control of the cultivator is made of pieces of steel pipes or aluminum. For the cross member, take a small piece of pipe with a diameter of 2-2.5 cm.

Structural diagram of a manual cultivator made of bicycle parts
A wheel of medium diameter is bolted to the frame with special wing nuts or conventional locknuts.
With this DIY cultivator, you can easily kill weeds by weeding the spaces between the rows of plants.
How to make a hand cultivator
The main part of this homemade cultivator model is five steel pancake discs, which are put on the axle and can be rotated on it. Three discs out of five contain sharp L-shaped teeth, which are working bodies for loosening the soil. At the ends of the axle, pins with bearings are installed, to which steel brackets are attached, which are connected on a wooden handle.
Toothed plower diagram:

- 1 - pancake discs,
- 2 - L-shaped teeth,
- 3 - axis, 4 - pivot,
- 5 - steel bracket,
- 6 - handle
Pancake discs and axle are either milled independently. or an order is made for their manufacture on a lathe. Five holes are drilled in the outer surfaces and in the lateral faces of the three discs to fix the teeth from a steel bar with a diameter of 10 mm.
The toothed discs are put on the axle, then we install the trunnions with bearings and washers.
Rolling on the soil, the cultivator discs pierce the ground with their teeth and loosen its top layer. Sharp teeth cut the roots of the weeds, crush the soil and help aerate it.
Rotary disc cultivator
With a homemade rotary cultivator, you can harrow, break up large pieces of land and level the surface of the site. The diagram of this model is shown in the figure below and is called a disc cultivator.
Homemade disc cultivator:

- 1- disc,
- 2 - axis.
- 3 - bushing,
- 4 - large bracket,
- 5 - small bracket,
- 6 - stock,
- 7 - pipe,
- 8 - handle
The working body of the disc cultivator are hemispherical convex discs welded to the bushings. Two hemispherical discs are put on two axles, the ends of which are fixed in brackets with cotter pins.
Pipe 7 with a transverse crossbar, into which the handles 8 are screwed in, passes through a special ledge welded to the large bracket 4. The end of the rod 250 mm long and 24x2mm in diameter is welded to the small bracket 5 with a blind threaded hole into which a 16 mm diameter rod is screwed, the upper end of which ( with lambs) protrudes above the crossbar.
Steel discs 1 must be hemispherical, and it is not easy to make them with this shape from ordinary 4mm thick steel plates. It is necessary to hit hard with a hammer, "knock out" the bowls from the blanks.

The lugs at the end of the rod allow you to adjust the angular position of the hemispherical discs. When the thumbs rotate clockwise, the rod and stem move upward, lifting up the small bracket and the inner ends of the axles, as a result of which the angular position of the discs will change.
Hand cultivator video compilation
There are many more ways to make cultivators for loosening the earth with your own hands, for example, the designs of homemade cultivators from a chainsaw are known.
You just need to know a little about the details of machines and electrical engineering, as well as a little imagination. Here is an interesting video showing how to make an electric cultivator with your own hands from a bicycle frame, chain and sprocket, as well as a washing machine engine.
Related Posts:
 What attachments are needed for motor cultivators
 Do-it-yourself cultivator
 How to make a homemade motor cultivator
 Moto cultivator Champion, description, reviews and video reviews
Every gardener cultivates land in the country. The word "cultivation" came to us from the Latin language. Translated, it means - to process, cultivate. And indeed it is. In the process of cultivation, the soil is cultivated, cultivated in order to get rid of weeds. But the goal of cultivation is not just weeding. After cultivation, the soil becomes loose and more oxygenated. The cultivator is used to cultivate the soil before sowing and after the crop is harvested. You also need to cultivate the aisles with a cultivator, huddle and replant the plants. The cultivator is a very convenient device, it will facilitate the work and reduce the time of tillage in the garden, flower bed and any other area.
A modern cultivator can be purchased at a specialist store. But such a technique can be easily assembled by hand. You just need to find clear instructions, the necessary parts and tools and get to work.
To begin with, you should know that cultivators are divided according to the type of food:
- manual;
- gasoline;
- electrical.
They are also divided by weight and power. There are ultralight cultivators, mini, they weigh no more than thirty kilograms, ideal for small garden plots and summer cottages.
There are light cultivators. Their weight is more than thirty, but not more than sixty kilograms. Such cultivators are used in large areas, on plowed fields and virgin lands. Medium cultivators weigh up to one hundred kilograms. Well, the largest cultivators are heavy. Their weight is over one hundred kilograms. Such cultivators are used on large fields and lands.

There is another classification of cultivators - by purpose:
- universal - used for tillage at any site, between rows, they are used for weeding;
- special - for processing a certain variety or culture;
- plant feeders - these cultivators are designed to cultivate the soil and gradually add fertilizers;
- pre-planting, steam - for harrowing any soil before sowing, suitable for summer cottages;
- row-crop - for weeding row spacings in fields where crops have already emerged.
There are cultivators for cultivating one row, mini cultivators for summer cottages and cultivators for cultivating several rows at the same time. They differ in size, because for one row the cultivator is much smaller than for processing several rows.
But the most suitable for cultivating vegetable gardens and flower beds is a standard hand-held cultivator. It is lightweight and easy to use. It also takes up little space and is lightweight. There are garden cultivators, they are also small in size, ideal for giving.

Advantages and disadvantages of cultivators
Each type of cultivator has its own pros and cons. Electric cultivators are light and small in size. They don't need to be refueled as they run on electricity. They are also quite simple and convenient to use, but not suitable for a summer cottage that does not have electricity.
The disadvantages include the fact that they work only in the area where the power cord reaches. Also, electric cultivators are not very powerful. With such a cultivator, it is possible to cultivate flower beds and greenhouse soil, but in large areas they are completely useless. After all, the length of the cord determines the place where this cultivator can work the soil.
A cultivator that runs on gas (a petrol cultivator) has slightly more advantages. It is convenient to handle large areas with it, because such a cultivator has high power and functionality. Disadvantages include difficulty in maintenance, heavy weight and refueling. And the more powerful such a cultivator, the more fuel is needed to refuel it. Gas powered cultivators are often referred to as star cultivators.

Hand cultivator - do it at home
Such a cultivator is the most useful thing in the household. It has a lot of positive sides:
- no stress on the lower back,
- ease of use,
- efficiency,
- availability,
- compactness.
With such a cultivator, you will not pull the weeds all over the site, but it loosens the soil very efficiently and does not turn it out. But the cultivator is designed for working on small areas and only on plowed land. It is ideal for summer cottages.
First, you should understand for what purpose you need a cultivator. Indeed, the choice of a particular cultivator is influenced by the set of crops that are planted on the site, and the structure of the soil of the site itself. If you have a small plot, then a powerful and spacious cultivator will take up a lot of space. It will only cause harm, there will be no benefit from it.
It is best to create a cultivator with your own hands, so you will save your money and find an assistant on the farm. Some cultivators can be created from available tools, some require additional parts, but their cost will not exceed the cost of an entire cultivator in the store. DIY cultivators are ideal helpers in the garden and are suitable for giving.
The smallest cultivator
"Nimble kid" is a small home-made cultivator, it can be called a mini cultivator. It captures only twenty centimeters of the territory, but it is very convenient to work with such a cultivator. All you need to do is attach a few cut-out metal stars to the axle, and then attach a comfortable handle. So the new farm assistant is ready. With him, it is easy to process the aisles at a time when the crop has already risen. It is its mini size that will prevent damage to the desired plants. Also, if the sprockets are well sharpened, then they cut weeds without problems. At the same time, the weed does not cling to the cultivator and does not spread throughout the site. Suitable for a summer residence, because it is convenient to transport it.

Simple cultivator - "Tornado"
Another simple cultivator that you can make with your own hands is called "Tornado". This cultivator is ideal for cultivating light soil. And it is made from the most ordinary pitchfork or springy wire, it can also be called a mini cultivator.
- In order to make such a cultivator, you need a wooden handle-handle, which will need to be finalized. The wooden handle of your new cultivator should be reinforced. For this, a metal or plastic pipe is used, cut lengthwise. It shouldn't be much larger than a wooden handle. After the pipe has been cut, put it on a wooden handle and rewind it. This will make the handle much tighter and easier to work with.
- Next, start making the main part of the cultivator. Take a pitchfork and a hammer, you also need a picture or drawings of the original Tornado cultivator, because you need to repeat exactly all the bends.
- A strong hammer blow will bent the forks in the direction you point them. But don't overdo it.
- Once the cultivator base is created, attach it to the handle and you can till the soil with your new cultivator.

You can also make cultivator teeth from thick, springy wire. This option will take more time and effort. But the result is worth it.
Old bike cultivators
For another version of the cultivator, which you can create yourself, you need bicycle parts. So, if you have an old and unnecessary bike - make your own cultivator and don't waste money on buying. This is the perfect assistant in the country.
- We attach the cultivator head to the frame of the old bicycle; it can be a part of an old cultivator, iron bars, or a small plow, glanders.
- The comfortable handle for operating the cultivator is made of pieces of iron pipes or other metal. A crossbar is attached between the handles.
- The assembly of all parts of the cultivator between themselves is carried out with bolts, the nuts on which are tightened as tightly as possible, so that the whole system is solid, or all the parts can be fixed by welding. This option is much more reliable than the previous one.
- After the base is ready, the wheel is attached to it, it should not be too large so that the plow fits well into the ground. And not too small, then you have to put more pushing force than is required with a medium-sized wheel.

If you have an old medium-sized wheel left, then you can make another version of the home cultivator. Simply attach the curved metal handles to the wheel, which also mounts the small plow, which is attached behind the wheel, closer to you. And now the homemade hand-made cultivator is ready.
DIY disc cultivator
There is also an option for a homemade hand cultivator, which is made from steel discs. There should be five discs in total, on three of them teeth are attached, with the help of which the soil will be loosened. Such discs can be made by yourself or ordered. After all, they are made on a lathe. Two discs will be smooth, and the other three will have special teeth or curved nails attached. When the disks are ready, they are alternately put on the axle, then bearings and washers are put, and then the whole structure is attached to a wooden handle. The soil is cultivated with the help of these teeth, they alternately plunge into the ground and loosen it. These tines also cut the roots of the weeds. Due to its weight, this hand-held cultivator does not require much power. The only drawback is that you have to periodically clean the teeth of weeds. After all, the cut grass clings to the teeth and spreads throughout the site.

A rotary cultivator can be made by hand, this type of cultivator is intended for harrowing, leveling the soil after plowing. It is somewhat similar to a disc cultivator, but the discs in it are of a different shape - they are hemispherical and convex. Also, there are not five, but only four. Moreover, each pair is attached to its own axis. Also, the base remains movable, which helps to change the angle of inclination of the discs if necessary. The base will be metal, it can be attached to a comfortable wooden or metal handle with screws to adjust the angle of the discs. An all-metal cultivator of this type will turn out to be heavier, so if you don't have the power, make a wooden handle. This cultivator is convenient because the grass will not cling to the discs.

Convenient chainsaw cultivator
If you have an old chainsaw that you haven't used in a long time, take your time to throw it away or sell it. From its serviceable parts, you can make an excellent manual cultivator with your own hands. This option is suitable for those who are versed in technology. You will also need to purchase some materials, lubricant and fuel. After all, this cultivator is gasoline, that is, it runs on gasoline or other fuel.
- First you need to make a frame for the walk-behind tractor from the corners. It will be cubic in shape.
- Then the engine is attached to the upper part of the frame of the future cultivator.
- The handles are made of metal pipes, with such handles it is very convenient to work the soil.
- You will also need two sprockets, one for the intermediate shaft, and the other will be the driving one. It is because of these details that the cultivator is called a star cultivator.
The disadvantage of this homemade cultivator is that it requires constant refueling.

DIY electric cultivator
If you wish, you can create an electric cultivator at home. But it should be borne in mind that he will break the ground in large pieces, this is with fast work. If you work the soil with such a cultivator slowly, then the clods will be smaller, and the soil will become softer and plowed. It should also be remembered that the area of work will be limited by the length of the electrical cord.
- In order to make such a cultivator, you need two metal corners that are attached to the gearbox. Curved handles are attached to them for greater convenience.
- The axle for the wheels is also attached to the same corners. The wheels for this cultivator are of medium size. After all, it will not be very convenient to work with large ones, and small ones will fail.
- Next, you need to connect the shaft to a conventional electric meat grinder. You will need to break off the standard nozzle and insert the prepared screw into the hole.
- Further, for greater convenience, you can transfer the power button from the meat grinder itself to the cultivator handle, and you're done.
- The power cord in the grinder should be replaced as the standard cord is usually very short and will not work.

There are many more options for making cultivators with your own hands. You just need to show a little imagination and ingenuity. After all, having an old, but working motor from a washing machine, you can also create a well-working electric cultivator. You just need to find the parts of the old bike and connect them together. You can also add batteries and you have a homemade cordless cultivator.
After all, not always all the work can be done with a large and professional cultivator. Sometimes it is much easier to process the row spacing with a hand cultivator without harming the plants.
As soon as spring comes and the snow melts, everyone begins to wait for warm weather. Many want to get to the cultivation of their plots as soon as possible in order to prepare the ground for bountiful harvests. And here a hand cultivator will come in handy for every summer resident and gardener. After all, if you loosen the soil before planting, then in the soil saturated with oxygen, the plants will germinate much faster. And when working with a cultivator, no special application of effort is required, while the work is done much faster. Both adults and children can work with a cultivator that you made yourself. It takes a little time to learn. The main thing is to follow all instructions when making a hand cultivator.

With a hand-held cultivator, you not only plow the soil before planting, it also creates a comfortable harrow for planting seeds. Also, the cultivator can be used in weed control when everything has already sprung up. After all, there is not always a desire to pull out the grass by hand. And you need to process the garden often.
Any of the hand-made, home-made cultivators is ideal for giving. After all, they are quite small in size and it is very convenient to work with them. In one mini cultivator you will find an excellent assistant in the country.
It is not always profitable to buy vegetables and fruits. After all, there is no guarantee that store vegetables are grown in compliance with all technologies. And after all, it is much more pleasant to eat vegetables that are grown by you in your own garden or dacha. Moreover, if you do gardening correctly and wisely, then even your mood rises. Your physical health also improves, because there is constant physical activity. In order for it to be convenient for gardening and horticulture, you should buy or make some tools yourself. If you understand technology, then there is nothing complicated, you can easily assemble a homemade tool for cultivating the land and removing weeds. If you are not particularly versed, choose a type of manual cultivator with a simple design. If you want to create a complex cultivator yourself, ask your friends to help you. Together with friends, it will be much more interesting and fun to create such useful equipment in the household.