Make a computer desk. How to quickly assemble a computer desk yourself
With the ubiquitous distribution of computers, the need arose for tables on which it would be possible to normally place a monitor, a system unit, a keyboard and various office equipment.
Therefore, in our article we will consider the question of how to make a computer desk yourself. This task is quite feasible for an ordinary person with little knowledge and skills in carpentry.
Having made a computer table with your own hands, you will not only save money in finances, but also select the ideal dimensions for your room, and also get aesthetic pleasure from the work done.
In contact with
classmates
Types of computer tables
There are quite a large number of types of computer tables and its varieties - a laptop table, which has a much simpler device and smaller dimensions.
- Rectangular computer table, which will easily fit into any interior. Usually it is equipped with a sliding table top for the keyboard and a bedside table for the system unit.
- Folding tables... Designed for people using a laptop. Very comfortable portable structures made of plastic and metal.
- Corner computer desk... If you have a free corner in the room, then it's time to put a corner computer desk there. This will save space and it looks more compact than it actually is.
- U-shaped computer table will allow you to feel like in your office, thanks to its shape and, in addition, you can place almost any additional devices in it. The main disadvantage is the large footprint.
- Semicircular table stands out for its design among other structures and the ability to place all additional attributes in it. But there is a drawback, like the previous version, - it is a fairly large occupied space.
Laptop table
When buying a laptop, users have a common problem that can get them into a lot of trouble. With a long work on this device, all parts of the body begin to flow. To avoid this, special mini tables are made for laptops, which are much simpler in design than tables for computers, but the price for them is sometimes very "biting". Therefore, a table for a laptop with your own hands can be quite a convenient way out.
Table designs
There are several basic table designs, which we will discuss below.
- The simplest construction consists of a wooden tabletop, usually made of beech, and two legs, which are two planks. The beech board is sanded fine and covered with a double layer of varnish.

- A table with folding legs is more convenient to use as it can be folded after work and will take up the minimum floor space in your apartment.
- A variation of the second design, but with the addition of a mug cutout. This table is very convenient for watching movies in a recumbent position.
- Another option is a table with fold-out legs, space for a mug and two armrests. His photo is presented below. This is a more complex design, which, nevertheless, does not present great difficulties in manufacturing.

For self-production of these products, it is recommended to use a beech board with a thickness of 1.8-2 mm. In this case, the table will serve for a long time. As you can see, all these types do not represent too complex structures and can be made by a person without special skills and knowledge in carpentry.
Instruments
Let's take a look at what tools you might need to make a homemade laptop table.
- A hacksaw, preferably for metal. When using a wood cutter, you will have to spend extra effort and time to trim the edges.
- and drills for it, small diameter.
- Measuring tool (ruler, tape measure, and possibly a square).
- Pencil.
- Fine-grained sandpaper for worktops.

Instructions for making a computer desk
The simplest version of the table will look like this. A table top that connects the legs, which are two boards.
Note!
All these details can be cut out of old unnecessary furniture and then such a product will cost you almost free.
Each one chooses the dimensions of the parts for himself, but, for example, for a 15-16-inch laptop, the dimensions of the tabletop can be 60 * 28 cm.
The sides for such a table are made beveled and the length of this same beveled side should be 28 cm. This side of the leg is attached to the table top. The most convenient tilt for such a table, when the back of the leg will rise by 29 cm, and the front by 21 cm. This tilt will be most optimal for working in a supine and reclining position.

Sawing out table parts
Computer desk
To make a computer desk with your own hands, you need to make much more effort than making a table for a laptop. In this case, the main task will be to make a table "for yourself", because the store version may not be suitable for your complexion at all. Before you start making a table, you need to decide on its model. A fairly common model is as follows.
The computer is located on the table, the system unit is on the side under the table on a separate stand. Also, under the table on a stand, only in the center, there will be a printer and space for disks and documentation, and the keyboard and mouse will be located on a pull-out shelf under the computer.

Detailed drawing
Dimensions of the computer desk
After you have decided on the model, you need to draw up a drawing with dimensions.
The main size of any table, including a computer, is its height. For a person of average height, it usually varies between 700-750 mm. For greater ease of use, legs with adjustable height can be provided. This will be especially convenient if the table is intended for children who tend to grow. Then the legs that are unscrewed in height will not spoil his posture. The printer shelf must be at least 20 cm high and can also be used to store discs in a standing position.

DIY computer desk
Countertop manufacturing
The next step is to make the countertop. Moreover, its size should not be too small and at the same time not be infinite. Everything on it should fit compactly and, moreover, the most comfortable working conditions are created. Standard tabletop sizes range from 1-1.3 m, and the depth can be on the order of 60 cm.
Note!
For greater convenience, it is necessary to provide a side at the back of the table.
This will prevent objects from falling onto the table, and its height is no more than 5 cm.
Completion of work
The size of the pull-out shelf will be only slightly smaller than the table top, and the depth must be foreseen with a size of 40 cm. The final stage in the independent manufacture of a computer desk will be the shelf for the system unit. The height from the floor level may not exceed 10-15 cm, but the width must be provided for at least 25 cm so that there is the necessary distance between the wall of the shelf and the system unit for normal operation of the computer. Thus, by fulfilling all these requirements, you can effortlessly carry out the manufacture of a comfortable desk for your computer. Well, a visual aid in the manufacture of such a table can be obtained by watching the video below.
DIY computer desk video:
In contact with
Do you see inaccuracies, incomplete or incorrect information? Do you know how to make your article better?
Do you want to offer photos on a topic for publication?
Please help us make the site better! Leave a message and your contacts in the comments - we will contact you and together we will make the publication better!
With the advent of personal computers into our life, it has become important to make a corner computer table with your own hands. Recently, corner computer tables are gaining more and more popularity. Making a computer desk with your own hands, you can not only get custom-designed furniture, but also significantly save your budget.
A homemade corner table will save room and your budget.
Of course, you can buy such a table in the store, but there are people who prefer to do everything with their own hands.
Where to start making a table

Determine the size
you can look at the diagram of the arrangement of objects on the table.
Before making a corner computer table, you need to decide on the shape of the table, its dimensions, design and, possibly, some additional functions. It is very important to clearly understand its appearance, the materials used in creating the table will depend on it.
Everything that may be needed during the work should be prepared in advance.
Now it is necessary to draw up a project for the manufacture of a computer table. When compiling it, it is imperative to take into account some parameters:
- the functions of the table, it is important to provide for such trifles as the number of drawers, as well as the need for a pull-out shelf for a keyboard and other shelves for office equipment;
- the height of the table, while it is very important for whom this table is made, if it is intended for an adult, then a standard height is needed, but if for a child, then it is necessary to choose the right height, focusing on the growth of the child, do not forget about the size of the swivel chair ;
- when planning additional shelves, you need to take into account the size of office equipment and make shelves strictly for them;
- the size of the table must correspond to the room in which it will be located, taking into account the furniture already located here.

Before starting work, you need to make a sketch of a table with all dimensions.
You can think of a place to store CDs in advance by measuring the width of a previously purchased plastic insert for CDs. Now you need to complete a drawing in which all the necessary elements are marked with an exact indication of all dimensions. This is necessary in order to subsequently use the material most efficiently. On the drawing, you must indicate the number and type of fasteners.
To make a computer desk with your own hands, you will need the following tools:
- rulers;
- end plane;
- ready-made plastic insert for discs;
- jigsaw;
- screwdriwer set;
- Circular Saw;
- drill and drill set.
From materials for a computer desk, you will need:

List of materials for the manufacture of a computer table.
- pine boards necessary to strengthen the product, the optimal thickness will be boards of 25 mm;
- for shelves, drawers and side walls, it is better to take an MDF slab in the amount required according to the drawing;
- screws for fasteners, about 130 pcs .;
- guides for shelves and drawers, their number will depend on the number of these elements;
- plastic ties for corners;
- end edge and sanding paper for processing the edges of boxes and shelves;
- varnish or primer for finishing.
It is not difficult to make a computer desk with your own hands, but you need to be very careful when dimensioning drawings and when trimming individual elements from a large canvas.
Assembly of a table with drawers
After all the necessary elements have been cut out, you can start assembling the computer desk. You need to start the assembly from the side elements. At the same stage, we fasten the guides under the pull-out shelf and under the drawers. This must be done very accurately in order to avoid distortion of the boxes during further use. Then all the side walls are connected with dowels. In order to make the mount more durable, you can add PVA glue to the holes. Further, all walls are fixed with self-tapping screws.
Edges that are visible are processed with an edging tape, such a tape is attached using an ordinary hot iron, you can iron it through a thin cloth or plain paper.

Tools for making a table: drill, jigsaw, screwdriver, screwdrivers, pliers.
The computer desk can be installed depending on the pre-selected design. You can buy special metal round legs with a plastic base to avoid scratching the floor, or at the initial stage, when designing, provide the main emphasis on the side pedestals installed on the above metal legs or simply on additional slats made of a material similar to the side posts.
After all the edges of the computer table are processed, you need to fix the tabletop. As a rule, it is simply fixed on the dowels, after adding PVA glue to the holes. The holes for them are prepared in advance, having previously turned the tabletop over, using a drill. It is best to use a stopper in this case, since the drilling depth is small and you can inadvertently damage the front side of the tabletop.
Now we place the board intended for the keyboard in the guides and insert the boxes. We check if everything works.
If, according to your project, the monitor will be installed not on a tabletop, but on a separate shelf, it is best to mount it on a special metal stand, firstly, it is very stylish, and secondly, it is reliable.
Place for the system unit
If you are going to use a personal computer at this computer desk, and not a laptop, you must provide a place for the system unit. A special stand is best suited for these purposes. It is not difficult to make it, but there will be a lot of convenience from it. You will not have to clutter your table with unnecessary elements, while the system unit will be very mobile, there will be no rigid binding to the table. You will need a base cut to fit the system unit, as well as two side strips. Beautiful metal legs with a plastic base can be attached to the base or castors can be installed instead.
Making a table with your own hands is not too difficult and very exciting. But you need to approach it responsibly. The main thing is to provide for all the little things at the initial stage, as well as very accurately cut out individual elements. And then a hand-made table will exceed all your expectations.
Today the whole world is moving away from physical labor and adjoining smoothly to mental. The list of professions has been supplemented with such specialties that do not require an employee to be located directly at the workplace in the office. Nowadays, a lot of people work remotely, sitting at their computer and performing the customer's work. But, you can't give up your personal workplace, where everything you need for comfortable work will be stored. Therefore, many husbands and fathers are trying to find comfortable table options for their wives and children. After all, you can make a computer desk with your own hands. This takes time and a lot of desire. In this article, you will learn how to make a table.
Computing machines are in every home today. Convenient and affordable way out into the world. But, they have one problem. Many were rather annoyed by the presence of endless wires, a large system unit, and they would also like to install a printer. Of course, all these things are visible. They, as a rule, spoil the impression and the overall picture of the room. The advantage of homemade computer desks is that everything is in your hands. Only you know what is convenient for you and what gets in the way, what height of the computer desk you want and how many cabinets should be pull-out, only you yourself decide where to hang the shelf and where to refuse it.

Do you have a small room and a lot of children? A do-it-yourself corner computer desk or a transforming table will help you retire and devote your time to work. There is another version of the table, which is attached directly to the wall and can be folded. Making such a table on your own is as easy as shelling pears, but how much benefit it will bring you and your family. You can drink tea or put a laptop on it at any time, just as you can free up space that was occupied by the table a minute ago. There can be an infinite number of design variations. You can add your imagination and wishes to this list, which will make it even longer.
Which shape should you choose?
When you decide to make such a design, you need a plan for how to make a computer desk with your own hands. First, calculate the place and size of the future table. Here's a list of the different types of furniture to work with:
- angular;
- combined;
- straight.
The corner version of the computer table can be realized between two walls, at the junction of a wall and a window, or only on one side contact the wall. Here, the dimensions need to be controlled depending on the purpose of the table and the dimensions of the room itself, or its free space.

The straight version can be equipped with shelves and cabinets for small items. If you use a computer, then this option will suit you. Then you can hide the powerful system unit, allocate a pull-out shelf for the keyboard and mouse, install the monitor on the rise, and make room for other gadgets. If you use a laptop or other gadget wirelessly, then you can use a more modern version of a computer desk. By attaching a good countertop to the wall without using legs, your workspace will win over everyone who enters the room. This move is very profitable and requires minimal costs. You can always buy separate shelves or make them yourself. Plus, the fewer lockers there are, the fewer unnecessary things you'll overwhelm your life.

The ideal option, according to psychologists, is a combination of the first two. It should be large, with a mix of angular and straight countertops. Work at such tables is usually also combined. A person should have where to turn around and where to put the necessary documents. Such a table with a superstructure and cabinets will take up a lot of space, but will make you love your work. After all, it is a pleasure to sit at such a table.
If you still have not managed to come up with the placement of your computer desk, here are some useful tips. For work, usually the daytime is allocated. Sitting at a corner table near the window, the work will go along with the sunlight. So, together with the natural clock, a person will quickly concentrate and by the evening will complete the assigned tasks. Set the table with its back to the front door so as not to be distracted by those entering. Depending on the type of activity, select the size and shape of the cabinets. Think they will be built into the table or located separately from it. If, in addition to working with technology, you need to write something down, then the table should serve as a writing table.
Preparation
At the end of the fantasies and desires outlined on the preliminary sketches, you should have a finished drawing and diagram. To implement a table with your own hands, drawings are available on the Internet. If you do not find the right one, you need to know some standards that correspond to the rules and laws of ergonomics. The height of a straight or angled desk must be at least 75 centimeters. For a tall person, his parameter should be multiplied by 75 and divided by 175. As a result, the resulting value will be ideal for him. The depth of the working area of the worktop should reach an average of 70 centimeters. But, if space allows you, the figure can be increased. In cases where a monitor stand is planned, the depth of the tabletop can be reduced to save space in the room. These values are selected for ease of use, but your wishes play a more important role.

A do-it-yourself computer desk can only be made if you have the necessary tools. You will need:
- screwdriver;
- jigsaw;
- chisel;
- drill or drill;
- grinder,
and don't forget about the standard items: pencil, tape measure, ruler. The jigsaw will help you cut all the curved parts on the sheet. A saw or hacksaw is useful for cutting parts.

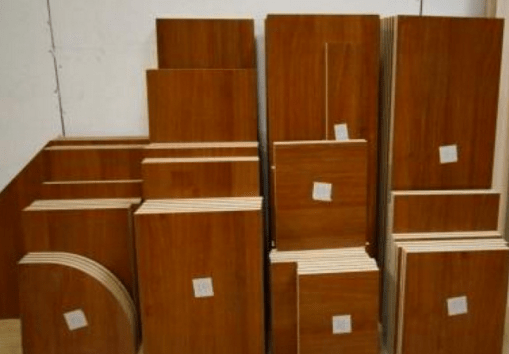
Now decide on the material. A table made of wood will look luxurious. Noble and expensive material will decorate the room. If you are new to the design issue, then it is better to start making a desk with your own hands from chipboard. The material is much cheaper and more affordable than natural wood. Plus, you can find a wide variety of colors here and experiment. The most affordable will be a plywood table that will fit into the modern, country or loft style. Today, a fashionable move is a tabletop made of a tree cut across the growth, in which all the insides of the trunk are visible. It must be raw. You will definitely not want to overflow such a force of nature with unnecessary lockers. But it will certainly please the eye.
Next step
When the preparatory work is over, the question arises of how to make and assemble the table with your own hands. The scheme is not complicated: you need to cut the material into pieces of the required dimensions in accordance with the drawing and connect them into one whole. If you do not have the necessary tool for cutting chipboard sheets, then you can always turn to furniture firms for help, who will be happy to make blanks for you. In addition, this option will be done not only quickly, but also efficiently. Indeed, without much experience in this matter, you can easily spoil the material or make a mistake with the dimensions. Moreover, if the scheme of a computer desk with a superstructure or a drawing of a corner one with additional drawers is complicated, then such a design is definitely not up to you.
For the main parts, buy chipboard with a thickness of at least 16 millimeters. For boxes, 10 millimeters are suitable. Corner cuts of the material must be processed. To do this, use a special edge tape, which is first heated with an iron, and then carefully laid out along the cut. The contact between the iron and the tape is not direct, be sure to put plain paper between them, as the tape can easily deteriorate under the influence of high temperature. If the tape comes out wider than you expected, you can always cut it.
Particularly carefully fasten the slats for the drawer units. It is better not to make mistakes here, and check all the marks several times before final fixing. In addition, such a system is made for a retractable keyboard. It should slide smoothly and not go astray.
How to assemble a table
They always start work from the supporting parts of the table. You need to analyze which of the parts play the role of a support and start assembling them. If you have made a high-quality drawing, it will not take much time to decide on the assembly order. In addition, for inexperienced people who want to do something with their own hands, it is better to transfer the drawing to natural size on cardboard or paper. So, the likelihood of making a mistake will decrease. For pull-out shelves, be sure to screw on the rails. All parts are fastened with self-tapping screws.

After they are assembled, you can attach the countertop. Determine the location of the upper part with the supporting ones, and drill the holes. This must be done carefully so as not to drill through the material. To do this, you need to install a limiter that will secure you. Remember that all holes must be made strictly at 90 degrees to the floor or countertop. Then, when connected, the whole structure will be firmly fastened. Otherwise, the table may be unstable. A small amount of PVA glue can be poured into all the slots and holes, for a more durable and durable result. Furniture wax can be used instead of glue.
After fastening the main parts, the structure must be fixed. This is done with zip ties. Then, you can disassemble and reassemble your table or improve it. Sometimes special holes are cut out for the wires, then the eternal web will not interfere with you under the table. A similar assembly scheme is suitable for all types of tables. As you have seen, this is not very difficult to do.
Conclusion
A computer desk is a necessary piece of furniture, because it is not just a surface where a laptop is located, but also a work area. So, a person can keep on it all the necessary gizmos and objects that he uses in the work process: office, copier, fax, telephone, and other elements.
The age of modern technologies is characterized primarily by an abundance of functional technology, the task of which is to make life easier for a person. Not the last place is occupied by computers and laptops. Agree, it is rare today to meet a person who does not have this technique. This is, of course, good. But after all, a computer or laptop must be installed somewhere and not always buying ready-made furniture is the best option. And it's expensive, and you won't always find what you want to see in your room. There is a great way to solve this problem - to make a computer desk with your own hands. This is what we will do in our article.
Where to start
Before you make a computer desk with your own hands, you need to clearly imagine what you want to get in the end. In other words, you need a project. And if you are determined and want to get furniture at the end of the work that will become a real solution, you should think it over to the smallest parts.
First of all, pay attention to the functionality of the table. Consider if you need additional shelves, drawers, special stands. It might make sense to make pull-out shelves.
Further, it is important to consider the height of the structure. It is recommended to make a standard ordinary table for a computer with your own hands within 750 mm. The table top is included in these dimensions. For a child, you can choose a lower height.
Do not lose sight of the estimated size of office equipment and the number of items. Before you cut out the shelves and make the boxes, you need to measure everything with a ruler or tape measure. Then you won't have to redo it in the future.
And finally, it is necessary to take into account the general parameters of the room and the place where it is planned to put the furniture. It should be comfortable and the lighting should be correct. Only then the person sitting at the table will not feel discomfort during work. The same parameters should be taken into account and if you want to make a table for a laptop with your own hands.
DIY table video
Materials and tools that will be required during work
Making a computer desk with your own hands is a laborious process that requires patience and attention. After drawing up the project, you need to decide on the materials that will be used. Most often, tables are made from:
- natural wood;
A table for a computer or laptop made of wood is preferable to others, but at a price it will cost much more and it will still have to be varnished. MDF and chipboard - materials are much cheaper and are not much inferior to solid wood. In addition, they perfectly tolerate high humidity and are insensitive to damage.
Which material to choose is a matter of taste. But the tool with which the work will be performed must be available without fail. Most often, the usual set is used, which every man, even a not too experienced master, has:
- hacksaw, electric jigsaw;
- Grinder;
- drill;
- screwdriver;
- chisel;
- roulette;
- square.
Naturally, this list may be slightly different, since it all depends on the design of a homemade computer desk with your own hands.
Several ways to make a table for office equipment
As mentioned above, it is not necessary to have special construction skills in order to make a computer desk with your own hands. There will be enough initial knowledge, desire and patience. For a more complete presentation of the upcoming volume of work, we present several methods of making a table for a computer with our own hands.
Method one: a simple rectangular MDF table

For work, we need an MDF plate with a thickness of at least 16 mm, a set of tools from the list above, self-tapping screws, glue, fittings. First of all, we measure the place where the furniture is planned to be installed: width, length and depth. Based on these parameters, making a computer desk with your own hands, drawings are drawn up. Only after completing these steps, you can cut the MDF into pieces and then mount the table:
- Using a screwdriver and self-tapping screws, we fasten the side parts with guides.
- Side modules are assembled with dowels. Greater strength can be achieved using special glue
- We use 4 mm thick MDF as the back wall, we assemble the table walls into a single whole.
- Using the drawing, we cut out the elements of the boxes and shelves, make a fitting and fix the boxes with clamps. We process the side surfaces with edging tape.
- On the underside of the tabletop of the computer table with our own hands, we mark the attachment points for the support pedestals. Using a drill, we drill blind holes.
- With the help of screws, we fasten the curbstones to the inverted tabletop.
- Turn over, fasten the hinges, hang the doors and insert drawers and shelves into place;
- We attach the monitor stand using round wooden blocks, piping and glue.
- We cover the made table with a primer, paint it in the desired color and start using it for its intended purpose.
Tip: in this way, you can make a computer desk from chipboard with your own hands and take any other material.
Method two: corner table for a computer

Now let's take a look at how to make a do-it-yourself corner computer desk. This work will require a little more attention, but the result will please - an empty corner of the room will function, and free space, at the same time, will not become less.
So, for work we need the following tools and materials:
- screwdriver or screwdriver;
- drill;
- clamps;
- wooden dowels;
- electric saw;
- knife sharp enough;
- iron, edging tape, ruler, square and pencil;
- joiner's glue;
- self-tapping screws.
We take 16 mm thick MDF sheets as the material, and hardwood for the support elements.
To begin with, we measure the space and make a drawing, according to which we carry out the detailing of objects.
If you do not know how to work with drawings, look for ready-made material. Drawings can be found on the Internet to make a corner computer table with your own hands.
Having prepared all the details, we adjust everything to size and proceed with the assembly, which must be performed in stages.
1. We assemble the side parts of the table on dowels, fasten the guides for the shelves inside and the drawers that will slide out. You can strengthen the mount with glue.
2. Fix the rear walls with self-tapping screws.
3. We process the side edges of all structures with an edging tape, gluing it with paper and a hot iron. We cut off the excess part with a knife.
4. On the inner side of the table top, mark the places for the pedestals of the support, drill blind nests. We turn the tabletop over and in this position we fix the curbstones.
5. Next, we return the table to its normal position, fix the side doors, install drawers and shelves.
6. We fasten the upper structure of the shelves with ties and put it on the table, install the monitor stand.
7. The table is ready. It remains only to paint it to match the overall interior. Thus, assembling a computer desk with your own hands is not as difficult as it seems.
If there is a laptop in the house
We have disassembled how to make a computer desk on our own. But what if you have a laptop instead of a computer in the house? It would seem that the thing is quite mobile and does not require additional stands. But, as practice shows, lying in bed or on the couch with a laptop in hand is not always convenient. Therefore, now we will make a table for a laptop with our own hands.
The easiest and free option
First of all, we will consider a design that does not require special construction skills and not a penny of financial investments. It is tempting to make such a table for a laptop with your own hands. You can use parts of old furniture, remnants of repairs and other scraps of any building material.
You only need three parts: 2 side pieces and a table top. Its size will depend on the size of the vehicle. We will be making a 270x660mm tabletop. cutting it out is simple, the main thing is to measure it exactly.
The side slats will be a little more difficult: they should have a beveled side, which is attached to the tabletop. The dimensions of the side walls are 270 × 205 × 255 × 280 mm. it turns out that the back of our table will be raised by 280 mm, and the front, lowered by 205 mm. Thus, a small do-it-yourself computer desk for a laptop will have a slope, which will make it very convenient to work with.
The side parts are attached to the tabletop with self-tapping screws and are additionally reinforced with small corners. This increases the strength and reliability of the structure. It remains only to paint or trim it to your taste and preferences. There is nothing difficult in such a design, and if a person likes to study or have fun reclining, then why not think about how to make a table for a laptop with your own hands.
Another way: a folding table for a laptop

The folding design of the table is a little more difficult to make, but if you often have to move from place to place, you should think about how to make the table for a laptop convenient and mobile. The following materials and components will be required:
- countertop material;
- material for side walls;
- screws or self-tapping screws;
- 4 hinged fasteners with a lock.
Any material that is available can be used as a material. We cut out a tabletop 600 × 400 mm, side legs - 400 × 310 mm. Using a ruler and a pencil, mark on the inside of the tabletop where the leg mounts will be installed. We make holes for screws, we fix everything securely and that's it - our do-it-yourself computer desk, the photo of which you see is ready.
Do not, under any circumstances, forget to fix the folding structure in the desired position. Be sure to remove the catch when folding the table.
As you can see, there are a lot of ways to make a computer desk with your own hands. The article discussed only the most accessible and simple ones. But there are craftsmen who are able to create such furniture that you will not find in any store.
Well, for clarity, watch the video on how to easily and quickly make a computer desk with your own hands, using the information of which you will cope with the problem easily and naturally.
A good computer desk helps to make computer work more convenient and efficient. Modern models of tables have an interesting design that will harmoniously fit into any interior.
The choice of model can be carried out based on the set of instruments that must be placed on the table. It all depends on the type of computer, you can put a laptop on the table, or a stationary device. The latter takes up much more space, moreover, the existing printer needs its own corner on the table.

With a large set of computer literature, you need to choose the type of table with many shelves for books or disks. The table can be angular or straight. Before choosing it, you should decide on the place where the furniture will be delivered.


Types of computer tables
There are three main types of computer desks:
- straight form;
- angular shape;
- combined form.

The straight table is a classic option for users who do not use a computer very often. This form is great for office work, it will not distract attention from work.

The angular shape of the table is suitable for those who spend a lot of time at the computer. It should be borne in mind that there is little space on such a table surface. Therefore, it will not work to place various stationery and paper supplies on it.
IMPORTANT! A table located in the corner is bad for the psyche. Corner tables are not used in offices.
The combined form combines the two previous table options. The disadvantage is that the design requires a lot of space. Has many shelves and drawers for storing documents and other things.


Design and drawings
The types and sizes of homemade computer tables are limited only by imagination, material, and their location. Once you have chosen a suitable shape, you can begin to design the dimensions.

A comfortable table will turn out when it fits the user's height. It should be multiplied by 75, and the result is divided by 175. As a result, we have the desired table height.

Then, a diagram and drawing are made for the manufacture of a computer table. Its complexity depends on the chosen model. Therefore, if there is no desire, it takes a long time to design, you should choose the simplest type of construction.

The design of a simple table should include the following components:
- the presence of a pull-out shelf for the keyboard;
- space for the monitor;
- shelf for folding small items;
- the presence of boxes;
- several upper shelves where you can put books.

In this version, there is enough space for all the peripherals of the computer. The location of all parts of the table depends on the design imagination.


How to assemble a table
Having found the necessary instructions on how to make a computer desk with your own hands, you should start preparing the tool:
- jigsaw;
- electric drill, drill;
- screwdriver;
- pencil.

When making a table from chipboard, to make the edges even, you should carefully cut the material. In this case, there will be a lot of sawdust, and it is better to prepare a vacuum cleaner in advance for dust.

If you do not have the skills to work with a jigsaw, then you can use the services of a furniture factory. They will make an even cut, and the edges will come out without chipping.

The general structure of the table should have the following elements:

- two side racks;
- central rack;
- table;
- back wall;
- slide-out stand for the keyboard;
- several internal shelves.

After the cutting of the parts is finished, you can start assembling. You need to make 2 holes in the two side and center pillars. They are needed to attach the bottom shelf, which is attached to self-tapping screws or confirmations. The top shelf is mounted using the same method.

Next, the back wall is installed. It is attached so that the top corners coincide with the corners of the side posts and the center wall. They are also attached to self-tapping screws. For the pull-out shelf, guide rails are attached to the table. The same action is done with the shelf itself.


The table top is attached to the side walls. Holes are drilled in them, into which the dowels lubricated with PVA are mounted. Drill holes in the worktop, not through holes, but with sufficient depth. The holes of the uprights and the countertops must match, otherwise they cannot be secured.

If there are not enough shelves on top, then the installation of additional ones can be carried out on dowels. The assembly of the wooden table can be considered complete. It remains to place it in the selected location.

There are many different photos of computer tables on the Internet. Every amateur will find a suitable option for himself.


Wooden table designs are the simplest and most affordable handicrafts for many. Not many people can make their own table out of metal and plastic.

Diy photo of computer tables


