Step-by-step instructions for insulating a balcony. How to properly insulate a loggia from the inside: instructions with illustrations for insulating a loggia with your own hands
How does a balcony differ from a loggia
First of all, let's clearly separate these concepts. Both are glazed, so most people call the resulting space a balcony, although this is incorrect. And some mistakenly believe that if you install windows on the balcony, it automatically turns into a loggia.
The key difference between the two structures is that the balcony has no walls and protrudes beyond the facade, while the loggia has side walls and, on the contrary, is recessed into the building. In other words, the outside air acts on the balcony from three sides, and on the loggia - only from one or two, if the apartment is corner.
What result to expect
You can insulate both, but the final effect will be very different. A well-insulated loggia is no different from a room. With a heat source, it becomes a full-fledged living space for year-round use.
Due to the lack of solid walls, the thermal resistance of the insulated balcony is much worse - it is comfortable to stay there until late autumn. A sufficient level could be achieved with an additional layer of thermal insulation, but this is irrational due to the small area of the room. After warming, there will be almost no free space.
What's with the glazing
Since 25% of heat loss falls on, it makes sense to take on the insulation of a loggia or balcony only if there are energy-saving windows. If wooden frames with one glass are installed, you will first have to replace them with modern ones.
Double-glazed windows with a higher thermal resistance weigh a lot and can only be installed on loggias. Balcony ceilings have a weak bearing capacity, and most likely it will not work to mount such windows there.
2. Consider the design
Before starting work, you need to decide on the type of insulation, choose the option for finishing the walls and finishing flooring, and also decide how the room will be heated. All this will determine the design and the algorithm for its installation.
Since the insulation of a balcony or loggia is carried out from the inside, it is important to use a vapor-proof material in order to avoid the formation of condensation and the appearance.
 instrumentgid.ru
 Extruded polystyrene foam (EPS) is best suited for this. When installed with sealing joints, it allows you to make a kind of thermos out of the room, which will retain heat well by cutting off the external cold. At the same time, with EPS, you can achieve sufficient thermal insulation, taking a minimum of precious space from the room.
Some consider styrofoam toxic. This is not entirely true. The material is indeed flammable and, when heated above 60 ° C, emits harmful substances, but this does not make it dangerous, since the EPS is always covered with a finish.
Wall decoration
After good insulation on the loggia or balcony, you can apply any type of finish. Depending on the chosen coating, the technology of work on thermal insulation is slightly different.
- Wooden lining, PVC or MDF ‑ panels - for mounting to the wall, you will need to first make a crate.
- Decorative plaster or putty followed by painting - this type of finish can be applied directly to the insulation.
- - the easiest way is to glue on drywall, fixed on a wooden crate.
Flooring
The floor of the insulated loggia is no different from the floor of the room, so all existing topcoats can be used there. However, for each type, you will need one or another version of the subfloor.
- Laminate, linoleum, carpet are laid on plywood sheets, chipboard (chipboard), DSP (cement chipboard) or OSB (oriented strand board) fixed on top of wooden logs.
- and porcelain stoneware are laid on a concrete screed.
The floor slabs of the balconies have a low bearing capacity, therefore, only floors on wooden logs are allowed on them. In addition to this, on more durable loggia foundations, you can also pour a screed for laying tiles.
In both cases, if desired, you can equip an electric floor heating system. The only difference is that for the construction on the logs, a film infrared floor is used, and for the screeds - a heating cable or heating mats.
Heating
It is important to understand that insulating a balcony or loggia will only prevent the walls from freezing and slightly increase the temperature compared to the street temperature. To maintain a comfortable microclimate in winter, you cannot do without a heating source.
There are three main ways to heat a room:
- Electric is the most costly and difficult to install option, but at the same time the most efficient and convenient.
- Convector - a heater installed against an outer wall can be turned on only on the coldest days or only when there are people in the room.
- Central heating radiator - by law it is forbidden to transfer the device to a loggia or balcony, but if the partition is removed or the door is constantly open, the battery will cope with heating even from the room.
Take things out, remove shelves, hangers, and other items. Remove old paint and plaster from the walls. If there are foci of lesion with a fungus, remove it and carefully treat the places with a special antiseptic, and then dry all surfaces well.

To prevent blowing out, seal all gaps around the perimeter of the fence slab, as well as at the points of contact with the side walls, floor and ceiling. Remove the old plaster from the joints and fill them with polyurethane foam.
The bottom line is to cut off any cold air flows from the street and make the room as tight as possible.
If you plan to use the insulated space as a study or recreation area, you must pre-mount the electrical wiring. To do this, install in the right places, lighting and switches.
 YouTube channel "Building for ourselves"
 It is better to run the cables along the inner wall adjacent to the room. It is not insulated, so all wiring can be easily hidden inside the frame or plaster layer. The sockets and can be plugged in from the nearest outlet in the room. But to supply the warm floor, it is advisable to run a separate cable from the distribution board.
Expanded polystyrene is sold in the form of slabs with a size of 60 × 120 cm and a thickness of 20 to 150 mm. The sheets have an L-shaped lock along the contour, which simplifies installation and prevents blowing through the joints.

There are different ways to fix the EPSP to the walls. The most common is glue-foam in cylinders, which is applied around the perimeter of the sheet and in the middle. Another option is fixing in the corners and in the center on dowels-umbrellas with a plastic or metal core. Also, expanded polystyrene is attached over the entire area of the sheet to adhesive mixtures for insulation.
To form a single contour of thermal insulation, all joints must be sealed. It is important to leave gaps of 10-15 mm near the walls in the corners, under the ceiling and near the floor, so that later they can be filled with polyurethane foam. It is recommended to coat the joints in the locks between the plates with glue-foam or glue with foil.
 YouTube channel DendenTV
 The required thickness of insulation can be achieved either with one sheet or with a combination of two. In this case, the second option is even preferable, since the fragments of expanded polystyrene are tightly adjacent to each other and form a single layer, and due to the displacement of the joints between the plates, maximum protection against blowing can be achieved.
After the end of the work, an unbreakable structure should be obtained, where each sheet of EPSP fits snugly to the neighboring one, and all joints between them in the corners, under the ceiling and at the floor are sealed with polyurethane foam.
The fence slab borders the street and is exposed to the cold air the most, so the maximum insulation thickness here is 80 mm. It is better to use not one 80 mm sheet, but a “pie” of plates: 50 + 30 mm.
 YouTube channel "Building for ourselves"
 If the dimensions allow, the wooden lathing is mounted on top of the second layer of EPS, fixing the bars with anchors or dowels directly through the insulation. When the width of the window sill is limited, the crate is fastened with 50 mm expanded polystyrene foam, and the second layer of insulation is placed between the frame bars.
If selected as a finish, you can do without the construction of a frame. In this case, the mixture is applied directly to the surface of the EPS. For better adhesion, the sheets must be trowelled or scratched with a regular hacksaw.
 YouTube channel "Building for ourselves"
 For walls, an EPS layer of 50 mm is sufficient. The work is done in the same way. If necessary, the sheets are cut to the desired size with a sharp knife. To join the pieces to each other, an L-shaped lock is formed at their ends with the same knife.
It is better to insulate it in two layers (30 + 20 mm), and fix the frame over the EPS. But if the window is installed without accessories and the space is limited by the width of the frame, the second layer of expanded polystyrene can also be laid between the frame bars.

If you are going to plaster the walls in the future, then the crate is not needed. It is enough to fix the sheets and make their surface rough with a grater or hacksaw.
The ceiling borders the apartment, not the street. Therefore, the same EPS layer is sufficient here as on the walls - 50 mm. Laying is done according to a familiar principle. Mounting of your choice: glue-foam, dowel-umbrella, glue mixture. Expanded polystyrene is a very light material and reliably adheres to the ceiling only with glue.
 YouTube channel "Building for ourselves"
 When installing, pay attention to the height of the windows. If the frame is installed under the ceiling itself without additional profiles, then due to a thick layer of insulation, the window sashes may not open. Take into account the thickness of the battens and finishing so that after installation there is a gap of at least 5–7 mm to the sash.
For thermal insulation of the floor, an EPSP with a thickness of at least 50 mm is required, and better - 80 mm in two layers. Extruded polystyrene foam has a high density and can withstand a load of up to 30 tons per square meter, therefore it can serve as the base of the floor.
 YouTube channel "XPS TechnoNIKOL"
 After installation on EPSP, it is enough to lay plywood, chipboard, DSP or OSB - and on top you can lay a finishing floor covering like laminate or. When installing a film underfloor heating, you first need to lay penofol or another heat-reflecting substrate.

Under the laying of tiles or porcelain stoneware, a reinforced cement screed is poured directly onto the EPSP, into which, if desired, a cable heated floor or thermomats can be installed. If the heating elements have a small thickness, they can be easily laid in the adhesive layer when laying the tiles.
The floor on the balcony or loggia is always lower than in the room, so many people prefer to bring them one level and remove the step. This is done using a log from a wooden bar 50 × 50 mm or 40 × 40 mm.
 YouTube channel "Building for ourselves"
 First, the transverse joists are laid with a pitch of 40–60 cm and fixed to the slab with anchors. Then the gaps between them are filled with insulation and foamed, and longitudinal logs with a similar pitch are attached on top and leveled. Next, the second layer of insulation is laid with foam filling and plywood or other sheet material.
10. Complete the finishing
At the very end, the ceiling and the floor are trimmed. If plaster is selected, then a reinforcing mesh is glued to the sanded EPSP surface, and then two layers of plaster and paint are applied.
 YouTube channel "Vladimir Odorov"
 When cladding with clapboard, plastic or MDF panels, moldings are attached to a wooden frame on the walls and ceiling.
 YouTube channel “Loggias. buy "
 For wallpapering, the easiest way is to sheathe the walls with moisture-resistant plasterboard. Use the crate as a frame, seal the joints between the sheets with putty and, after priming the surfaces, glue the wallpaper.
The final stage of finishing is the installation of the finishing floor. On the previously prepared base, linoleum is laid or spreads. If a warm floor is planned, then it is first installed. Next, the skirting boards are mounted.
 YouTube channel "Building for ourselves"
 The exception is tiles. Due to wet processes during installation, it is better to install it at the stage of floor insulation and before starting work on the walls.
Having decided to make repairs in the apartment, you, of course, will not ignore the balcony. Some have a balcony, some have a loggia - and some apartments have both.
What is their difference? A balcony is an outrigger structure, the basis of which is a balcony slab, fenced with a parapet.
It is located outside the outer walls of the house. The loggia is actually part of one or two rooms of the apartment, although it is fenced off from them by a wall.
The outer part of the loggia also has a parapet. Sometimes loggias can be adjacent to neighboring apartments, which, as a rule, does not please the owners.
The space of the loggia is not comparable more than the area of the balcony, therefore it is often combined with the main room, or a separate room is arranged in it. But for this, the loggia must be insulated and finished.
The balcony, of course, cannot be called a room, but there are methods to expand it a little. This will require the help of specialists, since this work is carried out outside the house, on a lift.
But the finishing of the balcony and insulation can well be done by hand, and our small instruction will help you succeed in this.
Despite the fact that the loggia is larger in area than the balcony, it is much easier to insulate it. It has only one outer wall, while the balcony has three.
When performing any work on the balcony, their weight must be taken into account, since the balcony slab is not designed for heavy loads. On the loggia, you can build any wall: even from bricks, even from concrete blocks - and insulate it so that you can even arrange a winter garden there.
Window
Insulation and decoration of loggias and balconies begins with the installation of windows. How warm it will be in this room in winter also depends on their design.
Hardly anyone is now putting wooden windows on the balcony. They cannot compete with plastic windows in terms of tightness: wood dries up, rots, and requires annual painting.
This cannot be done from the outside of the balcony, which is why wooden balcony frames deteriorate quite quickly.
- Plastic windows solve all these problems, and also have additional advantages. For maximum insulation, you can order double-glazed windows, there are even options with sound insulation, as you can see in the photo below.

- The thickness of the glass can also be different, as well as their properties. There is a so-called I-glass (energy-saving glass).
It has a high reflectivity and surpasses ordinary glass in thermal insulation properties due to a special coating. - Naturally, the price of such glass is higher, which will affect the cost of the entire window. The design of the window profile also has differences - there are three-chamber and five-chamber options.
So you can choose the right glass unit for any climatic conditions. - Installation of windows is carried out on a brick or concrete parapet... So, if your balcony has a fence made of iron rods with railings, you first have to lay out the wall.
How to do this, you can watch the video, or invite a specialist to do this work.
When the windows are installed, the insulation and decoration of balconies and loggias begins with them. As a rule, through slots remain around the frame.
To avoid drafts in the future, they need to be filled with polyurethane foam. If the gaps are large enough, you can first fill them in with pieces of styrofoam.
Waterproofing
The next stage of work will be the device for waterproofing structures. If it is not fulfilled, the heaters will get wet and deteriorate, dampness will be felt.

So:
- The most inexpensive waterproofing material is roofing material.... Since it is based on cardboard, roofing material is short-lived. Over the years, the cardboard decays and must be replaced.
- But this is on the roof, but for the balcony it will do quite well, because there will be no direct hit of rainwater. So, pieces of roofing material are overlapped on the floor of the loggia and glued with special bituminous glue.
The joints can be welded with a gas torch. - If you want to make more durable insulation, use penetrating compounds such as: penecrite, penetron, liquid glass, various dry mixes. There are many types of waterproofing compounds: both domestic and imported.

The mixtures are diluted with water to the desired consistency and applied with a brush or roller to the insulated surface. When it dries, a reliable moisture-proof film is formed.
Insulating layer
Insulation and decoration of the loggia must be done carefully, especially if there is a living room... The choice of materials that can be used for the installation of a heat-insulating layer is quite wide.
So:
- The most affordable and cheapest of them is polystyrene. It is not afraid of moisture and fungus, has soundproofing properties, and is lightweight.
Its only drawback: Styrofoam is a highly flammable material. - Therefore, manufacturers have developed a fire-resistant polystyrene foam material that looks like foam. You can use the traditional option - mineral wool.
Or turn to a new generation of material called isolon.

- There are many types of isolon, since the scope of its application is not limited to the insulation of structures. This material has many advantages: odorless, microbiological and chemical resistance.
- If we consider that the insulation must be covered with a vapor barrier film, the easiest way is to use the foil version of Isolon or Penofol. What thickness of insulation you need will depend on the method of finishing the balcony.

- The decoration and insulation of the loggia, and in particular its floor, can be done in this way: as a heater, you can use expanded clay, which costs mere pennies. Usually, the level of the balcony floor is significantly lower than in the apartment.
Therefore, a thick layer of expanded clay will not only insulate well, but also raise its level.

- In this case, the construction of the floor will differ slightly from that where soft insulation is used. In this case, there is no need to do waterproofing, a vapor barrier film is simply laid on the concrete, and expanded clay is poured on top.
- A reinforcing mesh is laid on the expanded clay layer, which is filled with liquid cement mortar... The result is a sealed structure.
Usually, a screed is performed on top, allowing you to lay ceramic tiles, laminate or linoleum.
And for the walls and ceiling, it will be possible to choose a different type of insulation from the options that we talked about. If frame cladding is used as a finishing finish, the finishing and insulation of the balconies are combined.
Frame cladding with panels
Let's take a closer look at how the balcony is insulated and finished with our own hands. First, find out from the neighbors upstairs if the floor on their loggia is insulated.
If the answer is yes, you do not need to insulate the ceiling, as well as the wall adjacent to the room.
So:
- When the waterproofing has dried, we proceed to the construction of the frame. Let's say you will sheathe the walls and ceiling with plastic. You need to start from the ceiling - then it will be easier to make the walls.
- If the ceiling is insulated, first a roll of insulation is glued to its surface, then fasten the starting profile with screws to the plastic window frame, and to the walls with dowels.
With a pitch of 40-50 mm in the middle of the ceiling, attach the hangers that will hold the guide profile.

- Not forgetting to leave the leads for the lamps, cut the start panel and attach it to the profile. Next, we mount the plastic slats using the comb-groove method, and fix it with self-tapping screws.
The last panel will have to be cut to length. - The frame can also be made of wood; it is possible to mount not only plastic, but also MDF, a lining board on it. If there is no need to insulate and sheathe the ceiling, you can simply glue the ceiling tiles onto its surface as a decoration, or putty and paint.
- Wall cladding begins with a parapet. The starting profile is attached to the bottom of the window sill with self-tapping screws. In accordance with it, level marks are made on the walls.
The guide profile is attached to these marks.

- Pieces of insulation are laid in the inner space of the frame. If it is mineral wool, do not forget about a vapor barrier film, if it is foil-coated isolon, we immediately close it with panels.
All surface joints will be hidden by skirting boards: both on the ceiling and on the floor.

If you plan to mount a wooden frame for cladding, you should use bars with a cross section of 40 * 40mm, and be sure to check them for curvature and knots when buying, otherwise you will suffer.
Clapboard sheathing
Decorating and insulating a balcony with their own hands, not everyone can do it. But even if invited specialists do this, their work must be monitored.
To do this, you must know how this or that stage of work is performed:
- Waterproofing of vertical surfaces is done using penetrating compounds, which were described at the beginning of our article. It is better not to use polystyrene as a heater under the lining.
- Wood itself is a combustible material, and even styrofoam. Better use expanded polystyrene or isolon.
Pieces of insulation must be cut exactly to the dimensions of the cells of the wooden frame, and fixed with glue. - Any resulting voids must be filled with polyurethane foam and glued with tape. The lining is nailed to a wooden frame, and at the end of the work, it is covered with wood stain or varnish.
- Such a coating will give the wooden surface not only a beautiful appearance, but also protect the tree from moisture.

Finishing and insulation of loggias and balconies can be done in other ways. For example, if you want to paint or wallpaper the walls of these rooms.
To do this, there are two options: mount drywall sheets on the walls or plaster the surfaces. To make plastering possible, a reinforcing mesh is mounted on the insulation layer.
Only in this way will the solution be able to adhere to the wall, that is, the usual alignment is done. After that, the walls can be decorated at your own discretion.
Several layers of insulation + Internal and external finishing + Glazing of the balcony and loggias with plastic profiles REHAU, BRUSBOX (BRUSBOX), KBE, Novotex in 3-5 chambers.
Insulation (without finishing): from 110 rubles. m2
Finishing + insulation: price from 900 rubles. per square meter.
Glazing: from 2 100 rubles / sq. M.
Warming and finishing of balconies and loggias "turnkey" in 1 day!

We insulate balconies and loggias so that they become a full-fledged additional room in your home!
Insulation with the help of energy-saving double-glazed windows, as well as insulation of walls, ceilings and floors, will create comfortable conditions for rest and work on the balcony, including in winter.
Moscow Glazing Company offers a comprehensive approach to the issue of finishing and equipping balconies. We guarantee big discounts for “turnkey” insulation of balconies and loggias! We are sure that we can make any project, even the most complex and original, a reality!
Moscow Glazing Company offers all types of services for insulation, glazing and finishing of balconies and loggias in Moscow and the Moscow region.
We carry out all the work on a turnkey basis:
- parapet masonry (foam blocks),
- foam insulation,
- wall and ceiling decoration,
- floor insulation,
- laying tiles, laminate or linoleum,
- warm floor,
- electrical installation,
- installation of slopes and window sills,
- exterior decoration.,
- production of furniture and cabinets for the balcony,
- DESIGN PROJECT DEVELOPMENT!
Contact us now and get 60% discount
Prices for insulation of balconies and loggias
The indicated prices are approximate. The final cost of glazing depends on the actual dimensions and characteristics of the object.
| Insulation materials | Units | Price in rub. |
| Penofol 0.3 cm | for 1 sq. | from 120 |
| Penofol 1 cm | for 1 sq. | from 250 |
| Styrofoam 3 cm | for 1 sq. | from 205 |
| Penoplex 3 cm | for 1 sq. | from 300 |
| Penoplex 5 cm | for 1 sq. | from 430 |
An example of the completed insulation of a balcony with a union
The balcony has been combined with the living room. Glazing with PVC profile, insulation of walls and ceilings, finishing, manufacturing of cabinets for the balcony.


______________________________________________________________________________________
We offer our clients the following types of balcony insulation:
- . Provides a set of measures to ensure minimum sufficient conditions to protect the premises from possible freezing. The level of comfort on the loggia will directly depend on which profile is used (aluminum, plastic or wooden) and the type of insulation (polystyrene, penoplex, penofol);
- ... Creation of a two-layer insulation "cake" will eliminate the risk of "cold bridges" and heat leakage. The insulation material is laid in 2 layers, and the joints are processed with polyurethane foam;
- . The maximum insulation of a balcony or loggia, carried out as part of a comprehensive repair, provides for the installation of energy-saving metal-plastic window structures, thermal insulation of seams and parapet junctions, laying of 3 layers of insulation - (polyethylene foam, foam, foam). If necessary, the installation of the "warm floor" system is carried out, heating radiators are connected. A decorative finish gives the room an attractive finished look.

Balcony insulation scheme
Prices for some services for finishing and insulation of a balcony or loggia:
| Materials and types of work for finishing | Units | Price in rub. |
| Rough flooring (timber + plywood) | for 1 sq. | from 500 |
| Finishing flooring (laminate + plinth) | for 1 sq. | from 700 |
| Finishing flooring (linoleum + plinth) | for 1 sq. | from 550 |
| Wall and ceiling decoration with pvc panels white gloss | for 1 sq. | from 800 |
| Wall and ceiling decoration with pvc panels white matt | for 1 sq. | from 800 |
| Wall and ceiling decoration with laminated panels | for 1 sq. | from 800 |
| Wall and ceiling decoration with wooden clapboard Pine A | for 1 sq. | from 800 |
| Wall and ceiling decoration with wooden clapboard Lux | for 1 sq. | from 800 |
| Wall and ceiling decoration with moisture-resistant plasterboard | for 1 sq. | from 1000 |
| Finishing slopes up to 20 cm wide | for 1 lm | from 325 |
| Finishing slopes more than 20 cm wide | for 1 lm | from 350 |
| Installation of EGGER laminated chipboard worktops up to 60 cm | for 1 lm | from 2000 |
| Leveling the countertop with drywall | for 1 lm | from 850 |
Glazing prices
Prices for glazing of windows in Moscow and a comparison of plastic profile systems
NOVOTEX CLASSIC
3,500 rubles / m2 Discount price:2 500 rub / m 2 |
NOVOTEX TERMO
3 300 rub / m2 Discount price:2 700 rub / m2 |
REHAU BLITZ
3,500 rubles / m2 Discount price:2 300 rub / m2 |
REHAU EURO
4 500 rub / m 2 Discount price:3 100 rub / m2 |
REHAU SIB
4 100 rub / m2 Discount price:3,500 rubles / m2 |
REHAU BRILLANT
5 500 rub / m2 Discount price:4 300 rub / m2 |
KBE Expert
4 500 rub / m 2 Discount price:3 300 rub / m2 |
KBE 88
5 500 rub / m2 Discount price:3 300 rub / m2 |
KBE-76 with argo-heat-glazing unit
5 500 rub / m2 Discount price:2 700 rub / m2 |
BRUSBOX 60-3
3,500 rubles / m2 Discount price:2 100 rub / m2 |
BRUSBOX 70-6
4 500 rub / m 2 Discount price:3 100 rub / m2 |
BRUSBOX 60-4
3,500 rubles / m2 Discount price:2 300 rub / m2 |
Which brand of plastic profile to choose?
- Plastic window constructions REHAU, KBE - reliable in German
Choosing windows of the European brands Rehau and KBE in Moscow, you give preference to high-quality and functional products. In addition to excellent heat and sound insulation, KBE and Rehau windows are in perfect harmony with any room interior. A wide range of models of these leaders in the production of plastic window modules will allow you to choose the optimal profile width and the number of double-glazed windows, taking into account the climatic conditions in your region. Rehau and KBE windows - proven quality, high environmental friendliness and affordable price.
- Brusbox and Novotex windows - perfect match for the Russian climate
All window designs of these brands are designed for the changeable domestic climate and possible extreme temperature differences. Moreover, you can order both standard options and the production of Novotex and Brusbox windows according to individual design.
How is the price of balcony insulation determined?
Balcony insulation can be either partial or complex
The choice and amount of work depends on many factors: the location of the balcony to the side of the world, the area, as well as the needs for using the balcony. So, for example, to create a winter garden or an office on a loggia, a three-level insulation of walls, floor and ceiling is required.
If you want to be on the balcony with comfort all year round, excluding severe frosts, you can do with two-level insulation. The tasks, in turn, determine the choice of materials, methods of insulation and the need to take out batteries or electric heaters to the balcony. From here the final price of finishing the balcony is determined.
It is possible to achieve the maximum return from the insulation of the balcony only if you take care of the insulation of the ceiling or the installed roof, if it is Khrushchev, insulation of the walls and floor on the balcony. To feel comfortable on the balcony in winter, including barefoot, you can order the installation of a warm floor. This will give maximum protection from the cold and will also prevent warm air from escaping outside. Even the snowiest winters will not prevent you from feeling comfortable on the balcony, including spending the night there.
In what cases is it necessary to install a "warm floor"?
The installation of a "warm floor" will be needed if a balcony or loggia is combined with the main room, or is a separate room that is planned to be used all year round.
Why insulate the ceiling?
It is possible to ensure maximum insulation of the balcony only by guaranteeing the tightness of the laying of insulation materials.
If the ceiling is left unattended, the heat will go out through the joints between the slabs and the places of abutment to the window structure.
Insulation of the ceiling on the balcony
Ceiling insulation begins with the installation of suspensions, on which guides or metal profile strips are then attached. Plates of insulation material are fixed with special dowels. The holes in the slabs for the hangers are insulated with polyurethane foam.
The most popular insulation materials are polystyrene foam, polystyrene foam, polystyrene foam, and mineral wool. At the final stage, the ceiling is finished with siding or clapboard, plastering or painting is also possible.
Why does condensation form on some insulated balconies?
The degree of comfort on the loggia or balcony directly depends on how competently the insulation will be made. Initially, they are designed as cold rooms, their floors do not contain an insulation layer, which ensures a high degree of thermal conductivity.
If the loggia is insulated incorrectly, warm vapors from the room will penetrate under the layer of insulating material and form condensation.
The consequences can be the formation of mold and freezing of the walls. All activities must be carried out in strict accordance with technology, using high quality materials, including vapor barrier. All layers must be sealed.
How is the floor insulated?
The budget option of floor insulation is the creation of a multi-layer structure, the first layer of which is foil-clad penofol. It is laid with the metallized side up, which ensures heat reflection.
Then the beams are attached 40x40 mm in increments of half a meter. Penoplex sheets are placed between the beams, the seams are processed with polyurethane foam. The next layer of beams is mounted perpendicular to the first, which provides the structure with additional strength.
At the final stage, moisture-resistant plywood and flooring (for example, linoleum or laminate) are laid.
What determines the cost of professional balcony insulation?
When calculating the cost of insulation of a balcony or loggia, the following parameters are taken into account:
- Room dimensions;
- Profile system type (aluminum, wood, plastic profile)
- Type of double-glazed windows (single-chamber or multi-chamber energy-saving options);
- Used heat-insulating materials and technologies.
Insulation of loggias and balconies in Moscow
Our experts produce insulation of loggias and balconies in Moscow using high-quality, environmentally friendly and durable materials at a professional level. Moreover, this can be either a separate service or a part of complex works on glazing, decoration and improvement of balconies. The result will be the appearance of additional useful space in which it will be pleasant to relax or work, be engaged in creativity, and sports.
The cost of services in each specific case is calculated individually. After the departure of our specialist to the object and taking measurements, a project will be developed, on the basis of which a calculation is made. The work begins after the project has been agreed with the customer!
You can leave an application for insulation of balconies and loggias "turnkey" on the website, our specialist will contact you as soon as possible!
When should you choose semi-insulated glazing for balconies at home?
Semi-warm glazing of the balconies of the house is carried out by sliding plastic windows and allows you to effectively solve the problem of fogging of PVC structures.
This is especially true in cases where there is a large difference between the temperatures inside and outside. With a sufficiently high heat and sound insulation, reliability and tightness, sliding systems additionally contain a climatic valve or auxiliary fittings for micro-slot ventilation.
Inside the PVC structures are reinforced, which eliminates the risk of possible deformation. The high rail of the system helps to avoid freezing. To provide the necessary level of comfort inside the balcony, it is possible to install a double-glazed window from 18 mm. If necessary, the PVC sliding system can be combined with conventional pivoting or tilt-and-turn windows.
Despite their small size, the complex modernization of these parts of the residential buildings is challenging. To find out how to do it yourself, step-by-step photos must be supplemented with detailed descriptions of working operations. Information about modern materials will come in handy,. It is necessary to find out how the new premises will be equipped. Finding the right answers to these and other practical questions will be easier after reading this article.
Read in the article
Do-it-yourself balcony insulation: step-by-step instructions for preparatory work
Open balconies in domestic climatic conditions can be fully operated no more than several months a year. They are blown by cold winds, covered with rain and covered with snow. After the implementation of the project, the necessary protection will be created. Even when choosing the most economical option, the insulating characteristics of the property will improve, and the costs for it will decrease. After a deep modernization, you can actually increase the living space at a relatively low cost.

Preventing erroneous actions
Some important details should be noted at the beginning to rule out incorrect decisions:
- Excessive "frugality" can subsequently be transformed into additional costs. If you install cheap frames without, use insufficient quality and finishing materials, the desired result will not be obtained. Subsequent alterations are additional costs.
- Wrong choice of technology also comes with troubles. It is necessary to carefully study the nuances of the techniques in order to make sure that they are realistic to reproduce on their own. Specialists can be invited to perform the most complex workflows.
- Standard cannot be installed on the balcony. Some municipal authorities prohibit discoloration of external surfaces, installation of frames and other visible changes from the outside.

Important! Make sure that the project does not violate the requirements of applicable codes and regulations. If such a structure is not officially approved, it will have to be removed at your own expense with the payment of a fine.
Formulation of the problem
After a detailed study of the thematic materials, final conclusions will be drawn. But already at the first stage, it is necessary to formulate general requirements, note the following important details:
- Even small modifications increase the weight of the structure. It is necessary to take into account the increase in loads on the load-bearing frame, schedule a specialized check. In some situations, a separate engineering calculation will be required.
- If the door block remains, it is not necessary to place increased demands on the insulation performance of the balcony. Otherwise, they should be no worse than in.
- A home computer network is installed in the new premises. It is necessary to decide on the equipment of the balcony.
- It is advisable here to make the floor of the same level as the room, without thresholds and steps.


This figure shows that, if desired, you can increase the available area. But we must remember that such structures significantly increase the load on the building. They must be approved in accordance with the procedure established by law, since significant changes in the initial design are assumed.
Important! A simple freehand drawing is better than no documentation at all. On its basis, it is easier to prepare a list of components, materials, tools and other necessary products.
How to insulate the floor, walls and ceiling on the balcony: the choice of materials
If appropriate, it is better to install the insulation outside the walls. This will help move the dew point towards the street. The likelihood of moisture penetration into the main building structures will decrease. This will prevent their destruction, the appearance of mold. The existing volume of the balcony will be used rationally.

It is easier to carry out assembly operations inside on your own. Therefore, only the corresponding techniques will be considered below. To find out how to insulate a balcony with your own hands with detailed step-by-step photos, instructions, you need to correctly decide on.
| Image | Name | Advantages | disadvantages |
 | Expanded clay | Low cost; good filling with granules of complex volumes; maintaining integrity over a long service life; incombustibility. | High moisture permeability, which is accompanied by a loss of insulating properties. |
 | Mineral wool | The durability of products of a modern level; high temperature resistance; high quality butt joints. | Low strength; deterioration of the structure and an increase in thermal conductivity when water enters. These materials must be additionally protected from mechanical damage and increased. |
 | Styrofoam | Reasonable prices; ease of processing; smooth outer surface; light weight. | Low strength, flammability. To improve resistance to open flame, special additives are used, but the corresponding materials are more expensive. |
 | Expanded polystyrene boards | High strength of products with a sufficiently high density; ease of installation; moisture resistance; durability. | Relatively expensive factory-made materials from well-known manufacturers. Difficulty filling internal volumes without the formation of empty spaces. |
 | Polystyrene formed at a construction site from several liquid components | It has all the advantages of slabs, but additionally it fills all cavities of any shape. | The total cost is higher because special equipment has to be used. |
 | Foamed polyethylene with a layer of metal foil (penofol) | Small thickness; long-term preservation of good consumer characteristics; moisture resistance. | High price. |
For your information! The insulation system will be effective if you install insulating materials on the outer wall, floor, ceiling.


How to insulate a balcony with your own hands: a step-by-step photo, installation of windows
| Drawing | Description of actions |
 | Taking into account the characteristics of a particular balcony, they create a reliable support for the frames. If necessary (as in the picture from the example), install additional metal supports. The manufacture of such products is entrusted to a specialized enterprise. |
 | Easier to work with assembled frames. They are installed sequentially. After precise alignment using the building level, the gaps are filled with construction foam. |
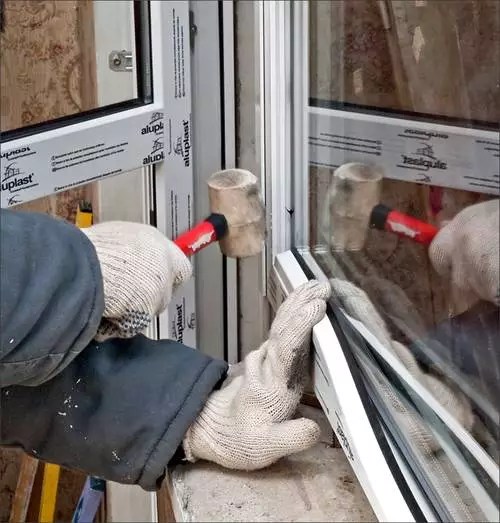 | If it is necessary to install double-glazed windows directly on the object, the glazing beads with seals are inserted carefully. In order not to damage the brittle plastic, use a wooden hammer, damping gaskets. |
 | Further, they install Wooden frames deteriorate by weather and natural influences   Hinged and sliding systems, curved and rectangular frames are created from polymers. If necessary, apply painting, lamination. Article |
The first association that arises with us at the word balcony is a cold small space outside the window, where we take out everything that seems to be not necessary, but it's a pity to throw it out. This is not surprising. More recently, the balcony was thought up as an additional room to the apartment for drying clothes and storing vegetables. But in recent years, the situation has changed dramatically, and now the balcony is becoming part of the interior of the entire apartment, and can perform several useful functions both in summer and in winter. "But how is this possible?" - you tell. Very simple. Nowadays, balconies are insulated, sheathed, energy-efficient windows are installed, and even heated.
Consider the best way to insulate the balcony of an ordinary apartment
There are two options for insulating balconies: outside and inside. Both of these methods differ radically from each other. If in the first case, the balcony is insulated without affecting the inner space of an already small balcony, then in the second, its usable area decreases by at least 30-40 cm.For large balconies, this is not perceptible, but for loggias with small dimensions, such a technique insulation is not quite suitable. "So what's the deal! - tell you, - let's insulate all balconies from the outside ”. The idea, of course, is a good one, but there is one "but" in it.
What is the best way to insulate the balcony? What methods and types of materials for insulating balconies exist in general, and how to properly insulate them. Our experts will try to answer these questions.
You can only insulate the balcony outside with your own hands if it is located no further than the second floor. For work at higher heights, you need to resort to the help of professionals, which will cost a pretty penny. Therefore, it is cheaper, after all, to insulate the balcony from the inside. Moreover, many special materials are being sold for this.
Materials that are suitable for insulating balconies inside:
- Styrofoam;
- Penoplex;
- Penofol;
- Mineral wool;
- Expanded clay;
- Izolon;
- Polyurethane foam.
Each of the materials has its own pros and cons, but they are all great for insulating a balcony and loggia from the inside.
To learn about the characteristics of other materials, as well as about the stages of balcony insulation, you will learn from our article: https://homeli.ru/komnaty/balkon/uteplenie-balkona.
The better to insulate the balcony inside: finishing methods
There are many ways to insulate a balcony. When choosing your option, be guided by personal plans. Consider what functions you want to add to your additional living space in the future. Modern technologies make it possible now to install energy-intensive windows, insulate facades and walls with such materials that the cold will not penetrate into the room at all, and the heat will not be able to escape outside.
What is the best way to insulate the balcony inside if you are doing major repairs? Based on your financial capabilities. Of the budget materials, the most popular for balcony insulation is polystyrene. It is lightweight, fully meets the requirements of insulation and does not deteriorate for a long time.
The quality of insulation, for the most part, is influenced not by the material with which you plan to insulate the balcony structure, but by the way it is insulated. The more you insulate the structure, the better the thermal insulation will be, and the warmer the balcony space will be in winter. If it is additionally equipped with heating, then such a balcony can be used all year round, without feeling the cold outside the door.

What methods can you apply by insulating the balcony from the inside:
- Insulate the walls;
- Sheathe the floor with insulation;
- Lay insulation on the ceiling;
- Cover the entire perimeter of the balcony with insulation;
- Add floor heating to a fully insulated balcony.
In addition, while performing work, you can add additional insulation methods such as a foil sheet gasket, or a plastic film wind barrier.
We will learn how to lay insulation for a balcony indoors
After we have decided on the material for wall insulation, and the method of performing the work, we need to draw ourselves a plan for further actions. It should consist of stages of construction and periods for completing assignments. Reassess the possibilities of your balcony. If you have not yet equipped with energy-saving windows, then now is the time to install them. You are doing a major overhaul of the cladding, and later it will be difficult to return to it, and the installation of plastic windows will require strengthening the positions that support them.
Insulation for the balcony inside the space must be prepared in advance. Try to calculate the correct amount of consumable. This is not difficult to do, you just need to carefully calculate the area of the insulated planes.
Further, step by step, according to your own plan and studying the feedback from experts, move forward. Immediately think about how you will decorate the walls of your balcony. The method of laying the insulating material with further cladding of the balcony with clapboard or plastic differs from the insulation of the balcony without further cladding.

Step-by-step instructions for insulating a balcony:
- If you already have windows installed, then we start by sealing cracks, cracks and destruction. Check the wood paneling for rotten planks and fungi. If they are, then take steps to eliminate them. If there are no plastic windows, then you need to install them.
- In the event that you will later sheathe the balcony with clapboard (which is done very often), then you need to start arranging the lathing.
- Think about electrical wiring. Make the layout earlier, so that later you do not have to spoil the repair.
- We begin the process of warming. Lay insulation in the space between the battens of the sheathing, attaching it in accordance with the type of material.
- Fill up the gaps between the insulation if it is hard.
- Cover the joints with assembly tape.
- For greater thermal insulation, lay a layer of foam foam on top.
- Level the surfaces.
- Cover the walls with finishing material.
When carrying out work on the balcony, one rule should be taken into account - for repairing the balcony, choose the lightest finishing materials. The balcony is a special design and should not be overloaded.
Practice shows that it is best to insulate balconies from the inside with penoplex and penofol. It is better not to use minvata for this. Although it is soft and comfortable, it does not like dampness. And temperature drops on the balcony are inevitable, therefore, condensation as well.
What is the best way to insulate the balcony from the inside, if there are not a lot of funds? Use Styrofoam. It's not expensive, but pretty practical stuff. A balcony properly insulated with it will serve you for a long time and reliably.
Styrofoam, 4-5 cm thick, will be quite enough to insulate the walls of the balcony. Use liquid nails or special glue as an adhesive. Do not use heavy mixtures for gluing. To make the repair progress in stages, and the finishing materials do not interfere with each other, perform the work in a specific sequence.

Stages of work on the insulation of the balcony:
- Install plastic windows;
- It is best to start the insulation of the balcony from the ceiling;
- After finishing it, go to the floor.
- The walls are insulated last.
If you do everything correctly, then in the end your renovation will come together in one harmonious idea.
Insulation of a balcony with penofol (video)
When the repair work on the balcony is completed, you can start arranging it. If this part is on the sunny side, it is imperative to hang curtains. You can find options and solutions in our next article: https://homeli.ru/dekor/shtory/shtory-na-balkon-idei-i-foto.
What your balcony will look like after insulation depends only on you. Use your best skill, patience and time, and you will equip yourself a wonderful room, where it will not be hot in summer and cold in winter.
We choose modern materials that are suitable for insulating the loggia from the inside
To create a comfortable functional room in the loggia, it is necessary to carry out work on its high-quality insulation. A variety of materials are presented on the market today, so it is possible to insulate the loggia with mineral wool, expanded polystyrene, foam and other types of insulation. The choice of insulation depends on many factors. It is very good if there is an opportunity to consult with experts on this matter.
Mineral wool
Mineral wool insulation is the traditional and most common option.
This material can provide a sufficiently high level of thermal insulation and sound insulation.
At the same time, it is recommended to use mineral wool for insulation only if there is no load on the insulation. In addition, the insulation material must be protected as best as possible from the effects of moisture and the formation of condensation on it.
Mineral wool insulation works are carried out in the following sequence:
- First, all surfaces insulated from the inside are waterproofed. This stage is preliminary. To create a high-quality waterproofing layer before insulation with mineral wool from the inside, it is best to use special insulating impregnations. They can be bitumen and polyurethane mastic, special paints and varnishes. In addition, rolled polyethylene materials (sold in any hardware store) are often used as an insulator. What kind of insulator will be used does not really matter.
- Then you need to complete the lathing device. The installation step of wooden blocks should be about 1 cm less than the width of the mineral wool sheets. In addition, you need to select the bars in such a way that their thickness is slightly greater than the thickness of the insulating material slab. The fastening of the elements of the lathing can be done to the rough surfaces with dowels and self-tapping screws.
- To install mineral wool slabs, you need to select and dilute a suitable adhesive composition (which one is not important). It is applied to the surface of the slab from the inside, after which it is placed in the cell formed by the crate. The slabs need to be adjusted so that they are slightly larger than the mesh size. This will avoid unnecessary voids.
- As soon as the adhesive composition dries, it is recommended to additionally secure the thermal insulation material with your own hands using dowels-fungi.
- Surface cladding can be done with any suitable material. Any type of finish is suitable for this, which will not create a heavy load - plastic panels, plywood sheets, lining ...
- In conclusion, surface finishing and decorative work are carried out. Work in this case can be performed with any finish.
Good results and reviews are given by the material ISOVER.
Expanded polystyrene
Warming your loggia inside with expanded polystyrene gives quite good results. This material is produced by mixing polystyrene and special foaming components. The mixture is heated, subjected to high pressure, then foamed and carbon dioxide is added.
For insulation of the loggia with expanded polystyrene, plates with a thickness of 45-50 mm are perfect.
- Their fastening is carried out on dowels, double-sided tape and glue (which type of fastening to choose depends on the material of the walls). When insulating the loggia with expanded polystyrene from the inside, it is best to arrange the plates of the material in a checkerboard pattern so that they do not move under their own weight during operation.
- In order to prevent the occurrence of cold bridges, seams, gaps and docking zones need to be filled with construction foam with your own hands (when insulating with expanded polystyrene and polystyrene, the problem of cold bridges is especially relevant).
- As soon as the polyurethane foam dries, you need to cut off its excess with your own hands.
- To provide additional insulation, which is required for insulation with expanded polystyrene and polystyrene, it is imperative to lay a layer of special polyethylene foam with a thickness of 5-8 mm. In this case, a layer with foil should be located inside the loggia. This approach will allow you to form a high-quality vapor barrier layer with your own hands and ensure heat reflection. The seams must be glued with construction tape with their own hands.
- A wooden lathing can be fastened to the insulating layer (for this it is better to use small-sized bars that have been pre-treated with antiseptic compounds). In addition, instead of lathing, often from the inside, the loggia is trimmed with plasterboard sheets.
- On a wooden crate or drywall sheets, any finishing materials can be applied with your own hands.
You can do without the lathing and use a mesh for reinforcement, for finishing.
Penoplex and penofol
Very often penoplex and penofol for insulation are used in one insulation system.

One of the best materials.
These are high-quality insulating materials that have a lot of positive performance and technical characteristics. Many experts recommend using them specifically for insulating loggias from the inside. The use of such a heater for a loggia will allow you to create a comfortable environment inside the room and maintain an optimal microclimate on the coldest days.

Penofol for the loggia.
Insulation works using these materials are carried out in the following sequence:
- First, do-it-yourself preparation of all insulated surfaces: floor, ceiling, walls, parapet. The old finishing material is completely removed, all traces and debris are removed. After that, you need to carefully check the integrity of the structures from the inside so that they do not have cracks, holes and other defects through which cold air can penetrate into the room. It is important that the loggia is completely sealed from all sides.
- Then, vertical logs are installed. It is necessary to fasten the material with a certain step, the size of which will depend on the thickness of the insulation used.
- Next, penofol is attached directly to the lags. For this, you can use any suitable adhesives that are suitable for indoor use. During the installation of the initial foam layer, it is required to direct the foil outward.
- After that, the installation of the penoplex is carried out (the best option for a loggia is a material with a thickness of 20 - 25 mm). Laying the slabs from the inside of the loggia can be done independently - there is nothing complicated in this process.
- Finally, you need to glue another layer of penofol. In this case, the material must be positioned in such a way that the foil layer is directed inward. As a result, we will get a kind of cake, in which the main heat-insulating material (penoplex) will be protected with penofol on both sides.
- All joints that arose during the installation work from the inside of the loggia must be glued with construction adhesive tape.
What kind of insulating material to choose for insulating a loggia?
You need to understand that do-it-yourself work on insulating the loggia can be done from the inside and outside. Of course, it is much easier to make insulation inside the loggia. For this, a wide variety of thermal insulation materials can be used. Their choice will depend on the design features, operating conditions, the nuances of the installation work, therefore, in each case, special attention should be paid to the choice of insulation.
The purchase of the most expensive insulation on the market will not always be justified.
For example, if the loggia has high-quality glazing, high-quality construction, and no defects are observed, then you can use the simplest materials. In addition, the choice of insulation for the loggia will depend on whether heating is planned.
The better to insulate the balcony inside: what materials to choose
 If the apartment or house has a balcony, then it must certainly be used, since this is an additional, and sometimes just a necessary area. If you approach the issue with imagination and think over all the nuances, then you can get a small, but very cozy room. In order for the balcony to act as a room, it must be insulated. How to insulate the balcony inside is decided by each owner independently, taking into account their financial capabilities and pressing needs. But a few words should be said about the nuances of the process and about the materials used to insulate the balcony. The choice of these materials must be very careful and pay attention to all the characteristics.
Where to begin
It is necessary to start mastering any balcony with an objective assessment of its condition. If the apartment is located in a new house, recently leased to tenants, then you need to pay attention to the material from which the construction of the balcony is made. Also, in new houses, you need to pay attention to what the neighbors' balcony is decorated with. Often in such houses, neighbors try to adhere to a single style.
 We make masonry from foam blocks
But if the balcony is located in a far from new apartment and it has always been used as an open space, then the work will have to start with strengthening the balcony... Strengthening is understood as the reconstruction of the concrete platform of the balcony, and the strengthening of the metal handrail. Also, such an event as strengthening the lower part of the upper balcony can be included in this process, this must also be taken into account. After solving all these issues and choosing the material for the external facing of the loggia (balcony), you can proceed to the interior decoration. To simplify this stage, you can lay out a wall of bricks or foam blocks up to half of the balcony, directly to the double-glazed windows. This will save on insulation.
Advice: If all stages of insulation are carried out at the same time, then it is better to immediately install double glazing in the windows, since one glass gives 70% more heat loss in cold weather.
Preparation for insulation
To start insulating the balcony inside with any materials, you need to prepare. Having chosen a material for insulation, it is necessary to create a special wooden crate for it, on which it will then be attached. The exception is roll materials that can be mounted under the crate. This frame is made of beams with a cross section of about 4-5 cm. Transverse and perpendicular beams must be fastened so that squares of 50 by 50 cm are obtained. The lathing can also be made from a metal profile, but this material is somewhat more expensive than wooden bars. The main advantages of the metal frame are the ease of construction and ease of use.
Note: When calculating the necessary insulation for the balcony inside, you need to take into account not only the dimensions of the walls, but the floor and ceiling, since these two positions also need insulation.
Material selection
Insulation is placed in the crate on the inside of the balcony, which can be:
 Foam insulation is one of the most common methods of thermal insulation for balconies and loggias.
Styrofoam... The cheapest of these materials is plain white foam, 5 cm thick. If a room is insulated in cold latitudes, then you can take a thicker foam, it can reach a thickness of up to 10 cm.It can be easily cut into the required number of parts, and you can not additionally strengthen it, but immediately place the lathing in the cells for finishing materials. The material is absolutely safe both when working with it and during subsequent use. The insulation is completely odorless, does not emit toxic substances, and the evaporation of styrene in small quantities does not affect human health. The installation of the material takes place without the formation of dust.
 Mineral wool insulation
Mineral wool... Mineral wool is a little more expensive, but its sound insulation performance is much higher, so if you need to get rid of extraneous sounds, it is better to use it. This material is completely natural and completely fireproof. The combustion temperature of mineral wool starts from a thousand degrees. The inconvenience of laying mineral wool briquettes lies in the mandatory observance of safety measures. The material contains small glass particles that cause itching of the skin. Installation must be carried out in protective special clothing, goggles and a respirator.
Expanded clay... The material is an environmentally friendly insulation. The word "expanded clay" is translated from Greek as "burnt clay". The material is more often used when insulation of floors and ceilings... It is not entirely profitable for them to insulate the walls, since they additionally need to prepare a metal mesh as a support.
More information on how to insulate a balcony here. Tips from the masters and instructions in steps.
After warming, you will need to move on to the interior decoration of the balcony. Plastic panels are well suited for these purposes. Read more about them and their differences in this article.
The installation of high-quality double-glazed windows plays an important role in the insulation of a balcony or loggia. Which window profile to choose? - you will find the answer here.
Penofol... This material is one of the thermal insulating agents that has a reflective effect. It is a layer of self-extinguishing polyethylene foam with closed air cells. High quality aluminum plating, 14 microns thick, 99.4% pure on one or both sides. Penofol is a versatile material with steam, - hydro, - wind, - sound insulation properties. The material has the appearance of a thin, flexible, lightweight and environmentally friendly structure. Foil foamed foam can be used as an additional vapor barrier, it is very convenient for them to work, since it is sold in rolls and can be easily cut even with ordinary scissors. This material protects the room from outside moisture and removes condensation from the room.
Penoplex... It is a new material specially developed for the insulation of premises. The material is very easy to install due to its low weight, so its use on the balcony is now relevant. It is produced in the form of rectangular slabs of various thicknesses, which can be easily cut with a clerical knife. It is also possible to manufacture "sandwich panels" by pouring. Insulation with a rough surface allows you to easily attach and glue them with other materials.
 Izolon
Izolon... It is also a versatile material in terms of use. Confirmed safety in use as a heater and vapor barrier element. Excellent sound insulation performance.
The degree of thermal conductivity is compared:
- with 15 cm brickwork
- with 4.5 cm of wood
- with 4.5 cm of mineral wool
- with 1.2 cm of expanded polystyrene
Reduces noise of at least 18 dB.
These are the main materials for creating an insulating layer, which are now easy to find in any hardware store. We hope you now have more information about how how can you insulate the balcony from the inside, and then we will consider how to do it.
How to insulate
One of the best methods for laying insulation is layer-by-layer:
- First, the surface is waterproofed
- The next layer is the selected insulation material, which is also attached with appropriate fasteners. These can be nails, screws, plastic fasteners with wide heads.
- Then a vapor barrier is laid, which is attached with a construction stapler.
- At the final stage, finishing material is attached to the crate with the help of special fastening materials
 Styrofoam sheets are installed in the crate, and the joints are covered with polyurethane foam
You should get a layer with a thickness of approximately 60 - 70 mm, this is the distance from the outer layer to the finishing layer. This size may vary depending on climatic conditions. It must be understood that any layer of insulation requires financial costs and labor, therefore it is better to immediately make a balcony conscientiously and not try to save on trifles.
In a situation with floor insulation on the balcony the sequence is also the most. If it is decided to fill the floor with concrete, then first expanded clay is laid and the solution is distributed on top of it. The concrete solution must be carefully distributed with a special rule and try to make the surface as smooth as possible. Then ceramic tiles or other finishing materials can be laid on such a surface. Roll-type underfloor heating can be installed under the final finishing, and this will provide additional insulation of the room.
Find out more about how to raise the floor on the balcony with your own hands and what materials can be used to do this.
Read on how to choose an electric underfloor heating. Features of different models.
If the option of a wooden floor is chosen, then first the guide joists are laid, between which the insulation is laid. Then a finishing board or chipboard is laid on the logs. Laying of chipboard is necessary if the installation of laminate or linoleum will be carried out further. It is also worth noting that under the laminate you need to lay special backing, which will provide additional thermal insulation. When the finishing of the walls and floors is completed, the skirting boards are installed, which hide the joints of the finishing.
In the complex of works on the insulation of the balcony, it is necessary to pay attention to the ceiling. The process of warming is carried out in the same way as walls and floors. The task will be complicated by the moment when the balcony or loggia is on the top floor and there is no ceiling. In this case, you need to take into account the additional costs for the installation of the ceiling and roof.
When working on the insulation of the balcony, you should not fuss and rush this can lead to an unreasonably high consumption of material. If you approach the matter with attention and carry out constant calculations, then you can acquire a full-fledged additional room for little money.
How to insulate a balcony from the inside video
We invite you to watch a video on the topic of our article "Insulation for a balcony inside - choose materials", which shows in detail the whole process of insulating a balcony using penoplex and penofol.
How to insulate a balcony with your own hands: from the refrigerator to a warm island

To begin with, it is worth saying that there are two ways to insulate a balcony - from the inside and outside. External insulation, of course, is more convenient - precious centimeters of the area are not "eaten away", and the facing of the balcony facade becomes more pleasant. But this is a laborious process that requires the involvement of a construction crew and industrial climbers. Therefore, in the article we will focus on how to properly insulate a balcony in an apartment from the inside - this can be done independently.
For insulation inside the balcony, first of all, it is necessary to carry out preparatory work. They include several important stages:
- Where to start insulating a loggia or balcony? Free up space of all unnecessary things. It is best if the balcony is completely empty: it is much easier to work this way. Also, get rid of old finishes in advance.
- Fill up all the cracks - a lot of heat goes out through them. For small cracks, a weather-resistant sealant is suitable, fill larger ones with polyurethane foam - it will not only fill the voids, but also serve as an additional heat insulator.
- To make it easier for you to carry out the insulation work, it is important to smooth out cracks and irregularities on the walls and ceiling using cement mortar.
- If you plan to place light bulbs or lighting fixtures on the balcony, you should take care of the wiring in advance. To hide unpresentable cables, place them in plastic boxes.
- Before starting work, cover the opening between the balcony and the adjoining room with a film so that construction dust and other pollutants do not enter the apartment.
Is it possible to insulate the balcony in winter? Yes, you can. Only when carrying out work in winter is it necessary to choose frost-resistant materials, in particular, polyurethane foam.
How to insulate a balcony: what materials are better to choose

To understand how to insulate a loggia or balcony, let's first figure out what properties the materials should have:
- high strength;
- fire safety;
- water resistance;
- environmental friendliness;
- relatively low cost;
- ease of installation (if we want to do all the work with our own hands).
Most often, mineral wool, expanded polystyrene, polystyrene, etc. are used for insulation. Several of these materials are sometimes combined. We have reflected the pros and cons of each heat insulator in the table:
What is the best insulation for the balcony? The answer to this question depends on your preferences and financial capabilities. More details about the characteristics of heaters, as well as about the insulation of the apartment as a whole, can be found in our blog.