How to make an apartment layout with your hands from cardboard. Paper house on ready templates
Now we will look at the topic how to create a kindergarten patterns, a multi-storey or private house, as well as schools and future class in it from paper.
Learn how to create really complex projects is difficult, but in your power and interests to collect a decorative layout of the building on a scale of 1:50, by making the contours of parts and facades of structures, as well as the whole roof and frame. Templates and layouts of structures can be printed.
How to do or build a bulk house, apartments and rooms in it? The technology itself is not complicated, but for the first time it may seem difficult, especially for children, so we share it in stages how to do it. For the manufacture of a layout of the house, you will need a plywood with a thickness of six mm, as well as materials for creating facades, partitions and roofs. From plywood Let's make a frame at home and lay it on a smooth surface.
Gallery: layout of construction houses (25 photos)


Create a scan for a layout of the house with your own hands
 The process of the usual creation of sweeps No less interesting than working with their finished samples. To do this, you will need the program installed on the PC to work with graphics. It is best to take CorelDRAW or similar to it, processing vector image program.
In it, with an increase in or decrease in the size of the picture in the same ratio, the dimensions of the lines are changed, and the textures themselves. It helps to receive real images. Yes, and the library of the textures included in her shell itself, huge.
Fill in the texture detail of the scanner, you can find the ready visual view of the main parts of the layout. . The whole process, including the fill of the scan particles A specific texture, imposing certain effects and architectural details, as well as inserting pictures from the symbol library, will take from ten minutes to half an hour if the construction is not complicated. We will make a scan on our printer, and proceed to maquetting.
Creating complex paper products
The process of creating complicated huge layouts of houses is not very different from the previously described. Just such sweeps are made for individual parts of composite layouts.. On group photography of the entire assembly of such a layout, its individual parts and assembly scheme are shown.

09.06.2018
Templates of multi-storey houses made of paper for layout. Layout of paper houses with a scheme, cut and glue
7 890
22.12.2014
Of course, the main highlight will not be the material of the house, but its stylistics. We will make some of the houses and of them will create the ghost gaming city.
We will need:
- White paper.
- Pencil, ruler.
- Scissors.
- Glue.
- Black feltster or black paper.
- Print the template (PDF)
- Look at our ideas for kids, there
The ghostly, our city will be made by the location of the windows and doorways, I explain: on the wall of the house there are two windows and the door located in such a way that the face is reminded by the face (windows, the house - mouth). The house seems to be followed by you. Moreover, the shapes of windows and doors can and should vary in shape, and the houses differ slightly with dimensions, color and shape of the roof.

In principle, templates can be found on the Internet and print. Can be made by yourself.
On a sheet of white paper, black is a rectangle, it is long, equal to the length of the perimeter of the poorer, and the height of the house is excluding the roof. If you do not want to calculate the dimensions simply, draw for a start in the middle of the album paper sheet a rectangle long 16 cm with a height of 5 centimeters. Slide it with vertical lines along the long side to four equal rectangles. Then the second left rectangle (this is the facade) draw a triangle from one free side, the side of the rectangle is the base of the triangle, and the top looks toward the opposite side (the triangle is the end side of the roof). 
And on the other free side, we draw another rectangle to the second left of the rectangle. Its height will be equal to the width of the first rectangle on the left, (this is the bottom of our house). By the third, the rectangle on the left, add a rectangle with a height equal to the length of the two side of the triangle (these are the side sides of the roof), and we reinstate it from the same side as a triangle. On the latter, if you count on the left, the rectangle is drawing a triangle (the size is the same as in the previous one, the display is mirror, if it is not equilateral).
It is possible to draw a truncated triangle instead of the triangles, then the height of the side of the roof is equal to the sum of the lengths of the triangled triangle, plus the length of a smaller base. Now it remains to trim the flaps from the outside, so that the house can be folded and glued. Cut the layout.
Bending the bulk house from paper will be inside about the drawn lines so that they are not visible on the facade. Pre-draw or take windows and Deri.
The principle is understandable, make different houses, and play.

This is an instruction, how to make a house from paper with your own hands for the kids! I hope even it will take them for a while. Note: parts for these toy houses will need to be cut out of thick paper, so it will be better if an adult cuts them, not a child.
Creating a paper home with your own hands
Ideas:
Color the parts of the houses before collecting them together. You can draw the door frame around and windows. You can glue the cellophane inside the window. You can draw roof tiles. Or add windows or even two, and maybe the doors.


You can add people and animals. Create your own home. Make a church, school, hospital. Or maybe even you will make a whole village.


You can make the basis of the green color to imitate herbs. Create your own streets.
New Year's option to decorate a paper house

If you make a small town with a huge number of such houses, could you post a photo with him to the site so that I could look at him?
NOTE: My templates are not very good, but everything is fine in them. You can download and print templates. If you can print them on tight paper, it will be very cool, and if not, you will have to move the drawing from printing on tight paper.
You can also download all the templates for buildings 1 - 5 in one zip file shown by just below the house number 5. You can also download all templates for buildings 6 - 8 in one zip file shown just below at home number 8.
General instructions
After you cut out all parts, transfer all lines with a ballpoint, including the places for the loops on the doors and leave the doors open. Then glue them together. It is better to take quick-drying glue. If you make a house made of thick paper with any pattern on it, make sure that the drawing will be from the inside of the house so that it is not visible.
To keep parts together until the glue is dry, you can take a few clips, old can also come up.

1. We will start with the simplest projects and move on to the most difficult houses. Let's start with a very simple garage:

For template
2. This garage A little more, designed for two cars:

You only need 2 parts for it, floor / wall and roof. Press here For template
3. Now proceed to our first house:

Press here To get a floor / wall drawing and click here For roof
4. Next house Very similar to the previous one, but it is a little longer:

You only need 2 parts for it.
Press here For roof.
Please note that you need a sticky tape to bond some parts together. When gluing the roof to the house, keep the roof upside down in your hand and lower the house on it to make sure it is located in the center.
5. I. second house Not much more complicated, he has a chimney passing through a hole in the roof:

You only need 3 parts for him.
Press here To get a floor / wall template and click here For roof.
If you want to download buildings from 1 to 5 one zip file, click here . Please email me if you have any problems with the download file.
6. This house is a bit more complicated - a multi-level house:

You need 4 parts for him.
And for the lower walls and two roofs click here
This house is quite complicated! See carefully where you cut parts.
7. The complexity of this house lies in the roof and "l" shaped floor.

You will need 6 pieces for him.
For floor / wall templates, click .
For roof patterns / roof for canopy / chimney click here
For canopy templates / extra roof for the back Click here
This house is not for newcomers!
8. The last house with an unusual roof, a canopy and a chimney (very similar to the one above).

You will need 6 parts for him:
For floor / wall templates Click here
For roof patterns, pipes, pointed roof Click here
For canopy and its roof patterns: Click here
Be careful with a canopy; Mark every end of the house to which it will be attached. In addition, to install a pointed roof over the main roof is uncomfortable. I propose to cut off the two glued parts of the pointed roof and re-attach them with a scotch from the reverse side.
If you want to download buildings from number 6 for 8 zip file, click here .
There are also other houses, just now issue templates, but you can look at them in the finished form and download outline:
building 9:

Template 1 \u003e\u003e
Template 2 \u003e\u003e
Template 3 \u003e\u003e
house 10:

Template 1 \u003e\u003e
Template 2 \u003e\u003e
Surely many parents are familiar with the problem: the better Take a child how to tear it from a computer or television. A good option is a walk, but if the weather is not set, he immediately disappears. A fascinating occupation is represented by your attention, which will help your spell to pass a couple of cold winter evenings. The main thing is that for this you do not need to spend a large amount of money for toys. You only need to download one file and print it. As you can see, everything is quite simple.
We offer an entertaining game - a designer that will provide you a couple of hours of rest until the baby is busy with construction. It is better Join it, because you have to deal with glue. Such a wonderful time will only bring you closer to your child. Help him build a dream house! In general, the game is designed for children from three years under the supervision of adults. However, it will be suitable for the children of younger school age. In the latter case, you can afford a couple of hours of rest. But do not hurry to deny yourself in such an entertaining pleasure.
For a child, the game will be useful, because you need to glue everything according to the instructions. Here develops thinking, imagination and motor skills. You will need paper, scissors, cardboard, glue and, of course, paints. It is better to take and, for example, PVA, and glue - a pencil. The last option is much easier to use and give you a minimum of inconvenience. We simply print the downloaded layout of our future home, gently cut it out and proceed to construction.
If you enjoy the process itself, you can make a whole miniature town, gluing a few more houses. In fact, it is an excellent option for the New Year holiday. You can, for example, place your creations under the Christmas tree and put presents there. When you finish the construction, with the help of ordinary wool you can create the illusion that snow fell in the town. You can settle there a few inhabitants there or decorate the windowsill, for example with this composition. In a word, the construction of such a paper theater will be a great time-looking for your baby and, perhaps for you. Such a scope for fantasy and imagination will give you a wonderful mood!
Paper is the easiest and most suitable material for a variety of creativity. For months from three, the child makes attention to the rustling leaves and they are engaged in them for a long time and with passion. Becoming older, children do not lose interest in paper and love to make different items from it. They are insanely rejoice when adults are mastered with them.
And if you ask Chad, what he wants to do, most often it turns out that this is a house. Moreover, create your own hands, it is the houses that love both boys and girls. Apparently, children, let and unconsciously, already perceive the house as the main attribute of life. How fast and just make a paper house?
Tools and materials for creating a paper house
When you decide to brighten a family evening or a child in school will receive a task to make such a crawl, you will need a little fantasy, paper, glue and just a few tools. Paper can be any: thin from color sets, sheets of notebooks or albums, drawing (which, by the way, gluits perfectly) or pieces of wallpaper. We will need scissors, ruler and pencil, and sometimes brushes for glue.
If there is a stationery knife, it will help quickly and carefully do the slots of the winds and the door. The glue is suitable in the most different: in tubes, PVA glue, bulk, glue-pencil, braceter of own preparation or paper in bottles, tape. From your child's scope with a child of fantasy depends the selection of objects to decorate the future house. Paints, gouache, color pencils, beads, wool, lace and other items for appliqués.
You can make a magical action at a table, on a wide windowsill or sitting on the floor. If only the surface was smooth and resistant to glue and scratches (you can put a plank or plywood).
Preparing paper house sketch
Constructing a house, small or volumetric, simple or complex, first create a sketch. Work starts with drawing. If there are only small sheets for making a house, you can cut the drawing on the dotted and perform each part separately.

Cutting the drawing, remember that the right side will remain without bending for applying glue and need to be daughter. You can add the floor to the house sketch. But is it necessary? Without him, the child is more convenient to put toys: the dishes, furniture, "residents" of various sizes, and through the door not everything can crawl.

Connection of parts, decoration and paper house assembly
Then cut out parts of the house and begin "construction", missing and gluing special bends.
Some time will take drying the product.
A new building lacks stability - it is better to install and glue it to a cardboard frame.

The design of the house can be complicated by adding an extension, porch, attic, second floor, balcony and other elements. Stages of work remain the same: creating a sketch - cutting parts - decor - bonding - drying.
Other options for paper houses
Very interesting, it turns out of paper round shape houses.
When creating a sketch, the housing of such a design looks like a solid long rectangle. Blooming a snaps of one column. And the roof is more often drawn separately in the form of a circle, then manifests and connects with the body with glue.

But it is possible to build a drawing in unity with the roof. Then there are many cuts for the roof, which then you can glue the flashes, creating a conical form.

With great enthusiasm, children make fabulous "log" hut.
Materials for work take the same, but the technology of building such a house is completely different. Here, first harvest building material. Of the same long paper rectangles with a pencil make tubes - "logs".

Will it be a little domishko or bulk domain depends on the size and number of rolled tubes. Usually the guys compete with adults or among themselves who rolls or smoke more.
Then the walls are neatly folded from the finished material. There are options: the walls are glued with the lumen, where there are two logs in a row, or a solid laying of four tubes with displacement of them to the edges in the next row. The roof of the house can be a "log" or smooth.
Patterns and layouts of houses
Save yourself to your computer scheme and print.
You can make a paper house in the Origami technique
The creation of origami figures, among them and houses, according to finished schemes, is the development of the logical and spatial thinking of the child, activating its mental processes. Origami can be engaged in any place, for example, in line for the doctor.
Having created my own first simple houses from paper, you can come up with a lot of others extraordinarily and more often to make them together with your favorite child.
Print, cut, Skeleton 3Paper houses. Print, cut, spool.
Name: Paper house I.
Format: PDF.
The size: 83 mV
Focus on: Letitbit and depositfiles
Description: Print, cut down and spool.
The kit includes: Bakery, Bathroom, Living room, Living room with fireplace,
Children's, Cabinet, Cafes, Bedroom, Kitchen, Toy Shop, Meat Shop, Vegetable Shop, Flower Shop, Fish Store, Restara, Japanese Dining Room ...
All houses in one archive
http://letitbit.net/download/7729.7c4904a413acc3f41dd7a9fa56/____________.Rar.html
Bakery
http://depositfiles.com/files/5bxf09x0g.
Bath
http://depositfiles.com/files/8lks6dpoj.
Living room with fireplace
http://depositfiles.com/files/evjdxs8sy
Living room
http://depositfiles.com/files/iox6kk45o.
Children's
http://depositfiles.com/files/u8p7LCqog.
Cabinet
http://depositfiles.com/files/s27qry56d.
Cafe
http://depositfiles.com/files/7gel2i34b.
Room
http://depositfiles.com/files/ikfmub4xe.
Kitchen
http://depositfiles.com/files/l774x5px4.
Toy store
http://depositfiles.com/files/ccfj7q49p
Butcher shop
http://depositfiles.com/files/g0szu7bpz.
Vegetable shop
http://depositfiles.com/files/txn6u7t4k.
Restarant
http://depositfiles.com/files/2bj2t2sj1
Christmas
http://depositfiles.com/files/ynqbp9uui.
Fish shop
http://depositfiles.com/files/g43srx4za.
Flower shop
http://depositfiles.com/files/4a8a04zca.
Japanese dining room
http://depositfiles.com/files/9npbqpmmr.
Paper figures for each letter of the English alphabet. Print, Cut, Skool
Name: Paper figures for each letter of the English alphabet
Format: PDF.
The size: 1.86 MB.
Focus on: Letitbit and depositfiles
The kit includes: Apple, Bus, Coffee Cup, Duck, Elephant, Fish, Glasses, House, Island, Juice, Kettle, Lion, Milk, Notebook, Ottoman, Post, Quoits, Rucksack, Star, Tote, Umbrella, Vase, Watch, Xylophone, Yacht , Zebra.
Description: Print, cut and splashes
Paper houses
Name: Paper houses
Format: PDF.
The size: 12 mV
Focus on:iFolder.ru.
Description: Print, cut down and spool.
Print, Cut and Square House Halloween
Name: House Halloween
Collective
The year of publishing: 2007-2008
Pages: 25
Language: Russian
Format: PDF.
The size: 5 MB
Focus on: IFolder, Rapidshare.
Description:Print, cut down and spool house-halloween.

Name: Paper models of cartoon characters
Format: PDF.
The size: 8 mV
Focus on: iFolder.ru.
Description: Everything is very simple - print, cut down and spool!
Gingerbread house. Paper model

Gingerbread house . Paper model
Developer: Canon
Format: PDF.
Language: English
It will be wrong to assume that only little girls make layouts of paper houses from paper. Of course, your princess will also be glad to such a gift, but they can come in handy in the architectural idea. Before being taken for construction, always make a reduced copy. At the same time, PVC (polyvinyl chloride) is used, from which the substainless parts cut out the milling machine. Then they are connected by a solvent.
But you can repeat the masterpieces of architects without special equipment. Such a house can be not only a useful layout, but also decoration at home. The most common material for this is paper, so the process will do not be too expensive.
We buy materials

You will need colored paper or cardboard for work. The latter is preferable for complex models, as an increased strength is required. For sweep it is better to take paper.
All windows, doors and other small pieces will cut through with a knife. Watch it to be sufficiently sharp, buy better in a construction store.

You can connect the details as super-glue - it allows you to speed up the process - both PVA (but it is better to speed up with the help of a hair dryer). In addition, scissors, pencil and ruler will be useful. For decorating you can use paints.

Select the scan

If this is your first experience in playing house layouts, it is better to take a finished scan. They can not only be found on the Internet, but also make themselves. This is a very exciting process.
You can choose almost any program. It is desirable that she worked with vector images. One of the most convenient in this plan is CorelDRAW. Building it is done very easily, you can change the thickness of the lines and load your own textures. But the built-in library also pleases the proposed photos.

The first step must be drawn the oblong rectangle. Now it needs to be divided into two pairs of the same walls located through one. On the lower edges you need to build the floor, it is attached for one of the faces to the general layout. The roof is divided into segments and also attach. After that, you can add architectural elements and visual effects. And do not forget about stripes fastening.

Stages assembly

Print and cut the previously obtained scheme.
If you do not have a color printer or you did not use textures, you can translate the blank to the cardboard.
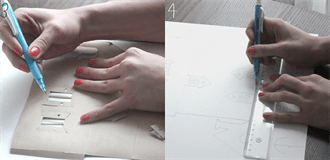
With the help of a needle and sewn mark the windows, doors and decor elements. Cut is needed all at once, entirely. And preferably a stationery knife - scissors will leave serifs. Pre-lay the plywood sheet.

Additionally, make shutters, doors, canopies and the like. We will glue them at the very end. Using the ruler, take all the bends - it will be easier to collect.

Video on the topic
In our selection of video lessons, you will be able to find out how more complex houses are created, and many interesting ideas will handle:
We continue the section Cottage and offer you an article. We will not offer you to learn how to use computer programs for 3D modeling, especially since it will still be drawn cottage. We offer you two simple ways, like using only the skills gained in school, make a beautiful, realistic and useful in all respects of the cottage layout.
A realistic cottage layout with your own hands, as we said, it is a very thing. But the question may arise: "And what is the benefit of the real layout of the cottage, and even made with your own hands?" The answer is very simple: thus you balance your ideas and a real world.
So, there are ideas, thoughts, imagination, the fact that the future cottage means for you:
- how many rooms there will be
- how it will be comfortable, good,
- what mats in the interior design will be used,
- how there will be warmth (by the way about heat - we recommend to study the article Heating at home - for tenants !; Very good in all respects article)
- what there will be there
- what kind of bathroom paint will be used,
- what will be a living room design
- etc.
All items are combined with a common feature - all this is in mind.
On the other hand, there is a real world as a whole, and the embodiment of ideas in the material in particular. Of course, the complete incarnation of the house is real. However, much more useful when a realistic cottage layout has been pre-created. So, perhaps you know that in any large construction there is always a layout of the future at home. What for? It is in order to agree on ideas with really existing (at least in the layout) things:
- walls with a real thickness,
- ceilings at the desired height,
- partitions at nodal points,
- real height of the floor, taking into account the "Warm floor" system
- etc.
What is the practical result of balancing mass and significance by creating a realistic cottage layout with their own hands?
Well, at least, the cottage layout will save you from many errors and clarify a huge amount of data.
Simple example: There is a beautiful picture of the cottage, color and volumetric. However, the construction of the cottage layout on this picture showed the full futility of a similar plan. Why? Because the rod of the roofs have just above the entrance. And in winter, everyone who includes and overlook, will receive the charge of rain and snow right behind the collar. And if you consider that the snow from the roof is used to fall, then the owners of the house will spend many hours, just raking the snow from the roof in front of the entrance door.
While simple realistic maquetting of the cottage makes it possible to avoid a huge number of similar errors. A question may arise: why exactly do it yourself? Why not entrust it to experts? Because live in this house is not experts, but you. And specialists, making a layout, cannot read all your thoughts and desires about the real coziness. Therefore, as a result, you will get a really cozy and harmonious house - just not for yourself, but for those who made the layout.
By the way, the layout is a useful thing, even if the house is built. With it, you can visually see and plan the redevelopment of the rooms, the completion of the room, garden accommodation and other vegetation. Not to mention just an aesthetic contemplation of your own home from a bird's eye view. Therefore, we suggest you take advantage of two simple ways to create a realistic layout and prevent problems in advance.
The first option is a realistic cottage layout of a foam.
To create a realistic layout of a polyfoam cottage, you must:
- a simple smooth ceiling tile foam (more about it - in the article "Ceiling tiles: how to glue optimally?");
- macatenie (Stationery) Knife
- scissors
- pVA glue
- a little time.
Why is the ceiling tile foam? Because this material approached as it is impossible by the way. Firstly, it has a thickness of 0.5 cm, which almost corresponds in proportion to the thickness of the present wall, and secondly, the ceiling tile foam is very easily and quickly processed - it can be chopped into smooth pieces of a conventional macate stationery knife. As glue, you can use PVA glue. Or remaining with the repair of the dragon glue.
To make a layout at home, you need to know exactly what you do. That is, you need to have a drawing of a house, a sketch or a plan with basic sizes. In principle, enough draft architect sketch.

In practice, the scale is used 1 m \u003d 2 cm. This proportion is easy to count, and the dimensions of the layout are good - the layout of the house is not large and not small, the wall thickness is almost proportional. And then a lot of routine work - the markup of the foam, cutting the foundation, walls, roofs, gluing pieces together.
The layout of the house is best to do the collapsible so that you can see the inner location of the rooms, stairs and furniture. For this reason, you should not stick the second floor, and it is better to make it removable. All elements (if possible) are made proportional - and length, and width, height, inclination angle, relative location.

At the layout you can clearly appreciate the spread of light in the bright time of the day. You just need to know, in which direction to the north will stand the house.
A couple of words about the cottage layout using cardboard
To simulate a realistic cottage layout using a cardboard, you need a thick cardboard from cardboard boxes. Best drawers in which air conditioner, refrigerator and other large household appliances were wrapped in. The thickness of this cardboard is also suitable for proportional modeling, as well as foam.
Plus, an important positive moment of cardboard - it is cheaper than foam for the ceiling. On the other hand, with a cardboard a few more troubles. However, just not knowing what and how to do. So, to create a cottage layout with your own hands you need:
- cardboard dense, high-quality
- male knife
- scissors
- pVA glue
- a little patience.
The procedure for working with cardboard is essentially different from working with foam. Only one nuance: the walls are better glued across, not along. That is, build them with layers, and not to put at once in full height. So the walls will turn out much more durable and, since they are cut into width, much more neat than the cardboard partitions immediately put into the height.

And cardboard, and the foam can be painted in "Natural" for the house of the color. This will help to decide on the colors in the interior (for example, using the article "Colors in the interior in the light of" Teaching about Color "Goethe"). In addition, the color can be drawn the location of heating, water supply, sewage, ventilation, ventilation, and so on. What greatly facilitates the real calculation of the route meters of materials used. And at the same time it will help to avoid unnecessary loops and intersections.
In the basement, you can approximately be the washing machine, a boiler, for water and other "basements" elements. Similarly, a bathroom, living room, kitchen and other useful and vital premises are planned. That is, using the layout, you can, for example, decide on the features of the planning of the premises. For example:
The room on the first floor is quite spacious, so any redevelopment is possible - you can separate, for example, a cuisine by partition, or hide the inputs in the bathroom and toilet. The sofa can be put in the stairs, and the kitchen is separated by a bar counter. An option without partitions or with sliding partitions is preferable if you are going to get parties and crowded gatherings - then you need a lot of space.
By the way, an important nuance: a cottage layout is best done taking into account the site, and not just a house in itself. This will help choose the optimal location of the house relative to the surrounding landscape - high-voltage lines, high trees, swamps with mosquitoes, etc. It will also allow to plan a plot so that later the problems with trees, pillars, mosquitoes and, etc. have not arisen.
Thus, a realistic cottage layout made with your own hands is a good help in construction or updating your own home.

According to the materials http://maketdoma.narod.ru/rukami.htm.
The idea to build a cottage is simply great, but what will it look in reality. Yes, you can look at the computer monitor and in magazines and architects directories.
It became very interesting, so I suggest a little experiment and feel like an architect and build a cottage layout on your own. This, of course, is not so time consuming and difficult, as with a real cottage, but it will have to be sufficient enough. But this process will be very useful experience, then it becomes clear why.
We need such things:
- pencil,
- marker,
- scissors,
- compass,
- stationery knife,
- protractor,
- line
- tight and ordinary cardboard,
- paper,
- pVA glue,
- polymer glue universal,
- scotch,
- ceiling tiles polystyrene foam.
Instructions for action
The method of creating a layout is quite simple and interesting. To begin with, we draw a floor plan and two tiles with a polymer glue and laying a sheet of paper between them and glue the model of three layers in each other, it turns out the model of three layers: tile, paper, tile. A very reliable thing is obtained.
After caught what the height is the cottage (sized size), we cut our tiles on the strip size from the floor. Immediately cut the windows and doors and make cutouts for connections. We glue the tiles with polymer glue, this process will pass without difficulty, glue glues without problems. To strengthen the design at the corners of the tiles can be glued paper strips. Also, to enhance the frame of the cottage layout, it is enough to glue the floor to the cardboard. It will be stronger and more stable, which will be easily attached to attach the second floor of a conceived cottage.
Walls that are not at right angles are located, do this:
- place the corners, but not cut to the end;
- gently cut the tile of foam on both sides, trying not to cut the paper;
- from the inside of the fold of the walls on the angle of the wall cut out the foam.
All carried out manipulations with blanks under the wall of the cottage layout, allow you to bend foaming without difficulty. It is best to do every floor separately, and then fasten together. The roof is preserved from the ceiling tiles and glue with polymer glue. After receiving the result, in the form of a layout, it is enough to glue the elements of the cottage with colored paper in accordance with the writer of the author.

What was conceived
The first thing was determined the scale of the real cottage and determined the size of the layout. It turned out that, in three centimeters layout there will be 1 meter of real house. On the cardboard is a dense application of floors with appropriate sizes. It should be noted that these plans will be used in the construction of this cottage.
Bonding tiles put the paper and thus achieved the strength of the future wall layout. It should be careful with the glue polymer, not overdo it in order not to get out of the edges, and it was aesthetically, moreover, areas with a thick layer of glue difficult to cut the panels.
The layout is not done in full height, and from the segments of the foam of the necessary length. At one of the pieces, one of the pieces were cut out from the bottom of the groove, and the following marked the groove on top and fold together, as if the constructor. The best option will make grooves from the edges and in the middle. For strength to glue PVA glue paper. The strength was small, and the best option was to glue a cardboard size with a foundation. Polymer glue glue is best.
After such fortifications, no mechanical damage is scary, even the fall holds glued parts together. You can even try to quit, check, will not fall apart. All holes that are designed on the plan at home, it is better to immediately cut on the layout items, and then glue. It is much more convenient than cutting up windows and doors on the finished model of the cottage house.
First floor of the future cottage
We define the size and, using the experience of creating a foundation, we introduce, by the same method of gluing and compound, for the walls of the first floor. In the idea there is a winter garden, we carry out the creation of the walls in this way - gently cutting the foam, not rebel, we create walls, cutting the foam from the inside to the angle. It so happened that the parts hold onto the paper very easily and conveniently bend.
Attic
The idea was not completely realized, invented attic did not come out, as I wanted, so it turned into a full-fledged second floor. When plastic tiles ended, and had to purchase. These tiles turned out to be different, much better. There was no characteristic structure of foam and it turned out to be more convenient to work with it, the only thing that was wrong was the size, they turned out to be much thinner. But already there is a glue, which simply did not replace, turned out to be all glued down with a thin layer of glue and wonderfully came out. These panels managed to cut much faster and easier, the granules kept in a bunch.
Created a roof
Whatever our roof has been kept and was beautiful, you should put a couple of pieces of foam in the middle of the model and stick one more to them. The lip of the roof was released, in the form of the letter P. planes for the roof cut out of the cardboard and glue the scotch. For the winter garden, we also build a roof from cardboard and put on thin beams. The roof above the garage is provided by the project warm, so it is better to use a thick cardboard or foam leaf. It turns out everything in accordance with the planned plan of the house, however, some details of the cottage had to be replaced, rather not to replace, but to revise constructive solutions to the issue.
Even very good, that we decided to make a cottage layout. According to the degree of creation of a layout, some are not clear, not immediately obvious, the nuances of the construction of a real cottage. The layout makes it possible to analyze whether the rooms are conveniently located, to realize what roof is more suitable, and come up with something new, for example, the location of the balcony. In subsequent experiments with the design inside and outside the house, the layout is undoubtedly useful.
The occupation turned out to be exciting and useful. This, of course, is not a super model developed by architects in a specialized program on a computer. But the visual allowance is very good. Then children can be given under a dollhouse, here's who, and they will remain satisfied with such a masterpiece.
Windows in 3-D model house