Dual homemakes with their own. Useful homemade for giving and gardening with their own hands
To work in the country and garden, there is always a mass of various tools. From the correctly selected tool depends on the quality of the land being processed, the number of future harvest and the spent forces.
Tools used in the processing of land
To apply a tool for working in the country, it is necessary to know what it is intended, because it will be difficult to dwell to the earth, for example, a symptoms.
Shovel
The most necessary tool in the country, of course, is a shovel.
Most often used sapper, scooping and bayonets, and the latter can be with a rounded and rectangular bayonet.
Soviet usually use when you need to collect something (for example, garbage or snow), download, mix or roll. They look exactly the same as the scoop, only larger size and with a long stalk.
The rounded bayonet shovel is drunk hard ground, harvest, and it can also be destroyed with small roots, due to the sharp end.
The rectangular bayonet shovel is used in the country for the coke of loose soil.
All types of bayonet shovels are flat and completely vertical, only on the top of the bayonet there are bent into one side of the edge - to stop legs during the coppe.
Shovels are usually made from steel, stainless steel and titanium. The latter are the best in quality, have light weight and dirt to the surface practically does not stick, but they are not looking.
Tip! Do not purchase aluminum shovels, as they are fragile and will serve very little time.
Shovels from the shovel most often made of wood. At the end, the Y-shaped handle can be added to make it possible to better make efforts to row hard soil. The main thing is that the cuttings are high-quality processed, without sticking bitch and the zoam. It is not recommended to buy shovels with cuttings, painted with varnish or paint, as they will slide in their hands.
Another kind of shovel - drainage. Already from the name it becomes clear that it is used to create trenches and cleaning from garbage. Its bayonet has an extended shape with rounded edges and rounded end.
Important ! Choosing a shovel, follow it on yourself, it must be below 10 cm of your shoulder.
The sapper blade is used to jump holes or transplants of small plants.
Pitchfork, roasters, flat
Forks are another necessary tool for giving. Vilafts with straight teeth can be attended solid land, with curved and long folded hay, and with short and curved work with a compost.
Vilafts often dig vegetables, as it is less likely to cut them, and also remove the incomprehensive garbage.
Attention ! Buy all-metal villas and, it is desirable that they are carbon steel. The distance between the teeth should be the same, just like their length.

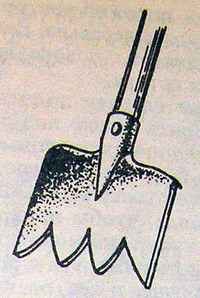
In the number of important tools for cottage and garden includes a chippet (hoe). It is used to remove weeds, plundering plants, loosening, breaking lumps and creating furrows. The design of the chipboard consists of a cutlery, which is imposed on a right angle tip.
During the purchase of the chip, pay attention to the blade, it should be a thickness of at least 2-3 mm.

The flattened is a tool for an amateur, someone besides him, no other tool for the cottage does not use anyone, and someone did not like someone, especially the owners of a very hard land. It looks like a metal bracket, fixed to the cutting.
It is very important to buy the original of this tool, and not a fake, which is absolutely nothing to do.
Rake
Rables in the country and garden are aligned with the land after the steaming, they break off the earthen lumps, collect trash.
Metal rakes are produced with straight and twisted teeth, as well as various widths of capture. Rables with straight teeth will be more convenient to collect garbage, and with twisted ground.

Fan rakes are used only for cleaning, such as grass and foliage.

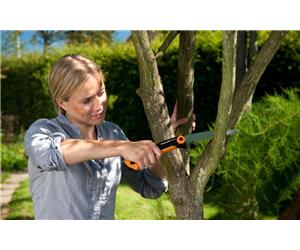
Secateurs, Sulls, Garden Scissors
In general, these tools for home and cottages are a sharp blade. All of them must leave behind a neat slice that does not bring harm to the plant.
SUCHES - a tool for cutting thick branches. Both blades are sharpened on it.
Secateurs are water-powered and stubborn. In the rod, one blade with a recess, and the second convex. This secateur is cut off young branches. The thrust secretor has one blade, and the lower part is made in the form of stop. It is used to circumcise dry branches.
Garden scissors are a tool for trimming shrubs. They create masterpieces from the bushes in the form of various balls, pyramids or other figures.
Choosing secateurs, pay attention to the manufacturer, as it is better to buy Finnish, Swedish or German tools.

Tip! Sample the scissors on your hand to feel the handles if they are not pressed into the palm.
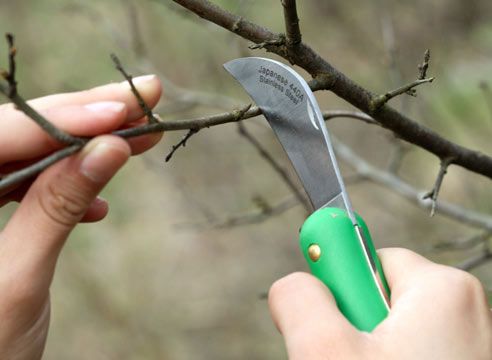
Saws, hacksaws, knives
Garden saw and hacksaw help to remove old bush or tree. For any saw, the main requirement is a smooth cut. After the spill should not be sticking in different directions of the bark or chips.
He strongly affects the size of the teeth than they are smaller, the smoother will be a cut.
Garden saw and hacksaw have a rounded end so as not to damage the tree during the spill of the branch, and also narrows by the end.
Important ! Constantly watch and at the time of the teeth of the saw in time, otherwise you can damage the plant.
You always need to keep the knife and necessarily very sharp. It will be possible, for example, to collect harvest or clean the wound on the tree before treatment.
Cultivators
Understand the land is not only a shovel, but also a cultivator.
Handmade cultivator is a few rotating disks (usually made in the form of stars), fixed to the cuticle, and a special knife for trimming roots. There are with different widths of capture.

You can purchase a gasoline or electric cultivator. They are produced different sizes and power. More lungs are used in small areas with soft soil, and heavy can be used on solid soils, and many different nozzles are attached to them.
Small and other tools
Be sure to have sets of small tools in the country. They will always be needed to work with a seedler and a transplantation of small plants.
The following tools will also need:
Non-standard tools
Unusual tools for the processing of land in the country include light-glass and potatoes "farmer".
Langokop is called a wonderful tool for giving, since they can switch to the ground several times quickly, while spending much less strength, and not straining back.
Externally, it looks like wide forks, but with a curved handle, in order to rely at once with two hands. The handle is made of a hollow tube to ease the weight of the tool.
There is also a special step (clamping bar), which will need to be reeded by foot.
The width of lungokop is 60 cm, and the height is 135 cm.
The entire design is covered with powder paint to protect against corrosion.
The tool for the garden and giving "farmer" replaces several types of inventory (forks, shovel, rake), and also facilitates work, as you can dig without using hands.
The tool has special adjustments to change the purpose of the destination.

Storage of garden tools
Any garden tool for home and cottages must be properly stored, then he will be able to serve for many years.
Preparation of storage tools consists of several stages:
- cleansing from dirt, grass or other garbage;
- drying (every detail of the tool must be carefully dried, so wooden parts will not rot, and the metal will not be corrosion);
- lubrication of metal tools with oil.
Haves, secateurs, saws are best stored in covers. If there are gasoline saws or cultivators, it is recommended to drain fuel.
An important role is played by the way tool storage. It is desirable that each tool is suspended.
The storage space should be absolutely dry and dark.
Garden organizers
In order not to waste time looking for the desired tool, you need to do or buy special organizers and storage shelves.
Board-organizer has long been used in the kitchen, in the office and for storing garden tools, it will also fit perfectly. It has many cells in which you can put a small tool. Due to the small design, it can be hung anywhere.
Wall garden organizers may not only have cells, but also shelves. There are also box organizers with lots of drawers.
In principle, most organizers can be made with their own hands.
For example, wooden pallets can be used to store a large and long tool (shovels, forks). In order for the pallet does not fall, it is better to fasten to the wall.
With the beginning of the spring season, the owners of garden sites arise a lot of worries. Coming time to prepare space for. Then, to get rich yields, it is necessary to put the seedlings or seeds correctly, and then during the summer carefully care for plants.
For all these processes, there are certain tools that can be purchased in specialized stores or make themselves. Some of them are very unusual, and are the fruits of the creative approach of experienced gardens to difficult work on Earth. About how you can make non-standard, comfortable and efficient garden tools with your own hands to significantly facilitate the processing of the Earth, and it will be discussed in this publication.
Where to begin?
As you know, almost the entire garden equipment is made of metal, so it takes a number of instruments and, of course, the ability to apply them. If there are no problems with this question, it remains only to prepare them. For those who are just starting their way in the independent manufacture of metal products, it makes sense to submit a list of minimally necessary:

- Usually, every economic owner of a private house has this device, since there is always a lot of work on the site for which it is necessary.
- Before starting welding, metal parts requires stripping their edges, and after the work - removal of slag residues. For these processes, rigid steel brushes are used, which can be manual or in the form of nozzles on a drill or grinding.
- The hammer-slag separator will be required to scroll suture slag.
- Chisel, stamps and hammer are used for branding the seams and the cutting of defective places, as well as the removal of frozen splashes of the metal.
- Templates, ruler, square, drain, roulette, as well as other measuring instruments are used in assembly operations, in the preparation of details of the future design to welding.
- Grinders - "Bulgarian" with metal circles will be needed for cutting parts. It is needed for final finishing - stripping seams, sharpening cutting planes.
- Personal protection kit. This is a welding mask, gloves and a welder suit, instead of which can be used with dense natural tissue.
- Metal table or goats for welding work.
The execution of welding operations requires a certain experience.
The acquisition of the device does not at all make it the owner of the welder. It will be worthwhile to "fill arm", starting with the simplest seams. And we must be prepared for what to get will not immediately, patience is required, effort, perseverance. - Read in a special publication of our portal.
If these tools are available, and experience in welding works is enough, it's time to choose a product for manufacture. The drawing of the future device can be found or developed independently, to the best of its abilities.
Several useful ideas will be as suggested below. They can be taken as a basis and, if desired, improve in their understanding.
Non-standard garden tool available for self-making
Today, manufacturers of gardening inventory, taking into account the heavy work on the processing of the soil, developed and offered to the consumer a considerable number of different devices that not only jump, but also explode the earth, while at the same time removing weeds. Such tools allow to significantly reduce the time to prepare the beds, protect the back from excessive loads.
Some of these means "small mechanization" can be made independently, saving a decent amount.
Miracle shovel
This tool appeared in the commercials of the manufacturers of the garden inventory relatively recently. And at the same time, many craftsmen use a similar adaptation for no first year, making it independently. And, I must say, only taking its effectiveness and convenience.
As soon as this invention is not called - both "miracle forks" and a cultivator ripper. But whatever the name is attributed to him, the main thing is that it greatly facilitates the labor of the gardener.
There are several varieties of the "miracle shovel", differing from each other with their design. But they all work according to one principle. Therefore, you can choose the option that will seem simpler in version and convenient to use.
First option "Miracle shovels"
This is the most popular version of this tool. Its in the finished form can be found in specialized stores or at the fairs of the garden inventory. Before proceeding with the independent manufacture of such a model, it is worth carefully considering its design and understand how it works.

The shovel consists of the following details:
- Workers
- Front stop.
- Rear emphasis.
- Forks of the front stop.
- Tulika for installing and fastening a cutlery.
- Stalk.
- Lever mechanism.
"User Manual" of this tool can be represented as follows:

- The shovel-ripper is taken behind the cuttings and is installed on the ground on the front stop.
- Further, the workers are sticking into the soil so that the lands touched and rear emphasis.

- Then the shovel cutting down down with a small effort on himself. Thanks to this, workers will begin to move upwards, lifting the soil layers.

- Forks located on the front stop, passing between the teeth of the workers, will break the land. In this case, the soil reservoir do not have to turn over, so that it will not be disturbed by a fertile layer.
- After that, the shovel moves to the next plot, and the operations are repeated.
This variant of the shovel is designed for soil pumping at maximum depth, equal to the length of workers. Accordingly, the width of the processed band will be equal to the width of the workers. In the example shown, the length of the teeth of workers is 250 mm, and their width is 430 mm.

This figure shows a "miracle shovel" in disassembled form, as well as the arrows, the process of its assembly is shown. This visual instruction will help to collect any version of the "Miracle shovels" design.

In order to make such a tool, it is necessary to prepare the following material:

- For the manufacture of workers, the forms will need:
- segment of the steel corner of 20 × 20 × 4 mm or profile pipe 20 × 20 mm, 460 mm long;
- Cut a round tube ½ inches, 220 ÷ 250 mm long - for the manufacture of tolections;
- two metal plates with a size of 100 × 40 × 4 mm - to fix the tulika on the frame of the front stop;
- Six segments of steel round (Ø 8 mm) or, which will be better - a square rod with a cross section of 8 × 8 mm, a length of 240 mm.

- For the manufacture of the frame of the stop with the front forks, it will be necessary to prepare the following details:
- For the supporting so-called skis, two cuts of a round tube with an outer diameter of 10 mm, 710 mm long;
- crossing, which will be attached to work forks, will require a segment of the profile pipe with a length of 460 mm and the size in a section of 20 × 20 mm;
- the second cross, on which the trees of the anterior should be welded, is made of a pipe with a diameter of 12 mm;
- a pipe with a length of 170 mm and a diameter of 12 mm for compounding a frame with a supporting heel structure;
- For the reference part, it will be necessary for a corner having a size of 15 × 15 × 4 × 330 mm;
- Six segments of a round rod with a length of 200 mm, similar to that applied for workers.
- Reliable wooden stalk.
Work on the manufacture of miracle shovels are manufactured in the following order:
| Illustration | |
|---|---|
 | The first step is placed and cut the part for the design of the shovel. It is best to prepare first elements of workers forks, and then the support frame. Further, all the details will be prepared according to the drawing during the installation work. |
 | First of all, the support frame and the front forks are manufactured. In order to make a pitchfork, a pipe markup is made under the holes that should be located in a pitch of 65 mm. Non-core holes with a diameter of 8 mm are drilled on the intended centers. Then the segments of the reinforcement are installed in them, which will become the trees of the front. |
 | Further, "skis" are prepared for welding, that is, the side details of the support frame. One edge of these poloz should have a small bend for better slip on the soil. In order for the pipe to retain the specified form when using the tool, on it, retreating from one of the edges of 100 mm, make an incision, thanks to which the hard curvature is given. Then she boils down, which will give stiffness to detail. You can do without an end, giving the form "skis" on the pipe bender. |
 | The next step on the profile pipe is made marks for the welding of "ears" - these are two metal plates with dimensions of 300 × 20 × 4 mm. They drill holes for the hinge compound of the support frame with workflows. Instead of plates that are quite difficult to weld, you can use steel corners with holes of the required size. |
 | The distance between "ears" should be 100 mm. |
 | The next step to the profile pipe, on the other hand, exactly in the middle at an angle of 120 degrees is welded by the rear stop consisting of a round tube with a cross-line from a metal corner. |
 | Now that all parts of the support frame are ready, they are collected in the overall design of welding. It is very important to exhibit the frames of the frames in relation to it at a right angle, otherwise the shovel will function not well function. |
 | Next, it is made of a toleic for workers, it should be welded exactly in the middle of the corner on which the teeth will be fixed. You can download the pipe on one side by giving it an oval form, as the master did in this case, or leave the diameter the same along the entire length. Having retreated from the top edge of the tulika 50 mm, there are places for fixing metal plates, in which holes are drilled in advance to create in the further hinge compound with "ears", welded on the support frame. The teeth are welded to the corner later, after fitting the attachment. |
 | When the toileik will be ready, it is trying on the support portion of the shovel, temporarily screwing into the bolts. In order for the lever mechanism to function without jamming, it is necessary to choose a bolts that have threads only at the end. |
 | If everything works, as it should, it remains only to try and welcome to the corner of workers forks. They are placed in such a way that they are between the trees of the anterior forms and did not come into contact with them during the work. The distance between the teeth of the working part of the shovel should also be 65 mm. |
 | But before welding the teeth to the corner, they must be prepared, as they must have a small bend and pointed ends. Calculate the ends of square rods in two ways - forging or neat trimming and stripping. For forging, the metal will have to split a hot, and then on the anvil to give the ends the desired shape with the help of hammer. This is quite skillful work, in addition, not everyone has a special oven for warming up metal. Therefore, it remains to sharpen the ends of the teeth mechanically, that is, carefully cut a part of the metal on one side of the square, and then clean the location of the cut. You can refer to the turbor, which will work on the lathe. |
 | You can make a smooth bending at the ends of the teeth using a pipe bender, one template. If this device is not, then this work will have to do with the help of vice and hammer. However, it is necessary to remember that the bend on all teeth should be the same, therefore, perhaps this process will be better spent after welding the teeth on the corner. The bending of the Villa can be performed with a hammer, putting them with teeth on the template. |
 | As a result of the operations done, it turns out a convenient, relatively non-severe design. Moreover, the "miracle shovel" will only need to bring work and carry out work at their end. The rest of the time does not have to raise it, as it will be moved by the soil with the help of the Ski. |
The manufacturer of this "miracle shovels" honestly admits that by making it in the fall, I tried to overheat a wet land, and he did not succeed. It was gone that the earth was stuck between the teeth, and the pollocks were hardly moved along the wet soil.

Therefore, given his mistakes, you should not experiment with the instrument immediately after the snow. A dry soil is perfectly discharged by this tool, even if he is already "before indefinitely" overgrown with grass. Working forks are drawn and pull out weeds, and the front forks free them from the soil. But in order to remove the grass with a stubble bed, still have to bend.
Prices for miracle shovels
Miracle shovel
Second option
In addition to this model, there are other models of the "miracle shovel". For example, for the elderly people who like to mess around in the garden, there is an option developed by the Altai craftsman V. Popenko.

This design has a convenient high P-shaped handle that allows you to work without flexing. And if necessary, it is possible to rely on such a handle, sticking into the soil of the teeth.

The disadvantage of this option "Miracle shovels" can be called the absence of good soil loosenings. Therefore, it is additionally necessary to break the closure and grind them with rake.
Third option
Another design, which is rather possible to be called advanced forks for pumping land. But it will also make work easier - due to the special support pedal installed on the cutken. When the forks are driven into the soil, the pedal helps to attach the leg force correctly. And after stopped the pedal in the ground - it becomes a point of support for the application of power through a hinge-knitted lever. It makes it much easier for the rise of the Earth piping.

Similar tool option can be purchased in the finished form. But it is easy to do and otherwise - to acquire high-quality forks, and then improve them by adding a support pedal, hingedly associated with a clamp, fixed on a cutting.

On the illustration above, the pedal design is not only clear, but also the dimensions of all parts required for the manufacture of the tool are given.
Cultivator "Tornado"
Among the gardeners is widely popular by the cultivator "Tornado". It is actively advertised in television and online stores. Indeed, the device is quite comfortable and relatively compact. But not every Russian dacket can afford to purchase this tool. Therefore, it is worth trying your hand in its manufacture.
The design of the "Tornado" is easier "miracle shovels" and works on the principle of corkscrew installed on a comfortable rack with a horizontal handle-crossbar.

If it is decided to make a cultivator independently to simplify the task, you can use for the basis of forks produced in industrial environments that have quite affordable cost. The main thing, when purchasing this tool, choose a qualitative option. Today, there are many products on the market, the metal of which will not transfer manipulations by alteration - the steel does not withstand any criticism.

"Tornado" can be made immediately under your height, or make a handle adjustable. Here options can be a lot. For example, a collet clamp with a threaded clutch (but it is quite difficult to perform yourself). Or a series of holes in the retractable part of the rack - this option is shown in the illustration below.

"Crab", that is, the working part of the factory instrument is made by forging, so the teeth are resistant to bending. And if it is possible to make this part of the cultivator on the same technology, it is better to choose exactly this option. To do this, it will be necessary to split the workpiece and with the help of a hammer to give them the desired shape and direction. It is necessary to immediately say that this process is not every wizard.

As can be seen in the drawings and photos, the "crab" teeth have arcuate bends, are attached to the base in one direction, and in the finished product they form the inner space of oval or round form.

The breeding of teeth is carried out so that they form around the rack the semblance of a square. That is, the fixation of each of them does not mind point, but through the entire fold of the part of the part, which forms one side of the square. It is possible to start to the bottom end of the pipe-rack to weld a square steel plate with a thickness of 5 ÷ 6 mm, and then the teeth weld to the sides of this square - it seems easier. Thanks to the continuous provision of teeth, the crab is withstanding high loads during the operation of the tool.

The teeth of the "crab" are alone, so they are easily water in the soil and are not deformed. But there is no need to hone their special need - they will cope with the task. The height of the "crab" can be from 180 to 200 mm. Accordingly, the blasting of the soil occurs on the same depth.
Tornado is often referred to as a root dealer, because when pumping and loosening the soil, weeds are extracted at the same time along with their root system.

The principle of operation by the cultivator lies in the perpendicular installation of the "crab" to the surface of the soil, followed by a tool tool to 60 degrees with simultaneous pressure down. Therefore, an important point is the form and length of the handle, as it should work as a convenient and efficient lever.
Prices for the cultivator "Tornado"
Other TURNING TOOL TORNADO
Models are produced with different shapes of the handle, therefore, when independently, you can choose the optimal option. So, the handle is made straight with a slight bend on itself, 750 mm long. Or, as already mentioned and shown above in the drawing, you can use the steering wheel from the old bike as the handle.
In a word, a skillful master is quite capable of making this tool as comfortable as possible for itself.
Fokina plane
Another device that decisions several problems is the plane invented by V.V. Fokin.

This simple tool is capable of performing the following:
- Effective removal of weeds with beds. Thanks to the compact dimensions and ergonomic form, this tool will easily pass between cultivated plants, without affixing damage them.
- Breaking the beds can be produced at different depths, as the working is not only the side, but also the front of the tool.
- Plugging of plants is also under the shortest tool.
- Formation of beds and maintaining their forms during the season, as well as much more.
Learn about the available options for arrangement, from our new article on our portal.

For the manufacture of flat cuts, a metal strip of 3 mm thick is required, and all other required dimensional parameters are presented in the drawing. The edges of the plate need to be well treated, clearing irregularities and burrs. And in the right chart of drilled two or three holes to fix the nozzle on the cutting. Then, the plate will be able to bend properly. In order for the metal better than the bending, it must be split, for example, with a soldering lamp.
To give the metal strip the required form, several consecutive bends are performed. The order of their execution is shown in the illustration below.

After the metal cooled, the edges of the working area of \u200b\u200bthe flat should be improved on both sides.

After that, the plane can be mounted on a wooden stalk, the material for which you can buy quite inexpensively in a construction store. Bar, it is necessary to fool well, remove the chamfers, clean from burrs, stick with sandpaper. After that, holes are drilled to secure the tool itself if the connection was planned to be screwed. Many owners are limited to the fixation of flat cuts to the cutting screws.

The tool is very small by weight, so it is perfect for working in the garden for people of any age.
Prices on Fokina
Fokina plane
It is also easy to use flat. For this, the sharpened side of the plate is introduced into the ground to a depth of up to 40 mm, installed parallel to the surface. Then, accompanying minor efforts, begin the loosening or cutting the root system of weeding plants.
With proper manufacturing and operation, the plate flat plate is capable of self-sharpened on both sides. If nevertheless, the tool is fixed, then it can be pulled out to be grinding or a file.
Fixtures for planting potatoes
To facilitate the landing work of the most popular root corner of the crafts, special devices were invented, so-called suganca and markers. In addition to them, mechanized landing devices are made, but they are more suitable for large areas. The manual sources are suitable for any of the size of the garden, will be much simplified and accelerated the planting process.
The simplest adaptation marker for fast landing of potatoes

Markers are intended to create in-depth in-depths to raise potatoes in them. They can be single, double or triple.

The presence of two or three conical heads for creating wells not only speeds up the work, but also allow to observe the evenness of the landing rows. So, to plant a sufficiently large area of \u200b\u200bthe garden, the joint actions of the entire two people will be required. One forms the wells with a marker, and the second throws in them potato tubers and falls asleep the earth from above. The recesses themselves are small and neat, so you can fall asleep, just pushing the ground with the foot. Thus, there is no need to work a shovel, digging, and then falling asleep wider grooves. As a result, the planting process is not accompanied by fatigue or even local injury.

The adaptation itself has a very simple design, which can be easily made at home. This will require a frame with a comfortable handle to which conical markers are welded.
As a handle, you can use parts of the backrest of an old metal bed or a pipe with a diameter of 15 mm, placing plastic handlers on it.

For the lower horizontal crossbar, which will be enshrined with welding cones, the profile pipe is suitable, for example, 10 × 20 mm with a thickness of a 2 mm wall.

The cones are welded on the crossbar at a distance of 450 mm from each other. On the protruding edge of the crossbar with the same distance from the nearest marker, it is simply a rod from the reinforcement - it acts only as a guideline when maintaining the evenness of a number of relative to the planned line or already planted rows.
More Saluing Option
Another, more complex in the manufacture of the Option of the plant involves simultaneous digging of the well and planting the tuber.

How to make this design - will be discussed later in the table-instruction:
| Illustration | Brief description of operations performed |
|---|---|
 | For the manufacture of this model, the plant will require a pipe with a diameter of 100 mm and a length of 150 ÷ \u200b\u200b200 mm. On the pipe from two sides it is immediately necessary to mark the markup under the holes. Their centers must be located exactly opposite each other. For them, two holes will be drilled. |
 | To drill the pipe it was easier, it is stacked on a comfortable stand. In this case, a piece of rail is used as it. He perfectly fulfills the role of not only the stand, but also anvil. Before proceeding with drilling, the holes are outlined using core, which will also facilitate drilling in a semicircular surface. The holes are made at a distance of 10 ÷ 12 mm from the edge of the pipe and must have a diameter of 8 ÷ 10 mm, under the bolts of the same size. |
 | For the manufacture of the conical detachable part of the plant, a small sheet of metal with a thickness of 1.5 mm will be required. On the sheet there is a markup of two triangles with a cut vertex. The size of one part is in the height of 190 ÷ 200 mm, the base of the triangle is 160 mm and the width of the upper cut is 30 mm. The second item has the same height, but its base should have a length of 180 mm, and a slice is 20 mm. Dramed details must be carefully cut with the "Bulgarian". |
 | The result is two triangles with a cut vertex, from which it will be necessary to make a detachable cone. One side of this assembly will be fixed, and the second is to be able to move in a hinge mount. For the manufacture of the fixed part, a detail of a smaller size is used. |
 | To make it details of the semicircular shape, they must be curled. Work is best done on anvil, if it is not, it comes to the rescue. Pressing the necessary form is carried out by a conventional hammer, which is bothering one, then the other side of the part. |
 | During the impressions of the required bending periodically, their fitting to the pipe is performed. |
 | The item must be installed on the edge of the pipe and at the same time, its edges must be located at a right angle to the pipe slice - so it will be converging to the center half of the cone. In order to achieve such an installation of the part, it will have to cut the edges in its lower part. To do this, hold the part in the required position, the areas under trimming are scheduled. |
 | On the markup lines, the part is cut with the "Bulgarian". |
 | Here in this position there should be a fixed part of the cone of the plant, since the second, the movable half should be closed with it as tight as possible. |
 | Just like the first part of the cone, the second, movable half is done from the prepared plate. Then it is performed fitting and fit. |
 | However, more accurate adjustment can be made only after fixing on the tube of the fixed part of the cone. Therefore, its welding is made to the bottom of the pipe. |
 | The illustration clearly shows that the angles of the movable side of the cone are found on the pipe. It is from them to get rid of them, otherwise they will interfere with the opening of the plant. |
 | Before removing them, it is necessary to mark the markup, and then cut off the extra pieces using the Bulgarian. If the fixed side of the product is installed and welded to the wall of the pipe, then the movable part should go to it, a little from the outside, as it will open. |
 | As a result of the work done, it should be approximately as shown in this illustration. |
 | The next step can be moved to the installation of the hinge assembly, with which the movable part of the plant will open and close. For this, it will be necessary to prepare two plates - "Ear", from a metal with a thickness of 2.5 ÷ 3 mm. In these parts, drilled along the hole of the same diameter as in the holes made earlier in the walls of the pipe. |
 | To screw the "ears" to the tube, bolts 8 ÷ 10 mm with a diameter and a length of 10 ÷ 15 mm are used. Their heads are better immediately sharpened so that they as far as possible performed from the surface of the pipe. The bolts are inserted from the inside of the pipe, pass through it and the hole dried in the "ear", and on top of it are attracted by washers and nuts. |
 | "Ears" will have to adjust a little, giving MM shape of the walls of the opening part of the cone, as they will be welded on them. |
 | Now the upper side of the "ears" can be grabbed the welding points to the walls of the movable part of the cone. Fixing them, perhaps you have to adjust the closure of two halves. |
 | Next is the manufacture and welding of the pens of the plant. This will require a pipe with a diameter ½ inches, and the length should be convenient for operation. One edge of the pipe is spilled at an angle, as it will be fixed on the casing of the plant. The slope can also be chosen independently, but in this case the position of the handle relative to the housing is at an angle of about 20 degrees. |
 | The second handle is welded in the middle of the discharge side of the cone in its top. When you click on this handle, it, attracting the pipe, will open the cone. Therefore, it is placed at an angle of 35 ÷ 40 degrees. |
 | If, when testing the plant, the handle welded to the pipe will not be quite comfortable, then its position can be corrected. |
 | To do this, with the inner side of it, an incision is made, according to which the pipe bends at an angle to its welded part and attracts closer to the body of the plant. Then, the handle copes the handle. |
 | Now the product tests are conducted again. In this case, the wizard found that the plant was discovered too wide, so it is necessary to include a restrictive bolt in the design. It will limit the width of the cone opening, so that the planted tuber or the same cup with seeds will fallinate independently with the soil when pulling out the soil suggestion. |
 | To do this, a nut is welded to the handle attached on the movable side of the cone, in which the bolt limiter is screwed. |
 | Thus, when the handle is cheered, the bolt in the desired position will rest in the pipe of the case, not allowing the cone the plant completely. Screwing and unscrewing this limiter, it will be possible to adjust the width of the well at the landing depth. |
 | The plate is welded to the back side of the pipe, which is necessary for the deepening of the plant in the ground transmission of the leg force. Since a sufficiently high load will fall on the pedal, the plate must be strengthened, welding to it from the bottom - the segment of the reinforcement, the second end of which is welded to the plant of the plant. |
Such a design of the plant is suitable not only for planting potatoes, but also for other plants that are planted in the form of bushes, seeds or bulbs. There are other options for such devices, but they all work on the same principle.
Fixtures for manual harvesting root
There are not only fixtures for planting potatoes, but also "mechanisms" for its convenient and rapid cleaning. So, using a manual digger, labor productivity can be increased almost twice. This is due to the fact that, unlike the usual shovel, the device captures the ground not with one, but immediately on both sides, it is easy to put on the surface of tubers.

The digger has a not too complicated design, which can be used independently. In order to make a similar tool, you will need to purchase a couple of ordinary forks. In addition to them, for the formation of the handles, two cuts of a pipe with a diameter of 27 mm with a thickness of the walls in 2 mm and a length of 720 ÷ 950 mm are required. And yet - a metal plate with a thickness of 5 mm, 50 mm wide and a length of 330 mm for the manufacture of the crossbar.

- Tooth Villa.
- Crossbar.
- "Ears", welded to Vilam.
- Bolt M10.
- Plees of potatoes.
The manufacture of the instrument is carried out in the following order:
- Wooden cuttings are extracted from Tuleck.
- Under Tuliki, in the middle part, two "ears" with a diameter of 11 ÷ 12 mm is welded at a distance of 55 mm. So that the crossbar is free to be free.
- From the bottom side of the crossbar, the tubes with a diameter of 10.5 mm are welded at short edges. Through them and "ears", fixed on the willars, will take place a hinge bolt with a diameter of 10 mm and a length of 70 mm.
- Next, the instrument handles are manufactured. The ends of the pipes intended for them must be bent so that they can be comfortably kept in their hands. And then on the curved ends it is recommended to wear a segment of the hose. So hands will not slide when working.
- And finally, the prepared handles after fitting their configuration are welded in Toulinki forks.
Everything, the design is ready to work. Copalca forks are bred in the open position and installed above the potato bush. Next, coming to the crossbar, ride the pits into the ground. After that, the handles are bred to the sides, that is, the forks are close to each other, lifting the captured soil with all the contents up. At the same time, the teeth engages the root system and tuber of the bush. Copulka, together with the captured harvest, raise the surface, loose soil crepts, leaving potatoes clean. In the process of digging potatoes with such a homemade squad, his tubers are damaged minimally, and the soil is not shifted.
It is not recommended to dig in potatoes with the help of copal (as, however, and the usual shovel), if the soil is very moistened. The cleaning process in such conditions will be significantly complicated by excessive severity and the inconvenience of the tool due to the sticking soil.
* * * * * * *
As can be seen from the telded, with the desire of the owner and the availability of tools, a convenient equipment for treating the garden, planting and harvesting is quite possible to make in a home workshop. This will save very significant funds. And especially - if in the "honeycomb" masters have many necessary materials for work.
The examples of the self-made means of the "small mechanization" of garden work, certainly not limited to the variety of homemade products. If you wish, you can find other useful tools, and maybe even come up with some kind of improvement yourself. We will be glad if someone can share their experience on the pages of our portal.
In conclusion, an interesting video about another useful tool is a cultivator. The FEN will become an excellent assistant during the regular ridge of the beds from weeds.
Video: Homemade manual cultivator for fast and efficient weeding
All gardeners want the village plot not only pleased the harvest, but also was attractive. It is not necessary to purchase expensive decorative elements - good summer housekeepings can be made with their own hands from the girlfriend, which for the most part we are thrown into the garbage.
Held crafts for the garden
As a rule, garden, summer cottages do not differ in a large area, and about the comforts in the form of a soul accounts for only to dream. Make a garden shower with your own hands is quite simple:
It is important to choose the right place to accommodate the soul. It is better if it is an exalted place, then it is more convenient to equip the drain. Do not place a shower away from home to do not feel uncomfortable cool in the evening. Choose a plot, not covered by branches of shrubs and trees - water will not heat through them, and there will be many insects.

The easiest view of the soul is in the form of a rack attached on the wall or vertical panel. You will only stay to bring water and make wastewater removal.
Among other useful homemakes for the country area:
- Arbor, where you can spend time summer evening.
- Recreation area with mangal.
- Playground for kids: swing, horizontal bar, sandbox, a small table with a bench.


Original flower beds
Flowers on the household plot - a mandatory element, with them the cottage looks attractive. The original flower garden can be made from various items - at least from the old car. Find her place in the landscape, fill in the ground and plant the annuals. Lush multicolored caps will attract attention with bright colors and fragrances.

You can turn an old bike into the colors stand. Place small caspo with decorative plants and flowers on it. It is better if they are different: low and medium in height hanging, different colors and forms.

On the fence or railings of the open terrace, the veranda can be placed unusual kashpo, the role of which will play perfectly ... Old teapots, bowls and pans. And the remaining alone tea cups from the service can be suspended to the wall obliquely: let the effect be created, as if the flowers are "poured" from them.

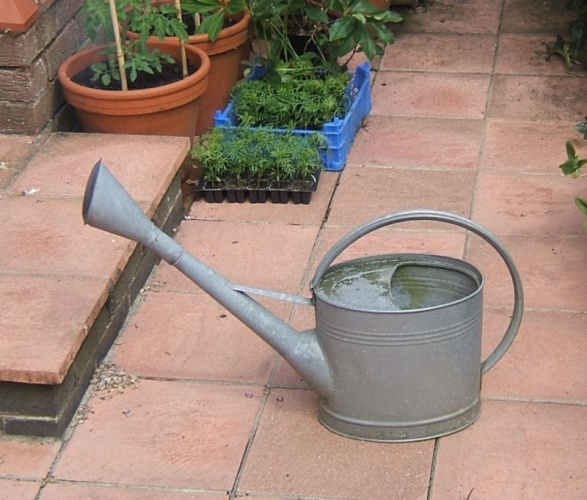
In the garden, an old bath, a shabby wooden chair, a watering can be the basis for a flower bed, even the old shoes can be the basis for caspo. Such an unusual application of old things will cause admiration for the neighbors and your guests.

Original flower garden can be made of old car tires:
Paint a tire in a bright color and hang on the chains to a solid bitch on a tree. Insert the tire insert the cache with the flower. Speak will look at hanging flowering plants.

Place the tire on the stand. Gently wrap it with a thick jute twine so that each row firmly lightened to the previous one. Fill the tank with soil and drop flowers.
Original furniture for giving can be made of wooden pallets. Sofas and benches, supplemented with soft pillows, will make rest comfortable.

Saturday evening, crouching to relax from garden affairs, look around around in search of material for original crafts for your site. Showing the fantasy and putting a little effort, you will turn your site into a cozy area of \u200b\u200brecreation or a fabulous kingdom.

Stock Foto Homemade for cottage and garden


The private sector is associated with a severe permanent job. To plant a garden, trace the growth of plants, collect harvest. All this, of course, you need to do. But if you correctly organize the whole process, then the work will be in joy. And there will be many more free time for recreation. And they will help in this homemade for the garden and cottages, with their own hands made. Someone will objected that everything can be bought already ready in the store. This is true. But, first, to buy all the money is not enough. And secondly, the process of making from the primary materials of something useful can bring a mass of positive emotions.
Russian people have always distinguished resourcefulness and ingenuity. And a huge amount of homemade made by their own hands for giving and gardening, whose photos can be found in our article, this is confirmed. We will offer for consideration only a few options that will be suitable on any site.
Klumba-konta
Many gardeners recently have preferred flower beds located in boxes. They are raised above the ground and fenced on all sides. Thanks to this, the care process is facilitated, and the bed looks more attractive and interesting. Use such structures can be used (or even recommended) on scant nutrients soils.
Self-masses for the garden involve the use of infringement materials. Therefore, for the construction of the box, you can use boards remaining, for example, from the construction of the house. If there are no such, you will have to purchase them in the store. Of these, the box of arbitrary sizes is constructed. The dimensions will depend on the size of the site, its style design and plants, which is planned there to plant. The height of the sides makes about the knee so that the layer of fertile soil is thicker.
Metal mesh with a small cell is fixed to the manufactured box on the bottom. It will be protected from the penetration of rodents and moles. If there are no such a plot, then you can do without a grid. From the beds-box can easily make a small greenhouse. Its height is selected taking into account plants planted there.
Drip irrigation
Self-masks for the garden will simplify such a heavy process as watering plants. Make a drip irrigation system. This will require a large barrel (metal or plastic), hose, capillaries (you can make holes with a certain interval in the hose) and various connections (tees, clamps, and so on).

The barrel raise about 1.5-2 m from the ground. For this, metal corners can be welded a special stand. Due to this, the system will have stable pressure. The trunk hose is underway from the barrel. It necessarily installs the filter so that the garbage does not climb the system. Capillaries fed from the main hose.
Write your own hands
Self-timers for summer cottages and the garden will allow you to create something necessary and useful on the plot from the remedies and materials. For example, from old plastic bottles, which are always thrown out, you can make the rod for the garden and the garden. It will allow processing and watering plants of different heights. A sprayer is attached to the watering hose. To a long stick (the longer, the better), the same spray nozzle is screwed up. The lever is fixed with a threads pressed.
In a bottle of 1.5 liters in the neck, a hole was made with a hot nail. The bolt is inserted into the hole and the nut is fixed with the outer side. Bolt must be drilled through the drill. A hose dresses on it and fastened by a clamp. After applying the pressure into the system, the nozzle is unwind, and water is sprayed.
Tires
Old tires from passenger cars are one of the most popular and affordable materials for the manufacture of homemade for the garden. Of these, you can make even a compost pit. You will need only 4 pieces.

One of the tires that will serve as the base is cut. One sidewall is cut off from it. Two sidewalls are cut off the rest to get rings. Next you just need to install the tires on each other in the allotted place.
Bench
After all the work on the garden, you can relax. And on this subject, you can also choose the appropriate option made by your own hands homemade for giving and gardening. Having a small set of tools and materials, you can make an attractive bench of the streamlined form. It will become a place where it will be possible to relax and relax.

Materials will be needed:
- A sheet of plywood (better from pine) measuring 90 x 90 cm and 1.6 cm thick.
- Reiki from the same tree in the amount of 7 pieces (2 cm thick, 9.4 cm wide and 140 cm long).
- 2 x 6.9 cm boards and 100 cm long in the amount of 3 pcs.
- 2 x 6.9 cm boards and 140 cm long in an amount of 9 pcs.
The parts will be fastened with 0.5 x 5 cm screws. In addition, we will use glue to connect wooden elements, wood varnish, turpentine.
The plywood sheet is cut into three parts. They are fascinated by a template for cutting the sidewalls and central crossbars. The shape is cut out with an electroller. On the back there are 3 recesses for the rails that will keep the design.

Self-timers for the garden will help make their country life more pleasant and easier.
Dacual territory - this particular world that often pushes us to the inventions. And it is clear, because there is a huge amount of work that needs to be performed quickly, efficiently, and without special investments. Therefore, today we learn the cunning country tool created by your own hands.
In our barns, full of special dacha inventory - shovels and secateurs, scissors and brush cutters, chips and axes, and forks, and what the Fokina plane is ... But there is also a more dick and modern tool - Bulgarian, drill, chainsaw. But all this is definitely not enough to do all the necessary work. No, everything is real, but only to whom you want to spend a lot of time to clear the garden from the young frightened, remove the weed from the spring garden or make another, even more ordinary work, if you can quickly cope with the task? Today we will give you the ground for reflection, because a reasonable and modernized garden inventory with your own hands is not difficult, but very useful. So let's go in order and consider all the novelties and more solid in the age of the invention, about which, by the way, and half of us did not hear!
Comfortable garden inventory with your own hands
This list is partially represented by us familiar dacifics, partly - right, readers of the site, well, another small part is our personal. Therefore, the site recommends to pay a few minutes of useful article, because it will help actually save time and effort in the future.
Clean the roasting pigs
You can make it an upgraded shovel that you see in the picture below. You can make a tool and from scratch, if there is a workbench, vice, bulgaria and sheet metal, but it is better to redo the finished shovel. Having received a similar product - a narrow and well sharpened at an angle, it is only necessary to choose a durable cutlery, and you can safely go to the garden. The device is easily chopped by a young piglery even at a depth of several centimeters.

Cleaning and Pumping Garden
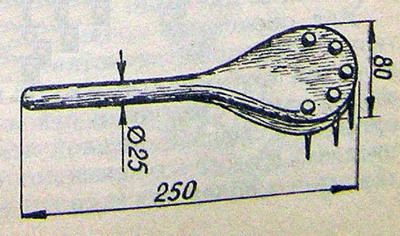
Most often, such an inventory is needed if you are clearing the old garden and plan to make a garden in its place. The same can be on the site of the forest belt on the edge of the garden, which was removed for the extension of the fertile territory.
But in the garden or forest belt, the trees are not completely removed, and many roots remain in the ground. Search for them for a very long time and difficult, especially when the land processing is coming. At this time, you can use a teeth-shaped shovel, which can also be made it yourself. Below you see that it is an ordinary shovel, which is cropped in such a way that its work part is with several sharp teeth, the roots are cleared very easily.
Work in the garden new chick
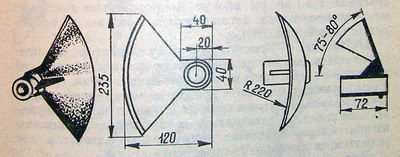
Want to get a new chief, which is now very easy not only to remove the weed and make a furrow in the soil under the landing of seeds, but also loose the soil? Then pay attention to how easy it is to do this in the presence of only a piece of sheet metal, a piece of pipes, grinders, hammer and welding. Of course, this is the lot of real men who are able to create a similar, but women have the full right to look, because in the future they will definitely try to work as a tool.
Slightly curved inside the blade, spherical and also a little deployed radius, can overcome many difficulties in the garden and garden, and believe me, it is much better assistant than standard chippet.
Hoe-homemade for soil loosenings
When planting seeds on a flowerbed or in the garden, when working on a garden with young crops, or simply during the loosening of the soil around adult plants, we need a high-quality and convenient tool. It must comply with many requirements, but immediately be convenient in work and fairly miniature, so as not to cripple the roots or the above-ground part of the cultures grown. Therefore, experienced summer houses and was invented by the thing, which today has many.
It is a compact hoe of remedies, which is created from a small piece of boards and several nails. You only need to cut comfortable to the shape of the handle from the tree, as well as drive into it through 5-7 nails in length at 6-10 cm. Not perfection, but still an interesting inventory that will be comfortable on small flower beds.
Updating broken secateurs
Intensive work in the garden, sometimes, leads to breakdowns of your favorite tool. And we are trying to do everything, just not to throw out the usual and long-failed inventory. Today, we broke the secret, right during the trimming of the trees, and therefore we urgently repair it, because there is no time or desire for a trip to the store.
We subscribe a secateur on a stone or machine, if any, and in the place of a broken or simply torn spring, which personifies the most frequent breakdown of the secateurs, set a piece of thick rubber. You can take and rubbish the fond, but fold it in so many times to create a spring effect. Turn the rubber to the handles with the wire, but be sure to nodes inward, so as not to be injured and not grazing the corns. You can also use the isolent to prevent injuries.

Device for speaking branches at high height
This occupation is not considered a problem in people with high steps or special professional secateurs. But if so, we do not, we take for the mind and again invent a tricky garden tool that promotes convenience and acceleration!
Before you, an ordinary hacksaw, which is working with hands. But today we attach a long handle to her, so that you can remove the hacksman as much as possible. You should not take a very long stalk, as it will work too hard, holding the weight at a big distance, but a cutlets of 1-1.5 m - just right. Believe me, it is quite enough to get those branches to which you can not reach the cut.
As shown in the picture, tie or pick up the hacksaw to the cutter, and be fruitful, and start working. Do not rush, otherwise you can break the tool.

Garden knife for removing mustache and stems
How long we have to suffer with a mustache and young stems, with which it is very difficult to cope. The secator swipes them, and a large knife work is generally unreal in the conditions of thick swords. In general, a special tool is needed that will help in beds and flower beds. And so it can be a homemade knife to remove mustache and stems.
We again, we suggest you pay attention to the schedule below, where we show you a similar knife. This is an ordinary piece of steel, which is installed in a wooden handle. The blade shape is oval and slightly pointed, and the cavity in the form of a hook is cut on one side. That's it here, inside, all surfaces are sharpened. You just need to take the left hand of the mustache, the root or young stalk of the plant, and right to spend the knife on it. And even if there is no effect right away, then hitting the acute cavity, any unnecessary material will be cut off.

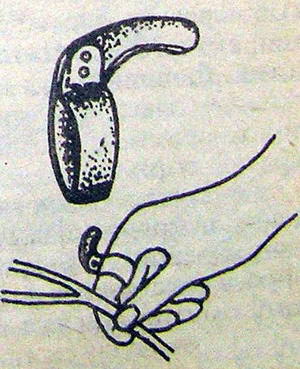
Ring-cutter for gardening
The next fixture and tool are difficult, for it is just a ring with a small blade for working in the garden. But, although the ring and very small size, it brings enough. As you can see, this is a metal ring on which there is a small sharp solder, bent inside. It is the inner part and pointed to trim the fine wire or rope.
When tapping plants in the garden, dealing with a seedler or vertical landscaping, it is often necessary to cut off small pieces of rope or wire, but every time you take a knife in your hands is not particularly convenient, and in the conditions of numerous branches near and leaves, also dangerous. Then you can just take the rope into the left hand, make a loop and throw it on the curved edge of the ring, and make the right hand to make movement to the side. All quickly and simple, and in the hands of the needle a piece of rope already necessary.
Each of the tools submitted or simply upgraded items are an excellent device for working in the country area. You can use this inventory almost in any conditions, and you can make it yourself.
Comfortable tool for cottage (video)