How to install an interroom door without a box. How to put interroom door itself: repair in the house
Step 1. The box is going on the door with a minimum gap of 2-3 mm on each side. It is possible to mount, both with the help of nails and long screws. Just need to ensure that the tree is not cracked. When fitting the edges of the box, the place of the joints should be cut off with a hacksaw and remove the surplus using the chisel
It is more difficult to collect cheap, so-called, "paper" doors. They are more tender. The gap between the box and the doors is slightly larger, about 2-5 mm on top and bottom, and 2-4 mm - along the edges. The corners of the box are better not to try to knock down with nails or self-drawing. Since the compressed paper will still burst. Such boxes are better to collect with the help of corners (or those that are used when assembling or furniture corners).
You can not try to assemble a box with straight corners at 90 degrees. At the moment, even very expensive doors have a small curvature.
Step 2. The next step explaining how to put the door correctly, the mounting of the canopies are left and right. They are put on the side in which the door should open. This moment is very important, and so as not to be mistaken, you can double all over again.
First, the hinges are attached to the canvas box. To do this, apply them to attach them to the contours pencil. Then, according to this circuit, the exhaustion is made in a couple of millimeters, so that the loop "drowned" in the tree, but not wade. In the same way, plants are installed on the door. Then everything is fixed with self-drawers, which are coming with hinges.
Step 3. Now let's start directly to the answer to the question of a question that suffers from everyone who is in repair state: how to make it possible after the assembly and fastening of the loops. The door is set in the opening level. It is desirable to "throw" from all sides of the box for loyalty.
In order for the door to the door to anywhere, "the edges and in the middle it is desirable to drive wooden wedges. But they should not be too thick, otherwise they will benting and the door will not cling. But too small wedges are not suitable, they should not fall out.
So, the wedges are clogged, the door is installed in place. Now it should be fixed with anchors. First, the drill or perforator is made holes through the box into the wall. Then the anchor is screwed into them, it fastens the box to the wall. They are screwed over 2-3 pieces on each side. Fixation completes
Before you knew, you need to "spread" the door frame. For example, to put on all sides, a loose carpet and doors tightly close. Now you can fill out the voids of foam. But different parts are different degree of swelling, so it is better to fill the openings half.
It is important not only to choose a way to correctly install the interroom door, but also give it a long time for final consolidation. Will be a time of 6-12 hours, during which you do not need to open the doors. This is how it is necessary to grasp the foam and then it can be carefully, a stationery knife cut off its surplus.
Now it is clear how to properly install the interroom door. True, the work on it is not over, as the process of cashing is in front (that is, it is necessary to put platbands), possibly varnishing (depending on the type of door). But this is a completely different story.
W. the formation of interroom doors in the apartment should be held according to a certain rules that customers need to know. After all, O.sibs in repair and decoration of the room or apartments may seriously complicate the installation and fly to the "penter"!
You can reduce the cost of installation, prevent errors in choosing doors, accessories and in the size of the outlook, help the masters do everything qualitatively.
Dimensions of doorways
- Width of the opening
The door leaf is usually 60/70/80/90 cm. In width. The correct width of the opening is the width of the web +8 or +9 cm. (If the thickness of the box in its narrow it is from 1.5 cm. Up to 2.5), or +10 cm. (With a box thickness in its narrow part 2.5 cm. And above ).
- Height of the opening
For all cases, the correct height of the opening is the height of the door canvase + 6cm. From the first floor, that is, 206cm. Doors in the bathroom can be height 190 cm., Therefore, the correct height of the opening is -196 cm.
Here are some examples of the right openings.:
- 80x200 cloth (see) - open 89x206 (see)
- 70x200 - open 79x206
- 60x200 - opening 69x206
- 60x190 - opening 69x196
 With the dimensions of the doorways, you need to decide in advance and it is very important to constantly control your brigade in the process of repair.
Width of doors for different premises
If you have the opportunity to plan the width of the doors and openings in advance and there were questions what the width of the door to choose, then follow these recommendations:
- the doors in the rooms usually make 80 cm wide. In order to be able to render / bring furniture. Width 90cm. It happens very rarely as such cloths are heavy and with time can be saved on the loop.
- doors in the bathroom are usually made 60-70cm. So that the washing machine is free through the opening, 60cm thick. Keep in mind that 60cm. The door assembly has an opening in the light of approximately 58cm. Due to the fabrics in the door box.
- the door leaf into the kitchen is usually made 70-80cm. It is also necessary to consider that the handles on both sides can interfere with the passage into the kitchen.
- in the wardrobe room usually make a width of 60-70cm.
When do you need to install good?
When installing interroom doors, if the wall thickness is greater than the thickness of the door box - it is recommended to purchase wallpaper, of course, it will not look at the walls of the walls, but it will look increasingly, and on the other side, the wall does not hit the platbands.
If you install, it will be a good solution that is beautifully issued. The color of the problems can be selected, for example, under the MDF panel.
The width of the standard voltage on the warehouse program is usually 10/12/15/20 cm. If your walls are very thick (more than 20 cm.), DOPFORTS must be splitted in width or order non-standard dotlights, which will be much more expensive.
Which part of the door to establish good?
It depends entirely on how you planned the opening. Usually, if your door opens into the room, the box is made flush with a room wall, and a good will be in the corridor, respectively.
If you do vice versa, the door will not be completely discovered (widespread in good). Sometimes we humble with this so that the doors look the same - all kinds in the corridor or all the good things in the room. Therefore, this is the question of convenience and design, taking into account the future placement of furniture in the apartment.
Diagram of opening interroom doors
Usually, if in one corridor part of the doors will open in the corridor, and part of the room - the closed doors will look different because of the features of the door box. If the doors are standing next to each other, and at the same time open one inside, and the other outward, the height of the upper platforms will not coincide.
Here it looks like a general corridor door that opens in the corridor, Ie on us:  This is what the door looks like, which opens in the room, Ie inside:
  It is necessary to ensure that the cloth does not close the switch when removing. It is very desirable that the doors do not cross their trajectories. In the bathroom it is necessary to provide an opening of 180 degrees for fast ventilation after the adoption of water procedures.
Make sure that the door open to 90 degrees does not overlap the opening of the adjacent door.
In order not to waste time on matching the door opening with masters during installation, make a drawing diagram in advance on paper sheet.
What height from the floor should there be a door?
Standard height - 1 cm. From the first floor. As for the baths of the bathrooms, less than 1 cm. It is not recommended to do not disrupt the influx of air. If you have plastic windows do not forget to make the air valves for air from the street to too much to increase the air humidity in the apartment when the vessels are closed.
Installing interroom doors when repairing an apartment and the sequence of stages of work.
In order to protect the wooden parts of the doors from warping due to high humidity during repair, it is necessary to make installation after all finishing works, including in the neighboring rooms.
Early installed doors may accidentally damage the tools during the repair process. Tile or wallpaper glue, especially the plaster dries quite a long time, highlighting moisture in the room. Increasing humidity over 70% for several days increases the risk that the doors will raise moisture from the air, will swell and stop closing normally.
However, if you like to wash the bathroom or soul often, no threat is no humidity, since the bathroom is quickly ventilated.
Installing interroom doors should be done if you are already ready for clean floor!
Without doors, it is much easier to lay outdoor coatings, and it is easier to make them installation, with a clear adjoining of platbands to the floor.
If you first install the box directly on the screed (the main floor), then it is impossible to bring the floor covering under the box, since it is already on the floor. In addition, the master is difficult to calculate the right lower gap of the doors from the draft floor, taking into account the future coverage, especially if the floor is not aligned.
If you are all done correctly and made the installation after the flooring of the first floor, will not work in the future to replace the floor - you just need to pull the laminate or parquet from under the door racks, and snap a new coating. At the same time, the racks will not be devastated and will remain hanging.
What if the doorway is much higher (wider) box?
A frequent error of the repairmen team is too high, proof, because the maximum height should not be higher than 208 ~ 209 cm., And better - 206cm. from floor covering.
Sometimes in new buildings standard Open May be height 217-220cm. This is explained by the fact that many customers make warm floors and height after their installation becomes standard. If no one drew attention to it during the repair and the situation arose when the upper platband does not close the opening.
Solution: If your opening is higher than the desired, but there is no possibility to reduce the possibility - glue the wallpaper down to install the doors, or order high capitals instead of the upper platband, but usually mounted by the corridor. A more solid way is to reduce the height of the opening with the help of drywall and wooden bars and then put the wallpaper.
Another option: if the platbands are flat shape - sprinkle at the joints at 90 degrees, and the upper platband is cut out of the problems that wider. Some customers are so twisted from the position. The disadvantage is that sometimes there are thicker than the thicker, and that if you do all the doors in the apartment, it will look a little dying)).
If the opening is widerly needed at least 2-3 cm. From the sides - the foam seam will not have sufficient strength, and this is important, since the mounting foam helps withstand smooth gaps and provides overall durability of the door to loads.
Solution: Type the door opening with a wooden bar cross section 3x5, 5x5 or at the repair stage with foam blocks and tiled glue.
How to align the doorway curve?
To begin, it is necessary to check the walls on the right and to the left of the opening of the humps / depressions, putting a long rule, a good or flat board to the wall. Especially often the rings are closer to the floor. Even one small hump will disturb the tight fit of the platband to the wall.
To solve this problem there is only one option: to shock and level the walls. If you do not want or can not align the walls in the entire apartment or wall, then do it only around the openings (on the width of about 50 cm) and go wallpaper.
Then it is necessary to check the verticality of the walls with a laser or bubble level. The ends of the openings must be parallel, the walls must be smooth and strictly vertical. If the opening of the curve, the walls are oblique, there are humps or depressions, proceed by circumstances.
If you understand that the opening curve, and leaves the vertical more than 1 cm. - You can align the walls with plaster for beaconsBy putting them on the vertical level and cross the wallpaper. As you already understood, this is the best and most difficult solution!
How to install the door in the curve?
But what if there is no opportunity to leve out the wall? Suppose the wall in which it is expected to install the door, is littered from the vertical of more than 1 cm for two meters of the height of the day. Then you have three outlets:
- Install the door box on the wall plane, the platbands will fit tightly to the wall, but the door will also be tilted and will probably become independently closed, clap, etc.
- Install the box vertically in terms of level, while the platbands are adjacent in the upper part and depart from the wall by the magnitude of the variation of the wall from the vertical at the bottom (or vice versa), worsening aesthetics.
- Buy the door with telescopic platbands and install it straight, a little deepening into the wall and put forward, where necessary, platbands from the grooves. This is a good solution to the problem, unless you need to open the door to 180 degrees, since opening the door canvas more than 100 degrees, it will pull off the loop.
The choice is yours, in all cases there are minuses and there are advantages, because it is a compromise.
How to be if the door is located close to the wall?

In such a work, one wall is perpendicular to another wall, and you have to reduce the width of the platbands, and attach them close to the wall on both sides. But reducing platbands in the width, we still porter the appearance of the door, see photo: 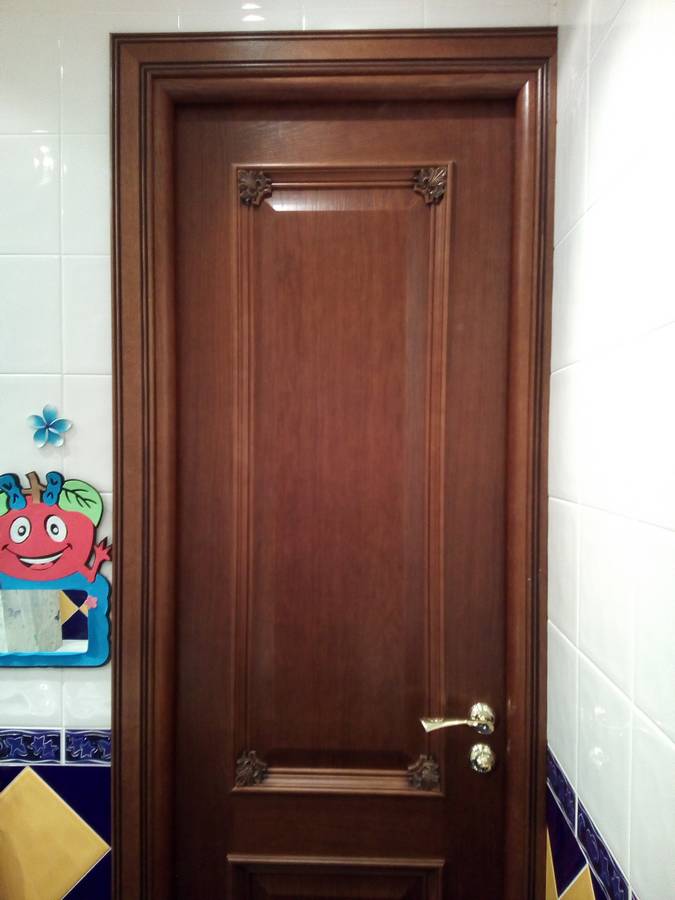 However, there are some more options for solving this problem:
- If the repair is already made and wallpaper is glued on the walls, you can screw the wooden timing to such a wall with a cross section of 3x6, 3x4 or 4x4 (no more). There is an opportunity to establish a whole platband close to the wall.
- At least 5 cm with the doorway at least 5 cm. From the wall and the same distance cut off the opening wall at the repair stage. The platband will be located at a short distance from the wall, which looks much more beautiful.
- In fact the doorway at the stage of repair by 5 cm. On both sides and order a 10 cm wide door. Less, for example 70cm. instead of 80cm ..
Installation of interior rock
The door leaf is located in the opening closer to that part of the wall where the door will open, therefore the clamping of the flooring of the floor with a closed door must be located under the door web and then it will not be visible when the door is closed, see photo:

A common mistake of repair brigades is an incorrect location of the thresholds! To avoid such an error in advance, draw a scheme for opening all the doors in advance and transfer it to the brigadier before you install the finish floors.
Installation of interroom doors in the bathroom
For residential rooms and kitchens, it is recommended to order the doors with a height of 2 meters. For bathrooms in new homes, the canvas is often required with a height of 1m. 90cm. Because of the presence of waterproofing and special high thresholds. If you missed this moment and did not order the doors with a height of 190cm., Then it is necessary to expand the opening in height or, as an option, you can shorten the door.
If you increase the opening in height, the top mark of the doors in the bathroom and interior doors will be at different levels. If the door is cut down, then the panel pattern is lowered. Therefore, sometimes it is better for bathrooms to order smooth doors.
A frequent error is a threshold in the bathroom from a wooden door box, as the aesthetics and ventilation of the wet room are disturbed, and in the future, the appearance of mold is possible.

Preparation of opening of interroom doors
The mounting foam will not be able to stick if there is a lot of dust on the door opening ends. It is necessary to remove dust or to predict the ends of the walls of the opening, if they are covered with a gypsum putty or if the walls are made of gypsum / fuel-concrete blocks.
If there is open round cavities and emptiness from the end of the opening - they can be seeded by plaster, leaving labels with a pencil so that the master drives the fastener. Holes under the fastener of the door frame are drilled between these cavities in the jumper.
If the walls of the opening are made of drywall, then in a metal profile in vertical ends opening before You need to lay dry wooden bar. It is needed for reliable fastening of doors on the self-tapping screw through the loops and the response part, as well as it gives the rigid the walls in the area of \u200b\u200bthe Owl. The doors installed in the loops without amplification are doomed to brief operation and quickly will be saved.
If the bar is laid inside the metal profile, and the ends are not sewn, it is not correct. The galvanized metal is badly lipot foam. Over time, it is possible to peel off. To avoid this to the ends screw the GLCs or GVL or Phane. These materials are excellent foam adhesion.
It is not allowed in the upper part of the opening to leave emptiness between the sheets of plasterboard. The fact is that the upper box is often very curved or bent when it is crushing, and for it, for example, a filled wall end is required with a foam.
Preparation of the opening of the sliding doors
For those who want to install sliding doors-compartment, the height of the opening for the standard door should be about 202 cm. And the width of the opening should be equal to the width of the door leaf or a pair of centimeters is wider. In the process of finishing the opening of good and platforms under the portal, its dimensions should be less than the door canvase.
At height from 207cm. up to 212cm. From the floor in the opening should not be emptiness, as it will be horizontally fastened with a wooden beam with a cross section of 5x5 cm. and about 190 cm long, to which the aluminum top rail attaches with rollers.
Finishing of the doorway (portal) in the apartment
If I do not want to install the interior door, you can install the portal instead. This solution increases the space in a small-sized apartment, so this is a win-win option for the visual association of related rooms: a hall and a living room, a corridor and a dining room, living room and a small kitchen. The doorway without a familiar door is surprisingly converting the room: 
Preparation of outdoor coating before installing doors
A frequent error of repair brigades when laying outdoor coatings when the gap between the flooring and the wall in the area of \u200b\u200bthe platbands exceeds the thickness thickness. And just just do not forget it to make no more than 3 mm. in the area of \u200b\u200bCalicaries.

In the wall of the floor, you can make a deepening (stroke) to compensate for possible extensions of the floor covering.
Storage doors after shopping
To eliminate the deformation under the influence of gravity, the canvas, a box timber and platbands must be stored on a flat surface lying. Doors can be put on side to the wall.
Doors, platbands and boxes can change their dimensions after moisture changes. Due to the set of humidity after the cold is warm, the door is needed before installing the door and the molding is kept in the room for several days. Do not remove the packaging with the doors in advance until the temperature leveling is completely aligned.
What loops choose?
- If the cloth weighs up to 20 kg., It is optimal to buy 2 loops of 10 cm. Height
- If the cloth weighs from 20 to 30 kg., It is necessary to buy 2 loops of 12-12.5 cm. Height
- If the cloth weighs more than 30 kg., Then you need to buy 3 loops on 10 cm. Height
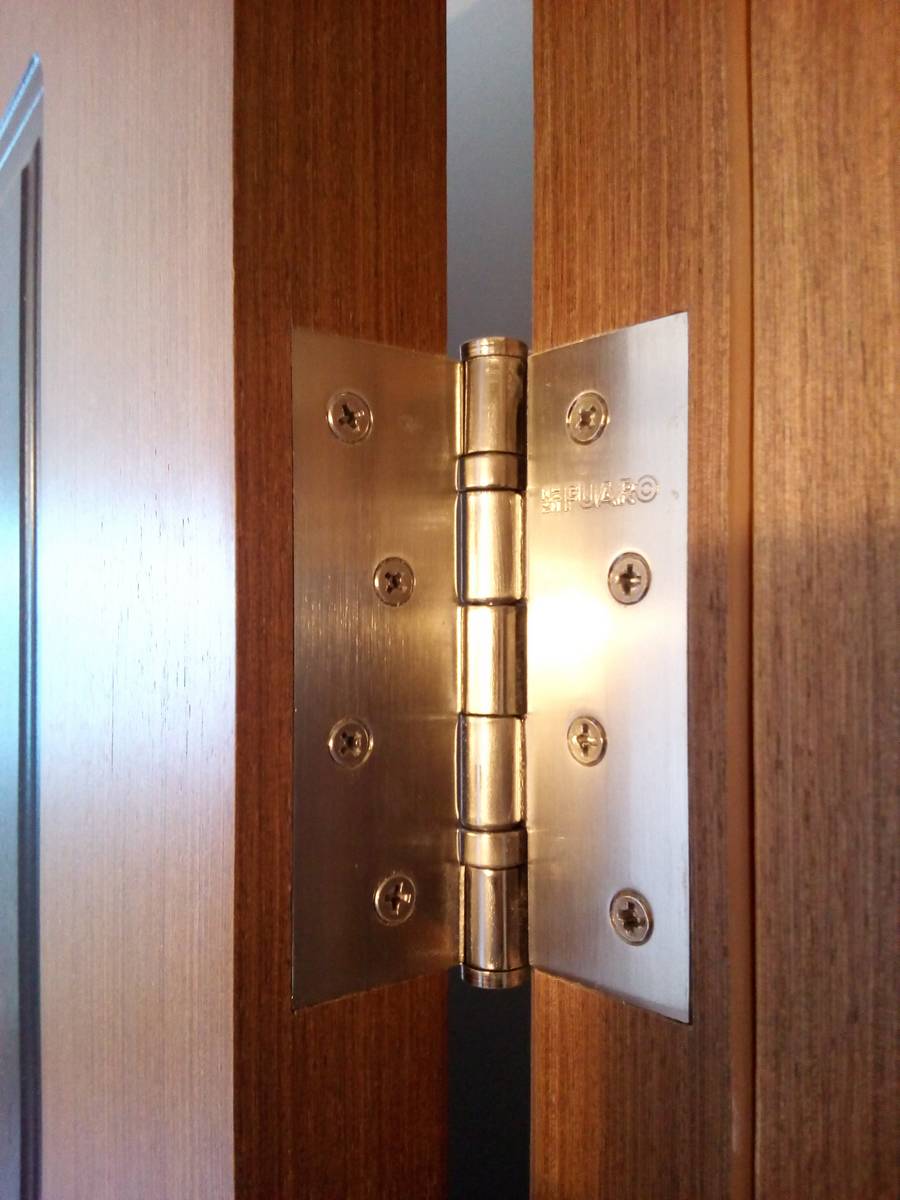
The loops are hung at a distance of 20 cm. From the top and bottom of the door canvase. Very important metal thickness and lack of backlash. If the thickness of the metal loop is 3 mm., Then these are good loops, the thickness of 2-2.5mm is much more common. Very good if the loops are made of brass, steel. The most common door loops come in several types:
- universal loops - These are traditional, massive loops we are familiar to all. If the choice of loops is not a fundamental point, buy universal loops. They can be opened both to the right and left. In addition, universal loops have a longer service life.
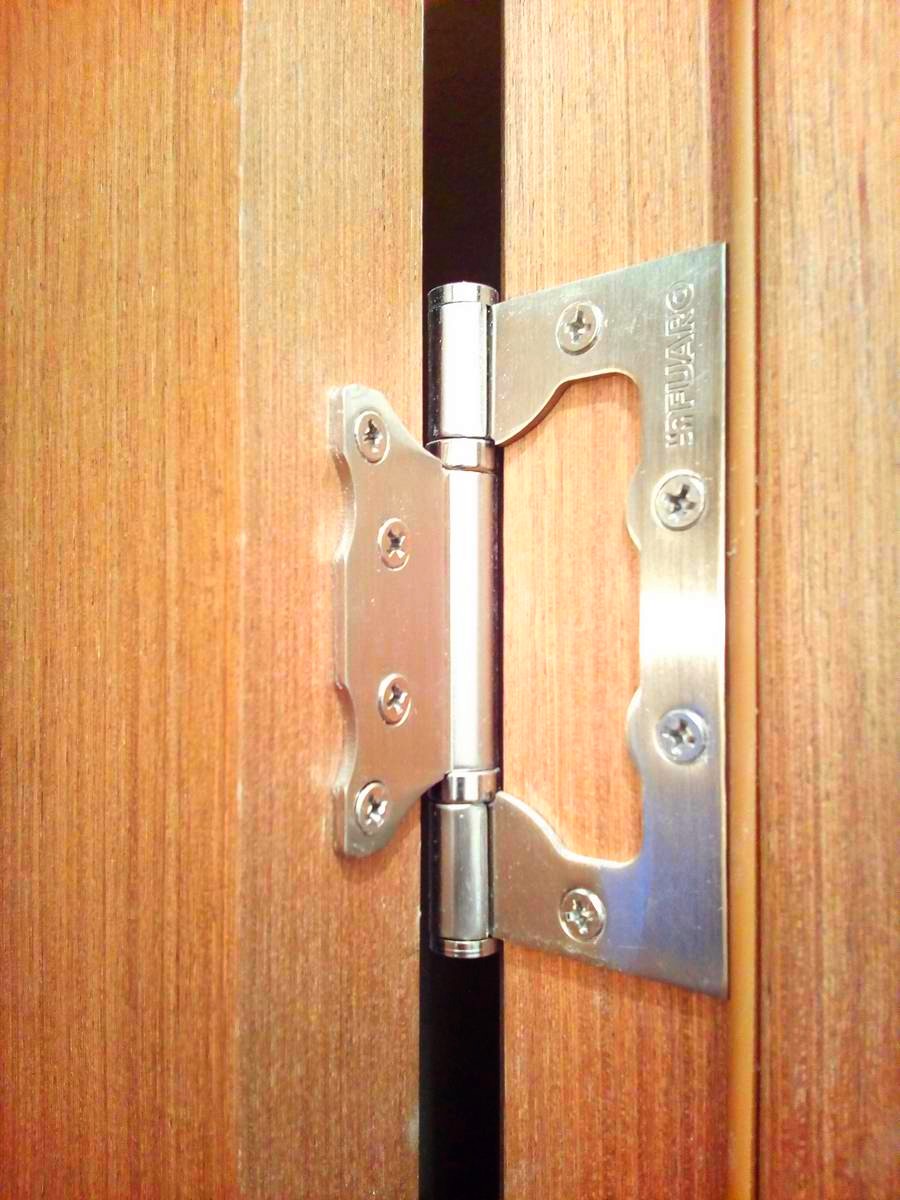
- - Non-mortious, overhead loops. Easy and simply installed. They received their name for a special unusual design - both of its element in the open state resemble the butterfly wings. In the process of closing the door flap, one piece of the loop is easily entered into another, forming a whole. Usually such loops are put on lightweight doors.
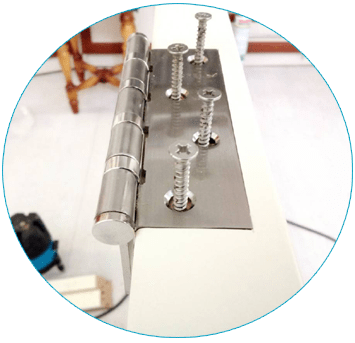
- - Curling loops proven by time, the door with such loops is simply removed if it opens by 180 degrees. There are right and left depending on the door opening

How to choose locks and latches?
Castles and latches are best to choose from the most quiet operation of the mechanisms when opening-closing and their reliability. Magnetic locks are quiet, but not all, they must be purchased more expensive and desirable Italian, there are very high-quality options. Do not save on them so as not to suffer later.

Cheap latches with plastic tongues are not always high-quality, it is necessary to first ask for knowledgeable people (not sellers), and not buy too suspicious options. Six months will work quietly, and then suddenly start thunder. Sometimes such cheap magnetic locks and latches are not triggered immediately after installation. Door installers know these models well.
You can buy classic latches / locks. It will be best to choose them with plastic tongues, as they are the most quiet in work and are not scented as metal.

Sometimes it happens that the new latch is trigged. In this case, drip into the castle tongue a couple of drops of silicone lubricant.
Door handle height from floor
For Europe - 95 cm. Many symmetric doors are available now, whose doors design handle should be located strictly in the middle of the canvas. Therefore, the standard of height of the handles for Russia is 1 meter.
Almost all models of door handles in the kit are too long self-tapping screws, which when twisting them in the door can jam the castle or lead to its unstable work. Door installers almost always fasten the handles with their self-draws.
How to choose how to choose a wizard for installing the interior door and check the quality of his work?
 How to make the right choice to not stay with hopelessly spoiled doors? Will the work done qualitatively if the door is on the installation of doors cause doubts? Let me find out how best to test the work of the master and wonder everything on items.
How to check the work of the door installation wizard?
- Look at the quality of the cuts of locks, junctions of the box and platbands, the pockets of the loops. The gaps must be disappeared
- The lock tongue must be in the retaliatory bar without the backup.
- The canvas should evenly lie down the entire length to the arrival or rubber seal. When closing the door, the rubber band should not be frozen the web
- The gaps between the door and the box should be even over the entire length.
- The box is fixed in the opening not only on the construction foam, but also with the help of fasteners
- The canvas should not be independently closed or open.
- Furnitura must rotate freely
- The price may grow, only due to the increased volume of work, which cannot be provided in advance.
How to choose a doors installation wizard? Main ways.
1. The master must narrowly specialize in the installation of doors!It is necessary to watch or see the work is live (familiar in the apartment). Master or Brigade must have an experience of at least 1 year and be sure to be available. Professional: saw for a carriage, sawing table or manual disk saw, milling mills, screwdriver, drill, perforator, spiker gun with compressor, fittings patterns, etc. Read
First you need to dismantle the old doors, and the opening of the construction garbage is then a new door frame. Vertical racks are measured in height and dumps with a stouch for the desired size, and the horizontal bar is supplied to the door canvase size. The file must be treated with rubbing surfaces. For reliable fixation in the angular connection of the box, screws are screwed. The location under the hinge is marked at the place of the loop on the door canvase. The horizontal rack is applied to the door so that there is a gap of 3 mm between the door and the horizontal crossbar.
When you want to set the interroom door or heavy, the doors must be hung on three loops, and interroom for two. The verticality of the doorway walls is checked and the collected box is installed. Wooden clins fix the box of interior door and the level of the verticality will appear. Vertical racks are attached to the wall with big screws with dowels. The remaining openings are closed with special caps. Consider other options
Installation foam you need to fill the space between the box and the wall. Foam has a property to expand greatly and at the same time creating pressure. Therefore, the door frame is strengthened with spacers. It dries foam from 4 hours to days, depending on the composition.
The last step is the installation of platbands. They close the slots between the box and the wall. Tubes are spilled strictly under 45 degrees. The box is nailed with small cloves with flattened hats or completely without hats. The distance between the nails should be 100 mm - 150 mm. Details about other ways.
The specialists show the whole process, how to install the interior door with their own hands and performing the locking of the castle. If you are still in doubt also study more tips on the installation of various types of doors.
Now you can install the interroom door independently on video instructions without problems and excess costs.
Today, the installation of interroom doors is done in most cases. Manufacturers seek to simplify the installation of their products as much as possible, so it can be cope with almost any person. We will later consider in detail this procedure.
Before installing the interroom door itself, you will need to choose a suitable model. By the opening method, they are divided into the following categories:
- Folding. Such models consist immediately of several shutters that are moving along the guide. They are divided into two subgroups: books (consist of 2 sections and differ in strength) and accordion (alternative to shirms).
- Coupe (sliding). Have the largest amount of modifications: 1 and 2 folding, opening in or along the wall, left-hand and right-sided, etc. The main advantage of such structures is saving space. With the right installation, they also provide a high level of noise insulation.
- Swing. The last variety is the most popular. Installation of doors of this type is much simpler, and people are cope with it without carpentry skills (which cannot be said about other categories). In addition, their cost is significantly lower. The main lack of such structures - they occupy a lot of useful areas.
Installation of the first two varieties is made according to various methods that have significant differences. At the same time, a carpenter will be required from the masters, otherwise it will not be possible to achieve a positive result. Therefore, our step-by-step instruction will consider the installation of the hinting doors.
A few words about choosing a canvase and calculations
Specifications need to be chosen based on the room conditions. First, we are determined with the size of the canvas, so we measure the opening. Do not forget about the need to leave a gap. Between the racks and the source surface 10-12 mm, between the web and the timber is 3-5 mm. This is necessary in order to avoid the jamming of the door. It may appear due to the swelling of the canvas (from temperature fluctuations and high humidity). The standard width ranges in the range of 60-100 cm, the height is 180-220 cm.
Remember: the finished canvas cannot be corrected, and expand (narrow) the opening of the work. Therefore, select the sizes as rather as possible - the complexity of installation will depend on it.
From the size of the opening, technical gaps (12-15mm), the width of the box and multiply on 2. The resulting number is subtracted from the width of the opening. Example of calculation:
- We have an open width of 78.5 cm.
- 78,5 - (1,2 + 2,5 + 0,3) *2 = 70,5.
- So, we suggest a model with a width of 70 cm.
The standard door length is 200 cm, so you have to customize the opening for it. To calculate the necessary height, to two meters (or other digit, if we are dealing with a non-standard model) add the thickness of the box, the size of the technical clearance and 1 cm (the distance between the web and the floor). If the installation of the threshold is assumed, then add its thickness.

In addition to the sizes, it is necessary to take into account the features of the material from which the canvas is made. This is not so important, but you should not bypass this aspect. Remember several simple recommendations:
- In rooms with high humidity, it is not recommended to use models from materials unstable to damp (chipboard, pressed sawdust, etc.). For several years, they wait and lose their original appearance. In such cases, the installation of laminated doors is recommended.
Tip: If there is a need to install such a variety, leave a technological gap 2 times more, because such a canvas is much faster and will be sweended.
- If there are small children or large animals in the house, it is better to abandon the models with glass inserts.
Another important point - for the newly built wooden houses, when installing the box, it is recommended that you not fully screw the screws. This will make it easily survive shrinkage.
Where to start - preparatory manipulations
Initially, you will need to produce several time-consuming and important operations.
What we need - we study tools
Tools for the installation of interroom doors do not differ high cost and complexity. To fulfill all manipulations, you will need the following:
- Hoven with stupid (it should be a suitable size - so that the box is fully in its groove, otherwise it will be very uncomfortable to cut). You can use a circular saw.
- Building level. Ideally laser - it gives maximum accuracy. However, for one-time work, it does not make sense - it is quite expensive.
- Drill with cutter.
- Pencil (or marker), roulette.
- A hammer.
- Screwdriver or furniture screwdriver.
- Mounting foam with a gun.
- Fastening materials: Finish nails (usually they are included), screws, dowels, screws (80 × 5), wedges.
- Two Waterpas (180 and 50 cm).

First procedure - disassembly
It is the hardest, and the main dirty stage of work. Independent installation of interroom doors begins with dismantling old. Consider everything in stages:
- In the course of operations will appear a unthinkable amount of dirt and dust. Therefore, you immediately remove all the furniture, carpets and other items out of the room. What you can not move cover something. Do not forget about SIZ (glasses, gloves, respirator).
- Remove the old door with the loops. To do this, unscrew the screws that are kept. If the loop type "dad-mom" (i.e., when one piece is inserted into the other), then simply open the door and at right angles stretch it up. If the loops are not lubricated, there will have to make a lot of effort, so we make work with a partner.
Tip: If the old web you do not plan to use anymore, it can be simply taken off if there is enough strength. This is the most radical and fast way.
- Next you need to dismantle the box. First of all, remove the solution that holds the frame.
- Then in the upper parts of both racks are made of propuls. This will make it easier to extract process: inserted mounts into the holes made and just pull in different directions.
- As a result, they are overwhelmed, and they can easily be removed from the opening.

Prepare the source surface
The next step will be required to lead the opening in the proper look. Work is made in such a sequence:
- We dismantle the insulation (if any). We do it in gloves, for this group of materials irritates the skin.
- We remove the construction trash, after which we spend a thorough audit.
- If materials are observed that are easily peeled, delete them. We also remove all the fasteners (loops, nails, etc.).
- As a result, we should get a bare concrete (brick, timber - depending on what walls are made).
After such procedures, most likely evenness and integrity of the surface will break. Therefore, it will be necessary to make it align. There are several ways to exist, but the easiest is plastering.
If, after cleaning manipulations, the width of the opening increased (for example, the surface layer of the plaster opal), then the installation of a problem will help. These are such wooden (in most cases) a strip of 6-30 mm wide. They are installed in the case when the size of the opening is needed. A more durable option is a cement solution.

Main Front of Work
The order of the installation of interroom doors must be strictly observed, so all further manipulations are presented in the correct sequence.
We collect the box right
Once again, making sure in the evenness of the source surface, proceed to the collection of the box. It is sold in the form of bars of various lengths. Of these, it is necessary to make a P-shaped design (if the installation of the threshold is assumed, then rectangular). The second option is used mainly for toilets and bathrooms.
If you ordered a box with the door, then, most likely it will be ready - it will only be necessary to collect it (with long screws or nails). With a separate purchase it will have to be adjusted in size. This is the most difficult process that will require maximum accuracy, because in the case of the slightest inaccuracies, the door will receive a slope, which will affect its operational characteristics.
Consider the assembly of the P-shaped structure:
- We put two vertical racks on the floor, it is necessary that it is perfectly smooth.
- We celebrate the height of the opening from the inside.
- From these points down, we produce cut at an angle of 45 degrees, in this you will help the stub.
- On the third rack (horizontal), mark the width of the opening on the inside. From these points we make cut at 45 degrees in different directions. Do not confuse the direction, these three items must be gathering into a single design, so at each new cut make fittings.
- Then placing the places under the loop and the castle. This can be done later.
- We collect the resulting design and connect large screws. For each joint we use at least 3 fasteners.
Attention! Watch out for the vertical location of the self-pressing during twisting, because with the slightest deviation, it will switch the rack.
For rectangular design, the assembly will be identical, only with the addition of the second horizontal rack.

How to put a loop
From the canopies will depend on how comfortable will be closing and opening, therefore, ideal accuracy is required. Most believe that two hinges for normal operation are sufficient. We recommend using three (one is put exactly in the middle). In this case, even with long-term operation, you will avoid distortion. So, you will need to be needed:
- We put the hinges and supply them with a pencil (marker) to the applied markup.
- According to the applied lines, we make two grooves (on the door and canopy) - to the depths of the canopy. A chisel will help us in this. The loop must stand "flush" with the main surface.
- Having made the fit, we screw the canopies on the diagnosis of medium length (at least 3.5 cm) first to the canvas, and then to the racks.
- If necessary, we make fit: put the design to the floor and start opening (close) - if the movement is not smooth, tighten the screws.

Insert the box in the opening
The next step is to install the door frame. We do everything in such a sequence:
- If the loop type "dad-mom", then take out the door - it will make it easier. Otherwise, we leave as it is.
- Level all three racks level. We achieve perfect verticality!
- Upper crossbar with wooden wedges.
- Once again, we use linings if necessary.
- We drill the side racks through the drill.
- In the wedges in the wall insert a dowel.
- With long screws fix the box.
- We carry out the final audit and alignment.
Final chords - handles, platbands
Making sure the perfect evenness, produce final manipulations. Initially, the installation of the handle on the door is carried out. To do this, a through hole of the corresponding diameter is drilled in the canvas (if you purchased a complete set, then this does not have to do). Then two parts of the handle are connected. In most cases, this is not difficult.
At the end, platbands are exhibited - decorative elements that hide all irregularities and forming the integrity of the design. They are glued throughout the perimeter on special liquid nails. The jokes are also drawn up with the help of Stusl.
- Measurement of the opening
- Choosing doors
- Step 3: Collect the box
- Step 4: Marking under the loop
- Step 5: Installing the box
- Step 6: Reliable fixation
- Step 7: Breppy loops
- Step 8: Hipster and Facing
Replacing interroom doors - the process is not such a time-consuming and complex, as it seems. Fill the double or single opening can be independently without the help of a specialist. You, of course, do not save time, but save money and acquire new skills when repairing an apartment or at home.
How to install the interroom door: in this article we will tell how to choose a good door leaf, which consists of a block for filling the opening and how to mount it.
Measurement of the opening
The error assumption during the measurement stage of the doorway is unacceptable: if you acquire a system of large dimensions, you cannot insert it smaller - you can not fix well.
Doorway it is better to measure after dismantling the old door when access to a bare wall appeared. Thus, you can estimate the situation and make the right measurements. It is easy to remove them: Take the roulette and determine the height and width of the entrance along the wall in the narrowest place (relevant for buildings, where the vertical designs are poorly observed). With these data, go to the store for a new door.
The manufacture of products for individual sizes will not need: in houses with apartments builders initially laid typical movements, and fillings for them are always in an open sale.
Interior doors in a private wooden house may differ from typical, then you have to order new and wait for their manufacture.
Choosing doors
The first thing to pay attention to when choosing a canvas and box is the material of their manufacture.

The ideal option is to purchase a box and canvas from one material. It is not necessary to give preference to the wood fiber plate, the doors from it are short-lived, they are installed on construction sites so that new owners can replace them with constant of more durable materials. Ideally, it is worth getting a one-piece array as a door fill, to reduce the cost of the canvas, can be replaced with MDF, which is also a durable raw material for the manufacture of a door, cheaper box.
Doblyar strips and platbands can be made of DVP, wood or MDF. They do not carry loads, only decorate the gaps and mask the connections.
Bivalve doors are more often chosen for large rooms and halls, single blocks are installed in bedrooms and kitchens. In any case, the size of the box and the number of cloths are determined by the size of the opening.
Step-by-step instructions for installation from scratch
The installation of interroom doors does not take much time, sufficiently stock by the necessary tool, buy the necessary material and you can start working. Follow the detailed phased instructions and the success of you is guaranteed.
This plan is valid for the installation of hinged doors, sliding are mounted somewhat differently, but in the same way.
Step 1: Cooking the tool and material
To install interroom doors, you will need:
- Drill or perforator;
- Drills for 3 and 4 mm on wood;
- Borants 4 and 6 mm for concrete;
- Saw;
- Screwdriver;
- Screws on a tree;
- Level / plumb;
- Mounting foam;
- Roulette;
- Pencil.

In addition, the door block should be bought in advance.
Step 2: Determine the Tactics of Action
Installation of wooden doors is carried out according to the standard diagram represented in the photo.

- Door box;
- Canvas doors;
- Nail / screw;
- Mounting foam.
First we collect the box, then insert it in the opening and hang the door.
Step 3: Collect the box
There are 2 options for assembling a box under the canvas.

To understand whether the extra pieces of wood are cut properly, collect a box on the floor as a mosaic: everything must be perfectly. Then pinch the planks on the tapping screw from the wall.
For the threshold, you also need to determine the place, applying a canvas-collected on the top. Return 2.5 mm from it and risk. At this label, attach the bottom bar - the thresholds.
Step 4: Marking under the loop
At the box assembly, it is worth identifying the locations of the loops. To do this, at the side rack, measure 20-25 cm from the top and bottom, attach loops and risks with a knife or pencil. Screw the product with self-drawers, thereby determining the future location of the loop, which will facilitate its mount. Now put the cloth, measure the gaps to the side faces and make risks on the canvas. In the same way, make a slight fasteners, then not to lose their location.

Remove the screws and loop, it will be necessary to mount them after installing the box in the opening.
The box is ready for installation. A more detailed process demonstrates the author of the video.
Step 5: Installing the box
Now fitting the doors do it yourself, but it starts with the installation of the collected box. To do this, you need to put the design on the threshold and align the vertical. For reconciliation, use a plumb and level. So for the time of calibration, the box did not fall, fix it with the struts or temporary clins of tree trimming.

Now you can check the cloth: it will open or not. To do this, you need to insert it into the installed box, focusing on the smooth wall. If the opening does not occur or is not implemented to the end, it is possible to correct the struts and adjust the position of the rack and transverse bars.
If you managed to install everything correctly and the canvas goes well in place, you can fix the box. How to do it:
- On the sides of the upper cross, the wedges are driven, then over the mounting of it to the racks;
- Drive wedges over the entire height of the opening, constantly checking the mechanism of installation and the absence of offsets in any plane.
Step 6: Reliable fixation
The delivered and cooled box must be finally fixed so that it can take the cloth. There are 2 solutions:
- Screw the box to the side walls on the screws. This is a reliable way, there are several screws or screws on wood for its implementation. Places of fastening choose invisible, mostly use areas under the door loops and under the castle plate. Take boot along concrete and make a hole for the screw. Now fasten the fastener so that its hat does not remain over the plane of the tree. If it lacks this quantity of fasteners, you can drill through holes in other places and also put the screws whose caps are covered with plugs in the tone of the surface.
- The second way is to use secret plates. The feature of the method is the lack of need for drilling the box and wall.
After that, fill the space between the opening and the mounting foam of 2/3 by the total thickness. So that the design does not squeeze, set the struts inside the passage loop for the polymerization of foam.

Step 7: Breppy loops
With the proper installation of interior doors, the hinges are fixed only before directly hanging the canvas. Parts for the box are screwed to the seats marked earlier, repeat the steps for the web.
Step 8: Hipster and Facing
The most difficult behind, you can now hang the cloth and close the locations of the joints by platbands. How to install the interroom door clearly tells the master on the video.
As you can see, replace or install a new interroom door can be completely independently, observing a clear procedure. The technology is described in detail and is given in concomitant video, so it is not difficult to understand the question.