The correct sequence of apartment repairs. What do first - the floor or walls when repairing? Black repairs
The issue of repairing the room is almost always resting in the budget of future works. Most often, the owners of the apartment or at home appear before the choice - to make the room repair with your own hands in a cosmetic version, without postponing the case in a long box, or schedule for an indefinite future capital restructuring with redevelopment and serious design updates. Most of the masters in such a situation are recommended to carry out the cosmetic room repair, during which you can solve the vast majority of problems with the interior of the room.
How to properly approach the organization of repair in one room
It is always inconvenient to start repairing the room and even scary, especially if there is no sufficient experience, and from the helpers at hand only the cheat sheet on the repair of the room with their own hands for beginners. But, as a rule, uncertainty and doubts pass when it becomes clear the amount of future work and the issue is resolved, in which sequence to make repairs in the room.
Therefore, the first thing is the master plan for cosmetic repair, and most importantly, before trying to make repairs in the room, it is necessary to compile a detailed estimate for the materials and consumables. This is a prerequisite, even for repairing in a small room, you will need to make a list of several dozen items.
Where to start repairing in the room - not fundamentally, it is possible to carry out repair work in the sequence that seems more convenient in these specific conditions. Traditionally, the room repair is starting with their own hands from the most "dirty" or drafts and finish with subtle finishing procedures.
A typical list of works or a repair sequence in the room is as follows:
- From the walls, the ceiling and floor is removed by the old finish. The removal of the floor covering gives the largest percentage of dust and dirt, so it is removed primarily;
- Conducting floor preparation is carried out for further laying of a new floor covering;
- Repair of wiring, transferring and hanging lamps, switches, unfold corrugations under television and Internet cable;
- The walls and ceiling are cleaned and sweep. If the plans for cosmetic repairs are supposed to change the wallpaper on a more modern type of finish, it will be necessary to perform alignment of walls with plaster plaster;
- The ceiling surface is equal to the same way. Under whitelle or painting, the ceiling is rubbed, plastering the lime-gypsum mixture and laid decorative coating;
- The decorative decoration of the walls is performed, the ceiling plinth is glued, the facing of interroom doors changes;
- The new flooring is placed, the plinth is installed, the lamps are placed, the switches are installed.
Of course, at every stage of repair of the room, photo, a large amount of garbage and dust will be formed. Not only will you have to regularly remove the room and take the garbage dusties, you will need to try to close the sections with the repair of the protective polyethylene film to avoid dusting the surface.

What should not be included in the cosmetic room repair
The wizard finishers often call the cosmetic repair of the work "for three days" in order to update the interior in the room, more, as a rule, is not required. The list of repair activities do not include the most expensive work:
- Redevelopment of premises with the transfer of interroom partitions;
- Replacement of the heating system;
- Installation of expensive multi-tiered suspended ceilings;
- Glazing balcony and replacement windows on double-glazed windows;
- Warm floor equipment in the room.
It is clear that all the listed components of repair require serious financial costs and attracting qualified specialists to the work. Time to hold such serious events will be required no day and not two. In addition, this is the specificity of the repair in the room, that the willy-nilly dust and the construction trash sprawl across the apartment. Therefore, the situation is regulated in this way - either the cosmetic repairs are made in a separate room, or the whole apartment "gets up" to capital repairs.
In general, in a plan for cosmetic repairs include everything that can be made in a couple of days with their own hands for relatively small money.

The main task of cosmetic repair
The main goal of repair work is to refresh the interior of the room, remove the minor defects and damage accumulated over the years, insanely annoying and interfering in everyday life.
In rare cases, cosmetic repairs becomes a consequence of force majeure circumstances, for example, the flooding of the room with neighbors in the floor above or preparing the room to surrender in the hiring. There may be a lot of reasons, but the main thing is still maintaining the room in a comfortable condition.

Properly performed cosmetic repairs makes it possible to save on the volumes of future overhaul, for example, the fulfillment of the center of the floor and alignment of the walls at least will reduce the costs of time and forces to prepare for overhaul, naturally, provided that the room repairing the photo is made as in good faith and high quality .

The next stage of repair, cost distribution and load
One of the most difficult stages of cosmetic repairs are fair to plan budget planning and procurement of materials. Especially if you plan most of the repair procedures with your own hands. The reason is simple - in lovers and beginner masters, there is no idea about how much the material will be needed on this or that section of the work.
In this case, the problem is solved in two ways:
- Compiled list work and estimates can be shown to an experienced master who will help calculate the expense of the room quadrature;
- Calculate flow Based on the standard recommendations of building materials manufacturers, increasing the stock of glue, plastering, wallpaper, flooring by 10% of the calculated indicators.
In the latter case, the costs of acquiring materials will increase significantly, but ultimately the remains of cement, dry plaster and adhesive can be used for the cosmetic repair of other rooms in the apartment. In addition, the list of often helps to get a wholesale discount, so that there should be no significant failures in the budget of the future cosmetic renewal of the room with a competent organization of procurement.

Preparatory stages of repair in the room
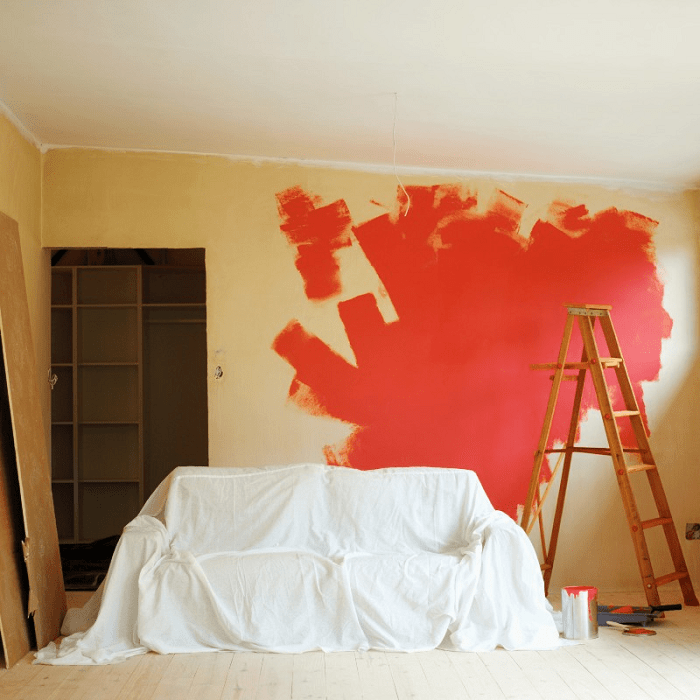
The first, the most time-consuming stage there was always a rough ridge of walls and a ceiling. Usually repairs in the room begins with the removal of furniture items and seal the entrance door to protective awning. You can use a dense polyethylene film or an old blanket. The improvised curtain will protect the rest of the apartment from the noise and dust, which, even with very neat work, the use of the vacuum cleaner and the damp floor cleaning is always accumulated in a room in considerable quantities.
Before repair, lamps are necessarily removed, instead of a chandelier in the room, leave a cartridge with a light bulb. If the room is installed double-glazed windows, it will be useless to tighten the film and the window opening before repair. It is clear that the film is closed and the floor covering, it is easier to minimize placed polyethylene than to wash the dirt in the room every evening.
We remove the old finish from the walls
A third of the scheduled time is due to the preparation for cosmetic repairs. During this time, you will need to remove the blots and wallpaper from the walls of the room. If there are areas with damaged plaster, it will take another day in order to knock down the plaster from the walls.

Old wallpaper is removed by either by one panel, or they will be scrooks for a long time with small pieces, it all depends on the glue used. Before removing the wallpaper, the surface is moistened from the sprayer with a small amount of water. After 20-30 minutes, the tag can be removed by flap. For highly strong adhesives, boiling water and steam are used. In any case, after the sprinkle of the old chopper, you will need to go through a vacuum cleaner and a rigid brush to remove the dust and remnants of glue.
Rogging and restoration of the ceiling surface
The ceiling is freed from the decorative coating much faster and easier than the walls. If the plans of the cosmetic repair will be a sticker of polystyrene plates or laying of plastic panels, then it will be enough to remove the top layer of whitewash.
It is more difficult to the situation if the ceiling in the room is painted with water-level paint or bites. In this case, you will need at least a day to remove the durable layer of the old finish.
The most common option to restore the ceiling during cosmetic repairs involves the alignment of the ceiling overlap plane. In any room of any apartment, the ceiling slabs lie with a differential in several degrees, which leads to a difference in the height of the ceiling near the opposing walls of the room from 2 to 5 cm.
If the time and budget of cosmetic repair allow, it is best to perform the alignment of the ceiling overlap with high-quality plaster plaster.
To do this, plastic rails are coiling and tighten the plaster with a plaster grid. Reiki-beacons glue alabaster, focusing on the pre-stretched marking horizontal cords. The grid is sewn on dowels. The total time required for the ceiling alignment in the room is 5-6 hours of operation.
In one working day you can complete the full repair of the ceiling. The next day, you can rub the surface and paint surface.
Cosmetic repair work with room walls
During the cosmetic repair, the walls are flattering and plastering only in exceptional situations, when this requires a situation, for example, the appearance of a large amount of cracks or the rocking of plaster. In addition, the total area of \u200b\u200bthe walls of the room is usually tripled exceeding the area of \u200b\u200bthe ceiling, which in itself requires a lot of time and materials.
Therefore, during cosmetic repairs, the preparation process is limited by a cutting of small cracks, followed by shtcloth and surface grinding. Sometimes, in order to align the plane of a separate wall, especially problematic foster is subjected to grinding with electric grinding.

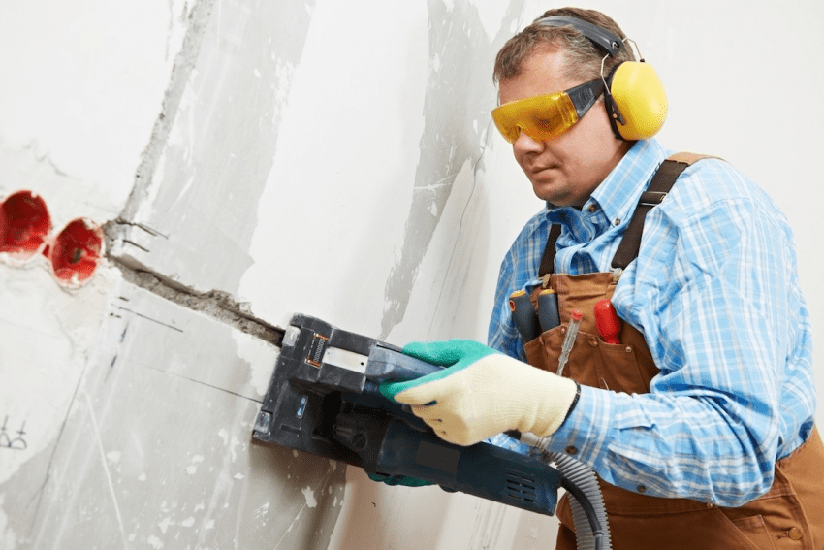
In addition, at this stage of repair work it is easy to change the profile and configuration of wiring wiring in the room. It is enough to labby the channels at the bottom of the walls to the place of installation of new electrical sockets, break through the "glasses" for cutting and install the sockets themselves. Channels laid in channels with wiring can be witching plaster or alabastern weight. All works will take a maximum of 2-3 hours. At the end of the preparation for decoration, the surface is carried away by a vacuum cleaner and ground.
Blood preparation
After the end of the most labor-intensive work with the preparation of the ceiling and walls, you can move to stripping and preparation of the floor. If concrete floors, with a floor-based floor-based coating, then cosmetic repairs can limit the resetting of laminate plates, with a replacement of a lining material or without any. Most often in the room change damaged plates, after which the coating is polished using wax mastic.

Linoleum coatings in cosmetic repairs are cut, the base is determined to concrete, it is ground and closes with a thermal insulating lining based on foamed polyethylene.

If wooden floors are equipped in the room, then the flooring themselves are observed and are repaired, then the joints are clogged and coincided, after which the surface is grouped and preparing under painting.
Do not forget about trash and dust
Any repairs, even the simplest and superficial, are always accompanied by the formation of a large amount of garbage and dust. Before repair, you need to prepare two or three polypropylene bags, in which all garbage from the room will be collected daily. At the end of the day after each finishing operation, the wall and the floor are cleaned from the raised crumbs and residues of the plastering solution, and before finishing the walls are a vacuum cleaner or a wet brushed.
If it is supposed to align the walls of the room with plaster plaster, then the amount of garbage will increase five to six times. It will be necessary to consider in advance and find a way to collect and remove 150-200 kg of cement and sand garbage drops. It is impossible to send it to garbage chute or garbage tanks, you will need to order a special service for the removal of construction waste.
Cosmetic Repair Operations in Room
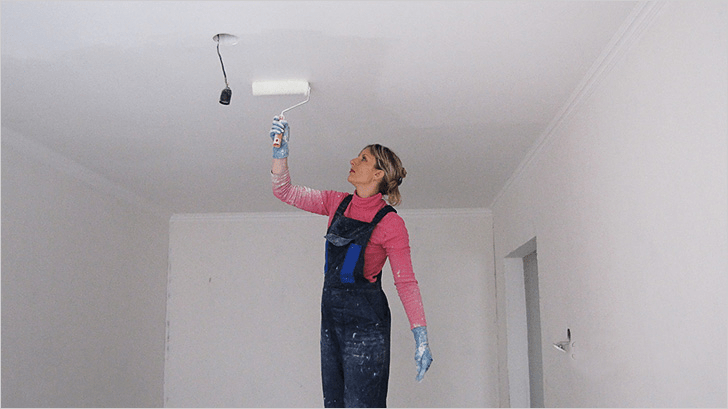
The first finishing ceilings are performed. Typically, the renovated and ground surface is ground and stained with acrylic paint of light tones.
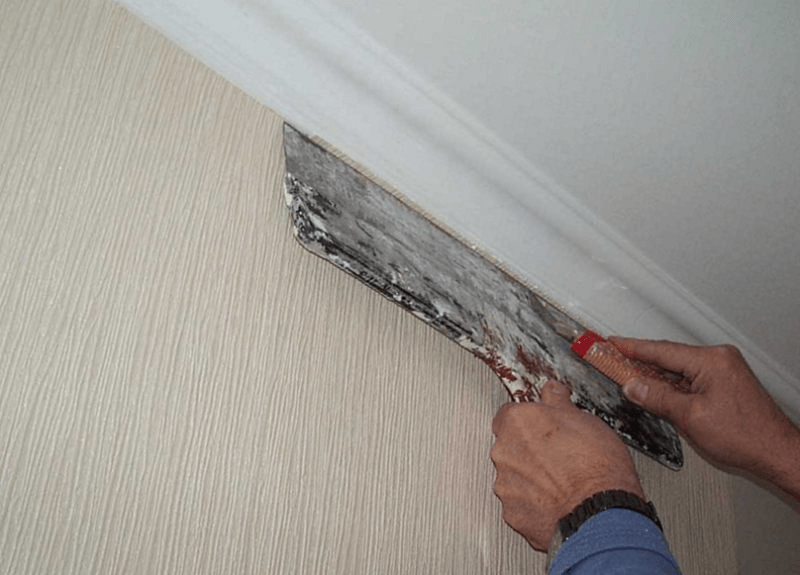
If wallpapers are used in the interior of the room, ceilings can be decorated with fluiseline or vinyl wallpaper in the tone of the future wall decoration. The usual practice for registration of lamps and chandeliers is considered to use imitation of stucco from polystyrene foam and decorative ceiling plinths.
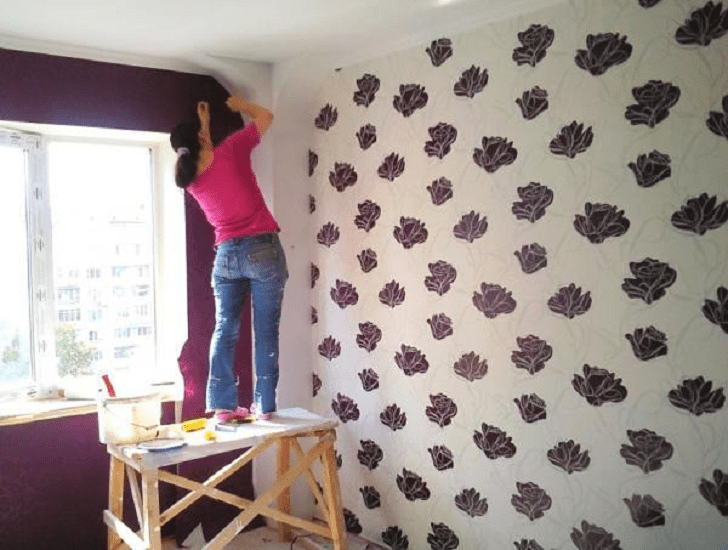
The finishing of walls in the room is considered one of the most responsible and at the same time labor-intensive cosmetic operations. Even with the fact that half of the walls in the room will be closed with furniture, all the same as a certain part of the walls will be well viewed by all those present in the room. If during the cosmetic repair, it was not possible to highlight the surface of the walls, we can only hide the disadvantages under the wallpaper. It is best to tissue-based tissue trellis or with a pronounced embossed textured surface. There will take 7-8 hours or full time on the room.
Repair doors and floor in a small room
The wooden board of the old layout often has to be hiding under linoleum or laminate. In this case, the surface of the flooring is polished by a cyclical machine, and the joints are crossped with nails, clogged at an angle to the board. At the next stage of repair, the surface of the floor is sewn with OSB plates, after which a linoleum or any other option of flooring can be laid in the room.

The situation is complicated if concrete floors are aligned in the level of the screed in the entire apartment. In this case, any floor covering in the room will lead to the appearance of the clad, so laying the laminate or parquet should be planned simultaneously in all rooms.
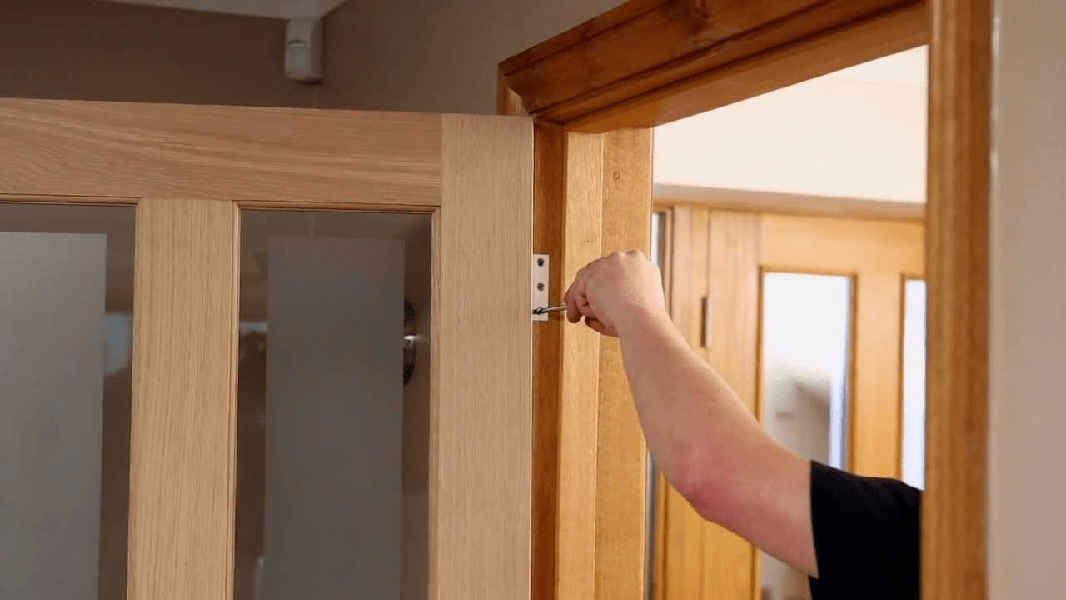
The final stage is considered to restore interroom doors. Lutka and the door itself, if they are in good condition, can not be changed, but to subjected to restorations with cleaning and surface polishing. The external facing of the door frame during the repair is traditionally replaced by a new one. The replacement of the door with the carrier box is planned for overhaul, usually so that the doors of one style and execution in the entire apartment or house.
Conclusion
Room repair, even in a cosmetic version, requires careful preparation, first of all, in the details of the future interior of the room, the method of decorating walls and gender. Any attempts to postpone the decision for the future, to make random, as it turns out, will lead to a significant increase in costs and an increase in the time required for the restoration of the room, two or three times.
Do you associate with a million spent nerve cells with a million and very long process? We will prove to you the opposite! You still do not believe, but the repair can become pleasure if it is not easy to turn this and, at first glance, a rather boring occupation in a simple and exciting process.
And the main thing in this case is an order when the sequence of apartment repair is observed with their own hands, and all stages of repair in the apartment follow one after another according to a predetermined repairs plan.
So, you still decided and tuned to make repairs in the apartment, a separate room with your own hands. How to make an apartment repairs with your own hands? What is it preferable to start? When and in what sequence to change the doors, windows, repair floors? What is the procedure for performing repair work should be? We will try to answer the main questions in this article.
Stages of repair of the apartment with their own hands: We plan in advance work order

Indeed, all stages of apartment repairs from scratch is important to know and comply with the sequence of work carried out.
If you follow the sequence of events, you can significantly save money, reduce repair time, achieve a better result in finishing works
First stage - Global preparation

Each repair begins with global training. First of all, it will be necessary to fulfill all dismantling work: removal of plaster, old wallpapers, blots, door blocks, flooring, and, if necessary, dismantling partitions and their permutation.
There may be such a situation that already completing the repair, when finishing, you will find that I still forgot to dismantle something. Here you have to redo the work, and redo slow, carefully, to minimize new destruction.
Therefore, graduating from dismantling the entire unnecessary, old and subject to replacement, carefully inspect the result of your work: whether you did everything.
2 stage - replacement of glass windows

This work is quite dirty, especially its first part, when old window blocks need to be dismantled. After installing the window and the windowsill, immediately close them with a thick film of polyethylene, so as not to scratch and not smeared during subsequent work.
3 Stage - Plastering

Plastering, when performing, require compliance with the following sequence of work: markup for beacon profiles, primer walls, installation of a beacon profile, plastering walls, slopes. Plasterboard walls are not subject to shuttering. Works on the plaster ceiling, installation and installation of stretch and suspended structures should be carried out only by completing the wiring on the ceiling of ventilation, electrical cabbels, other communications.
4 Stage - Wiring of electrical communications, plumbing work
The events of the fourth stage belong to one of the most responsible steps of repair - this is the installation of heating radiators (or replacement), gasket and wiring of electrocabilities, low-current wire (there are grounding cables, Internet, telephone, TV, alarm.
Before styling cables, be sure to make outlets and switches output on the plastered walls. Next, proceed to work on the winding of holes and grooves for cables, junction boxes, pickles, install the built-in electrical block.
Be sure to draw the circuit wiring: it is necessary to then not allow a random hit to the place where the wire is laid when you become drilling a hole, clog nails. It is very important in the kitchen, toilet, bathroom in front of the wiring laying, perform pipe wiring, including other related work.
Fifth stage - floor preparation
Warm floor, screed and alignment. When the screed is laid, aligned, it is necessary to wait for its absolute drying. For different materials - different drying time, carefully read the instructions in the instructions or packaging.
6 Stage of Repair - Getting Started

When the floor is prepared, you can install the doors, then proceed to finishing work. The sequence of finishing works depends on the choice of technologies and the materials used. So, the whots or painting of the ceiling is performed first, but, let's say, the suspended ceiling is best when the walls are finished. Laying any floor covering, be it linoleum, tile or parquet, is performed when the walls and the ceiling are ready.

Then you can install plinth, sockets, platbands, all sorts of decorative elements; In the bathroom, kitchen, the toilet is installed plumbing, mixers, various accessories.
Important! Repair, if possible, better all the apartment immediately and entirely. Similar stages of work, this is especially relevant for "dirty", such as the removal of the old whitewash, the installation of windows, not to mention the breakdown and permution of partitions, it makes sense to do in all rooms at the same time, to prevent such a carpet, in the same room The other was just started to wash off the ceiling old bliss.
If you immediately repair the whole apartment problematic, you need to start repairs with the longest room from the entrance door and continue repair work, gradually approaching the exit. Repair of the corridor and the hallway make last. This is quite an obvious rule: it is clear that on the freshly spent rooms to carry buckets with a solution, bags with construction garbage - not the best solution. But the rule is disturbed constantly ...
Read about whether all the secrets and features of the installation of double-glazed windows in residential premises.
Watch the video, how to put the plasterboard under the wallpaper - all drywall sheets before cutting wallpaper should be prepared.
By the way, moving from the most remote room from the hallway and with the full repair of the apartment is entirely. To greater extent it concerns the final stage of the work - finishing.
This is how the instructions for repairing an apartment looks like. For those who prefer to read the video format, we offer to see the educational video on the repair of the apartment with your own hands:
Everyone knows or remember that it is necessary to pay attention to the planning. But sometimes it is equally important to determine flat repair sequence. Not only the planning of work and time, but also financing the entire project. It may be necessary to purchase expensive materials during the repair process, and the money will be completed. And what, repair will have to freeze? That is why it is important to clearly represent the entire order of repair with your own hands.
We will not open America, but try together to find the cherished formula. We will simply list work from the end, and get to the truth. For example, consider the usual room repair in the following volume. The ceiling with whitewash, on the floor, on the walls - wallpaper, change interior doors, put plastic windows, and, forces, we produce a replacement of heating radiators. Most often we are solved for serious repairs, it is after replacing windows and / or radiators.
The principle of performing finishing works during the construction of "top down" is known. We agree with him, however for home conditions, we offer the following principle of repair in the apartment, with more everyday color - from more dirty work to cleaner.
Consider the sequence of repair in the apartment in the reverse order
So, the last, most pleasant and clean stage when repairing an apartment is both thresholds. Immediately, all sorts of shelves and lockers are hung. If aesthetic addiction is not too demanding, then cable channels or other communications are attached.
Before plinths, we finish the walls. In our case, this is either or any other finish. It is believed that the latter is the decorative floor decoration. It is legitimate when work on laying cleaner than finishing walls. For example, if the walls are textured plaster, and on the floor.
The third competitor of the penultimate stage of repair, many call the installation of interroom doors. The main criterion for which you have to shift the installation to an earlier stage is a possible error when measurements. This happens because of the objective technical complexity of the execution or self-confidence of the measurers, which is not all.
Before the doors, walls must be prepared, that is, and prepare for salary by wallpaper. If unexpected potholes appear when installing doors, it will be possible to eliminate them to the final decorative wall decoration. Again there is an opinion that you first need to install the doors, as you still have to smear the doorways. The main problem of installing doors to wall decoration is the danger of their damage. As delicate paper, both kind-quality doors may suffer. If you can organize the protection of platbands or find doors with easily removable platbands, it is better to move the installation of doors to the stage earlier.
Finally we get to the most dusty work: new windows and radiators. Most often, outsiders are attracted to these operations, which will not be trembled to cleanliness in the apartment, it is almost impossible to maintain order. In addition, due to the new situation, it may be necessary for the transfer of old or. It is also supertile work.
It is perfectly remarkable that all these very dusty works can be alternating. Moreover, the speed of their implementation largely depends on other people and your financial opportunities. These works are planned in advance and can be torn to reasons independent of you. So the order does not matter. The only thing to remember is: welding works can damage the floor, walls and windowsill. Therefore, we propose to plan the replacement of heating radiators to the earliest stage. If the batteries do not give God, of course, they will be installed poorly, you will not harm the repaired subjects.
To find out the final amount of work before starting repair, it will take a critical inventory of the entire premises. If you remember all the work mentioned, you can already call flat repair sequence from start to finish:
- Electricity.
- Replacing heating radiators.
- Repair of rough floor.
- Window.
- Alignment of walls and preparation for staining or sticking wallpaper.
- Ceiling with whitewash or painting.
- Doors.
- Stretch ceiling.
- Decorative flooring.
- Wallpaper.
- Plinth and thresholds.
Here is an approximate sequence of work we will perform at. Of course, this is not a dogma or an absolute rule. But adhering to this list, you can not turn repairs to an unmanaged process, and most importantly, avoid many troubles and save your own nerves.
To repair the apartment did not turn into a phenomenon of a long and annoying, it is necessary to know exactly the sequence in which it should be performed. However, to begin with, it should be clear what exactly you are going to do: fully transform everything or limit ourselves to one or several rooms.
It also recommends that the sequence of apartment repairs also depends on its complexity, that is, from the capital or cosmetic repair you are going to perform. No less than the value also has the one who will perform work: you yourself or hired workers (or perhaps some of the work you will take on yourself, confesting the most difficult builders-professionals).
Repair in new building

If you bought an apartment in a new building, then, most likely, you have now only bare walls and ceilings, as well as the complete absence of a floor and doors. In this situation, you should act in the following way:
- If necessary, first launch the pipes of the water supply and the consumer heating, "hiding" them in the floor level. If working with polypropylene pipes for you in a novelty, entail her professionals.
- Decide whether you need to plaster the walls, pour the concrete tie to the floor and put the ceilings. All of these works require quite high construction skills, and are among the most dirty, as they are associated with the preparation of solutions. Therefore, it is recommended to invite a construction team to fulfill them, which will cope with the task quickly and efficiently.
- Before inviting builders, it is worth taking care of the amenities for them. We are talking about installing the toilet and washbasin, in which they will also be able to gain water to mix the solution. And the toilet bowl with a tank, and the washbasin must be connected to the water supply (enough cold water) and sewage (it is not necessary to lay capital pipes immediately, it is enough to make a flexible eyeliner).

- Invite an electrician so that it pauses the wiring (or do it yourself, if you know).
- Hire plaschers, entruscing them to perform the full amount of work.
- After your new apartment will be plastered, the workers will fill the tie to the floor, and then cover the walls (as well as the ceilings, if you chose this type of finish).

- The next step is laying the tiles in the bathroom or combined San.Uzle. Leave this part of the repair "For then" should not be, as laying the tiles is also usually accompanied by a small amount of dirt due to the use of special glue.
- Conduct water supply pipes directly to San.teh. The instruments can also be independently by setting them to the place of constant location.
- Install door boxes and shock steps.
- Perform ceilings from drywall (this will allow them to align, but at the same time "eating" part of the height of the room).
After your workers coped with the main works throughout the apartment area, you can start the rest, performing everything with your own hands. The list and sequence of work in this case will coincide with cosmetics.
Overhaul

The sequence during capital work is usually recommended as follows:
- Remove all furniture from the repaired room.
- Replace old windows to new (wooden or plastic).
- Replace the doors (if there is a need for this).
- Watch the walls and put a new wiring, increasing the number of outlets.
- Remove the old floor covering, fill with a new screed.
- Slip the ceiling (or complete it from drywall).
- With putty, align the walls.
- Restore window and door slopes.
- Replace tile in the bathroom.
After the completion of these work, you can start by the next stage, which coincides with the repair of cosmetic.

The sequence in the case of cosmetic works involves movement in two directions: from top to bottom and from the long-distance premises to the exit from the apartment (it allows you to avoid "disappearing" of dirt and garbage from the already repaired premises):
- Select the room from which you will start executing work.
- First, put the ceiling in order - cover the ceiling plinth, paint it (along with the rest of the ceiling), or get wallpapers and paint them already.
- Get wallpapers on the walls, moving from the window opening to the door. In the course of the execution of work, install the external parts of the sockets and switches.

- Place a new flooring.
- Secure the plinth room through the perimeter.
Combination and division of work

Repair work in one room in the apartment can be combined with the works carried out in another room.
If the "dirty" works are performed in one of the premises (that is, there is plastering or poured the screed), it is better not to do the first finishing works at the same time (such as painting ceilings or sticking wallpaper) in the next room.
The sequence of apartment repair also implies the option when a certain type of work is performed immediately throughout its area. For example, you first paint the ceilings in all rooms and only then start sticking the wallpaper (also in all rooms) so that you also sit new floors everywhere.

To perform repair work in the apartment you will need a stepladder, as well as a large number of different tools (drill, screwdriver, jigsaw, etc.). Part of the tool, such as a soldering iron for polypropylene pipes, can be rented. But such trifles like pliers, screwdrivers, drills, and so on, it is better to have their own (they will fit you in the future).
Tsugunov Anton Valerevich
Reading time: 4 minutes
Many familiar expression "Repair is a natural disaster." To update your beloved dwelling, it is necessary to have a real "catastrophe", it is necessary to consider the sequence of repair of the apartment and continue to adhere to it. The compilation of the algorithm of action will save from excess spending time, nerves and family budget.
Where to begin?
In what sequence to make repairs should be determined at the very initial stage. It can be conventionally called theoretical. It is characterized by a number of preparatory activities:
- Development of a designer project. To compile a design project, you can contact a special organization where experienced professionals will cope with this case. But this is something optional, in your apartment you can experiment with your own design solutions. The project should reflect such moments such as redevelopment of rooms, placement of furniture, technology, location of lighting devices, switches, sockets, decorative elements. An important role in this project is given to color solutions, it is now that the ceiling, walls, doors and gender will be.
- Choosing materials and drawing up cost estimates. On the basis of a ready-made designer project, you can already begin the selection of necessary materials, an approximate calculation of their consumption and the preparation of the estimate. This document will help track and monitor financial costs during the repair.
Tip: When creating the estimate, do not forget to calculate the number of materials and costs for them with a margin, since there is always a risk of marriage, damage in the process of work or change their value.
- Drawing up a plan defining the sequence and types of repair work.
- Purchase of materials and missing tools.
Non-case rules will help correctly refer to the repairs:
- Repair should be started from the rooms most remote from the front door.
- Dismantling and installation works are carried out towards the ceiling to the floor.
- Finishing works begin only after complete completion of the wiring of communications.
Need to neglect this stage in no case. It is the preparatory activities that will help avoid disappointments in the final result of all repairs.
Repair process: what for what
The entire repair process can be divided into several stages:
- Preparatory stage. Liberation of the room or the whole apartment from furniture, home appliances and other interior items.
- Dismantling work. Includes the release of walls from old wallpaper and plaster, plastering off the ceiling and walls, removal of floor covering, if necessary, a break and demolition of wall partitions and door blocks. The success of further repairs depends on the quality of dismantling work, therefore they need to be considered responsibly.
Tip: If you do not plan to change interior doors, they are still better to remove with the loops so that they do not interfere with the introduction of building materials and the removal of garbage, and also not frank or scratched.
- Construction and transfer of wall partitions and doorways (if necessary).
- Communication layout. Strobling of channels and. It is appropriate to draw a scheme of the location of the electrical wires so that in the future it is not damaged when drilling. If necessary, at this stage there is a layout of water and heat supply pipes. Their, like wiring, to improve the aesthetic view of the room should be hidden in the depths of the walls or with the help of plasterboard boxes.
- Replacing window designs (if necessary).
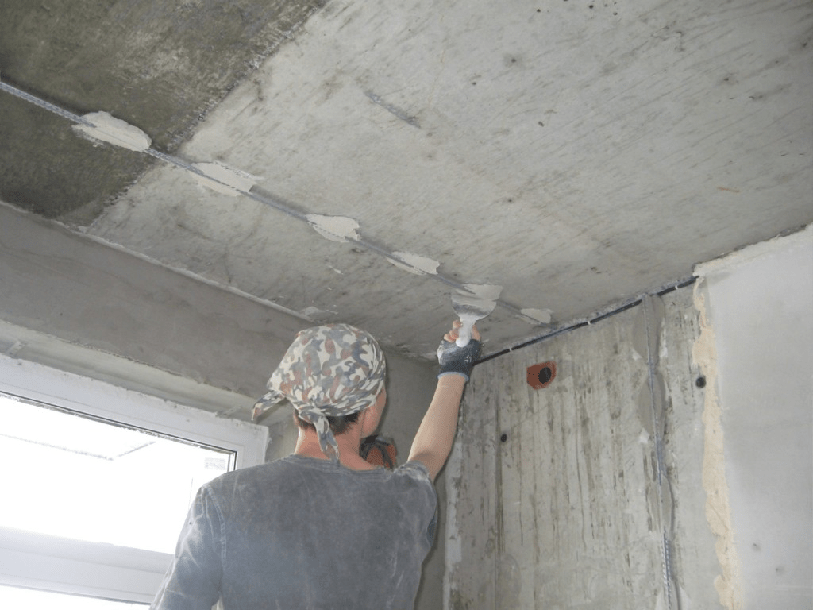
- Plastering. It is plastering, sweeping and align the surfaces of the ceiling and walls. If installing a tension or mounted ceiling is planned, such work on the ceiling overlap is optional.
- Floor repair work. There is a screed of the floor, its finishing alignment, installation of heating.
- Installation of doors (if they were planned to replace). After installing the door box, do not hurry to hang the door to the loop itself - it is better to do at the final stage.
- Finishing work. These works should also be carried out in a certain sequence. Painting (whitewashing) The ceiling is performed first, then the finish finish of the walls is carried out. It may be painting, decorative plaster or sticking various types of wallpaper. Outdoor coverage of any type are laid in the last place, that is, when the ceiling and walls are already updated.
- The final stage. Fastening plinths, platbands, sockets and switches, installation of plumbing, furniture accommodation and various decorative elements and accessories.
Special case - stretch ceilings
To date, stretch ceilings have gained tremendous popularity and prevalence. Their installation is possible in any of the rooms, they reduce the time of repair and look just excellent. However, the installation of tension structures makes some adjustments to the usual repairs of the apartment at the finishing work phase. The rule about the direction of repair from top to bottom, or from the ceiling to the floor, in this case it does not work.
Most experts strongly recommend installing the web after the end of the finishing walls. This advice has a completely reasonable explanation. Installation of the ceiling after decoration of the walls will save it from the negative impact of various primer solutions, glue and paints, which can be left on the ceiling cannon insisect stains. The ceiling material has a fairly high price, so its replacement will cost much more than the replacement or repair of the wall covering.
How to Protect Walls
Mounting frame for stretch ceiling is a sufficiently dusty process that can entail pollution of wall coating. To avoid this wall, you can cover with a protective film, and cement dust during drilling to collect with a vacuum cleaner.
High temperatures that are needed to install PVC ceilings can cause lag of wallpaper from walls. Therefore, to the installation of ceiling structures, you should begin after a complete lubrication of the wallpaper glue. This happens in approximately the fourth day after pasting while compliance with the normal temperature mode.
