High-quality foam ceilings with their own hands. Figoam's curly ceiling with their own hands the ceiling of foam with their own hands
Specialization: a professional approach to architecture, design and construction of private houses and cottages, new products in the market of building materials and finishes. Hobbies: growing fruit trees and roses. Breeding rabbits of meat and decorative rocks.
Since through the roof, the room loses from 15 to 25 percent of heat, the ceiling thermal insulation will significantly reduce the cost of heating, which are not at all cheap today. The ceiling of foam - a simple budget solution for the thermal insulation of an apartment or a private house, as well as baths, saunas or garages.
Pros and cons of insulation of foam (personal experience)

In private houses, the foam is the most popular and demanded building material. Advantages, with a small cost of this insulation a lot:
- Small weight - you can glue the insulation yourself and on the ceiling, and on the walls. It does not carry load on overlap, so you can safely mount in old buildings.
- The foam on the ceiling is the material that can be thermal insulation from the outside, as well as from the inside.

- The ability to choose any finish finish - plaster, plasterboard, plastic panels.
- The price of the material is small, so this type of thermal insulation is the most sought-after.
- The foam is not afraid of moisture and dampness, it is perfect for insulation of wet premises - a bath, a sauna, a bathroom.

- The material is resistant to temperature regime drops, it is not terributed or frost, nor high temperatures (not to be confused with an exposure of open flames).
- There is a sale and finishing finish from this material, which looks very good in the country or in the corridor, hallway.

But the insulation of the ceiling by foam from the inside, and also outside has a number of significant minuses:
- This is a combustible material, so it is impossible to mount such insulation without protection over the gas stove and the heating boiler.

With the insulation of the roof of the foam, it is necessary to process wooden lags with flame impregnation. The same requirement concerns the thermal insulation of all buildings from the tree.
- Such cladding requires additional protection, as the foam lights easily crumble at the slightest impact.
- It will not be possible to paint this facing by nitrocracy or varnish, exposure to the dyes based on acetone. The optimal option is water-based dyes.

- The foam finish does not pass the air, so mold and fungus appears without ventilating gaps, especially in the formation of "cold bridges". Cold bridge - metal parts in the walls and ceiling (fittings, strengthening beams) for which the cold penetrates the inside of the room.

Mold - Frequent phenomenon with internal insulation foamless ventilation
In places of formation of such chod bridges, moisture accumulates, that is, the dew point is transferred inside the premises, and the appearance of fungus and mold is inevitable. Therefore, in front of the foam finish, it is necessary to carefully insulate such cold bridges.
Features of insulation from personal experience

With thermal insulation, the foam need to know some important features of this material, since instead of beautiful facing, you can get the opposite effect. First of all, it is important to comply with certain requirements for interior decoration.

Warming with foam ceiling from the inside - is it possible to perform such a finish? In principle, yes, but in the residential room it is still not recommended. Why? Conclusions on the basis of their own experience, two years ago she made a foam finish in the kitchen. The main advantages and disadvantages of such a finish:
- after sticking, the plates in the kitchen really became twice the warmer, and immediately;
- i painted the plates with an ordinary water-free, wash them is easy, and you can update the coating, just applying a layer of paint;

- it is necessary to relate to this finish, since any pressure deforms the tiles, and it is no longer possible to fix the dent, and remains;
- a significant minus - foam squares do not stick without junctions. They must be very careful to close the white putty, as otherwise the ceiling looks very inaccier. A simple gypsum finish putty is suitable;

- a special problem is borders, bleach them carefully difficult, especially in the corners and on the joints. Alternatively, you can do without them, just leaving a narrow strip of the ceiling around the perimeter without finishing. It can be painted in a contrast color, which looks very good;
- if the chandelier believes in the center of the ceiling, then immediately need to buy a rosette under the chandelier to hide the mount;

- another minus - in the room immediately it became difficult to breathe, you have to constantly keep an open window, since the foam does not let the air completely;
- over the kitchen stove glued such a finish, firefighters are not allowed. There were many cases when the plates under the influence of the pair fell apart right on the open flame.

Foam ceiling finish is an ideal solution for cottage or for a corridor, hallway. It is not bad in a private house to be faced with this insulation and, only additionally need to paint the ceiling of water-repellent paint. As an inexpensive alternative - PVA glue, it creates a thin transparent water-repellent film on a foam.
Selection of glue and decorative trim

The selection of glue depends on what the surface of the ceiling. The instruction recommends for any surfaces special adhesive for foam - "dragon" or "titanium", and the white "moment-installation" is also suitable. The price of titanium for packing 0.5 kg - from 110 to 135 rubles (assembly liquid nails).
But on personal experience it was checked that a much more convenient single-component polyurethane glue. The fact is that liquid ceases are not immediately collapsed and each square has long press to the ceiling, which is very uncomfortable, because the hands are constantly raised up.

There is another important point - domestic products are five times cheaper than imported analogues. Glue polyurethane TM "Kleyberg" Desmocol production of Russia costs 320 rubles per kilogram, and "Artelite" Poland - 8900 rubles for 15 kilograms. The difference is significant.

If the ceiling surface is perfectly smooth and clean, then you can make fastening of sheets on PVA glue. But in order to provide perfect gluing on three kilogram PVA Bank, recommend one package of white "moment installation".
For strength, especially in old buildings, you can additionally fasten the plates on a dowel with wide umbrellas of white plastic, and then reap the fastener to the finish putty.

For the price of ordinary glue and polyurethane material are not too different, but a large plus of two-component glue - additional thermal insulation, which is important for the thermal insulation of the bath or sauna.
Choosing than glue foam, we take into account the quality of the surface. In any case, before amusement, it is necessary to thoroughly grind the surface with a deep penetration liquid from fungus and mold. This will protect the fungus from the appearance and ensures good adhesion of surfaces.

For very uneven surfaces, it is better to stay on the usual finish putty. A bucket of 20 kilograms costs 590 rubles. The putty lines the ceiling, hiding the depressions and cracks, and firmly holds light foam squares.
Alternatively, you can take a mixture of dry gypsum putty and PVA glue - keeps perfectly. Another plus of this material - you can immediately sharpen the joints between the tiles.

And how to paint the ceiling to create an interesting and stylish design?
It is possible to paint polystyrene foams only by neutral water-based paints without aggressive components, such as acetone and alkids, as they corrode this material.

The optimal option is a water-emulsion. The choice of color depends only on the fantasy and features of the room decor, since in the store you can always buy the desired color pigment.

It looks beautifully decoring the details of such a finish under ancient with the help of bronze or silver paint. It is better to perform such a decoupage with a soft cloth, caking the paint point. Thus, we create the illusion of the aged gypsum modeling.

It is interesting to look at the panels painted with bright colors under the "Khokhloma", but here it is important to observe the measure. For example, bright plinths and a rosette under the chandelier and a neutral white ceiling without suitable lines and patterns. Or one bright detail repeated on each tile and throughout the perimeter of the plinth.
Features of the installation of foam tiles on the ceiling

Now we will analyze the question - how to glue foam sheets correctly. Basic installation rules Non-futured:
- Very thoroughly clean the ceiling from whitewash, old plaster and chalk. It is important that after gluing the pieces of plaster .

- We perform the markup of the ceiling, as shown in the figure.
- Ground ceiling by primer deep penetration "Universal".

- Immediately cut out the corner of the tiles under the fastening of the chandelier, then it is very difficult to exhaust foam from concrete.
- We apply glue and start mounting from the center, moving towards the corners.

- We carefully close all the joints between the plates with the help of plaster putty. In the bathroom it is better to use silicone water-repellent sealant for joints.
- Important nuance - eaves. Itself, without experience, do this work is not easy. It is very difficult to accurately make joints, especially in the corners. But about this below and more details.
The last touch - immediately wipe the remnants of the adhesive mixture, because then it will be quite difficult to remove it.
In the presented video, this article shows in detail the entire process of installing foam plastic on the ceiling, given all the subtleties of this finish. This is the easiest and most affordable finish option.
Installation of cornizes of angular elements and rosettes under the chandelier

Of course, I want to decorate the ceiling with an original plinth, the benefit of the choice is great, and the price is quite democratic. How do you install the plinth correctly, especially in the corners:
- More convenient to use acrylic sealant. In order for the plinth to glue well, it is necessary to lubricate the cornice, the ceiling and the wall with glue, and this is uncomfortable, a large consumption of material.
- You can easily facilitate work. They smeared the plinth, immediately put to the place of fastening on a second, removed, and gave adhesion to dry. Then they already pressed the stronger and held two minutes. Everything.

- Acrylic work easier. You can immediately glue to the wall, pressing for a few seconds - grasps instantly.

- Now the joints in the corners are needed to trim correctly, as shown in the photo, so that the edges of the plinth are perfectly fit to each other. We cut a very sharp knife or a special knife for foam, it is sold in a construction store along with blades.

- Before mounting the corner elements, make a "pattern layout" on the floor, first with a pencil, measuring all the necessary cut slices. The corner must fit tightly to the details, without gaps and irregularities. For better clutch, the joint place can be cleaned with shallow sandpaper.
Many such suitius corners like, but I believe that this is an extra dust collector. It is very difficult to wash all curved surfaces. In addition, it is in the corners the most dirt and dust accumulate.

Now about the central socket, the mounting chandelier should not be visible. It is important that it completely covered all the wires and electrical wiring. Therefore, it is necessary to very carefully cut the middle.
Therefore, we cut the center by applying a decorative glass of the lamp to a foam outlet from the inside (from the side to which glue will be applied).
Warming of wooden buildings, baths and saunas by foam sheets

Thermal insulation of wooden buildings, as well as baths and saunas should be performed in compliance with several important technological features of the installation of the finish:
- In a bath or sauna, the polystyrene foam can be used only for the thermal insulation of individual parts of the room. The steam room and the location of the boiler cannot be fermented by this material, since the foam is lit at a temperature of +90 - +95 degrees.
- The insulation of the bath and sauna with foam can be performed only outside, so as not to create the effect of the "thermos" and not to shift the dew point inside the room. Otherwise, not avoiding the appearance of fungus and mold.

The same requirement applies to all wooden buildings. Moisture from the room will settle on wooden structures, causing their rapid rot. Therefore, all rooms with high humidity require insulation outside by any kind of polystyrene foam, since it is airtight.
- It is very important when installing thermal insulation from foam organize high-quality ventilation of the bath, sauna or. Polyfoam does not miss the wet pair, and the walls of the construction instantly watered, especially during the cold season.
- Another important nuance - do not leave slots and gaps through which rodents can penetrate. This error most often occurs when thermal insulation on a metal or wooden crate. Mice and rats are guaranteed by multi-storey and comfortable accommodation. I do not think that their permanent runs under the skin will bring joy.

- Very comfortable sheets of foams as heat insulation of floors in a bath or sauna. This finish is not afraid of moisture and keeps warm.
- Another plus - in this material you can perform any decorative finish (tile, cement screed, natural stone).
With thermal insulation of any subsidiary buildings with foam plastic, it is best to fix it directly to the wall surface on the "Cerezite" mixture with subsequent plastering. But, insulation in a wooden house involves the mandatory installation of the carrying crate to provide high-quality ventilation of the space under the trim.

Therefore, for wooden log cabins, the foam is best used with the thermal insulation of the foundation and the base, as well as the roof. But you need to not forget about the device of the Parobarker from the film, as the polystyrene foam does not miss any steam, and this leads to a rapid rotting of the tree.

Summary
As a conclusion and answer to the question - is it possible to insulate the ceiling by foam, of course, yes. It is convenient, inexpensive and pretty. But, if there is a desire to make stylish and fashionable repair, then inexpensive foam plates - not the best solution.
In my opinion, even with interesting design, they look "cheap". Now there are many other interesting finishes.
One of the lightest and warm building materials is a foam (polystyrene foam). The scope of the use of polyfoam is unlimited to use. It is used to insulate residential, office and technical premises. The scope of expansion of polystyrene foam is not limited to use. The polystyrene foam is used for both internal and external finishing works. It is one of the most common types of insulation used in decoration and facing. The main advantage of foam is that it is easily processed and fastened. In the field of use, the foam does not need additional waterproofing and vaporizolation barriers. Affordable and easy installation carries the most important feature of the application not only for specialists, but also for ordinary inhabitants.
Polyfoam - material with a rigid foam structure of white, consisting mainly by 98% air. The remaining 2% is polystyrene.

Main characteristics:
- Thermal conductivity- One of the indisputable and unique properties of foam is explained by it consists of multifaceted cells, tightly closed with each other. Thereby decreases heat exchange, serving an obstacle for cold air.
- Soundproofing and windshield - The surface, insulated with foam, does not need additional, windproof materials, and a dense cellular structure determines good sound insulation.
- Water resistance- polystyrene foam has very low hygroscopicity and absorbs the minimum amount of moisture.
- Durability and durability - Foam plates do not lose their properties for a long period of time. Do not expose strain and destruction, and strength depends on the density and thickness of the plate.
- Chemical and biological stability - Exhibits resistance to building mixtures, varnishes and paints. Poor reacts to the impact of plant and animal oils.
The foam flag is flammable, but only with direct contact with fire. Alone, polystyrene foaming process does not support and fumbles within a few seconds. These data characterize foam plastic as a fireproof.
How to get the ceiling by foam with your own hands
One of the most popular types of ceiling finishes is to design. This method is very popular and accessible, as well as does not require large financial costs. It is cheap enough and make it with his own hands does not represent any particular difficulties.

Stages of sticking foam plates:
- Calculation of tiles on the ceiling. It is necessary to calculate the ceiling area in square meters and acquire the appropriate number of tiles.
- Selection of glue. Attach the tile on the ceiling can be used liquid nails, but if the surface is not smooth, you can apply the finish putty with the addition of PVA glue.
- Processing and preparation of the surface. Clean the surface and apply antiseptic primer, which will improve the clutch of the material.
- Selection of the tool. Stationery knife and greasy cord. Scissors, several spatulas and brush. Rag or any suitable rag.
- Application. Marking is made using painting thread or cord to determine the central point of diagonals. A variety of sticking is used as the exactly inline and chaotic.
- Application of glue on the tile. The glue is applied directly to the tile, but it can be applied to the surface of the ceiling without limiting the visibility of markup. Sticking the design begins with the center of the ceiling and with a de-energized surface.
- Processing of seams between tiles. After sticking the material, the seams should be embedded with finishing putty and with complete drying to paint the surface.
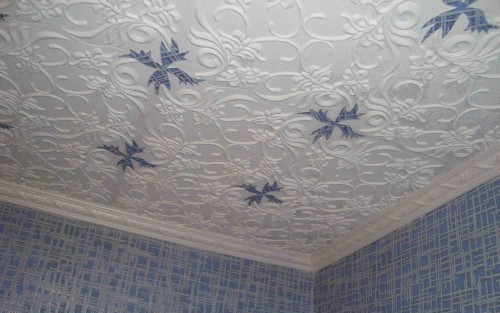
The shape of the tile has a different configuration and front surface. Its decorative texture can be smooth, glossy or embossed, and the painting imitates the decorative stone, stucco, wood carving and fabric.
Varieties of foam panels for the ceiling
The foam plates for the ceiling, as a rule, have a standard shape and look in the form of squares, the size of which is 50 x 50 and 30 x30 cm. Find on sale and rectangular panels, but very rarely.

The production process of such panels highlights 3 varieties:
- Pressed panels Created with the use of stamps that form relief, factory impression, as well as preserve the graininess of the material. Such products have a white shade and a thickness achieved by 8 mm.
- Extruded panels Produced by a vacuum thermal way. Have a glossy surface with a volume decor, and embossed patterns. Care for such a ceiling is quite simple. Re-painting does not apply to such panels.
- Injection panels Processed with steam and have a thickness of 9 to 14 mm. One of the main advantages is water resistance. It is intended for use in wet rooms.
Polystyrene panels have some drawback - this is an inappropriate application for expensive interiors.
The main negative feature of expanded polystyrene is hydraulicness. In the room, the foam creates the effect of the thermos and does not give the walls to absorb the extra moisture. It can serve as a fungus in the room.
With the right approach to the repair of the ceiling, you can get an excellent result. Blooming the ceiling by foam can everyone, if you know certain subtleties. Figure and decorative patterns on the tile, partially give the visual alignment of the ceiling and create a specific design in the room.

Community advice:
- Before installation, it is recommended to leave the material indoors where it will be used;
- Combine colors and laying panels can be diamond;
- The process of laying the pattern should not be interrupted in the middle of the row;
- The gaps are recommended to rub the glue after a complete drying;
- When glue hit the front surface, it is necessary to remove it immediately;
- The tile is pressed against the ceiling not by hand, but a long rule or bar;
- Chandeliers, LED ribbons, sockets and other electrical equipment are installed at a distance of at least 10 cm from the coating;
- Secure foam moldings (corners) at the end of the sticking panels;
Create a ceiling of foam with your own hands (video)
With the help of foam, you can create a plurality of drawings and patterns on the ceiling. Apply clouds, squares, starry sky and other decorative elements. Thanks to the foam having a different thickness, you can mount a two-level ceiling using special attachments and a suitable tool. A certain kind of painting will give the opportunity to wash the surface or repaint it several times.
Foam ceilings design (interior photo)


Polyfoam - in demand and inexpensive building material, widely used in insulation and insulation of various surfaces. You can build a figured ceiling of foam, which will not give up with tension and drywall structures.
Benefits of material
The ceiling of polyfoam is in many respects no worse than designs of drywall, this is due to the positive properties of the material:
The disadvantages of the material include the fact that it does not tolerate acetone and benzene, is not suitable for finishing an expensive interior, and also highlights the caustic smoke during burning.
Jpg "alt \u003d" (! Lang: figure ceiling of foam with his own hands" width="680" height="534" srcset="" data-srcset="https://remontcap.ru/wp-content/uploads/2017/06/1_525505b5e4c8a525505b5e4cc7..jpg 300w" sizes="(max-width: 680px) 100vw, 680px">!} 
Creating a curly ceiling of foam
What instruments and materials will be needed
What you need if you decide to build a figoile foam ceiling:
- Materials
- polyfoam - the right amount
- glue for Material Mounting
- primer for surface treatment
- shpaklevka
- water-emulsion paint.
- Tool
- stationery or construction knife
- lobzik
- pistol under the glue
- spatula
- roulette
Project creation
In order for your company to be successful, you need to create a design drawing on the ceiling. Draw the scheme on paper to accurately imagine what you want to see on the plane - there will be curvilinear shapes, clouds on the sky or a bulk flower with a backlight.
The material is produced in the form of small layers, so you can simply decompose them on the floor of the room in which it is supposed to make a multi-level design, and move onto them.
Then the foam is cut with a stationery knife, if it is not thick, or a junction, if the thickness is more than 5 cm, according to the applied lines.
As soon as curious elements are ready, you can proceed to the preparation of the surface.
Jpg "alt \u003d" (! Lang: figure ceiling of foam with his own hands" width="650" height="388" srcset="" data-srcset="https://remontcap.ru/wp-content/uploads/2017/06/69ce0e12c7ae9fd51494cb7f4b23c1f8..jpg 300w" sizes="(max-width: 650px) 100vw, 650px">!} 
Preparation
The plane needs to be cleaned of dust and dirt, remove the layer raided. If there are visible defects, they need to be attached, pre-covering the surface with the soil.
As soon as the plastered areas be lit, the plane is well stuffed into two layers. After drying the primer, the surface is ready for installation.
Installation of foaming
Since the material is very light, then the special frame for it is not necessary to mount.
Jpg "alt \u003d" (! Lang: Figure ceiling of foam" width="650" height="388" srcset="" data-srcset="https://remontcap.ru/wp-content/uploads/2017/06/d87fc4536a9f5ef7fbd25ed4f8065b7f..jpg 300w" sizes="(max-width: 650px) 100vw, 650px">!}
The foam - the material that creates strongly during cutting, so to create curvilinear structures on the ceiling, you can apply an analogue of foam - expanded polystyrene.
Jpg "alt \u003d" (! Lang: Figure ceiling of foam" width="650" height="388" srcset="" data-srcset="https://remontcap.ru/wp-content/uploads/2017/06/d4a0ccc9e9c32a5c3d2e5a79be7196c1..jpg 300w" sizes="(max-width: 650px) 100vw, 650px">!} 
Jpg "alt \u003d" (! Lang: Figure ceiling of foam" width="650" height="388" srcset="" data-srcset="https://remontcap.ru/wp-content/uploads/2017/06/c1d48f5ce33ca0e1f5fb720dead43bc9..jpg 300w" sizes="(max-width: 650px) 100vw, 650px">!} 
Jpg "alt \u003d" (! Lang: Figure ceiling of foam" width="650" height="388" srcset="" data-srcset="https://remontcap.ru/wp-content/uploads/2017/06/b4e3f3f3f6f25a22593ee333c3475c7d..jpg 300w" sizes="(max-width: 650px) 100vw, 650px">!} 
Foam plate for ceiling
If there is no desire to bother with a sharp of individual elements of foam, you can stick on the ceiling curly tile.
There are two types of tiles for the ceiling:
- Pressed plate
Made by pressing polystyrene strips, the finished product has a thickness of up to 8 mm
- Extruded stove
Brilliant and smooth. It is manufactured by pressing with the creation of various structures on the front side. A distinctive feature of this material is the possibility of wet cleaning.
- Injection stove
It has a thickness of up to 14 mm, manufactured by sintering, so that a pronounced volumetric pattern appears on the surface of the plates.
Material is mounted using mounting glue on a predetermined ceiling surface. The direction of the pattern can be parallel or diagonal, it all depends on your preferences and skill. Work is simple, it will easily fulfill one person.
When repair work is carried out in the house or a new room is built, the developers are necessarily used by new practical and very reliable materials. They are a guarantee of the durability of a new or renovated building.
The ceiling of foam is easy to wash, it is water-permeable, resistant to temperature differences.
When it comes to finishing the ceiling surface, the builders have the opportunity to choose one of many known methods:
- stretch ceiling;
- suspended systems;
- plates;
- foam ceilings.
Most often, the ceiling is frozen foam tiles with very many positive qualities. Create ceilings from foam plastic is simple enough. Such a tile has many positive qualities.
Main characteristics of tile

Scheme of mounting foam tile.
- The desired drawing is easily selected. In the construction market and stores are offered a large range of various interpretations and colors.
- Fontoam laminated tiles have excellent waterproofing. On this ceiling will never appear mold.
- The ceiling is easily clean.
- The foam tile itself is distinguished by high waterproof.
- A competently bleached tile, which has passed a certain preparation, does not respond to races of temperature.
- The ceiling of foam is perfectly combined with drywall structures. In combination with the patterns of the tile itself, the room looks very attractive.
- Competent use of the sealant makes it possible to hide small slots between the tiles. There are foam ceilings on which such traces are not noticeable.
It is very easy to work with foam tiles, even a very inexperienced builder will be able to mount it.
Perhaps the most inexpensive ceiling coating, the installation of which does not require the help of professionals, are foam plates. This material can have the most different color, have a laminated or film coating.
Supports such plates usually standard sizes:
- 50x50;
- 100x16.5.
For pasting kitchen ceiling, foam is used, the surface of which is laminated with a film. This technology allows you to hide the existing irregularities and ceiling defects.
Of course, when the apartment is repaired, the least costly will be pastoching ceiling by foam plates. This method is today the most popular among builders.
Article on the topic: Homemade Simulator Hyperextension (drawings, photos, video)
Types of foam plates

Mounting the ceiling by extruded polystyrene foam.
Before starting to perform installation work, you need to more carefully examine the existing types of foam plates intended for the ceiling surface. Polyfoam has several varieties:
- extruded;
- stamping;
- injection.
The extruded foam is obtained by polystyrene extrusion. In the original it turns out of a dirty white, so its surface is covered with a press using pressing. Due to the film cover, the extruded tile has a large color palette, it easily selected for any interior.
Such a coating is considered the most durable, but it is characterized by normalized thickness. Of course, it becomes a significant disadvantage, since the appearance of gaps is quite possible during installation. Another negative feature is high cost.
Ceiling foam and stamping is also manufactured. At the same time, a variety of stamps are used, so the tile is obtained by various shapes. The source material is foam blanks due to their high grain.

Scheme of blending ceiling tiles.
Tile has white color. These ceiling tiles are painted with waterproof paints. If possible, they are laminated. The tile looks very aesthetically, while possessing an increased operational capacity.
Since the foam tile has a very low cost, it has become very popular. However, such a tile has several negative qualities:
- Fragility. While working it is easy to break, so it requires a very gentle and accurate circulation.
- The use of detergents are not allowed, which include abrasive substances.
- During the installation, it is possible to form a slot, as there may be an error of the measurements made.
Before installing the ceiling tile, it is necessary to make the calculation of the desired amount of material that will be mounted on the ceiling. First, the room is determined, for which the length of the room is multiplied by its width. The resulting result will help calculate the desired number of tiles, pushing out the tile itself.
Article on the topic: How to make the ceiling to do with your own hands?
The area of \u200b\u200bthe room is divided into the square of the tile itself. The result will show the desired number of tiles. However, it should be remembered that there are some inaccuracies during work, due to which several tiles may be lost. Therefore, to acquire such a tile is needed with a small margin. If this is not done, then if necessary, the store may not be the necessary material.
How to glue the ceiling tile?
To perform work, you will need a variety of tools:
Scheme of sticking ceiling tiles.
- stationery knife;
- level;
- scissors;
- brushes;
- putty knife;
- stuslo;
- ladder;
- roulette;
- corolnic;
- meter;
- twine;
- soft pencil.
Often, inexperienced finishers ignore the markup process and preparatory work. They completely trust their charming, as a result, curvature after installation appear. To obtain an excellent result in front of the tile sticker, you must make markup. When installing the first row along the wall curve, the surface with the curves of the seams turns out.
To avoid such an error, it is necessary from the main wall to carry out a perpendicular line, from which parallel lines are carried out at the desired distance. The building level will help to get the perfect markup. To carry out an absolutely smooth line, you need to use the painting cord.
Start gluing foam tiles are needed from the most noticeable corner of the room. The pasting should be completed above the door. Thus, the last series will not be visible. Basically, it is always incomplete.
Usually, the drawing on such tiles is the same, but during the docking it is necessary to withstand symmetry. To get rid of the gaps, the tiles must be severely pressing among themselves. Before gluing, you need to remove burgers from the ends of the ceiling tiles, which remain after pressing.
Several options for gluing ceiling tiles are known:
- Plates are glued directly to whitewash. In this regard, the blots must be predetermined by primer.
- Old packers removes with a spatula. This method is used if the whirlwinds have a thick layer and begins to fall. In all other cases, a single priming is enough.