DIY toy pillows original patterns. Features of sewing original pillow toys using patterns
Today we will sew a cute Fox pillow-toy. The master class is quite detailed, so there will be few words. Enjoy your sewing!
Advice. If you don't have sewing machine, try sewing a toy pillow by hand with a back stitch. To do this, you better lightly mark the seam with a 1 cm allowance to get it neat. And the markings can be made with a vanishing marker, which you will find in almost every needlework and sewing store.
Materials and tools: cotton fabric 30x35cm - 2 pcs. - orange and back (I took gray), cream velor 20x40 cm, glue non-woven fabric, small pieces of felt, colors: black, light pink, white and blue. For the bow, I used a lace ribbon (you can use any other - satin, rep, whatever), synthetic filler (120-150 gr). Scissors, thread, sewing machine.
1) Cut out the template. The photo shows the A4 format. Cut out the main detail of the face in a mirror spread.

2) For strength and good shape, we glue non-woven fabric. And we also glue it to the velor.
3) Cut out the orange fabric with a 1 cm allowance.

4) We cut out the cheeks from velor also with an allowance.

5) Sew on the cheeks to the orange muzzle.

6) We apply the resulting part to the gray fabric and cut it out.

7) Sew the parts face to face, leaving a gap for turning and stuffing with filler (I left it in the head area), make cuts in a circle, without going over the seam.


8) We turn it out.

9) We fill with filler.

10) Sew up the hole through which the pillow was stuffed with a blind seam.

11) Sew on felt details: eyes, nose, cheeks, pre-attached with pins. Sew on a bow.


Our Fox is ready! Be healthy 🙂

Fast navigation through the article
To update the interior of the children's room and make the baby's bed more comfortable, it is enough to decorate it with a couple of three decorative pillows. We offer creative mothers to sew them with their own hands, because this is done quickly, simply and on a budget. The main thing here is to come up with interesting design and find the right materials.
In this article, we have collected 30 inspiring photo examples of baby pillows for beginners and experienced craftswomen, and also prepared 3 step-by-step master classes DIY sewing:
- Toy pillows in the form of a cloud.
- Pillows-letters.
- Patchwork style pillows.
- Combine different pillows with each other for a more fun interior. The composition can be united by the shape, color or print of the products. When choosing fabrics, it is easiest to focus on the colors and patterns of the wallpaper, as well as the rest of the textiles in the children's room. For example, pillows can overlap with curtains, sofa upholstery and, of course, a blanket.
- When coming up with the style and decor of the future product, take into account the style of the interior. If, say, for modern interior you can sew bright toy pillows, then products of calm colors and traditional styles in the form of rollers and pillows with ruffles or tassels are more suitable for more, as in the photo below.


- For sewing baby pillows, it is advisable to use natural and dense fabrics (linen, cotton), which are much easier to wash, say, felt, and look much more beautiful than synthetics like fleece.
- Before sewing, the fabric should be washed and ironed, then you will sew already taking into account the shrinkage of the material.
- It is clear that baby pillows should be washed often, but how to wash decorative pillows that do not have pillowcases and must always keep their shape? We recommend using:
- Synthepukh (not to be confused with synthetic winterizer);
- Holofiber.
These materials are hypoallergenic, keep their shape well after washing, and they can be washed in washing machine at low temperatures even with spinning. Unfortunately, synthetic winterizer, natural fluff, buckwheat, batting, foam rubber and other fillers do not have such properties.
- If you want to make a decorative and sleeping pillow at the same time, for example, a bolster or a side for a crib, then it is recommended to sew not just a pillow, but a pillowcase with a pillowcase. After all, removable pillowcases are much easier to wash, besides, by sewing one pillowcase and a pair of matching pillowcases, you can update the interior according to your mood.
Master class number 1: Pillow-cloud from a sweater
As you know, the world of children's interiors has its own trends and such pillows in the form of clouds are just at the peak of their popularity. They are good because they are easy to sew, look cute and are suitable for decorating a room for both a boy and a girl. In this master class, we will tell you how to sew a soft cloud with your own hands from any sweater in a pleasant color.

Materials:
- Sweater (better made of polyester than acrylic. By the way, instead of a sweater, you can take an old cotton sweatshirt, T-shirt, etc.);
- Synthepukh;
- Sewing accessories;
- Sewing machine (if any);
- Paper for making patterns.
Step 1. Draw on paper a pattern in the form of a cloud or any other shape that you like.

Step 2. Turn the sweater inside out (!) And attach the resulting template (including the back layer of fabric) to it using pins as shown in the photo. Then we outline the contour of the cloud and start cutting out the blanks with an indent of about 0.7 mm (for allowances).

Step. 3. Now we begin to grind two parts of the pillow along the previously drawn contour, but be sure to leave about 10 cm not sewn.
Step 4. In the places where the cloud is rounded and in the corners, we make cuts - this will make the shape of the pillow more accurate and correct.
Step 5. Unscrew the pillow and stuff it tightly with filler using, for example, a Chinese stick. Finally, cover the hole with a blind stitch.

Woo-ala! The baby pillow is ready!

Based on this master class, you can sew the pillows of the most different forms and colors. For example, a cloud can have arms and legs, beady eyes and ruddy felt cheeks.


Instead of a cloud, you can sew a star, a raindrop, a moon, a heart or a candy. For examples of such pillows, see the following selection of photos.


Master class number 2: Pillow letter
And now we propose to sew another simple but original letter pillow, which will help to personalize a nursery or a bed, if, for example, there are more children.

Materials:
- Textile;
- Synthepukh;
- Sewing accessories;
- Sewing machine.
By combining 3 types of fabric, you can use up leftovers and make your pillow design more fun.

Step 1. Select a letter, draw it (or print it in A4 format) and cut it out along the contour.
Step 2. Now we need to cut out two parts of the pillow - front and back.
- To cut the front of the pillow you need to: put our template face up on the fabric that is face up, circle it and then cut out the blank.
- To cut the back side of the letter you need to: do everything the same way, but first turn the template "wrong side" up, that is, according to the principle of mirror reflection.
Step 3. Now you need to prepare the side of the pillow.
- Its length should be equal to the perimeter of the letter + 2 cm for allowances. You determine the width of the sidewall yourself, for example, it can be 4 cm, then, taking into account the 2 cm allowance for the seams, the width of the workpiece will be 6 cm.
But since you will most likely not be able to cut a whole strip of fabric, you will need to cut several strips of the same width and stitch them, so that in the end you get one tape of the desired length.

Step 4. Sew the sidewall to the first letter. To do this, we fold them facing each other and begin to grind along the entire perimeter of the workpiece.
- For convenience, the side strip can be attached with pins.
We repeat the same procedure with the second half of the pillow, but leave a small section unfinished.

Original and cheerful pillows are a fashionable and stylish interior detail. Textile or made of fur, these toy pillows will appeal to both adults and children. Bunnies, cats, dogs - what kind of animals are not created by the skillful hands of craftswomen! Today we will figure out how to sew a do-it-yourself owl pillow using a simple pattern.
In our master class, the owl has a blue shirt-front. If you are going to sew a pillow for a girl's crib, then you can make an owl in pink tones.
For needlework you need:
- cotton fabric in two colors;
- pieces of felt for the eye and beak;
- black beads or buttons for the pupils;
- decoration tape;
- lace;
- filler;
- needles, pins, scissors, threads, sewing machine.
Description
We print a full size pillow pattern.
 We cut out all the details of the toy from the fabric.
 For the bow, we cut out a rectangular piece 8x16 cm and a square with a side of 45 mm.
We attach lace and beak, making a zigzag seam along the contour. The lace should lie in the center of the calf, between the wings.

We attach the wings and eyes with the same seam. Sew on pupils - beads by hand.
 We fold the two parts with the front sides inward, pin them off, sew along the contour. At the same time, do not forget to leave the area for turning and stuffing.
 We make notches on the convex areas so that the shirt-front with the wings does not bulge after being turned inside out.
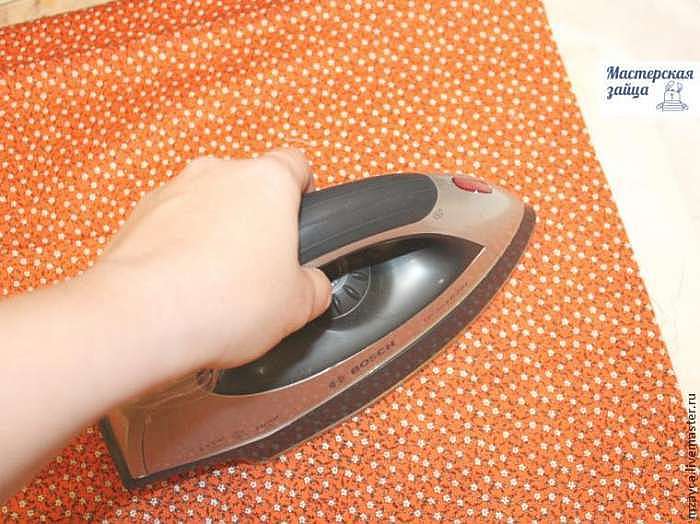
We turn out the pillow, iron it. Then the main part, that is, the shirt front, is filled with filler.
 Sew up the hole with blind stitches.
Now let's start decorating the owl. We fold a strip from a square blank for a bow (see photo) and iron it. We sew the rectangular blank with an allowance of 1 cm.
 We turn out the bow, collect it in the center. We cover the place of assemblies with a strip.

Sew the decoration on the ear of the pillow toy.

We make a bow from a narrow ribbon and sew it on. Optionally, you can also decorate the pillow with buttons.
Pillow "Owl": video master class
Felt owl

Sewing such a toy is quite simple. Depending on the size, the craft can be a small owlet - a keychain or a comfortable one sofa cushion... A bright do-it-yourself felt owl is made according to a pattern.

For work you need to cook:
- felt of different colors;
- filler;
- fabric for trimming the tummy and wings;
- needles, pins, scissors.
Description
It is convenient to sew an owl, like many felt toys, using a needle-forward seam, in which the lengths of stitches and gaps are equal.

Using pattern templates, we cut out all the elements from felt and fabric. Sew on colored details on the felt wings. Hide the knot of thread between the felt and the fabric. For convenience, the fabric can be secured with a pin before sewing.

We decorate the muzzle of a felt owl. Checking the pattern, place and sew on the details of the eyelet. Please note that from the edge of the main part to the eye, as well as between the eyes, the distance should be about 5 mm.

As alternative option can choose peephole gluing.
Then we sew on the tummy, having previously fixed it with a pin.

We attach the claws, beak, dark details of the ears. On back side we embroider the tail.
We fold the two main parts, insert wings between them and fix with pins. We sew a seam around the circumference, leaving a small part not sewn up.
We fill the owl with padding polyester or any other filler. Sewing up the hole.

We sew a side in a baby cot Sovushka: video MK
Educational toy-seeker "Owl"

For creativity we you need to prepare:
- fleece material in sand and light green color;
- felt brown and white- thickness 3 mm;
- felt, black and yellow color- thickness 1 mm;
- rep ribbon with bright ornaments;
- film file or any thick transparent film;
- quick-drying glue;
- short chain;
- filler - rice, beads;
- small toys - scraps;
- embroidery threads;
- scissors, pencil, needles, tape.

Description
We make patterns for all the elements of the toy, drawing them ourselves or printing them from the site.
The body with ears should be symmetrical.

We mark the abdomen and frill. For this, you can use the items at hand.
Try to keep the size of the waves of the frill the same.


Cut out the abdomen.

We mark two main parts on the fabric - one with a belly, the other without it.

Cut out both parts.

Cut out the frill pattern.

We mark it on the fabric and cut it out.

We put the main part on a transparent film.

We connect the parts with pins and sew along the contour of the window with a "zigzag" seam.


We cut off the excess film, leaving an allowance of 20-30 mm from the seam.

Fold the main parts right side out and fix with pins. Then along the contour we manually sew a seam "over the edge". Such a seam looks good if it is made with threads to match the main part, but slightly darker.

We make a loop from the tape.

We sew it along the edge of the product.

The top of the head and ears are not sewn up. We do not cut the thread.

We glue the frill along the edge of the window in the form of a decorative rim, closing the seam.


To fill the tummy of an owl, we use beads or rice.

We prepare small items that we will put in the toy, lay them out on paper and take pictures.

We fill one third of the abdominal height with filler. We put the prepared scrapes there.

Sew up the top of the owl, fasten and cut the thread.

Using the items at hand as templates, we cut out three circles of white, yellow and black for each eye. We also cut out the beak and eyebrows.


We connect the white circles, glue the beak on the seamy side.

We glue the details of the peephole, eyebrows and beak.

We glue the common part on the front side of the owl.

We print out a photo of the searchers, laminate them with adhesive tape, laying a piece of cardboard or multi-colored paper Velcro for rigidity.


We pierce a hole in the corner.

We pass the chain through the hole and the eyelet on the toy.

Owl - the hound is ready!

Pillows are an indispensable accessory for any modern home. This article is for those who are determined to create them with their own hands.
Materials and tools
Getting down to new job, each craftswoman thinks about what to use.
Items you may need:
- Fabrics (give preference to specialized fabrics: plush, felt, denim, fleece, upholstery).
- A piece of thermal transfer paper containing an image (sold in photo shops).
- Internal pillow, purchased in advance or made by hand (35-40 cm side).
- Sewing machine (speeds up work).
- Iron (translates the image).
- Threads of the color of fabrics (thickness from 40 contributes to the creation of a strong product).
- Tailor's measuring tape, ruler.
- Scissors.
- Pins.
- Tracing paper.
- Pencil.
- A sharpened piece of soap or crayon.
- Several needles.
- Decorations (braid, lace, ribbon of various colors, buckles, zippers, laces, buttons). Woolen thread, floss threads will help to decorate the seams and make tassels.
Colors
The style of the interior dictates the preferences in the choice of colors, style, fabric of the product.
Possible options:
- Selection of color tones that match the furniture and accessories of the room.
- Sewing the cover for the palette of the main color of the room.
- Combination of the dummy color with one of the accent colors.
The most interesting choice: matching the tone of the material of the pillows and curtains.
A combination of the color of dummies and a bright carpet can become an accent to the monochrome of a room.
The color of the product may match the color of the wallpaper pattern.
Important! The color of the cover of the product should not repeat the color of the sofa upholstery - a darker, lighter tone is preferable.
 Color
Color DIY soft toys made of fabric
Below are children's pillows with their own hands, original copyright patterns.
Herodotus the Cat - a pillow on the road
This wonderful pillow can not only become a highlight of the interior, decorate it, please children, but also serve as an amazing support for tired cervical vertebrae.
 Herodotus
 Preferred fabric - fleece (two colors); felt (for decoration purposes).
- A pattern is created on tracing paper.
- It translates to fabric with allowances.
- Is taking shape seamy side, pinned, stitched.
- It is turned inside out through the remaining lumen.
- Filled with filler.
- Decorated.
Important! When making a mustache, it is worth abandoning the use of raffia (the finished pillow pricks, tickles), draw them preferentially with a contour, create using floss threads.
The size of the final product: the diameter to the outer edge is 43-45 cm, to the inner edge - 13-15 cm.
Sleeping kitten scops pillow
Do-it-yourself scops pillows, pattern patterns which are very popular with young mothers, are great for newborn cribs. Making a pillow with your own hands gives you the opportunity to really choose quality material at an affordable cost.
 Sonya
Sonya Bright floor cushion
Such decorative elements adorn the houses of Chinese, Japanese, Indians, Arabs and Muslims, gaining popularity in Western countries (Lounge style), making the atmosphere more relaxed.
Advantages:
- The design of the room will become more original.
- Possibility of easy redevelopment.
- The indifference of children.
- Ease of execution.
- Ease of use.
- Exclusivity.
 Floor
Floor Manufacturing:
- Draw sketches of parts on cardboard.
- Cut templates.
- Pin the cliché to the fabric and cut it off, creating a margin for the seams.
- Sew on a typewriter, keeping the hole.
- Unscrew, fill with polypropylene.
- Sew the opening, decorate.
Application styles: Provence, country, Scandinavian style, minimalism, hi-tech.
Cat pillows
- The simplest, most reliable, effective method transfer the image to the fabric - use thermal transfer paper. It is chosen by the type of printer (inkjet, laser), fabric color (light, dark), size.
The pattern transferred to it is cut out with a couple of centimeters in reserve, placed on the fabric with cells upwards, ironed with an iron (upper temperature limit, without steaming). After cooling, the checkered layer peels off gently.
 Photo print
 - It is possible to directly apply the pattern to the fabric with an inkjet printer. Before that, the material is rigidly starchy (2 tablespoons per liter of liquid), dried without clothespins, ironed dry, dried again, inserted into the printer. The finished image holds up well.
Pattern of a toy-pillow Hare
Dumochka hare is easy to sew, will give originality and warmth home interior... Sewing it is easy according to the pattern presented above.
 Bunny Pattern
 DIY animal pillows patterns
Animal pillow patterns are indispensable for novice craftswomen.
People who spend a lot of time working at a computer with a mouse and keyboard develop carpal tunnel syndrome. You can avoid it by stitching a pad under your wrist of two rectangles filled with rice.
 Wrist pad
 A pig from smeshariki will perfectly complement the interior of a children's room and will delight little households.
 Nyushenka
 Owl pillow simple execution will serve as an excellent toy for any child.
 Owl
Owl A do-it-yourself panda pillow, made according to a pattern, will become a rare specimen of a room with plant motifs.
 Pandochka
 Also, when creating toy pillows with your own hands, you can come up with original patterns.
Padding
Soft natural fillers for pillows (wool, feathers, down) have a number of disadvantages:
- Poorly keeping in shape.
- They provoke the occurrence of allergies.
- High price range.
- Collect dust - require systematic cleaning.
 Synthetics
 Artificial materials are becoming the best choice:
- Holofiber.
- Comforl.
- Silicone.
- Synthepukh.
- Expanded polystyrene.
Reference! An inexpensive synthetic winterizer is a bad choice (due to its low elasticity, it quickly gets lost).
Unusual fillers, for example, buckwheat husks, cherry pits, have the following characteristics:
- Absolutely natural.
- They are hypoallergenic.
- Noisiness.
- Not available for washing.
- Have low orthopedicity
Herbs give a unique aroma to the pillow, have a lifespan of one to two years.
Fillers can be orthopedic (latex, viscoelastic foams, polyurethane foam).
Pillow Decorating Techniques
Decorating a pillow is difficult and exciting. Here are some finishing options that are feasible even for a novice master.
Attention! It is more convenient to decorate the front fabric of the product before stitching it with the back side.
 Decorating
 Using bows
Accommodation options:
- Corner of the pillow.
- In the middle.
- At an angle.
- Similar to a gift (criss-cross).
- Make it a butterfly by embroidering the antennae.
Production: tie a ribbon neatly or 3 pieces of fabric (connect the bow and tails with a belt loop).
Relevant in interior styles:
- Provence.
- Vintage.
- Country.
Placement of ruches
How to place ruffles:
- Sew a strip of fabric (size 1.5 times the required length, edged edges).
- Pull the string.
- Make the folds even.
Applicable in Rococo interiors.
Idea! The ruffle flower will perfectly decorate the pillow.
Decor flowers
How to make a decor like this:
- Cut the old T-shirt into ribbons.
- Fasten them in a circle.
Embroidery decor
Sashiko embroidery is simple, the outline of the pattern is repeated with large stitches.
Possible decor with ribbons (the direction of attachment depends on the fantasy)
Applications
Will come in handy:
- Colored scraps of fabric (you can cut something old).
- Drawing transferred to tracing paper.
- You can buy linings specifically for creating masterpieces - the base is adhesive.
- The felt is suitable for the production of applications based on silicone glue.
- Special tape for application.
- Threads (sew on patches with a zigzag stitch sewing machine, with your hands - a looped seam).
- Buttons (instead of pieces of fabric).
 Decorated product
 The theme of the masterpieces is varied:
- Zodiac signs;
- drawings of children;
- the names of the tenants of the room;
- animals;
- hearts;
- insects;
- flowers.
In this article, options for pillows for every taste were presented, how to sew toy pillows with your own hands, based on the article, you can easily create something of your own unique, inimitable, functional and simply beautiful.
Pillow toys will undoubtedly transform your interior, making it more joyful and bright. When creating a toy pillow with your own hands, Special attention devote to the choice of ideas. Textiles generally play important role in creating a certain home atmosphere. And with the help of decorative pillows, you can enhance the emphasis on a certain mood that reigns in the house.
It only takes a little creativity, creativity and imagination to make it happen.
Soft pads, which can be found in all rooms, can have a completely unexpected appearance... In addition to boring and monotonous square and round products, you can completely unexpectedly sew a new and intricate thing.
She will play the role of not only textiles, but also soft toys for the smallest in the house. Such products provide for an element of play, while they can be easily taken not only with you to bed, but also played on the floor.
DIY toy pillows - looking for inspiration
Specialized shops and supermarkets for children have long offered a wide range of play cushions. Most often they are presented in the form of large soft toys with 4 legs, which can be fixed with Velcro, thus creating an ideal quadrangular shape.

With such creative pillows, it is much easier for a child to game form put to bed or simply decorate your bed or sofa in the living room with them. A large number of such pillows in the same style help to create a certain coziness, helping to comfortably sit down and enjoy your vacation.

However, toy pillows can also be made by yourself with your own hands, just armed necessary materials, patterns and patience. Most often they are made in the form of soft animal toys, which have a wide body-base with soft and pleasant padding.

The main advantage of such products is that you can use the remnants of fabric and rags on them, harmoniously and correctly stitching them into a single composition. With the help of these pillows, the child can learn colors, as well as develop the sensitivity and motor skills of their hands, playing with bows, ribbons, buttons or other decorative elements on it.

DIY pillows for children may also have the form of letters. This is quite a fashionable and widespread trend lately among young parents. At first, the letters of the name simply decorate the bed of the crumbs, and in the future they serve as toys and pillows for him while playing on the floor. They may have different heights and the thickness of the packing. The main thing is to arrange them correctly and harmoniously, combining them with a common fabric element or other accessory.

Another type of modern and fun toy pillow is draft bolsters. Most often they are performed in the form of funny animals on a string or animals with a long body. Such colorful rollers will not only protect from blowing out on the windowsill, near the door or balcony block.

Important! If the pillow is used purely for sleeping, then it is worth avoiding the use of hard materials - buttons, thick fabric, plastic stakes. They can injure the skin while resting.

A separate place is occupied by pillows for travel in transport. They often resemble standard products for adults, only they are made in the shape of the letter "C", where the shape is repeated by an animal twisted into a ball or its long and fluffy tail.
Such pillows will help little travelers to gain strength with pleasure at any time of the day, in an unusual body position.

DIY toy pillows - how to choose the right fabric for sewing?
Embodying interesting ideas DIY toy pillows, it is important to understand what materials you should work with. The durability and strength of the finished product depends on the tooling and quality of the fabric used.

Concerning colors, - then any solution and variety can reign here. The main thing is to initially decide for yourself what functions the pad will perform.
If she decorates a room or upholstered furniture, - then be sure to combine with general tones interior. If this is just a funny and bright children's toy, then it can have the most unexpected embodiment.

Quite often, the funniest and cutest DIY pillow toy ideas come up with ordinary old scraps of fabric.
They can be left over from old sewing articles, cuts, worn out but bright things. It is them that can be cheaply and cheerfully turned into a new funny thing.

As for the filler, here it is necessary to foresee in advance the functionality and direct purpose of the finished product.
If you want to fill it with down or feathers, then it will not hold the desired shape that you want to give.
To DIY toy pillow ideas were brought to life strictly according to the conceived plan, then they should be stuffed with silicone, dense cotton cloth, or foam rubber.

If the design of the finished pillow toy can allow for a cover or removable elements, then it is better to think about this in advance and calculate when sewing.
This will help you more often clean this thing from dirt and dust, preserving its original appearance as long as possible.
Most often, pillowcases or covers are created from dense and high-quality fabric - fleece, jeans, drape or linen, which, with frequent washing, will not lose their shape and original appearance.

If you want to create a "cool" pillow for hot summer nights, then take silk fabrics as a basis.
They will keep you feeling cool for a very long time. Brocade products for children are not worth making. They are better suited for the general decoration of furniture in certain classic interiors.

Using pillow fillers
In addition to using standard fillers (feathers, down, foam, etc.), you also need to know certain rules and the secrets of filling a toy pillow with your own hands.
The main requirements and criteria for the work performed look something like this:
- First of all, the material used for stuffing the product must have hypoallergenic properties. This will avoid unnecessary problems and will not expose the health of the household;
- The filling should have a medium hardness. A base that is too hard will not be comfortable and orthopedic. Soft padding - over time, it will completely lose the shape of the sewn thing;
- An ideal filler should not lose its original shape and volume even after washing or dry cleaning;
- The interior should be easy to clean a large number of once.
These criteria can be met by polyester materials of different processing - synthetic winterizer, foam rubber or synthetic fluff.

Very often, many needlewomen, making a pillow for the house with their own hands, allow one serious mistake- they use cotton wool for stuffing. However, products with such a "filling" will not last long, in particular, if they play the role of a child's toy. Over time, the cotton wool begins to roll down and stray into one certain corner. The product with it will lose its shape, and become dense and unpleasant to the touch.

Slightly less often, instead of stuffing, old fabric rags or fur are used, however, they also do not tend to keep the shape of the pillow for a very long time with frequent use. An alternative can be silicone balls, which have different size and diameter. They contribute to the development of motor skills in children and quite easily give the product the desired shape.

Decor Toy Pillow Ideas
It is difficult to imagine a single-color and expressionless pillow-toy for children. Needlewomen often try to give them brightness and resemblance to different cartoon characters or animals.
For this, quite different materials and tools, the main thing is to determine the direct purpose of the product.

The basis for the decor can be bows, colorful ribbons, laces, buttons, zippers, lace, beads or beads. It is better to deprive products for very little ones of small accessories in order to protect the baby from swallowing small particles.
And for older kids, everything is best. additional elements fix well - sew or glue to prolong the life of the funny animal. From these auxiliary things, you can make facial features, clothes, bows, flowers and other cute applications.

What do you need for sewing?
Don't worry if you don't have the proper sewing experience or a wide range of tools. Sewing a funny pillow-toy can be done quickly and easily with your own hands, even if there is no special sewing technique nearby.
This is especially easy to do if you are sewing a toy from different scraps of fabric. The main thing in this is to iron all the seams with an iron and carefully sew everything with thick threads. Separately, the seams can be decorated and reinforced with tape. It remains only to fill the product with filler and take care of the design of the appearance.

If the finished pillow should have a completely simple shape - a long roller, square or rectangle with the animal's legs sewn separately, then here it is quite appropriate to use a zipper or buttons to fix it.
These things are right geometric shapes provide only the correct packing, which must have its own clear radius and length. More complex pillow toys should be sewn according to certain sketches or clues.

Ideas for creativity can be taken from specialized literature, magazines for needlewomen, or simply on the Internet. For this there is great amount sites and forums where you will be offered patterns and patterns for every taste.

Decorating your home or giving your child a real soft friend made with your own hands is very easy and simple. Create and embody your imagination in creativity and needlework. This will give you a lot of positive emotions and great mood!


