Installation of kitchen sink. How to cut the shell in the tabletop
It is difficult to argue with the statement that the kitchen of the modern hostess is the personification of global scientific and technological progress.
An integral element of the working corner of all the kitchens, along with the refrigeration unit and stove, is washing.
This accessory should be practical, convenient and functional, and also organically fit into common interior Rooms.
 With the existing variety of devices, varieties of execution, used materials and artistic finishes, to stop your choice on some single model of the sink is very difficult.
When buying a sink, the following factors should be taken into account:
- square and interior of the room,
- a type kitchen furniture,
- the number of people living in the house
- personal preferences of the hostess.
What does good wash mean? She must be:
- spacious
- resistant to the effects of an aggressive environment
- drops of temperature
- and mechanical damage.
Dirt and fat should be easily laundered from its surface.
Incorrectly chosen sink () is able to turn the process of washing dishes in torture. And this statement is not an exaggeration.
May you know that most of the affairs in the kitchen, in one way or another, is connected, it is, with this subject of life.
So, it would seem that it could be easier to install a kitchen sink? But, only the amateur is able to argue that with this work you can cope easily and quickly.
If you have never been engaged in something like that before, you will have a little podnaping and attach, maximum, efforts so that there are no complaints in your work in the future.
The characteristics for which they differ from each other
For their manufacture, such raw materials are applied as:
- ceramics,
- composite materials (artificial stone),
- natural stone (granite, marble, onyx, travertine),
- glass,
- high quality stainless steel.
Everyone has modern models Original appearance and high degree of practicality.
Kitchen shells are installed in different places. The most common option is near the wall, and most practical - in the corner of the room.
Sometimes, the sink is mounted on the cabinet, standing in the middle of the kitchen. Products have different forms and sizes, as well as the number and depth of bowls.
The question is how the washing will be installedmust be resolved at the design stage external view premises.
The material for the top board of the table and sink depends on the style of the design of the kitchen and from the materialities of the home owners.
By type of installation and the conditions for using washing are divided into:

How to fix the invoice
Before starting to install the overhead shell, you need to build all the plumbing equipment. Since after fixing the facilities on the end - it will do much more difficult.
Attention! Top ends plate chipboard It is necessary to handle silicone, thus, a water-repellent barrier is created. This procedure Protects the frame from swelling and deformation.
Cutting washing can be installed in three ways:

 If the mount is not provided or the typical fastener does not fit (because of the tabletop flaw), then in this case you can use wooden bars Different thickness and personally make the base under the sink.
The finished frame insert into the housing along the perimeter of the washing and fix with metal corners.
After that, the sink with a box is installed on the end. She is attached to S. inner Walls at the same corners.
Sequence of operations
Installing such an accessory, as a rule, does not create a cut-out problem in the tabletop. This work is not even a professional work. For fitting no special equipment required.
This procedure is not expensive, it is applicable for kitchen furniture with a common table top, which can be made of wood, laminate, granite, plastic of artificial stone.
Cut the sink in the countertop can be three ways:
- exactly in terms of countertops
- a bit higher,
- slightly lower.
In this case, much is caused not only by your desire, but also the configuration of the kit.
 Before the production of work, you need to make sure that a reliable water supply is ensured to the scene, and the drain is well debugged.
To install, you will need a jigsaw and a transparent silicone sealant.
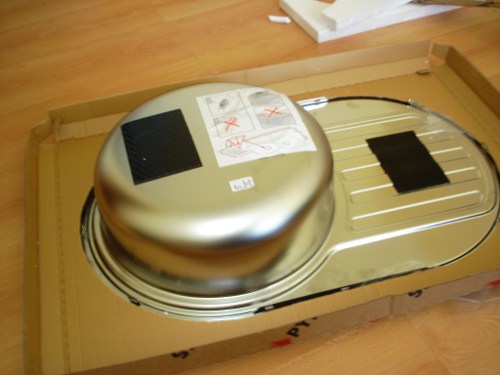
Sometimes, together with the sink, you can get an unexpected surprise - a pattern of the sinks of the sink (it acts as its packaging).
IN otherwiseThe cliché will have to draw on a tabletop by attaching it a product.
Instructions for performing work

The sink can only be used after the complete drying of silicone (enough hours).
Installation of integrated washing
 This kind of shells belongs to the number of the most expensive and without the involvement of a specialist to establish this accessory itself very difficult.
The main feature of the product is that this accessory forms a single integer with the worktop.
In order for the integrated sink to be installed qualitatively, you need to very accurately make a mounting opening and make good sealing.
To implement this design, coordinate milling machines are used. They provide the integrity of the cut and high clarity of the trajectory at the rate and depth.
Thanks to the methods and new tools that have recently appeared, an ordinary ordinary man has the opportunity to independently mount the combined sink.
Installation of polystolesit is produced in the countertops of solid wood, natural or artificial stone. In this case, the edges of the sink should be located below the surface height per dimensions of its thickness.
The main rule that must be adhere to when performing all consistent actions: do not rush.
Remember, in this case the law is valid:
- seven times will die, and one is a detachment.
Going to connect washing yourself? Consider several nuances:
- instead rubber seals Use silicone sealant.
It will provide tight fit and fill all small cracks and clearances; - heavy products (sinks of natural and artificial stone) better connect with a partner, so you will be able to avoid falling and damageing the washing;
- all mounts must be mounted solely manually.
If you follow all uncomplicated prescriptions, then the owner of the house can make the owner of the house without the help of a specialist in the worktop.
How to install washing and countertop with your own hands. Look in the video.
The kitchen repair can not be completed while the sink is not embedded in the worktop. In this article we will imagine you step-by-step process Setting the sink in the kitchen: how to make the right markup than cut hole in the table top and how to achieve really competent car wash.
How to install washing
TO independent installation Sinks should be searched only if this service is not included in the table top manufacturer. At home, this work is performed quite real, but attention should be paid to some non-obvious moments that are known only to professional furniture assemblers.
So, the sink is installed in the tabletop by the method of the insert. First by accurate sizes The center of the array carves the hole, its edges are properly processed. Then the washing is inserted, its housing is fixed to back side Special fasteners, and the gap between the metal and the table top is carefully sealed. At the end of the installation, the installation of pure plumbing, sewage siphon or waste chopper is performed.

The main requirements for the installation of washing three: fastening strength, adjustment density and thorough sealing from moisture. Most often as the base of the countertops is used by a particle of 40-60 mm thick. This material is very sensitive to high humiditythat for the sink zone is very characteristic. Due to poor quality installation of the edge of the hole, it may require the replacement of the tabletop entirely or even the entire headset.
Application markup
The sink should be located the center in the middle of the depth of the tabletop, shifting to the left and right for the most convenient location. The distance from the sink of the sink to the edge of the table top should not be less than 50-70 mm, otherwise the washing should be shifted slightly. It is not recommended to make an indentation from the angular plinth less than 30-40 mm, otherwise it will be difficult to wipe the surface in this place. When installing washing in the angular section, it is useful to leave the indent of 100-140 mm from both walls to get small space For convenient accommodation household chemicals and detergent.

Some manufacturers provide their products with installation templates, some are not. If there is a template, it must be glued to the front side of the countertop, slightly moisure the surface with water. This will help to avoid a random shift and mark the markup without assistance. The template usually indicates the width of the sink sink, otherwise it needs to be measured and noted for visual control of the action.

If the template is missing, the car wash must be turned over and installed on the tabletop, thoroughly observing indents. The sink should be circled in a circle with a water-soluble marker and removed, and then shift the line of the contour inside on the width of the side. If the bowl does not repeat the external contours, which is found in sinks with a drying pallet, the markup lines must be shifted by a certain distance on each side. If two sinks or waste compartment are combined in one block, the overall hole is cut under it.
How quickly and gently cut the hole under the sink
Immediately note that household instrument You can cut a hole only in a tabletop from a chipboard or a wood array, regardless of the type of coating. More durable materialssuch as silicon agglomerate require special cutting tool and fixtures.
First, in the table top you need to drill several holes with a diameter of 10-12 mm at the markup line, but not crossing it. Usually 4 holes are drilled on diametrically opposite points of the contour or on the corners of the rectangle. Drilling must be started with front faceso as not to snatch a large area when drill out.

To cut a hole for the sink, you will need an electric logby, which is installed a pink of a width of at least 8 mm and a length of a tooth is about 1.4-2 mm. The direction of the tooth is better to choose the opposite, so that the chips are not formed when front surface. And although the sink's side is covered with a strip of 12-20 mm from the edge, some countertop coatings behave unpredictably and give a rather long crack.

At first, the hole is cut on two opposite sides, then a small strap from a chipboard or wood is stacked across the cut lines. It is attracted by self-drawing to the cut-off part of the table top and keeps it from falling upon completion of the cut. After installing the bar, you must complete the cutting of the fragment and delete it. Open section, all chips and unprotected edges are abundantly processed by transparent silicone, leaving a layer at least 0.5 mm, and give it to dry.
Installation of washing and its connection
Almost all washers are equipped with ribbon seals, but they are quite hygroscopic and accumulate moisture, creating conditions for the development of mold. Instead of standard seals, manual sealing of silicone sealant is necessary.

With an indent of 1-2 mm from the edge of the hole on the table top in a circle, a silicone burning is squeezed, the thickness of which is 2-3 mm more than the height of the sink. Another flagery is applied with an indent of 10 mm from the first. Silicone needs to be left for 30-40 minutes, until its surface stops sticking to the hands. Then the washing is installed in the hole, its edges are carefully attached, giving silicone fit form. The sink should be tightly adjacent to the tabletop over the entire perimeter, otherwise, when tightening the attachments it can unscrew it. After 5-10 minutes, the car wash should be removed and make sure that Silicon did not burst and not spread. Thus, on the tabletop, a double continuous side is formed, eliminating water from entering inside, while the sink can be easily dismantled.

Before the final installation and consolidation of the countertops, it is necessary to mount the reinforcement, access to which it will be difficult to bowl, that is, the mixer and the overflow hose upon its availability. But the siphon or chopper is much more convenient to fix it to the installed car wash so that it can be kept during the installation process for the open drain hole.
To fasten the washing in it there are steel hinges located along the contour of the bowl in an amount of from 4 to 10 pieces. They have screwed clips that have the shape of a paw, the edges of which should be oriented outward. After that, the washing is lowered into the hole and is finally aligned, then the screws are tightened, tightly pressing sterns to the table top.

Character professional installation
The main difficulties in the installation occur in the manufacture of the hole: if the gap between the edge of the table top and the bowl will be too large, the paws of the fasteners can raise. If the hand is not solid, better when cutting out, do not touch the markup line, but if necessary, adjust the size of the rashpyl.
When the washing is attached, silicone should not burst. It is better to squeeze a small drop from the tube in advance and it is necessary to observe for what time the surface is formed enough of a rather durable film.

The screws of the fasteners should not be delayed too much, especially with an enlarged gap. This leads to the fact that sinking sinks are not pressed, but strung up. A small gap between the side and the countertop can also be sealing with silicone.
Today, a person can install such a sink in his kitchen, which he soul. And at all, it is not necessary to seek help to the Master of a narrow orientation, sometimes people decide to carry out such a process as the installation of a mortise sink, with their own hands.

The modern market of sanitary products can offer wide selection Money for kitchen. Modern sinks May have a variety of forms, differ materials from which they are made, to be a variety of colors. However, from all this diversity it is worth highlighting a sink from of stainless steelwhich is considered the most durable and budget.
Of course, the service market is currently developed and can offer such a service as the installation of a kitchen sink. But people sometimes prefer to deal with such questions in their home, and quite naturally, if the question arises in front of them: how to install a mortise sink yourself?
The most common method to install washing in the kitchen, regardless of the material from which it is completed is the sinking in the furniture table top in the kitchen. And in order for the process of installing a washing with their own hands, it is impeccable, it is necessary to follow some rules and recommendations.
Selection and preparation of the instrument
To embed a sink in the table top in the kitchen, you may need the following tools:

- markup pencil;
- roulette;
- construction corner;
- screwdriver cross;
- well sharpened knife;
- electrolzik with saw;
- electric drill with a metal drill with a diameter of 10 mm;
- self-tapping screws 4x30;
- universal or sanitary sealant;
Carrying out work on the installation of washing with their own hands, it is important to prepare all required toolsIn order not to spend time on their search during the work.
We make markup

The key to the successful result of the operation when installing washing in the kitchen is correct and accurate markup.
So, the main stages of work:
- First of all, it is necessary to determine the axis, symmetrically relative to what the washing will be installed.
- Next, you should consider the distance from the edges of the tabletop. Usually, such indents make up 50 mm from the front edge of the table top and 25 mm from the rear.
Carrying up before installing the sink in the kitchen, it is important to remember that the above dimensions are not reference and can be changed depending on the size of the sink itself, the characteristics of the sinking and so on.
- A sharp pencil should be made on the front side of the countertops, which will denote the axis and the center.
- Next, you should schedule the borders of the sink itself in the kitchen.
- In order to determine the distance from the edges of the countertop, the sink should put on it bowl down and align relative to the markup made by their own hands. Without moving the sink, outlining its edges and remove from the table top.
Depending on the manufacturer, in order to collect the sink, with it in the kit can go metal or plastic fasteners. Better if it is metal mounts. And, before proceeding with the installation of the washing with your own hands, you should disassemble these fasteners and install special parts on the sink itself.
Cut the seat opening in the tabletop

Depending on which form there will be a washing, you should make holes in the kitchen countertop. For the washing of round form it will be needed to make one, and for rectangular shape - Several holes.
It is important that the hole is near the cut line, but it did not touch it and the drilling to produce only from the front side of the kitchen countertops.
As a result, a hole should be turned out through which the electrolybiz needs to be carried out with his own hands. In order for the kitchen's countertop does not fall down, you need to insert the screws into the slot. After the cutout is ready, it is necessary to substitute a car wash to it to make sure the actions and markup.
After interior Countertops will be extracted, cuts must be cleaned from dust and covered with a special sealant. Sealant use it is necessary that the kitchen countertop then does not twice when water gets.
Mounting washing

After the tabletop is carved with your own hands for washing, you can begin to fasten it. To do this, it is necessary to insert a washing into the hole and fasten the mounts is equidist to each other. It is important to remember that it is not worth tightening to the end of the attachment.
Important, carrying out the wash fastening, tighten the mounting manually, without applying any tools, all the time control the position of the washing.
Then it is necessary to turn the countertop to the front side down, install the remaining fasteners and tighten them completely. At the same time, sharp spikes of fasteners should maximize in the worktop so that later they can be written to the file.
In order to finally collect the sink, you need to tighten the screws, attracting the sink to the tabletop.
As a result of the work done, the washing around the perimeter should be pressed against the surface and is installed clearly on the markup lines. If the excessive sealant is visible, they need to be removed with a simple pure cloth. The sealant completely dries over one day.
How to install a mortise sink in the kitchen (video)
Set the sink in the kitchen - the case is responsible and requires a person of patience and skill. However, if you clearly fulfill all the installation rules, you can do everything in best view, giving the interior of the kitchen of the finished species.
Industry furniture production Provides to choose from great amount various furniture for kitchen. Sometimes wash for dishes is offered separately, and is installed by the buyer on its own. This requires any special knowledge and skills.
The tool in order to make a hole correctly, you need the easiest. The question is how to cut the worktop under the sink, not very complex. However, if not followed certain requirements when installing, the installed equipment can be spoiled.

The sequence and performed manipulations are similar to the discharge of the hole in the chipboard.

The tool in order to make a hole correctly, you need the easiest.

Do it better on open airSince in the process of dusting will be a lot of dust.
Regarding level working surface The sink can be set in the following ways.
- Below countertops. Such a location looks very effectively, but will additionally require the use of a special tool. The sink itself must have a certain form. Creates in this case below, special fasteners. They are usually sold complete. Open end must be impregnated with a water-repellent means. At the same time, it should have enough thickness.
- On the same level. With this position it is very important to correctly make the desired deepening, equal to the thickness of the side. It must be ideal throughout the perimeter of the washing installed.
- Above the table top. The tool for this type of installation is needed the easiest. Special efforts With this installation will not be required.

In the hands you will need to wear protective gloves, and face to protect with a special transparent mask.

Sometimes wash for dishes is offered separately, and is installed by the buyer on its own.
The sealant serves to prevent moisture from getting into place of sink and countertops. Water can spoil the chipboard strongly. For different surfaces It is intended for its sealant. When working S. artificial stone Applies only silicone. Sealants containing alcohol are used more often to the wood and plastic.

If you are decided to cut a hole in the tabletop to the sink on your own, then you will need a special tool - "Bulgarian" with a diamond circle.
The use of sealant not only prevents unwanted penetration of water. This serves even further compound strength.

If the sink is purchased separately and the installation will be required, it is desirable to entrust this work to professionals.
Required tools:
- electric drill
- electric logsik
- tree drill with a diameter of 10 mm.
- set of wrenches
- brush
- adjustable key
- rasp
- screwdriver

Before cutting the hole in the table top to the sink, the marking of the desired hole is made. For this from cardboard or dense paper Pattern made. Some manufacturers and manufacturers of miles make a template with the product itself. If the installation option on the worktop and the sides have been chosen, you can make a marking without a template. For this wash is used as a pattern. It is applied to the top surface to the plane and the marker or pencil will be burned along the contour. For the convenience of installing the tabletop, it is advisable to remove. Rates inside 0.5 - 1 cm. From the feature carried out, the working circuit is performed, according to which it is done.

It will look solid, but it will be more difficult to easily hindo in it.
Describing the cutline line, the pattern is cleaned and you can proceed to the sawing process of the sink. The drill is drilled by an electric jigneling carriage, a diameter of about 10 mm. For a quadrangular or triangular wash holes are made in all corners. If the product has a round or oval shape, one will be enough to work.

Install the sink in a tabletop of a tree or chipboard, having the required tool and the simplest skills of handling it is not difficult.
The hole and propyl are made from the laminate side, it will prevent its chip. The jigsaw gently chop the desired hole along the drawn circuit. Electric jigsaw need to tightly press to the surface. The pink canvas should go smoothly at right angles.

A sealing tape is applied to the sink supplied with the product.
When performing this work, the internal ventilated part should be supported. Or arrange a worktop so that at the end of drinking it does not fall this part. With a sharp separation of the remaining and retractable part, the laminated coating can crack. Or is part of the chipboard.

You can use drill with special drill - Furniture crown, just immediately take such a drill diameter.
If there is no place for this location, or the countertop has not been filmed, use the construction scotch. Drinking is made in this case with stops. It is done for 10-15 cm., Which is then sicked with a scotch on both sides.

The decay is mounted and, if it is provided with a design, a mixer (water tap).
After the drinking is completed, the sink is pre-trying. It should come in free, but also the clearance should not be big. If it is too tight, it is necessary to expand the installation location with a rashpil or jigsaw.
Describing the cutline line, the pattern is cleaned and you can proceed to the sawing process of the sink.
Now you should carefully "sand" the inner end to which the sink will be faced. This is done emery paper With shallow grain. The resulting dust is removed, and the place of contact with the brush is applied with a thin layer of sealant.

For the convenience of installing the tabletop, it is advisable to remove.
Installing washing and connecting communications
The decay is mounted and, if it is provided with a design, a mixer (water tap). Installed in the desired sequence all gaskets. Typically, the layout layout scheme is indicated by the manufacturer on the packaging of the mixer and the drain siphon. Threaded connections Good stretch out spanic keys Or, if necessary, by the adjustable key.

When buying furniture for the kitchen with such a surface it is desirable to have already ready productwhich will require only connections to the water supply and sewage system.
In the absence of in the design to which the installation is planned, holes for water pipe and sewage, they should be cut. They are made similarly as for washing. Drills the drill I. electric pubsomy Putting the desired opening. You can use a drill with a special drill - a furniture crown, simply immediately take such a drill diameter.

For this wash is used as a pattern.
A sealing tape is applied to the sink supplied with the product. It is left from the edge a small gap, which is subsequently filled with a sealant. Installation of fasteners is carried out.

Some manufacturers and manufacturers of miles make a template with the product itself.
Re-apply the sealant in the place of contact and give him a little bit, 2-3 minutes. Install the product in place and pull mounting. The table top with it to fix in its place and combine the plumbing hoses. Connect the drain. Once again, go to the places of joints with a sealant, excess must be removed.

Before cutting the hole in the table top to the sink, the marking of the desired hole is made.
Installation of washing into construction from other materials
Install the sink in a tabletop of a tree or chipboard, having the required tool and the simplest skills of handling it is not difficult. More durable will be installed in the cooking zone Countertop of artificial or natural stone. It will look solid, but it will be more difficult to easily hindo in it.

Use of the sealant not only prevents unwanted penetration of water
When buying a kitchen furniture with such a surface, it is desirable to have a finished product that will require only connections to the water supply and sewage system.

Sealants containing alcohol are used more often to the wood and plastic.
If the sink is purchased separately and the installation will be required, it is desirable to entrust this work to professionals. In the workshop on the processing of the Master, the wizard will produce the required work without damaging the surface. For this, they have appropriate skills and have the entire set of necessary tools.

For different surfaces, its sealant is intended.
If you are decided to cut a hole in the tabletop to the sink on your own, then you will need a special tool - "Bulgarian" with a diamond circle. When working with this tool requires increased attentiveness. In the hands you will need to wear protective gloves, and face to protect with a special transparent mask.

The sealant serves to prevent moisture from getting into place of sink and countertops.
It is better to do it outdoors, since there will be a lot of dust in the process of dusting. The sequence and performed manipulations are similar to the discharge of the hole in the chipboard.

The cut case is selected taking into account the minimum distance to remove the water into the sewer and connecting the water supply.
Video: Installing a sink video. Sink in a tabletop.
In this article, we deal with how to cut the washing in the worktop, and if you joined us, then you have a change in the kitchen, and I would like to try yourself as a master. Well, we will try to consider all the pitfalls in detail so as not only to carry out installation, but also provide a new acquisition of durability.
Installation of washing in the tabletop - why do we choose the mortise shell?
You can organize a sink in the kitchen in two ways - overhead and mortise. In the first case, along with a bowl for washing dishes, you get a pedestal or an end to which it is placed. But in the second case, the installation of washing in the tabletop of your kitchen headset is carried out. Most often, the preferences of buyers are given to the current version, even though it is a clapping in the installation, but still has a number of advantages that forced us to make a choice in its favor.
The first, and most important, argument is not in favor of the overhead shell, constantly reigning moisture in the kitchen, which is formed between the cabinets adjacent to the block with the sink. Further users argued the type of variety of assortment and aesthetics mortise shells. Here you can most often find a wide selection and materials, and forms. Ceramics, porcelain stoneware, stone, plastic, stainless steel, copper, bronze - enviable list, right? And if you diversify it with round, rectangular, corner and various asymmetric forms, then the eyes are scattered.
Thinking how to cut the sink in the worktop, it should be borne in mind that it can be installed in three ways: exactly at the level of the table top, just below and slightly higher. It depends not only on your desire, but also from the configuration of the purchased kit. Specify how the bowl should be located, which attachments are used during installation. Also think how durable they are, and what can affect the terms of their service, because sometimes the quality of the sink is good, but it is attached almost on an honest word.
How to cut a sink in the worktop and prepare for the operation?
Before you understand how to install a mortise sink in the worktop, you should make sure that you have a reliable water supply to the place of the insertion and the sewage is also qualitatively established. From strategically important tools that will need to search for familiar, perhaps not one day, if you personally do not have them, you can bring the electroltrol bike. Without it, starting work is meaningless. From purchased materials, except for washing, a sealant must be present, the best transparent silicone.
By buying a sink, you can get a pleasant surprise - a template for its insertion (it acts as her packaging), otherwise you have to draw it on the tabletop, applying the sink. Also do not forget that if kitchen set Very new, then there are no holes and for pipes, actually, like the pipes themselves, possibly. That is, the siphon and the accompanying hoses are purchased independently, they are rarely included in the sink.
If you just collect furniture, and you have the opportunity not to fix it yet that the cover of the table top, then do not do it. So cut will be more convenient.
How to install a mortise sink in the tabletop - step by step instructions
Here we give general principle Work, no matter, the installation of a round washing in the worktop or washing any other shape is made.
How to install a mortise sink in a tabletop - a step-by-step scheme
Step 1: Making Template
First, you should create a cardboard pattern or draw it directly on the table top using the sink itself. If you are lucky, then you have a packaging pattern, just need to be cut through the indicated circuit. In the case of its absence, take a clean cardboard, attach to it washing up the bottom and circle the contour pencil, cut it out. When it is impossible to get it no other, then get ready to use the sink itself, turn it upside down, put on the tabletop, and we will circuit out the contour.
Step 2: Choose a scene for washing
Need to find optimal place For location. To do this, appreciate where you will have a mixer, on a sink or near the table top, how to approach pipes, it will still have to cut the edge of the countertops before final installation. Strive not to clean the sink close to the edge, make a minimum indent 6 cm so as not to break the case with randomly these subtle places. Also, look at the worktop, there will also be other elements of the furniture block, possibly carrying, it will be impossible to cut them, everything else can also be cut if the sink does not fit.
Step 3: Marking Countertops
Suppose you have a template. To mark the countertops, it must be attached to something to the surface to ensure fixedness and circle. On this line and we will cut in the future. If you have a factory template, then it has already been marked specifications The borders of the sink, you can immediately cut. If you are using cardboard or the sink itself, then the outdoor outline is not a cut line, because the bowl of the sink is inserted, and not its contour, it is exactly the contour of the bowl and should be calculated and noted. To do this, measure the distance from the outer edge to the connectors or pastries itself, this distance is back from the circuit drawn on the template, draw a new outline, already internal. Cut it, attach it to the tabletop and circle a pencil. If you draw immediately on the table top, without a template, then the essence does not change. Marking is ready.
Step 4: Drink out the outline
Some do not paint on the table top, and they will fix the cardboard and saw it, but this is extremely uncomfortable, our advice: apply still drawing with a pencil. According to the marked circuit, we have to cut the hole, but how to avoid chipping on the edges of the table top? To do this, look at the surface of a painted scotch, then it can be easily removed. We do a hole somewhere in the circuit, better drillBut so that it turns out to be on the inside of the line and then went along with the carved piece of table top. Insert the jigsaw cloth in this hole and move on the outlined line. It is necessary to do it slowly, so as not to create a high load on the pink, it can then bend and deviate from the course.
Step 5: Cutting Processing
The resulting cut is best cleaned a little, blow and wove in silicone qualitatively.. So the cut will not be subject to the destructive action of moisture. If on the path of the bowls there will be some other internal elements of your kitchen cabinet, you will have to make marking and cut them and, also processing silicone. In the case of using the factory template, even the markup of the inner region is provided in it, otherwise they will have to rummage, just do not try to act on the eye.
Step 6: Fitting Extra Equipment
If you have a new kitchen set, you will need to make these operations before the final installation of the shell. Namely: to collect and try siphon and pipes, do the necessary holes in the locker for the flow of water and the drainage of sewage, to trim some hoses. For all this, use the same jigsaw, and for round holes You can take a crown on a tree. Now all pipes are laid. The further mixer is installed if it is located on the tabletop, or is placed and the hole will be drilled on the sink itself, if it is located on it.
Step 7: Installing washing
First you need to supply washing sealing ribbonwhich comes in the kit. It is attached almost along the edge, but leave a place for silicone, sometimes there is even a special groove. They wear fasteners, but they are not fixed, they will not be fixed, then they will need to tighten them according to the sink connector. Fix the mixer if it is provided on the sink, and now we apply silicone into the grooves around the edge and insert the sink in the opening, pre-burning the attachment. Slightly move the design to the village well and most closely along the contour, climb under the sink and tighten the fastening carefully. Wipe the sealant speaking around the perimeter until he managed to dry, and expect frost. They also process the gaps, if so, still turned out somewhere.