How to make a ceiling with backlit from Duralight. Ceiling backlight LED ribbon with your own hands How to connect backlight on the ceiling
When multi-level drywall and, there was an opportunity to zonate the premises depending on their functional purpose. 20 years ago, it was possible to highlight a certain part of the room, painting a plot suspended ceiling In another color. Today, the LED backlight of the ceilings is applied.
Such a lighting will make your room unique, add her comfort and attractiveness. Marking the LED backlight of the ceiling with your own hands is not at all difficult.
However, this will require basic knowledge to help you choose the right lighting devices and install them without errors. Read this article to the end, and you will learn how to make the ceiling backlight almost in any room.

Backlight options
There are two most common options, how the ceiling lights are running with their own hands:
- Contour LED LED LED Backlight Ribbon
- Backlight of embedded LEDs (the imitation of the starry sky)
The second option is used when the diode ceiling light (tension) is performed. It is the most time consuming and costly on the financial component.

Miniature LEDs are used in such a ceiling with LED illumination lighting Frequently decorated light scattets from Swarovski and other famous manufacturers.
The most popular LED backlight of the ceilings in the first embodiment. It can be used to illuminate, both plasterboard ceilings and stretch ceiling systems. In addition, component parts for such lighting can be purchased at any store for chandeliers and lamps at an affordable price.

Principle of contour LED backlight ceiling
How is the led backlight of the ceiling with their own hands? The basis of this method is the coverage of the ceilings. lED ribbon laid in gypsum Carton. It is located in the second level. suspended system And eliminates visual contact with the source of light.
It seems that the lighting goes nowhere. It is gently and limited to the contour of the ceiling. Alternatively, you can apply LED tape laid in a wide foam ceiling plinth, simulating manual stucco. In this case, the plinths are attached to the wall only at its lower part.

Between the plinth and the ceiling leave the gap 5 - 7 cm. In the formed pocket between the wall and the plinth, the light is stacked diode tape. Such a ceiling with LED backlight is much more economical than the installation of a plasterboard box.
It is convenient to use it to illuminate stretch ceilings. Repair in such premises can be completed, and the installation of the LED lighting of the ceiling and ceiling plinth Do with your own hands the work is not dusty and light.

Set of materials for LED backlight
For lighting, a special conductive tape is used with LEDs installed on it. There are ribbons moisture-proof, ordinary (white light) and multi-colored (RGB light). The first are laid in a silicone, transparent tube. They cost a little more expensive, but they are protected from a possible flood from above.
To supply voltage to the diode tape, a lowering transformer is applied. It is installed in the circuit between the switch and the backlight source.

It's important to know! It is not recommended to set the backlight into a chain of the main ceiling lighting controlled by a common switch. The main light will score soft contour lighting. LED backlighting the ceilings should be removed on a separate switch.
There are ribbons to obtain multi-colored backlight (RGB tapes). They are more expensive and require the use of a transformer and a special controller. It programs the switching of ceiling lighting colors.
The tapes also differ from each other by the location of the LEDs and their power. The most common LED tapes with a density of 30, 60 and 120 diodes are 1 meter. The greater the density, the higher the backlight brightness.

Calculation of contour diode illumination
The resulting method multiply to the power consumption of 1 meter of LED tape. Find out the seller before buying. Based on the data obtained, you need to select a transformer (power supply unit) and the controller of the required power. The voltage of the transformer and the controller can be 5, 12 and 24 V. Remember it when choosing devices.
Important to remember! If you find it difficult to calculate and select a transformer and controller, contact the seller in the store. He will undoubtedly help you make the right choice.

Installation and connection
Ribbon is sold on coils (bobbins similar to tape recorder). The coil is wound 5 m. If necessary, the ribbon can be cut and soldered, having received the required size.
Cut the LED ribbon with your own hands only in places marked on it. Cutting multiplicity for different tapes may differ. The cut ribbons sold down with their own hands according to such a scheme:
- For monochrome tapes sold two contacts "+" and "-"
- For RGB tapes, the same name "V +", "R", "G", "B"
When soldering, you can not overheat the ribbon, as the LEDs can fail.
It is also impossible to solder sequentially more than 15 m (3 coils). Conducting tracks will not withstand such power. In this case, it is necessary to connect the sections in parallel. In order not to damage the base of the tape and the conductive paths should not be bent at an angle of 90 degrees.
When LED (LED) ribbon is soldered to the desired length, the transformer and controller are connected. Often the transformer is sold without a network cord, so if it is not, then buy the lighting cable and fork. Mounting the wires to the terminals L and N. When using RGB tape to the transformer, connect the controller.
Note! When connected, the polarity must be observed.

LED tape is connected to the controller. If you use a single-color tape, it is immediately connected to the transformer. The ceiling LED backlight is connected to a power source and tested for performance. After that, carefully clean the surface from dust, where the backlight will be laid.
From the reverse side of the diode tape a protective film is pasted. It must be removed and stick to the tape into the box or pinlets pocket. Installation of the diode illumination of the ceiling is completed.
Every year, new elements are included in the interior design of residential and special premises. The LED tape for the backlight of the ceilings has become one of them.
This functional decorative item is able to transform even the most boring interior. Often it is able to shine in various colors from which you can choose the corresponding mood or a folding setting.
What is a LED ribbon?
LED tape is a flexible strip, which can be width from 5 to 50 mm. On one of the sides of the tape there are LEDs and resistors combined with electrical conductors in a single scheme. On the other hand, it is usually pasted on it. double-sided tapewhich the band is fixed in the place selected for it.
On LED tapes different models There is a different number of LEDs, and they may also differ in size. If you need to achieve greater brightness of lighting, the additional LEDs are sometimes soldered by the second or even the third next.
Advantages of LED tape when lighting ceiling

The advantages of this lighting decorative device are quite a lot, and they include the following indicators:
- Affordable package price and significant electricity savings at a sufficiently high brightness of lighting.
- Easy installation similar lighting equipmentwhich can be quite independently following the attached instructions.
- Wide selection color Gamma.. LED ribbons may have in their composition of the LEDs of the same color, for example, white - to enhance lighting or focusing lines, or various elements for creating special moods in the room.

- Long service life, as high-quality LEDs can serve 10 years or more.
Criteria for selecting LED tape for ceilings
LEDs used in ribbons
By purchasing a LED tape to highlight the ceilings, you need to know which types of LEDs for this purpose are applied.
The main types that are currently used for the production of luminous tapes for ceilings are SMD 5050 and SMD 3028 LEDs.

SMD - These letters in the marking are an abbreviation, a reduction from the name "Surface Mounted Device", in translation, it means as "the device mounted on the surface", since the LED is reliably soldered into the surface of the tape.
Figures going in marking after letters mean the size of the LED in millimeters. For example, SMD 3028 is an element with dimensions of 3 × 2.8 mm, and, accordingly, SMD 5050 - 5 × 5 mm.

The LED with this labeling is provided with six "legs" coming out of the housing with which it is in the tape. The element itself is equipped with three light-emitting crystals. A similar LED will give light radiation about three times more intense than one-chip SMD 3028, connected to a ribbon of only one pair of contacts.
To determine the characteristics of the radiation intensity of the LED, such a term is used as the light stream that is measured in lumens. Thus, the officially defined values \u200b\u200bof this parameter for SMD 5050 LEDs are 12 lumens, and for SMD 3028 - only 4 lumen. One LED from the SMD 5050 brand shines as intense as three next to the placed SMD 3028.
The color of the luminous tape will depend on the LEDs that are installed in it. In the case when the tape contains the SMD 5050 LEDs, three crystals can be installed in each of their enclosures. different color - Red (Red), Green (Green), and blue (BLUE). It is these English names that have given such a frequently used abbreviation RGB.
Using the electronic control circuit, you can optionally include any of the colors. Moreover, there is an opportunity to receive countless varied beautiful shadesBy changing the brightness of the glow of red, green and blue crystals. By this mixing, a new rich light background is obtained - it's hard to believe, but the "game" of only three colors when mixed as a result can give up to sixteen millions of different shades.
The intensity and brightness control of LEDs is usually carried out through the remote control using a special instrument - controller.

Very interesting shades can be obtained by adding white light to the existing background. It dilutes the brightness of red, blue and green, and as a result, the tender, pleasant shades, for example, pale blue or gentle pink are formed.
These shades can also be obtained when the white brightness is turned on with the addition of other colors included with the smaller intensity to it. It is necessary to take into account that with different lighting, a look at the interior design is almost completely changing, as it can appear every time in different colors.
Experts recommend to highlight the ceiling to use LED tapes with white light or combined optionconsisting of white and tricolor elements. These tapes will be able to change color solutions In the mood room. And the intensity of white color can be so high that it can be compared with the daily natural light in the dwelling day.
Getting white color
Since the LEDs with the "clean" white light does not exist, it can be obtained in two ways.
- One of them lies in the fact that crystals are used with a blue glow, which are covered with a luminophore from above.
Luminofo is a view of a light yellow substance that is applied to the surface of the LED crystal. This composition is capable of converting absorbed energy into white light radiation. According to the presence of light yellow substances on LEDs, it can be clearly defined that these are elements that will emit white light.

It should be noted that the phosphor must gradually lose its qualities of the converter over time, and the blue color begins to break through white, and radiation acquires a bluish shade.
If the LED tape is used continuously for a year, then its brightness can decrease by 25-30%. Therefore, when purchasing this "lighting device" you need to get acquainted with his technical characteristics and instruction manual, where the manufacturer must specify the warranty period.
With a decrease in the intensity of white light or appear in it blue TintYou can use the second way to get it.
- The second method is based on the laws of optics, of which it is known that white color It can be obtained by mixing all the available colors (in this case, green, red and blue) turning on them simultaneously at full power. Thus, it is possible to "create" white light, and the problem with the influence of the "hitch" phosphor will not matter.

The optimal choice for setting the backlight on the ceiling can be the RGB-LED tape, as it is installed tricolor LEDs that will help to get white light if necessary, as well as other shades.

This variety of LED tapes will serve long enough. They are easy enough to use - the dachshund is the ability to turn on the white light if only intensive lighting, or color gamut, corresponding to the mood, is needed. The color setup process is made from the remote control and does not take much time.
Varieties of LED ribbons

1 - tape with SMD 3028 LEDs with a density of their placement 60 pcs / m.
2 - the same, but with a density of accommodation 120 pcs / m.
3 - a two-row tape with SMD 3028 LEDs, with a 240 pcs installation density / m.
4 - tape with rare placement of LEDs such as SMD 5050 - the density of only 30pcs. / M.
5 - the same, but with a density of 60 pcs / m.
6 - a two-row LED tape with SMD 5050 elements and an accommodation density 120 pcs / th.
If you plan to install decorative backlight for niches of ceilings, furniture, or desktop in the kitchen, it is better to apply SMD 3028 tape, which has 60 LEDs per meter. It will be enough for it to cope with its task. LED tape with too high light intensity will be unnecessary, as it can make eyes, especially since the larger brightness will require a power supply unit and larger in size, so it's more difficult to find a secluded place for it.
The importance of the quality of the LED tape
Deciding to make additional lighting or decorating the interior with the help of LED tape, it is not recommended to buy its cheapest options. Such products do not serve for a long time in the original condition - they, as a rule, quickly breaks the color balance, or even diodes can completely overdo it. In cheap lighting ribbons, it is usually installed elements of not too high as the low price predetermines.
Design and self-installation of LED ribbon
LED ribbon lighting system is often sold complete. It is possible, of course, to acquire all its elements and individually, but it will be more difficult to choose correctly by parameters.

The LED backlight kit includes several electronic devices:
- a power supply that is necessary for converting a power AC to the constant voltage required for diodes;
- controller with a sensor that allows you to change the color of the lighting using the remote;
- remote control panel, regulating changes in the intensity and shades of the light flux;

- lED tape of the desired length.
The installation scheme of the system looks approximately as follows.

This scheme shows the system with RGB. - Silver, which is necessary to maintain a stable control signal in cases where it is required to lengthen the tape or it initially has a greater length. On this drawing, the connection points are clearly visible, so relying on it, it will be easy to understand the sequence of work.
- The first step to the power supply is switched to the power cable with a fork to connect it to the network, that is, the contacts N and L. are connected.
- Next, there is a connection of two controls of the controller to the same power supply, provided that the RGB LED tape will be used for the backlight.
- After that, contact cables connecting to it are joined to the controller.
 In high-quality sets color marking Wiring corresponds to "reality". Yellow wire - Plus power.
 - If the controller is designed for a certain length of the ribbon, and it is necessary to use more LEDs, it is necessary to use an amplifier to eliminate or wiring the elements, which connects to the power supply and another end of the tape. Then another segment of the LED tape is fixed to the amplifier on the other side.
The fact is that it is dangerous to connect to one power line of a successively more than 1500 mm tape, since the conductive track current may not withstand the load. But the control signals are precisely consistently, from the segment to the segment, gradually fading. Here in these cases for parallel connection To the power source of several segments, and the control signal amplifier is used.
- After everything is collected, you can check, turning on the plug into the outlet.
- When carrying out compounds, it is necessary to monitor the observance of polarity and the conformity of the controller voltage, the power supply and tape.
- If you need to build ribbons, if other devices are allowed in terms of its power, this process is carried out using specially intended connectors.
- If the ribbon needs to be shortened, the incision is made exclusively in the manufacturer intended in a certain place --0, it is usually indicated on it a dash line. The incision is made using conventional scissors.

A few words must be said about the correct installation of the ribbon on the place intended for it.
- Ribbon is fixed on bilateral scotch, which is released from protective film Before sticking.
- If the ceiling illumination is made, then the tape is usually fixed under its surface into a small niche made of drywall. This method of installation is effective in that the light gets the focus on the light ceiling plane, which, highlighting the LEDs, contributes to a more uniform lighting of the room.

Is it difficult to mount the suspension ceiling yourself?
Installation of such a design solves many of the problems of repair and refurbishment of the room. With materials and components in our time there are no problems, and make own hands - Completely satisfied. detailed instructions - In a special publication of our portal.
- Another option to increase the efficiency of the backlight is the fastening of the ribbon to the cornice (for curtains or specially installed around the perimeter of the whole room for illumination).
In this case, the ribbon is fixed in such a way that it sends the light stream to the wall and on a certain section of the ceiling, on which the light will dissipate, increasing the highlighted area. A competently highlighted ceiling will not only make the room lighter, but also help.

- In order for the tape to fix on the surface without problems, the place of gluing is to be cleaned from dust and desirable to degrease, and then dry well.
Financial Question
Several words can be said about the financial side of the issue. It should be remembered that, inviting the wizard to install LED lighting, it will have to pay the amount that will be from 50 to 150% of the value of the instruments themselves. Therefore, it is recommended to acquire the finished sets of the system to which the installation scheme of all components is always applied. Each of the components of the sets is designed for a certain amount of LEDs and the length of the tape, so it will be possible not to be afraid that their extra quantity will be connected. You can save a fairly decent amount on this process.
Some systems are sold already in the assembled and connected form, so they can be checked immediately upon their acquisition. It will only be left to bring a set home and make an installation in a place defined to illuminate, and then turn on the plug into the outlet.
Those who acquire such a backlight, the electrician skills are not particularly required. The most difficult thing in setting the point will be the choice of space for the power supply and controller, and then reliably their correct and reliable mount.
If the means are limited, and the backlight is already scheduled to be installed, you can choose a kit with a ribbon of one color - SMD 3528 LEDs, the density of the installation of the elements on which is 60 pieces on the temporon meter. However, this option cannot be placed in the bathroom, as such tapes are not equipped with moisture protection.
When setting the backlight in wet premises or in other places where there is a chance that the neighbors can fit on top, it is worth choosing a ribbon equipped with silicone external insulation.
In the conclusion of publication - a video showing the process right mounting Ribbon LED lighting.
Video: Installing and connecting LED tape
The ceiling with highlighting around the perimeter is quite original solutionwhich looks much more attractive than just a ceiling without backlighting. That designer solution Simple and quite inexpensive. In addition, such a backlight can be made, with their own hands, without resorting to the help of a hired brigade, which, by the way, is quite expensive.
LEDs are not at all accidentally taken, since lED lighteningThese are not just lamps, but a very thoughtful designer solution, which, together with the main light, creates a harmonious light ensemble.
Nowadays incessant crises, in fashion steel budget renovations, By the way, there are even more expensive, with incomparably less costs.
Such a simple design, like LED backlight, can arrange, practically anyone.
Perhaps it is worth considering one of the most common methods where the LED ribbon is placed in a plasterboard box.
Her advantages:
- Since the box is placed in the second level, it creates the impression that the light comes from nowhere;
- The light does not cut the eye, and it is evenly rushing through the entire perimeter of the ceiling.
Installation of such a box, of course, requires some costs and efforts in terms of installation. However, there are much simpler methods.
LED lighting around the ceiling perimeter: in foam plinth
Alternatively, a LED tape is used, which is placed in a wide ceiling foam plinth, made with the simulation of manual stucco. Plinths are fixed on the wall at its lower edge.
Between the ceiling and plinth, leave the gap, about 5-7 cm, and the resulting pocket and hides the LED tape.
Such a ceiling with LED ribbon was also widely used.
Benefits:
- Much cheaper than the drywall bar;
- Much easier to install.

Thanks to these two qualities, the backlit ceiling device is significantly simplified.
Required materials for LED backlighting
Materials for the lighting device of the LED need not so much, but the materials themselves are inexpensive.
What do you need:
- Conductive tape with LEDs. Ribbons are waterproof (white), as well as RGB (multi-colored). Waterproof tapes are placed in a white silicone tube. They are more expensive, but, at the same time, have a reliable isolation from possible leaks from the upper floors.
- A lowering transformer to which a diode tape is connected. It is embedded in the gap between the switch and the backlight.
The inclusion of the LED tape is performed by a separate switch.
The backlight will lose the entire effect that is interrupted by the main lighting.
It has already been mentioned that there are tapes that give highlighting multi-colored (RGB). In this case, besides the transformer, there is a need for a controller in order to control the brightness. Light switching is carried out at the expense of the program.

Tapes are different, both in terms of power and frequency of location on them LEDs. The most common ribbons with a density of 30, 60 and 120 LEDs per messenger meter. The more density, the more brightness.
Ceilings with LED ribbon under plinths
You can, of course, rummaged on the Internet for a long time, killing your time and doubting, in the correctness of my actions, and you can simply make the right calculation in order to understand the benefit of this event.
LED tapes are a very reliable source of lighting, the lamps change extremely rarely - the tapes are very reliable and durable.
In order to arrange everything correctly, you will need the simplest knowledge, plus simple actions.
Actions:
- Need accurate measurements of the perimeter of your room;
- The resulting result is multiplied by the power of one running meter LED ribbons;
- In order not to doubt the power, you need consultation with the seller, before buying;
- Based on this data, you need to pick up the power supply and the controller.

If the ceiling is multi-level, then the backlight LED is perfectly combined with a beautiful chandelier. By the way, the backlight can be performed not a single ribbon, but its fragments.
Proper connection and installation
To the backlight turned out without flaws and shortcomings, some rules should be taken into account.
Rules:
- The ribbon is sold in five-meter coils, and, if necessary, it is cut and soldered into the desired size;
- The tape is gently cut solely on the markup;
- Slices ribbon are soldered according to the scheme;
- In order to secure LED tape, use double-sided adhesion, or self-tape tape. Before sticking, the surface is degreased, the protective layer is removed, and the tape itself is pressed against the required area.
Installation of tapes on the plinth is different from the mounting of the tape on the wall. Both options are used by the consumer.
The plinth is not glued directly to the ceiling, but below five centimeters, and ten lower, in case of sticking to the plinth.

It happens that the power supply is sold without a network cord. Then you need to buy and cord.
How to solder:
- Plus with a minus, when the tape of one color;
- If the RGB is color (RGB), then the V +, R, G, and B contacts should be soldered.
After the tape is obtained desired sizeYou need to connect a transformer and controller.
Cannot be allowed when soldering a tape overheating! You can not solder more than three coils consistently - tracks, in which case, do not withstand the load.
At all stages of work chief Principle - Accuracy, caution and thoroughness. Bending radius - at least 2 cm. The tracks can not be flexing more than 90 °.
How to connect the RGB LED tape (video)
And in conclusion, the following should be noted. The originality of the ceiling with LED illumination is not worth talking, because it is so completely obvious. In addition, one of the advantages of such a ceiling is the fact that the mounting of the backlight is not something sophisticated, requiring the intervention of narrow specialists with special training - you may well do it yourself. I am also pleased with the fact that such a backlight can be arranged as on plasterboard ceilingand tension. In a word, having studied articles on this subject, viewing photo and video materials, as it should, considering how it all will look, acquire the necessary materials, and, having rolled up the sleeves, proceed to business.
Ceiling with highlighting around the perimeter (photo)


The ceiling lighting decoration for any room is quite responsible.
Therefore, before starting to select the options for illumination of the ceiling, you should pay attention to several important aspectsrelated to constructive features of ceiling surfaces.

When installing lighting equipment, such requirements should be taken into account as:
- light streams should evenly diverge throughout the room;
- in all lighting devices, the following indicators should be the same: power, luminescence intensity, light spectrum;
- light bulbs should be selected bright, durable and economical, for example, LED copies;
- the design of light devices and the entire interior with furniture objects should be united;
- to create a soft nice backlight, all lamps are directed up, for brighter lighting - down;

Wires need to be hiding - with hidden mounting, Wiring hides under the wall finish, in the case of open gasket, all wires are hiding into cable channels.

Types of ceiling lighting devices
How to organize the ceiling lighting and what lamps will be used for this, you should think about the stage finishing work. There are several types of lamps.

Chandelier is a casual classic. The main thing that is worth paying attention is the weight of the product, as some ceiling surfaces, such as drywall, may not withstand fasteners.
The chandeliers have a scattered light stream, so it will be enough for the entire area of \u200b\u200bthe room. This is a pretty universal type of lamps, so they are suitable for multilevel structures, and for inclined surfaces.

Spotlights of built-in or outdoor type - exterior shine more brightly.
These dots have an indisputable plus - simplicity of installation. However, there are cases of cases where the ceiling surfaces were damaged by such light sources, as a rule, stretched.
Note! Lighting in the apartment - 75 photos original ideas Lighting in the interior

Lamps with a directional light stream - illuminated with a light of a specific zone. Often applied for the purpose of highlighting for the working kitchen zoneOr to adjust the area of \u200b\u200bthe room.

LED (neon) tape - used for hidden lighting ceiling structures. Such a tape is placed inside the cornice. It is used with any room, except for the bathroom, since the increased moisture is contraindicated with this product.
Types of ceiling coatings and their lighting
What should be the lighting of the ceiling depends on the design features of the surface.

Suspended ceiling structures are created from plasterboard sheets that are attached to frame profiles. For this type of surface, as a rule, use spotlights.

The location of the lamps should be thought out in advance, since the holes should be done in the plasterboard coating.
Also in plasterboard type of ceiling use chandeliers. It is only important to correctly select a method for fixing the lamp.

If the device is not too heavy, it is possible to fix it on a dowel-hook to concrete surface. If the chandelier is heavy, then the anchor should be selected.

Select the lighting for stretch ceiling surfaces is more difficult. Since the film has low mechanical strength, it is impossible to mount the lighting devices to it.

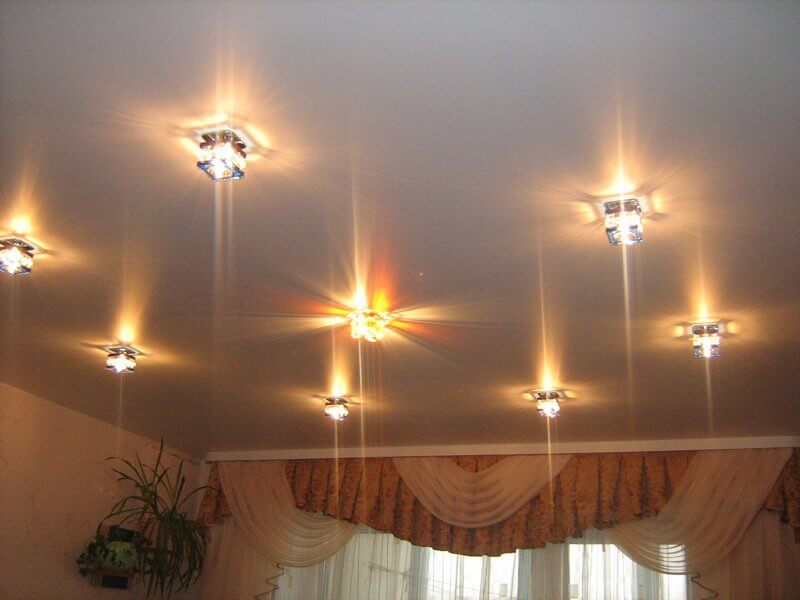
The best option for such a coating are dots that are mounted in prepared seats and practically do not distinguish heat.

If the chandelier is still necessary, then the hole should be done in advance in the material through which the wires will connect from the chandelier, and then remove under the decor cover.

Also for stretch ceiling surfaces it is possible to use hidden lED backlight ribbon.
For a concrete or wooden ceiling canvase, any kind of lighting devices will suit. However, mounting point devices will be quite laborious in such surfaces.

Lighting for each room
The corridor is often uncomfortable narrow elongated or a small square room. To shorten the long corridor, you can place the built-in lamps along the entire ceiling and send the light down. And to increase the area of \u200b\u200bthe small room, you should send light up.


Kitchen room here the best option There will be a combination of dots and LED tape.

Sleeping room - here you can pick up any device from a small wall brake, to massive floor lands.

For the living room you can create a real unique design The ceiling, which will be the "highlight" of all housing. The photo of the ceiling lighting shows that the "Star Night Sky" effect can be such a ceiling.

The main condition for the type of lighting in the bathroom is a lot of bright quality light, thanks to which unwanted shadows from items will not be discarded.

Photo of ceiling lighting


Before we consider the main options and ideas of the ceiling lighting, I would like to pay a little time to pay the requirements that are presented to this issue. Immediately, it should be clarified that these requirements refer not only to the location itself, but also their design, as well as constructive features.
So, for electrical work You must take into account the following requirements:
- The light should be evenly distributed across the area.
- All lamps (or each specific group) must have the same power, light spectrum and illumination intensity. IN otherwise There will be no harmony and the interior will noticeably worsen.
- Lamps should be economical, bright and at the same time durable. Leaders in this case are.
- If the ceiling lighting is hidden, the enclosures of the lamps should be hidden in the special cornice.
- The design of the plafoons (or other products) should be combined with furniture and wall decoration.
- Light bulbs should not blind eyes. To create a soft "fuel" backlight, direct the lamp up. To create bright light, the lamp should look down.
- All wires must be hidden. When the track is hiding under the trim of walls. With an open wire laying, it is necessary to hide it into a special cable channels (most often this option is used with and garage).
The most popular lamps
Most often to illuminate the ceiling in the house and apartment can be used:
- chandeliers;
- spotlights;
- directional lights;
- lED and neon tapes.
Consider the features of using each option.
Chandeliers are a classic lighting option not only the ceiling, but also the entire premises. Special requirements for them are not presented, the only one - the weight. This is due to the fact that with some types of ceilings may not withstand loads and collapse (for example, drywall). The lighting stream in these products is rather scattered and bright, so in most cases the chandeliers are enough for the whole room, the advantage of these devices is to be universality - you can easily make the lighting of a two-level, flat ceiling, and even inclined (if you use a suspended lamp on the chain) . 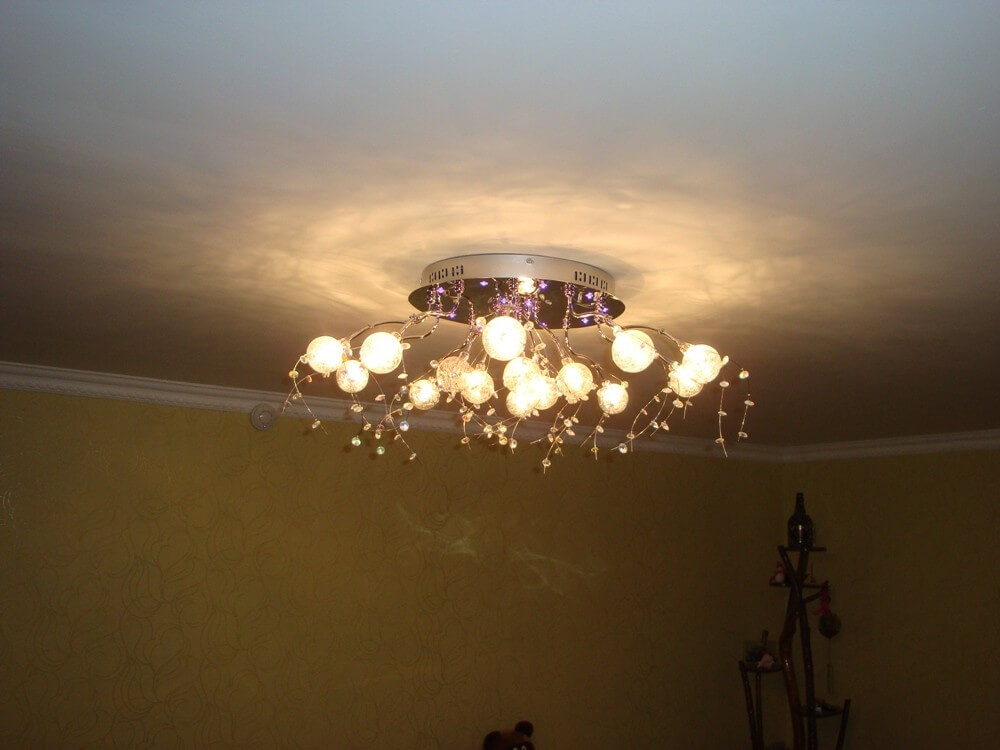
Point lamps belong to modern variant backlight. They are outdoor and built-in type. The first option is better "pours" the surface with light. Products have a lot of advantages, the main ones are simple installation and attractive appearance. The disadvantage is that some light sources can damage the surface when heated. This problem often occurs with stretch ceilings.

Lamps of directional light may highlight a certain zone, because The luminous stream does not differ in them, but concentrated in one area. Most often, such products are used to visually change the area of \u200b\u200bthe room. In addition, the lamp of directional light can be used to illuminate certain sections of the room itself, for example, working area Kitchen. 
LED and neon tapes have greatly proven themselves at. Products are stacked inside the prepared cornix and act as decorative backlight Perimeter room. To date, LED ribbons are customary to use in the kitchen, bedroom, corridor and living room. Bathroom due to high humidity Not suitable for these products. 
You can also illuminate the surface with plafones, but they are rarely used. This is due to the fact that the light stream of products has a small radius of dispersion, and the dimensions occupy a lot of space.
Backlight options
To date, there are a lot of ceiling lighting options with their own hands. The main factor in which is determined suitable option - this is constructive feature Surfaces. Recently, concrete, wooden, suspended and stretch ceilings are used.
Suspension
Represents plasterboard designfixed on the frame of profiles. To illuminate the ceiling of plasterboard, most often used. Products can be installed on the spiral, along the contour and in a row (it all depends on the room). Lighting should be designed during repair, at the creation stage plasterboard carcassbecause This time you need to take care of the laying of the wire to the place of installation of all buildings.
Also for this option A chandelier can be used, the main thing is only correctly choosing the method of fixing products. If the housing is not heavy, it can be fixed to concrete ceiling With the help of a special hook dowel or a butterfly dowel. For a heavier chandelier, it is necessary to provide anchor mount. LED tapes are used if a special cornice is provided for hidden backlight. In this case, the ribbon with the power supply is laid in it entirely throughout the perimeter.
Video Review of Creative Options
Tension
With the lighting of stretch ceilings, things are much more complicated. This is due to the fact that PVC tape.which actually stretches, has a low mechanical strength and heat resistance. In other words, it is impossible to attach the lamps to the film, because Under this weight, it immediately breaks. Even when creating a special attachment, it is also necessary to take care that the lamp does not burn the film. Such a problem may occur when used and halogen.
Point lamps in this case have proven themselves most successfully, because they are attached to specially prepared landing placesAnd the LEDs themselves practically do not distinguish heat. It is best to use outdoor products in this case, because They have an derived source of light. If the hook is already installed under the chandelier, then you can make the ceiling lighting using this lamp. All you need is needed - even when repairing cut a hole under the wires in the film, connect them from the chandelier and hide under the decorative lid, which is provided in the kit.
When using LED tape you can make a hidden backlight stretch ceiling. In this case, it will still have a little lower than the level of the film to create a cornice under the tape. The material for the design is chosen to your taste, but a simpler version - polyurethane eaves. LED ribbon well proven itself for lighting multi-level ceilings, especially if it is combined with other variants of lamps, for example, with point.
An example of illumination
We draw your attention to the fact that the lighting of the stretch ceiling has one feature. If the film is glossy, then all the bulbs will be reflected on its surface and, as you understand, visually their quantity will double. Sometimes this consequence spoils the interior of the room. Also, the reflection affects the interior if the chandelier is dirty (it is immediately displayed) or if the LED tape will be laid crooked.
Concrete / wooden
Lighting wooden ceiling Does not have special requirements, as in the case of concrete. Of course, the chandelier, like a lamp of directional light, in this case will feel confident in this case, because the anchor (or a dowel) will be reliably "sitting" in the overlap. Stylish chandeliers are well suited for ceiling lighting from wooden beams either by clapboard. 
As for the point lamps, they are inappropriate here, because Significantly complicate mounting work In the ceiling of wood. 
LED tape can be applied, but the installation process is similar to the previous one - it is necessary to think over and make a special cornice in advance to do without a chandelier. IN wooden house In the country, you can use even wall lamps, directed upwards, which will do cozy atmosphere in the room.
Finally, I would like to provide several interesting ideas On the installation of lighting in each of the rooms.
Original ideas for modern house and apartments
Corridor
Very often, the corridor in the apartment is an uncomfortable planning room: a narrow and elongated, or a small one, in which there is even a wardrobe. In this case, you can visually correct the position using designer techniques. For ceiling lighting in narrow long corridor You can install several bright spot lights directed strictly down, which will allow you to visually shorten the room,

If you need to vice versa, it is a bit to increase the volume of the room, the products should be directed upwards, as shown in the picture. 
We were told about in detail in the relevant article. As for the ceiling, it should be noted that it is best to use several groups of point lamps and LED tape in this case. The latter will increase the free space and create a creative interior. 
To illuminate the ceiling in the bedroom, you can use anything: from the brain to the flooring. If the bedroom is small with low ceiling - Direct the lamps up, refreshing the room from all sides. Such an idea will allow you to understand, increase the volume of the bedroom. 
The spacious bedroom can be reduced using lamps directed strictly down the walls. In this case, the ceiling will be darkened, and, therefore, omitted.
Living room
Very often, with the help of ceiling lighting in the living room create an "highlight" of the interior. For this purpose, LED ribbons and point lights located in several rows are used. 