Sliding wardrobe in the corridor with hands. A detailed description of the manufacture of a wardrobe in the hallway with your own hands, which will be convenient, beautiful and functional
A corridor or hallway is the face of any home. The attitude of guests to the owner of the apartment largely depends on how well everything is arranged here. Highly important element the interior in this place is a wardrobe. It takes up most of the space and is used to store various things. It can be not only shoes, but also clothes. There may be a mirror in front of which ladies love to show off.
The owners themselves can make a wardrobe in the hallway. This is not as difficult as it might seem at first glance. The wardrobe in the hallway should be multifunctional. Here it is worth thinking about choosing the appropriate design and the availability of certain devices. How to make a wardrobe in the hallway yourself, and will be discussed further.
Tools and materials
Of course, first you should take care of finding all the tools and materials most necessary for the work. Something that is needed may already be present in a person's house, but he will have to acquire something. In any case, the cost of work will be several times lower than the purchased version of this product. So, for work you will need the following tools and materials:

- wooden base for the mirror;
- mirror;
- wooden dowels;
- self-tapping screws;
- screwdriver;
- overlays;
- adhesive tape.
This is quite enough to make a wardrobe in the hallway with your own hands.
Preparing the mirror itself
To begin with, you should start preparing the mirror for installation on a cabinet. By itself, it will not hold, so it must be properly secured to wooden base... In this case, the wood should be the same color as the chipboard that will be used to create the main structure. Mostly modern market allows you to choose any colors and shades of wood, so no one should have any problems here.
Now it's worth talking about the wooden base itself. It is a board that is wide enough. It should be wide enough so that the mirror is attached to it as tightly as possible. Previously, the very surface of the base must be carefully processed. For this, you can use all available tools.

The most important thing is that there are no protrusions or defects on the board. After that, you need to use adhesive tape to secure the mirror to the base. In this case, we are talking about double-sided tape... Today it is available in a wide variety of widths and lengths, so the desired option can be selected without any problems.
After that, the tape must be fixed to the base. Moreover, it is applied not in a continuous layer, but after a certain distance. You can, for example, take 10 cm as a basis.
After that, you can already go directly to the mirror mount. This is done very simply. You just need to lean it against the base, and then push hard. As a result, the two surfaces will connect to each other. In this case, it is very important that the mirror is immediately installed in a given position so that there are no problems with its alignment further. It will be extremely difficult to do this, since the adhesive tape will reliably connect the two surfaces to each other.
Cabinet installation: features
Now you can proceed directly to the installation of the hallway cabinet. Of course, before starting work, you should take care of the design drawing. You can do this work yourself, but it is better to try to search for a sketch on the Internet. Maybe there is something really worthwhile here. After that, you need to prepare the chipboard for installation. Initially, only a standard sheet of this material lies in front of a person. He will have to create the most real art with his help.

To begin with, it is worth marking up all the main structural elements on a sheet. This is done using measuring tool and a simple pencil, all the walls, lid and shelves are drawn on the sheet. Then they need to be cut. A grinder is perfect for this. All work will be done extremely quickly.
However, this tool does not always do everything well. Burrs can remain, which then lead to delamination of the material. It is better to use here electric jigsaw... With its help, all parts are prepared for further installation.
On the side walls, it is imperative to first mark the places where the shelves will be installed. They are also made of chipboard. At the same time, it is very important to maintain the evenness of the geometry and lines so that all elements are fastened exactly. Then you can assemble the cabinet. This is done very simply:
- First, all the main structural elements are assembled. This means that you need to connect the walls and the bottom and top covers. For this, PVA glue is used. Additionally, all elements are attached to each other using self-tapping screws. This fastener works great in this case. However, don't forget about aesthetics. After screwing in, it is worth putting on pads on the self-tapping screws. They will give the structure a more beautiful look.
- Then you need to start attaching the mirror to the cabinet. This must be done using self-tapping screws, which are screwed into the base attached to the mirror earlier. They should also be covered with special overlays. After that, you can already start assembling the shelves. They are attached with wooden dowels. This will not in any way affect the beauty of the entire structure as a whole.
The cabinet is now almost complete. However, it is too early to exploit it. First you need to cover its entire surface with a protective layer of a special substance that will prevent the destruction of the hallway cabinet. Now you can wait a few hours until the composition is completely absorbed into the chipboard structure. The wall is screwed on at the back. In most cases, it can be thin. Here, too, we are talking about chipboard. Its thickness is limited to 3-5 mm.
You can fix the back wall using small nails or self-tapping screws.
The most important thing is that it is firmly and securely held in its place.
Now we can state the fact that the hallway wardrobe is completely ready for use. He will serve long years reliable assistant. Do not forget about its decoration. To do this, you can use a wide variety of decor elements that the modern market offers. It can be wood inserts or pretty hangers. This will once again emphasize the beauty of the cabinet. The entrance hall with his appearance will begin to shine with new colors. She will simply become much more beautiful. At the same time, it will be possible to save a large number of money to buy a new copy.
Today more and more owners are paying attention to modern design premises. It is imperative that all rooms are stylish, original and in harmony with each other. The entrance hall is the place that first introduces guests to the apartment. It has many functions. It is in the corridor that shoes and clothes are stored, guests are met, and preened right before going out. It should be practical and comfortable. Hallway installation can be done by yourself.
Today many are trying to fulfill Beautiful design not only in living rooms but also in the hallway. Thanks to this, the corridor can look stylish, neat and beautiful. But for this you need to know the techniques and methods that will help you correctly arrange the furniture.

It is important to decide in advance on the pieces of furniture that will be located in the corridor. They should be practical first and foremost.
Our climate is very changeable. Therefore, the hallway is often a concentration of dust, moisture and dirt. It is important to think carefully about the finish of the floor, as well as how to store outerwear and rooms. It is important to remember the main rule of the material must be of high quality and durable.
What to put in the hallway:
- Swing cabinet;
- Shelf for shoes;
- Large mirror.
When choosing one or sometimes the type of furniture, it is important to pay attention to its spaciousness. Very often, furniture that looks oversized cannot accommodate a sufficient number of things. Furniture must be ergonomic. Modular designs are very popular today.
Hallway assembly: basic elements
The cost of equipping the hallway may vary. After the purchase necessary furniture the owners will have to resolve the issue with its assembly. This can be done by specially hired workers.
You can assemble the hallway yourself. However, for this you need to have certain knowledge and skills.
Furniture can not only be assembled, but also made by yourself. To do this, you need to decide on the number of required elements. Work should begin with the development of an assembly diagram.
Hallway assembly elements:
- Single-leaf pedestal;
- Double-leaf pedestal;
- Hanger;
- Pencil case;
- Cupboard.
In order to collect full set furniture, you need to prepare materials, make drawings, decide on the number of parts. After the parts are ready, you need to make sure you have enough fasteners. It is important to assemble in a safe manner.
How to assemble a hallway with your own hands: assembling a pencil case
The size of the pencil case can be varied. The dimensions of the furniture should be decided in advance so that unforeseen situations do not occur. Pencil case materials can be purchased at building supermarkets or ordered online.

Preparing to assemble the pencil case takes little time. The main thing is to cut the strips of the appropriate size.
During the assembly process, the strips must be placed parallel to each other and fastened to the lid with self-tapping screws. Do not forget to fix the frame with corners made of plywood. After that, it is fashionable to start cutting out doors and shelves.
Pencil case assembly features:
- Available in various sizes.
- The cover should be cut with an overlap.
- Use 2 or 3 hinges to secure the doors.
Assembling the pencil case is not difficult. However, you should not take on a job without experience working with building materials... It is important that the hallway looks beautiful.
In our next article you will find helpful advice by choice of functional wardrobes: .
Hallway assembly diagram: corner option
When assembling a corner hallway with your own hands, it is important to be extremely careful. Incorrect calculations can lead to damage to the material from which the furniture is made. Before assembling the furniture, you need to check the condition of the wall near which the furniture will be located.

A curved wall assumes the presence of a common frame, to which the shelves are screwed during the assembly process.
The correctness of drawing up the assembly diagram is influenced by the size of the room, the length of the walls and the proximity doorways... After the dimensions are taken into account, you need to think about interior fittings furniture construction... It consists of six main body elements.
Corner cabinet assembly process:
- Frame assembly;
- Work on the planks (lower and upper);
- Manufacturing of back walls;
- Creation of side walls;
- Installation of internal shelves, drawers and baskets;
- Securing rods and hooks.
You can assemble a corner cabinet yourself. For this, it is important to prepare in advance. Watch video tutorials that will help you understand the assembly process in more detail. It is important to note that the quality of the cabinet will depend on the material chosen. It is best to use natural tree species. However, such a cabinet, even if made independently, will be quite expensive.
How to assemble a hallway with your own hands (video)
You can assemble the furniture in the hallway yourself. The main thing is to treat the assembly and installation of the hallway responsibly and carefully. Many designers advise installing a modular design in the living room. It is ergonomic and has a beautiful appearance. It may take a while to build the modules. You can also make furniture yourself. However, this cannot be done without professionalism and appropriate skills.
& nbsp & nbspFloor: - & nbsp & nbspWalls: - & nbsp & nbspCeiling: - & nbsp & nbspCabinet: -
1-05-2017, 17:29
A wardrobe in the hallway is one of the most essential pieces of furniture. What should be the correct cabinet inside? It is necessary to consider for whom and for what things you need a closet. For someone, shoe shelves and a pair of hangers will be enough, someone plans to store bedding there, bags and even washing machine.

Here, for example, everything is located not only rationally, but also with the use of unusual shelves, for example, a dynamic shelf, in which any little thing can be conveniently obtained.
Correct filling of the wardrobe
There are no definite rules. The main thing is to think over everything in advance and draw a sketch. You can even make a cabinet yourself using ready-made drawings. It's important to consider the size of your hallway.

For a small family or even one person, a single-door wardrobe is suitable. But the number of sections is at least two. The cabinet should be divided into sections. It is convenient to leave your shoes here or even leave sports equipment, such a wardrobe resembles a small room, but it takes up little space.

For your convenience, the inner filling of the closet in the hallway should contain hangers, shelves for shoes, drawers for gloves, hats, mittens, possibly coasters for hats and umbrellas. If the entrance hall is spacious enough, the sliding wardrobe can replace an entire dressing room with a mirror and space for changing clothes.

The width of the shelves is at least 80-90 cm, but there is also a variant of narrow shelves (40 cm), if there is no room at all in the hallway.
For outerwear: coats, raincoats, fur coats, the height of the cabinet should not be less than 140 cm. The crossbar (it serves as a holder for hangers) is most practical not deep into the cabinet, but across.

This wardrobe contains not only convenient shelves for clothes and accessories, but also a decorative corner shelf for small items.
Practical wardrobe inside - features
There are much more filling options for two-door and three-door cabinets than for one-door. Storage items may include bedding, seasonal clothing, tablecloths, towels, magazines, and even built-in sections for jewelry and beauty supplies.

Metal cabinets are very convenient, they do not accumulate dirt and debris, moreover, they are very light, which is very important for complex structures.
The width of the shelves varies from forty centimeters and more.

The arrangement of things in the closet can be done according to a very convenient scheme:
- In the middle there are often worn things so that they are always at eye level.
- Above - rare and unnecessary, for example, hats or carnival costumes.
- The most bulky and heavy things are stored below, for example, suitcases.
Which cabinet filling should you choose?
Corner cupboard occupies a non-standard hallway area. A corner wardrobe is a mini-dressing room; a lot of things are placed on the occupied area, especially non-standard sizes.

A straight cabinet fits less, but it is easier to fit it into general interior hallway.

Make sure that the closet does not interfere with the passage to other rooms. The hallway should be comfortable and spacious.
Internal elements are made from metal frame to be stronger and more reliable. Check that the doors move smoothly and without jerking.

V large wardrobes you can put the boxes, as in this photo, then the cabinet will look neater.

Such a cabinet is sometimes inconvenient due to the narrow frame and rather bulky structure.

Pay attention to whether the lighting is located here, sometimes the hallway light is not enough to find something, or to pick up an image.
To store men's belts and ties, as the inner filling of the cabinet, special pull-out holders or shelves with cells are used, which are mounted on the sidewalls and are very convenient to use. Shoe boxes (nets) are practical, but they should not be located close to the floor (dirt accumulates under them and it is inconvenient to clean it). The mesh width can vary from 30 cm (for a pair of shoes) to 100 cm or more.
Built-in wardrobes are quite comfortable in the hallway. The top bar fits into the ceiling. There is no free space on the sides either. Thus, the entire area is used to the maximum.


It is not very convenient to position the crossbar in the depths; outerwear does not fit much. But then the closet may not be very deep.

It is a very rational idea to put a washing machine in the hallway closet. Often in small apartments this is the only place where it will fit.

And here the ironing board is also inscribed.


There are suitcases on top here, although here you need to make sure that they are not very heavy.

Wooden and sliding shoe racks are not always practical, because they often get dirty and sand accumulates there.

It is very convenient to store shoes in pull-out metal shelves, so it will also dry normally.
In any case, it must be remembered that the sliding wardrobe is not designed for one year. Therefore, designing interior space should take into account the perspective and maximum filling, as well as the features of the hallway in which it will stand.


V last option very conveniently located both closed wardrobes and open hangers where you can hang everyday clothes.

& nbsp & nbspFloor: - & nbsp & nbspWalls: - & nbsp & nbspCeiling: - & nbsp & nbspCabinet: -
30-10-2016, 16:04
Target: place in a narrow aisle and a minimum hallway space a place to place current clothes, shoes, a small pile of accessories and a mirror for a family of 4 people. Moreover, to do this as inexpensively and quickly as possible, in short, to assemble a wardrobe with your own hands.
Attention: the calculation is made for a particular case. For other cabinet models, the scheme is the same, the only difference is in the cost and amount of material. For visualization and calculation of dimensions, it is convenient to use our online designer of sliding wardrobes.
From the tool you will need:
- drill for confirmation
- square
- roulette
- screwdriver
- level
- pencil
- Straight arms
Expenses
- cash - about 11.000 rubles
- temporary - 1 day
Materials (edit)
We go to Leroy Merlin, buy components there and cut them as needed. If Leroy is not in your city, you will have to look in local stores.
- Rail kit 1383 mm - 1 piece
- Sliding door, 2455x604 mm - 1 piece
- Furniture part laminated chipboard, 1200x300x16 mm - 3 pieces, sawn exactly in half
- Furniture part laminated chipboard, 2700x400x16 mm - 4 pieces, we cut them in height, as well as for pieces of width 350 and 366 mm, two pieces.
- Furniture part laminated chipboard, 2700x300x16 mm - 1 piece
- Sectorial laminated chipboard shelf, 350x350x16 mm - 6 pcs
- Schlegel - 5 meters, door stoppers - 2 pieces
- Confirmates (many), 16mm screws (a bunch) and furniture corners 30 pieces

Assembly
We do preliminary assembly corner pieces... We combine sheets with a width of 350 and 366 mm, as indicated in the figure, and pre-tighten them with confirmations. It is convenient to do this on the timeline, but in the absence of it, stools can also be used. Immediately we fasten the sectors with 2 confirmations on each side. For an even arrangement of confirmations, it is recommended to make a preliminary marking. One confirmation per sector is still sufficient for a wide sheet. We repeat the procedure on a symmetrical element.

WITH assembled structure remove the wide (side) chipboard sheet (it will interfere) and attach the semi-assembled structures to the wall. This should be done carefully so as not to scratch the ceiling and tear off the sector elements.

Again, more specifically, we collect side elements... At this stage, you can attach the entire structure to the floor and ceiling if you are confident in the accuracy of the markings. Do-it-yourself wardrobe assembly does not tolerate mistakes. When attaching, be sure to check the verticality of the installation.

We install a vertical sheet 30 cm wide in the center of the structure.Install rectangular shelves, fixing them with furniture corners to vertical risers, given that these shelves are installed on the same level with the sector elements, confirmations from the sectors will be hidden.
You can now permanently attach the structure to the walls and ceiling. The structure itself is quite massive and there is enough for a pair of fasteners for each vertical element - a total of 6 pieces.

Install the clothes guide and fasten the clothes hooks. The quantity is optional, but in practice, a couple of hooks are enough in the corner, and 3-4 inside the cabinet half.
We cut the required length of the guides. You will need to saw off half of the top one - in connection with one door, it is not needed, and it will not physically fit. The top can be fixed, the bottom can be simply put down for now, it will be fixed later. Do not forget to put stoppers for doors in the lower guide

We put the door in its place. We check that the door fits well into the upper rail - it does not fall out of it. To lift the door, you can put a chipboard strip under the lower guide strip - sheets 100 mm wide are sold in Leroy. It can be raised to a small height by adjusting the rollers. We control the verticality of the door installation and finally fix the lower guide.

Now you can stick a schlegel and a mirror to the door if you want, install the door in place and use the screws on the lower rollers to adjust its position relative to the cabinet body.

Delightful! So we assembled the wardrobe with our own hands. For a year of operation, he showed himself just fine.

The entrance hall is the very place from which the house begins, and the first impression of it is formed, therefore it is especially important that such a room looks beautiful and original. To make a unique and harmonious environment, the hallway can be decorated with your own hands. Then we can say with complete confidence that it exists in a single version.
The scope of imagination is not limited by anything, and you can bring any ideas to life.


Advantages and disadvantages
Currently, almost anyone can independently take up the design of the hallway. You can purchase a ready-made set of materials in stores, which you just need to assemble yourself at home. It is also permissible to order the production of the necessary parts. on individual sizes and preferences. And if there is an opportunity and the necessary tools, then there is an opportunity to make all the components yourself. In any case, if you take on the manufacture of furniture with your own hands, this has both pros and cons.


The advantages include:
- original design;
- compliance of furniture with the required dimensions with a minimum error;
- price homemade furniture several times less than finished;
- an exciting pastime.

The disadvantages of such design solutions are the following nuances:
- as a result, the product may not turn out as perfect as the one bought in the store;
- making furniture will take a lot of time and effort;
- in the course of work, a lot of dirt and dust will appear, so the best option for the rest of the household is to be in a separate room at this time.


Required tools
In order to start the process of decorating the hallway, you should carefully prepare and stock up on everything you need. In addition to material or finished parts, you will need to prepare:
- fittings (corners, hinges);
- pencil and tape measure;
- the necessary fasteners (screws, bolts);
- construction knife;
- sandpaper;
- small saw or jigsaw;
- a screwdriver, or electric screwdriver;
- materials for decoration and decoration, if necessary.


You will also need to work in advance prepared drawings and diagrams.


How to do it at home?
Decorating a hallway with your own hands is not as difficult as it might seem at first glance. Even a novice master can handle this. However, if you have little or no experience in creating furniture, it is better to start with simpler models.


Before starting work, it is worth deciding on the desired model and dimensions of future furniture. It is better to start from the dimensions of the room in which it will be located. Do not use all the space to the maximum. If the room is small, then there should be little furniture. You can limit yourself standard set compartments for jackets and coats, shoes and various little things.
This will be especially true for city apartments.


If the hallway is planned to be done in a private house or in the country, it is better to create a more spacious environment. If space allows, a wardrobe or even a small wardrobe, fenced in sliding doors... It is worth considering that this option will be somewhat more expensive. When deciding on the organization of the room, it is worth thinking about a seat where it would be convenient to put on shoes. For greater comfort, you can make it soft, for example, by padding the surface with foam rubber.

Having chosen a suitable model, you can proceed to the next step - taking measurements. They need to be filmed with extreme care. On the same plane, it is better to take several measurements in different places. Between two numbers, the choice should always be made towards the smaller one. Do not forget about the necessary clearances... On each side, for future furniture, it is necessary to leave from 0.5-1 cm of free space.


Materials (edit)
A variety of materials can be used to make furniture:
- Chipboard is the most popular material. It is affordable, has a wide palette of various colors and is available in all hardware stores. In addition, he is unpretentious in his work. It is very convenient and easy to make furniture from it. When choosing chipboard plates Special attention it is worth paying attention to the manufacturer and the quality of the product. In the manufacture of such materials, harmful resins are used as a fastening element. It is important that their content does not exceed the permissible norms, as well as that the edges of the slab are covered with a laminated edging;


- Wood is an environmentally friendly material. It is durable and has an exceptional appearance: it looks very presentable and solid. However, in terms of cost, it is an order of magnitude higher than, for example, laminated chipboard and requires special rules for caring for oneself. During the construction process, it is easy to work with it, as it lends itself to almost all types of processing. Almost any structure can be made of boards. This is the only material that can be left intact and not subjected to further processing;


- The best option for woodworking are furniture boards. They are already specially prepared, so that all that remains is to cut out the necessary parts and start making the hallway.
The cutting lines must be processed by yourself;


- Plywood- material very easy to process. It has a low cost, strength, resistance to moisture, heat and other factors. external environment, therefore it is very popular. Pine or birch veneer is used for its manufacture. Softwood plywood has a very beautiful drawing and is most often taken as the basis of furniture. Birch wood is more expensive. It has a contrasting structure and turns out to be monochromatic;


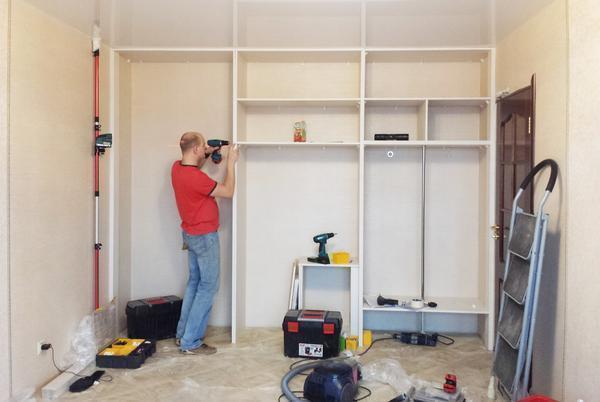
- Drywall- an option more suitable for the construction of a dressing room. Any design can be made from it, and even a small one. new room... Even a beginner can build a structure, however, you need to follow the instructions very carefully, and perform each action clearly in accordance with them. Drywall allows you to build a box even in an uneven room, smoothing out all defects.


With the help of drywall, you can create both vertical and horizontal structures, which gives room for imagination for decoration. Another plus of this material is that it can be used to mask any communications, and under the casing it is easy to stretch wires and pipes between the frame profiles.
As the disadvantages of drywall, we can mention the low strength of the material. It is susceptible to deformation under the influence of moisture and external mechanical influences. In addition, the structure itself with profiles takes up space, so it is better to build such a hallway or dressing room in spacious rooms.


Materials at hand
As materials for the future hallway, you can use not only the usual options. The materials at hand can serve as a basis. The manufacture of such furniture will be inexpensive, will look original and will not be inferior in terms of outward appearance products from the usual wood or chipboard.


From plastic bottles you can get an ottoman or a curbstone. They must be fastened together, for example, with tape and given the desired shape... To do this, you need to make a frame. For the base, you can use thick cardboard or plywood.
To give the product an aesthetic look, it should be upholstered with foam rubber, fabric, artificial fur or leather.


The construction of plumbing pipes... They are cut to the same length and fastened together into the desired frame with glue. To give them a neat shape, it is better to close them with corrugated cardboard or plywood. It is better to fill the inside of the pipe with dense material in order to prevent deformation of the finished product. For this old will do rug or thick fabric. Outside, the product can be dyed or upholstered with fabric.


Furniture made of wooden boxes or pallet. You can make an unusual wardrobe, clothes hanger, cabinet or shoe rack. The structure is assembled very quickly and easily. The finished product can be painted with paint, supplemented with unusual fittings and decor. Things that have already been used in the house that are no longer needed can be used. It is enough to restore and improve them. Old doors, tires, vintage suitcases and chests, and even window frames can be used.


Dimensions (edit)
The dimensions of the future environment depend on the size of the room. V large rooms you can afford to put a large wardrobe, dressing room, shelves and a sofa. A street bench and a lantern look original in such an interior. All designers dream of furnishing a large room, since the flight of imagination in this case is not limited by anything, and you can afford to embody any ideas.


For medium-sized premises, solutions are suitable with a standard set of hallway furniture. It can include a small wardrobe, a small seat, a sideboard or chest of drawers for small items, as well as several wall shelves.

The most inconvenient option is small space... It is necessary to fit everything you need into it, but also not to clutter up the whole room with furniture. In this case, a mini-hallway is suitable. You can use a flat wall hanger for clothes, vertical structures for shoes, put a small pouf as a seat, and think over a small shelf for small things. An excellent storage solution will be mezzanines, which are fixed to the ceiling.


Colour
The color of the future hallway can be anything. This is one of the main advantages of self-registration. The finished product can be painted with paint, pasted over plain wallpaper or canvases with photo printing, decorative stickers, film. If you want to emphasize the natural beauty of wood, you can simply varnish it, or artificially age it by decorating furniture in a retro style.

When choosing a color, it is better to stay on light shades, since often the hallway is small in size, and dark furniture creates the impression of a cluttered space.
For the same purpose, the hallway must necessarily be with a mirror, moreover, the more mirrors the better... They will help to visually enlarge the room.


Step-by-step instruction
It is better to start making a hallway from the very simple element- curbstones. So that during the work you do not have to correct errors, but ready product later it only made me happy, you need to carefully think over each action in advance and adhere to the plan:
- we determine the desired height of the product;
- cut out from furniture board 2 identical side parts, according to a certain height;
- cut out the corner at the bottom of both parts, if there is a plinth, and the product will stand tightly against the wall;
- cut the corner a little from above so that the upper part is narrower;
- we cut out the bottom base and the cover from the furniture board, according to the selected width;


- we connect the sidewalls, the lower and upper base with fasteners (the lower base should be located just a few cm above the floor). You can also make a basement from a furniture board, which will close the gap between the floor and the lower base;
- we make the back of plywood and fasten it with fasteners;
- we cut out the door from the furniture board. It may not be at the full height of the cabinet, but lower, then it will fit above it drawer;
- we make holes in the cabinet for the door and fasten it with hinges;


- we make a box from a furniture board. The bottom can be cut out of plywood. The front part should be slightly higher than the rest of the parts for the contents of the box to be covered. We fasten the parts of the box with self-tapping screws;
- we attach the guides to the box and the cabinet, having carefully made measurements;
- if necessary, we cut out the shelf, make a mount for it;
- we collect the product and attach the handles.


A large wardrobe is made in a similar way. If you plan to store clothes in it, you need to think about its depth so that the hangers can fit. If the space does not allow you to make the furniture of sufficient depth, then for this you can choose an end hanger that is suitable for shallow cabinets.


If a wardrobe is planned, the frame is assembled in the same way as a cabinet, except for the doors. The rails for doors are attached to the lower and upper bases, which take up 10 cm, so all shelves and drawers are made 10 cm less of the sidewalls in depth so that the sashes can close.
The standard cabinet depth is 60 cm.
In addition to the cabinet and cabinet, you can make wall hanger with hooks. To do this, it is enough to cut from the shield right size, or several narrow boards, which are connected to each other by another transverse board. Vertical boards can be made curly by complementing them with contrasting color elements. The hanger is completed with hooks and a top shelf.


Another way to get a new hallway is restore the old one. The update should start with surfaces. They must be well cleaned of dirt, degreased and prepared for the application of paint, glue, wallpaper or film. You can update not only the surface, but also the entire structure: replace facades, fasteners, fittings, add decorative elements.


Accessories
Complementing the finished furniture with accessories is the final touch in the design of the hallway. The main thing is to decide in what style the room will be made:
- for a retro style, you can use antique-style objects, vintage hooks and handles on furniture, put an old chest as a seat, hang a large mirror in a carved frame and complement the picture with an old carpet with patterns;


- modern style suggests a lot of light and space. For these purposes, it is better to use light shades, mirrors and glass. On the walls, you can arrange mirror compositions, add original lamps and put a homemade pouf in bright colors;
