How to make polymer self-leveling floors. DIY polymer floors
Self-leveling polymer floors have now become promising and fashionable look floor coverings and are increasingly being arranged in apartments (houses). Because they very well combine many of the requirements for flooring. Their qualities such as durability, hygiene, resistance to mechanical and chemical damage, the ability to decorate, as well as their electrophysical properties push polymer floors to the first positions. In addition, this floor can be of any color, thereby giving a flight of imagination for design.
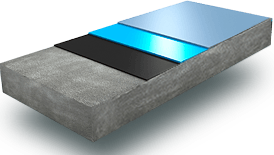
Self-leveling polymer floors
And what is important for home master, you can make such a floor yourself. You just need to have no more experience in carrying out repair work in your apartment, a set of tools and devices. And before starting the floor installation, carefully study the instructions that are attached to the set of materials for self-leveling floor... Scrupulously observe the proportions when mixing the components, observe the time ranges, strictly observe the temperature and humidity recommended in the instructions, so as not to disrupt the technological cycle and not let all the work down the drain. If you are not afraid of such conditions, then you can get to work.
The process of installing polymer floors is carried out in stages:
- preparation necessary materials, tools, devices, workwear and protective equipment;
- preparation of the sub-floor;
- treatment of the base of the floor with a primer;
- application of the main layer of the polymer floor;
- application of the top (finishing) layer.
If this is your first time taking on this work, then it is best to start installing a polymer floor with a bathroom. Because there is usually a small floor area and, in case of some flaws, they will not be so noticeable, but after gaining experience, you can continue in other rooms of your apartment.
Preparation of materials and tools.
Once on the building materials market, you will see a fairly large selection of materials for the device. self-leveling polymer floor... They differ in their characteristics and properties. Consult the seller to find the right one for your particular case, depending on the quality of the base of your future floor, its evenness and moisture content.
 Self-leveling floor tools
 Of the tools you will need: an electric drill with a stirring attachment, it is not bad to have a surface grinder, a vacuum cleaner, a regular paint roller, a needle roller, spatulas - normal and notched, special needle paint mortars for moving on wet polymer floor, and of course personal protective equipment. Provide good illumination of the floor surface while working.
Preparation of the base of the self-leveling floor.
If you arrange a polymer floor in the bathroom without dismantling the old floor tiles, you still need to prepare the floor. To make jointing, grinding, cleaning all seams and cracks, check its horizontal position. In case of detecting a deviation of the floor from the horizon, you will have to make a screed to level it. After finishing the preparation of the base, it is necessary to remove all dust in the room with a vacuum cleaner and cover the cracks with putty.
Treatment of the base of the self-leveling floor with a primer.
The primer is a simple but very important detail and must be done with great responsibility. The primer is made with the usual paint roller in two layers with drying of each layer for at least a day. To ensure better adhesion of the polymer floor to the base, the freshly laid primer is sprinkled with clean quartz sand. The quality of the completed primer is determined visually after its final drying by the gloss and saturation of the surface where it is applied.
Application of the main layer of polymer self-leveling floor.
Polymer self-leveling floors are subdivided into several systems, and in each there are differences in the technology of applying the main floor layer. The main ones are: paint, self-leveling and high filling.
 Painted polymer floors
 The easiest system to manufacture is the paint system.... It is a thin layer system about one millimeter thick and can be applied on both new concrete, and the old way existing coverage floor. Polyurethane paint systems are most commonly used, and it is recommended to apply up to 150 g / m2 on each floor layer. The floor arranged according to this system is relatively inexpensive, but due to its small thickness, it is not durable and requires good preparation grounds.
 Self-leveling system
 Self-leveling system and is the so-called self-leveling floor, their thickness reaches 5 mm. Self-leveling coatings are available in many formulations. Such compositions are prepared from two components right before use and poured onto a prepared substrate.

Then it is evenly distributed over the surface of the future floor using a notched trowel. The solidification of the polymer mixture begins in 15 minutes, so you need to hurry to have time to level the material and roll it with a needle roller in different directions for removing
air bubbles and its even distribution over the floor surface. In this case, you do not need to remove the roller from liquid material before the end of rolling.
If you need to move on a freshly poured floor, then special paint mortar with needle soles.
Highly filled systems, their thickness is about 10 mm, the most complex in terms of technology and labor intensity of work, and therefore require highly qualified performers. They hide all defects in the subfloor.
 Highly filled systems
 Application of the top (finishing) layer.
On final stage devices of a polymer self-leveling floor over the base layer apply the so-called finishing layer to make the floor surface more resistant to various influences and improve the appearance. As such a layer, various varnishes are used that are applied with a roller. After the end of the work, access to the room stops until the floor is completely dry.
Video instructions for installing a polymer self-leveling floor.
Recently, new types of floor coverings have appeared on store shelves. An innovative discovery was the emergence of a polymer self-leveling floor, which appeared relatively recently on the market of building and finishing materials.
His path began with the use, in production premises where higher dynamic loads are used.
But also, often used where aesthetic appearance and environmental friendliness is required, this is the sector food production, sanatoriums and so on. This kind floor covering poured, after hardening, it becomes an absolutely flat surface and has no seams.
It looks like linoleum, so sometimes a self-leveling polymer floor is called " liquid linoleum". Due to its phenomenal properties, beauty and practicality, it has become widespread not only in industry, but also in general household consumption.
Types and classification of self-leveling floors
The most basic classification is by composition, and so they are divided into:

One of the advantages, you can carry out work in cold weather, not susceptible to low temperatures... There are also disadvantages, poor resistance to chemically active substances, and high cost.
- Polyurethane floors- shows resistance to everyday household damage. They are used in unusual cases, when flexibility and elasticity with a combination of strength come first.
Due to its elasticity, it is able to withstand any dynamic influences, without cracking and deformation. Also resistant to chemical damage.

V industrial buildings the first types of self-leveling floors are usually used. Subsequent types of polymer self-leveling floor are widely used for decoration of residential premises.
The following type of classification by layer thickness:

There is also a classification, depending on the properties:

Advantages and disadvantages of self-leveling floor
Like all Construction Materials, self-leveling floor has its advantages:

But, like all materials, there are drawbacks:
- Very high cost
- Due to all its positive properties, it is very difficult to dismantle a self-leveling finishing polymer floor; specialized equipment will be required.
Preparation for pouring a polymer self-leveling floor
As with any floor covering, surface preparation, tool preparation, preparation of a ready-made mixture are required.
We start with surface preparation. We remove garbage, vacuum cleaner. We conduct a visual inspection for defects, chips, cracks, height differences.
We eliminate defects, in the presence of minor defects, we use a putty, in the presence of rough irregularities, we use a floor screed. We wait until everything is dry.
In the process of mixing, an endothermic reaction occurs, you should be careful and careful. We take a mixer or a drill attachment and mix the components, after which we pour the finished mixture onto the prepared surface.
Polymer floor pouring technology
The pouring process consists of three stages:
- Stage - Preliminary or base layer.
- Stage - Finishing layer.
- Stage - Lacquer coating.
And so we start by filling the preliminary layer. The pouring process is best done together, one prepares the polymer mixture, the second smoothes it, the finished solution removes air.
In most cases, an epoxy polymer mixture is used as a subfloor, with the addition of quartz sand or granite sand. Pouring the mortar usually starts from the far corner, it is recommended to pour in stripes.
 For a perfectly flat surface, it is possible to use beacons that are pre-set using a level. The finished solution is poured onto the prepared surface, evenly distributed with a rule or a metal spatula.
Afterwards, air bubbles that form when the components are mixed are removed with an aeration roller. Rope casting is also possible. The thickness of this layer should not exceed 1-2 mm. Drying time is approximately one day.
Once the subcoat is completely dry, you can proceed with the final fill. It is important to wash the instrument thoroughly after each use to avoid agitation.
At your discretion, the use of decorative elements is possible. As elements, coins of different denominations, buttons different forms and sizes, small river stones, seashells and much more.
 It is also possible to use stencils, landscapes and drawings painted with paints. And recently the use of 3D films. The process of pouring a finishing layer is no different from the process of pouring a preliminary layer.
After the final coating has dried completely, a special varnish is applied.... That's all the floor is ready after the varnish dries. Professionals warn that drafts and direct sunlight do not favorably affect the drying process of the flooded floor.
And it is also required to clearly maintain the time between pouring each layer. When pouring a floor with your own hands, we recommend that you watch video lessons on how to properly install a polymer self-leveling floor.
Prices for polymer bulk floors
The price will be influenced by manufacturer, brand, region and place of purchase.
Now we will consider the average cost of one kilogram of the mixture:
- Polyurethane mixture - 230-260 rubles.
- Epoxy mixture - 250-280 rubles.
- Methyl methacrylate mixture - 340-380 rubles.
- Mix on cement base- 310-340 rubles.
It is important to know what the price is for square meter polymer self-leveling floor, it consists of the price of a primer, a preliminary layer, a finishing layer, and if required, prices decorative elements and varnish. And the thickness of the layer also affects the cost.
On average, the price for 1 sq.m. and the layer thickness is 1-2 mm. material is:

Depending on the complexity, the number of decorating elements, the amount of work, the use of 3d films - and the price of work per 1 sq.m. varies.
Recently, polymer floors have been relevant and in demand.Today, construction is the most important industry National economy... A special place in the industry was taken by work on the creation of flooring in a particular space. Today, to create a floor, you can use a variety of building materials - wooden planks, plywood, linoleum, concrete screed.
Advantages of a polymer self-leveling floor
V last years the so-called liquid floor is becoming more and more relevant. It is also called liquid in another way. Unlike traditional building materials, it has several advantages. Floor polymer plaster floors are made of synthetic material... They are most often used in large shopping centers, garages, showrooms, etc.
Often, polymer fill coatings are used in production due to their reliability and long term service.
It is quite simple to create such coatings with your own hands. It is necessary to consider in more detail how the filling of polymer coatings is carried out, the main stages of repair, positive and negative sides self-leveling floor. Polymer moldings have a number of advantages, due to which the floors are in demand among the consumer.

The advantage of polymer flooring is that it is beautiful and practical.
The advantages are as follows:
- Polymer coatings are different types(epoxy, polyurethane, methylethacrylate), depending on this, they can restrain the highest temperature conditions, and also have moisture resistance.
- Despite the fact that a polymer is used, they are clean, safe, environmentally friendly.
- The floors are very easy to clean, they are easy to wash and treat with a cleaning agent.
- Resistant polymer coating different kinds abrasive substances.
- Self-leveling coatings can be with a glossy or matte surface, so you can choose for your room a design that suits your taste, which will correspond to the style direction.
- Self-leveling coatings contain a liquid substance that hardens rapidly. Thanks to this, the floor dries quickly and adheres to any surface, be it wood or concrete screed. Unlike woody and concrete base, this coverage is created quickly and effortlessly.
Due to all of the above advantages, the coating is preferred by all more people, equipping the floors of apartments, private houses, offices, parking lots, etc. In addition, 3D coatings have been developed. They differ from the standard coverage by the presence of complex images, which not every home craftsman can do on his own.
Preparatory work for self-leveling coatings
The difficulty in creating fill coatings is that they need a perfectly flat base. In the event that the basis of tile, you will need to perform some roughness. This can be done using sandpaper or sandpaper.
Problems can often arise when leveling the base if it is made of wood. For this, it is of the utmost importance to remove all uneven places, carefully sealing them up.
The unevenness of the base of the floor surface can be well manifested when the logs are disassembled and the old coating is removed. However, the difference in height is allowed, and it is equal to 4 mm. If possible, it is better to do concrete screed... If it is not done, then uneven places and defects can be removed using a special grinding machine or a whetstone.

You can install the polymer floor both independently and with the help of qualified specialists.
In order to determine the evenness of the surface, experts advise using:
- Water level;
- Building level;
- Another measuring device.
It will also be helpful to prime the surface thoroughly. The primer increases the moisture resistance of the surface and increases the adhesion of the cast floor to the base. After the base is qualitatively prepared, special slats like a plinth need to be nailed around the perimeter of the room. This is necessary so that the liquid filling polymer does not spread into the existing floor surface and walls of emptiness. The slats are attached to self-tapping screws, nails (if the wall is made of wood) or dowels (if the wall is made of concrete).
Polymer self-leveling floors: mixture preparation technology
In order to make your own PUR floor, you should carefully prepare a working liquid composition. You can buy polymer mixture at any specialty store. After that, it must be diluted, as provided by the instruction and technology.
This is one of the most important steps in the entire repair, since the result largely depends on the quality of the liquid composition. renovation works.
You need to prepare the mixture only according to the instructions that are attached to the purchased product. Vital role plays the mixing process. This must be done slowly, carefully so that not a single lump remains. In addition, absolutely all air bubbles must be removed from the solution. Mixing can be done with a special construction mixer or other suitable means. The next important step is filling the composition. The liquid mixture should be applied to the floor base from the farthest section of the room from the doors and carefully move towards the doors. The correct thickness of the floor layer should be approx. 4 mm.

Before proceeding with the installation of a polymer floor, it is necessary to select and prepare correctly special mixture for filling
If the layer is thinner, then it will turn out:
- Not durable;
- Unreliable;
- Not durable.
A very thin layer can only be poured onto the finished substrate as a supplement. It is best to pour the composition together. One home craftsman holds a bucket with a polymer composition and gently pours it onto the floor, and the other evens the surface. You can use a wood strip for leveling. After the polymer filler floor has dried out qualitatively, you can begin to apply varnish. Varnish is necessary in order to finished coating it was aesthetic, shiny, more protected. In addition, the varnish increases the wear resistance of the material, and makes it the smoothest. The time it takes for the polymer to dry is approximately 30 minutes. But it is best to do everything in accordance with the directions on the packaging of the material. The varnish is applied only to the already hardened surface. Laying the coating should be in 3 or even 4 layers. Walking on only a flooded flooded floor is not possible right away. So that there are no traces and defects, it is better to step on the finished floor after a day.
DIY tools and materials for polymer flooring
In order to make a PUR floor based on a polymer composition, you should have a whole arsenal of tools and building materials available. The kit must consist of certain items and materials.

Prepare in advance necessary materials and tools so as not to be distracted during work
Namely:
- Water or building level;
- Rail for leveling the polymer solution when pouring it;
- Brush;
- Putty knife;
- Primer;
- Mortar, if a concrete screed will be arranged;
- Capacity for the polymer composition;
- Mixer.
In addition, you should prepare wood strips to enclose the room around the perimeter for a 3D fill coating. In this case the most important detail there will be a film with a pattern or a coloring composition. In order to give the flooring aesthetics, you will need to varnish the surface.
Types of polymer floors (video)
As a result, one thing can be noted that the filler polymer floor is an innovative design solution to carry out repair work in a cottage or apartment building. This technology has found the widest application in production.
On our website you can buy materials for self-leveling floors with various special properties. The assortment includes compositions for the following objects:
- garages, parking lots, hangars;
- warehouse complexes;
- production and repair shops of food, chemical, pharmaceutical and other industries;
- medical institutions;
- kindergartens, schools, institutes;
- shopping and entertainment complexes;
- administrative and office buildings etc.
The scope of application depends on chemical composition and characteristics self-leveling coating... For each product in the catalog, we have placed detailed description and recommendations for use.
Types of bulk polymer floors
Polyurethane floors
Floor coverings based on polyurethane have been used for a long time and have established themselves as one of the most reliable and durable. These are versatile formulations with a wide range of applications. With their help, you can create a variety of coatings: thin-layer, quartz-filled, colored, sports and others.
The main advantages of polyurethane floors:
High adhesion- the compositions have excellent adhesion to concrete, wood, metal, subject to preliminary priming of the surface with an epoxy or polyurethane primer.
Elasticity- you can buy self-leveling polymer floors for use in conditions of constant deformation, shock, vibration loads. This is an effective solution for industrial areas where there is an intensive operation of machinery and equipment.
Resistant to temperature extremes- the minimum coefficient of thermal expansion allows such coatings to withstand significant heating and freezing. Temperature Range operation of bulk polymer floors - from -60 to + 140 ° С.
Mechanical strength- polyurethane coatings withstand intensive pedestrian and traffic loads well, but are somewhat inferior in this indicator epoxy.

Epoxy floors
Polymer coatings are versatile, reliable and durable. Such compositions are tougher than polyurethane, therefore they are more effective in resisting abrasion, static, mechanical stress, but the cost of self-leveling floors of this type is higher. Epoxy coatings are recommended for food and chemical industries, for objects Agriculture... The fragility of epoxy floors does not allow them to be used in conditions of significant shock loads, vibrations, as well as on moving surfaces.
The main advantages of the formulations:
Durability- epoxy floors are 50% more resistant to abrasion than polyurethane. They are successfully operated in areas with heavy pedestrian traffic, in places where heavy vehicles and warehouse equipment pass. The coating retains its aesthetic appearance over time.
Chemical resistance- epoxy self-leveling floors are not susceptible to water, gasoline, engine oils, alkali solutions, acids and other chemicals.
Environmental friendliness- one of the main advantages of our polymer self-leveling floors is their environmental safety. The formulations do not contain organic solvents, do not have unpleasant odor and do not emit toxic substances after drying. Due to these qualities, it is recommended to lay them in workshops. Food Industry, in educational institutions and at health care facilities.
UV resistance– polymer coating for concrete floors does not turn yellow under the influence of direct sun rays... For example, the AQUAPOLIMERDECOR PLUS self-leveling floor can be used even outdoors.

Our offer
Prices for materials for self-leveling floors from LKM POLYMER are indicated in the catalog and in the price list on the website. We also offer to use the services of specialists in the installation of coatings at the customer's site. At our disposal modern technologies, whole necessary tool and qualified employees with extensive experience in carrying out such work.
You can buy a self-leveling floor in Moscow by placing an order on the website at any time of the day or night. Phone numbers for communication with the company's specialists are listed on the page. When contacting us, each customer can get a free consultation on the range of products, help in choosing materials and ordering.
In modern industrial and civil construction wide application got . According to their characteristics, they have proven themselves well as environmentally friendly, dust-free, shock-resistant and sound-insulating coatings.
According to the composition of the components included in the bulk antistatic polymer floors, they are divided into polyurethane and epoxy. The former are based on polyurethane and methyl methaacryl. The curing of the coating occurs under the influence of air.
The latter are based on a two-component epoxy resin. Polymerization of such a coating occurs when a hardener is added to the mixture.
Since these coatings were developed for industrial use and are resistant to high loads, then when they are used in an apartment and a private house, the difference between them is practically not noticeable.
The difference may not be significant, but there is. Epoxy self-leveling floors are more resistant to abrasion and impact (when the tool falls). But polyurethane coatings dampen vibration well and reduce noise (during machine operation).

Based on this, it is possible to offer polymer floors in an apartment or house according to the following principle:
- hallway - polymer epoxy floors (here increased content sand from shoes);
- kitchen - epoxy floors (high probability of falling heavy objects);
- bathroom and toilet - epoxy floors;
- bedrooms and living rooms - polyurethane floors ( increased sound insulation premises).
The technology for laying self-leveling polymer floors is quite simple. Even a schoolchild can master it. Therefore, it will not be difficult for a home craftsman to lay a self-leveling polymer floor with his own hands.
When performing work, he will need a maximum of one assistant. However, it is important to remember that no matter how simple the operations for the installation of the self-leveling floor are, they need to be approached responsibly. Especially if you are planning to install self-leveling 3D floors.
Self-leveling 3D floors are the same epoxy or polyurethane floors, on the surface of which a volumetric drawing, a finished photograph or a reproduction of a painting is applied. From above, such a floor is covered with a protective transparent layer (varnish).
Let's consider in detail how to properly fill the self-leveling floor. More precisely, below there will be instructions on what and how to do.

How does the repair in an apartment or house begin? Of course, with planning, calculating materials and your budget. When you have decided which floors you will use, you can start calculating.
Choosing (epoxy or polyurethane) self-leveling floor how to calculate the amount of material for its device will not be difficult. They are sold in sets. The composition of the self-leveling floor may include various fillers (quartz dust, marble chips, dyes, etc.)
The choice of color and filler is up to you. An instruction is attached to the kit, which indicates which layer and for what area it is consumed. On average, 1 square meter of the base of the floor is 1 liter of the mixture with a layer thickness of 1 mm.
How to calculate material for self-leveling floor
The specific gravity of 1 liter of the substance is approximately 1.3 kg. For a room of 16 square meters, you will need 16 x 1.3 = 20.8 kg of the mixture. For polyurethane floors specific gravity 1.25-1.33kg / l. For epoxy floors 1.4-1.5 kg / l.
Sets of self-leveling polymer floors from different manufacturers may differ in weight. On average, 1 set weighs —— and its consumption is 20 square meters with a layer thickness of 3 mm.

Damping tape to compensate for the expansion of the floor when it is heated. It fits around the entire perimeter, where the floor is in contact with the walls.
You can do without it, but for this you need to arrange a special expansion joint in the walls. It will be described below.
Instruments
Tool for polymer floors:
- electric drill with low speed and mixing attachment;
- container for mixing components (plastic bucket);
- household scales (for weighing fillers);
- angle grinder (grinder);
- vacuum cleaner;
- wide spatula (notched);
- cloth roller;
- needle roller (squeegee for);
- paint shoes (have needle soles and are worn on shoes).
After you have prepared everything you need, you can get to work. Important! Before laying the self-leveling floor, the instructions attached to the set of materials should be carefully studied by you.
How to properly fill the self-leveling floor
Polymeric floors are laid only on a pre-leveled and prepared subfloor surface. If the screed has cracks and chips, they must be repaired cement mortar or waterproofing mastic.
You can also process the joints of the floor and walls around the perimeter with mastic. If the base of the floor has critical drops, then it must be leveled. Self-leveling self-leveling floors are ideal for this.

If the surface of the original cement-sand screed is even, then it must be processed with an angle grinder (grinder). This will remove fragile elements and roughen (sand) the surface for strong adhesion of the self-leveling floor and the base (screed). If you do not want to use a damper tape, then along the perimeter of the room (in the places where the floor adjoins the walls), the grinder makes an incision parallel to the floor and up to 5 mm deep and equal in height to the poured layer.
This gap compensates for thermal expansion of the floor and prevents cracks from appearing. Otherwise, lay damping tape around the perimeter. After pouring the floor, you can cut it off with a knife, and close the joint with a plinth.
After cleaning, remove all debris from the surface and thoroughly vacuum the subfloor. Dust main enemy self-leveling floors. If there are grease or oil stains, they must be degreased with a solvent.
A primer is applied to the prepared surface. Manufacturers of self-leveling polymer floors produce polyurethane-based primers. They can be supplied in a set of self-leveling floors.
In their absence, the solution can be prepared by yourself. The primer will be a mixture of 20-30% of the base material of the self-leveling floor and a solvent (acetone, solvent, xylene, etc.).
The primer is mixed in a container with a drill with a nozzle at low speeds. This will prevent bubbles from forming. Mix for 3-4 minutes. After that, the primer is poured onto the floor and stretched evenly over the surface with a flat trowel.
The applied layer of primer is rolled with a needle roller to remove their mixture of air bubbles. Paint shoes should be worn on your feet. Apply a second coat if necessary.
After applying the primer, it should dry well. Remember! Do not make large technological gaps between priming and application of the base coat.
As a rule, the drying time of the composition is indicated on the container with the primer composition. For epoxy floors, complete drying time is 12-18 hours. For polyurethane: 6-12 hours.
When priming is performed, the room must be well ventilated. The use of open flames is prohibited.
After the primer has dried, the base coat can be applied. Preparation of the mixture requires careful preliminary study of the instructions.
Open the container with base coat(liquid A) and using a drill with a nozzle at low speed, stir the liquid for 3-5 minutes. Add the hardener (liquid B) to the center of the container with liquid A. Using the drill again, stir for 3-5 minutes.
Avoid air bubbles. Add fillers (quartz sand, colorants) while stirring. When the mixture is ready, it is ready for styling.
Work begins from the far wall. From the container, the mixture is poured along the wall in parallel strips and, using a spatula (notched trowel), is evenly leveled over the surface. Then the next portion of the mixture is poured.
When the mixture is spread over the floor, it must be rolled with a needle roller. It will remove air bubbles from the base coat. If this is not done, the floor will be weakened and may crack.
After the last procedure, the floor is ready and takes time to dry and cure.
After 24 hours, you can walk on the floor carefully. Full polymerization will occur in 7 days and the self-leveling floor is finished.
To increase the durability of the polymer floor, a protective varnish can be applied to its surface. If you first apply a decorative volumetric drawing or photograph to it, you will get wonderful, exclusive 3d floors.
Step 3 describes the sequence for an epoxy floor. However, it differs from the sequence of laying the polyurethane floor only in the preparation of the solution.
There, the solvent supplied in the kit plays the role of a hardener. The term of execution of works on pouring a polyurethane floor after mixing with a solvent is limited to 30 minutes.