Folding the oven with your own hands for a beginner. How to fold the oven with your own hands drawings and construction technology: step-by-step instructions, video
At a time when a stationary solid fuel stove was the only existing means of heating a house, the profession of a stove was very popular and respected. Today, for the arrangement of individual heating, you can use many different units operating on a wide variety of fuels, however, brick ovens are still in demand.
Nowadays, finding a truly competent stove-maker is not an easy task. And you don't need to do this, because you can lay out a full-fledged stove with your own hands.
Before you start laying the oven yourself, familiarize yourself with the features existing varieties similar units. Stoves are:
- heating. For heating purposes only. Such furnaces have an extremely simple design and are laid out in the shortest possible time and with the least effort in comparison with other types of structures;
- heating and cooking. The most popular and demanded option. Simultaneously heat the house and allow food to be cooked;
There are also improved varieties of heating and cooking stoves with a built-in cooker or even a full-fledged oven.

Fireplace stoves belong to a separate category. This is a great option for a modern private home. Such designs perfectly cope with the tasks of heating premises and have an attractive appearance. Correctly laid out and finished fireplace stove will be a worthy addition to the interior of both a small country house and an expensive private villa.

Schemes modern ovens they are distinguished not only by their purpose, but also by the peculiarities of their form. Most often, rectangular and rectangular units are installed in private houses square shape... But if you wish, you can lay out a round oven. Choose a specific option, taking into account the characteristics of the room and your own preferences.

The oven, of course, can be laid out with your own hands and numerous schemes will help you do this in the shortest possible time. However, when performing such work, remember that any stove, regardless of its purpose, shape and other characteristics, must fully comply with the current fire safety standards.
Choosing a place and type of foundation for the stove

Before you start laying the stove, pay due attention to finding a place to place it. For example, if the unit is placed in the middle of the room, it will be able to give off much more heat, warming up from all sides and evenly heating the air around.
If you place the stove against the wall (and this option is most often used), cold air will constantly "walk" near the floor. Therefore, in this regard, you need to make a decision yourself.
Determine the place of installation of the combustion door in advance. This element must be installed so that in the future you can load fuel into the stove as conveniently and quickly as possible, without carrying garbage from firewood or coal throughout the house. Typically, the firebox door is located on the side of the kitchen or some little-visited room.
The finished brick stove will have a fairly impressive weight. In order for the device to stand as securely and long as possible, an individual concrete foundation must be prepared for it.
Furnace design features
Traditional brick ovens have a fairly simple design. However, seeming simplicity at first glance makes it possible to achieve very high rates of productivity and efficiency.

The main elements of the brick stove body are the firebox and the chimney. Cooking ovens additionally equipped with stoves and / or ovens, it is also possible to install a tank for heating water.

The firebox is the main part of the furnace unit. It is in the firebox that firewood or other fuel used for heating is loaded. The firebox can have a wide variety of sizes. There are several important factors to consider when determining the appropriate dimensions, such as:
- type of fuel used. If you are going to heat the stove with wood, make a firebox 50-100 cm high;
- required performance;
- required volume.
To equip the firebox, use refractory brick... The wall thickness of the structure under consideration cannot be less than half of the brick.
The chimney is also one of the main elements of any heating stove. The chimney is designed to remove flue gases with various harmful impurities formed during the operation of the furnace.

At the design stage of the chimney, try to think over everything so that its design has the minimum number of bends and turns. Ideally, the chimney should be completely vertical. Any kind of bending will lead to a deterioration in draft and a decrease in the efficiency of heating the room.
Among important elements the design of the brick oven includes an ash pan chamber. Ash will collect in this compartment. Also, through the ash pan, air is supplied to the inside of the unit, to the fuel. The ash-pan is installed under the grate and is equipped with its own door. Traditionally, the height of the ash pan is 3 bricks.
What mortar should be used for masonry?
Reliability and durability directly depend on the quality of the masonry mortar. finished oven... Masonry will be carried out using a mortar on a sandy-clay basis.
There is nothing difficult in preparing a solution. Take clay, fill it with water and soak it. Sift the mixture through a sieve and then stir in the clay milk. Finally, add some water to obtain a sufficiently viscous and plastic solution.

Remember, the reliability and durability of the oven directly depends on the correct preparation of the masonry mortar. Do everything right - the stove will effectively heat your home for many years. Violate the technology or decide to save a lot on materials - the heating unit is unlikely to be able to fully reveal its potential and stand for any length of time.

The main stages and important features of the oven masonry
From the moment the foundation is poured to the start of construction, 3-4 weeks should pass. During this time, the base will gain the necessary strength and be able to withstand the weight of the brick oven. The work in question requires maximum responsibility and concentration on the part of the performer. Any mistakes can lead to irreparable consequences, so tune in to work in advance and set aside sufficient time to complete it.

The laying of the stove is carried out in several stages.
First step. Lay out the ash pan and the lower part of the first hood out of bricks. Perform masonry using the previously discussed sand-clay mortar.
Second phase. Install the ash pan door in the masonry. Use galvanized wire to secure the door.

Stage three.

Stage four. Mount the firebox. Line the inside of this compartment with fire bricks. Lay the bricks on the edge. At this stage, you need to use a special masonry mortar. It is prepared in the same way as the standard one, but instead of simple clay, refractory clay is taken, i.e. fireclay. Secure the combustion chamber door with a steel plate and the wire you already know.
Fifth stage. Continue normal laying until you reach the 12th row. Having reached this row, close the combustion chamber and lay the hotplates evenly. This plate must be made of cast iron. Control the evenness of laying with a building level.
Sixth stage. Lay out the first cap. It is erected at the left edge of the stove. At the same stage, the canal for the summer run is being set up.
Seventh stage. Place the hob and line the sides of the cooking compartment. Lead the layout of the previously mentioned lower cap.
Eighth stage. Install the valve for the mentioned summer run channel. This latch is located in the inner corner of the brew compartment.
Ninth stage. Work up to the 20th row. When you reach this row, close the brew compartment and the first hood. Be sure to leave in the solid masonry the required number of openings for the summer run and the lift channel, as well as the vents for the cooking compartment. Place bricks on steel corners - this will ensure higher strength and reliability of the stove.
Stage ten. Close the portal of the brewing compartment with hinged fireplace doors. It is better that the doors have heat-resistant glass inserts. This solution will allow you to follow the fuel combustion process and admire the flame.
Eleventh stage. Install cleanout doors for easy soot removal. For installation, choose a location that is easiest for you to get to.
Twelfth stage. Line the hood walls almost up to the top edge of the wall opening. At the top, block the stove with a couple of rows of bricks. Fill the gap between the top of the stove and the lintel with mineral wool. This will provide additional thermal insulation and slightly increase the heating efficiency.
Thirteenth stage. Place a decorative band around the top perimeter of the unit.
Fourteenth stage. Proceed with the installation of the chimney. It is better that the chimney is brick. This design will last much longer than the same metal or asbestos pipes.
In the end, you just have to lay out the chimney to the end and, if desired, complete the outer finish of the stove. The easiest option is plastering. Otherwise, focus on your own preferences and available budget.

Thus, although laying the stove is not a simple event, it is quite possible to do it yourself. It is enough to simply understand the technology and follow the instructions in everything. Remember, materials for work must be of the highest quality. And the stove schemes proven over the years will allow you to independently build a unit that will heat your house with high quality for many years without any problems and complaints.
Happy work!
Video - Laying stoves with your own hands schemes
© When using materials from the site (quotes, images), the source must be indicated.
The good old brick oven does not give up its positions under the onslaught of modern highly efficient competitors. Disputes - why? - countless, but actually the reason is the same: the brick stove breathes. Stone, by the way, no.
What does it mean - breathes? When heated, the microporous body of the furnace emits moisture vapor into the air of the heated room, and when it cools, it absorbs them. As a result, the brick oven supports the so-called. the dew point in the room within the optimal physiological limits. When they say that a brick oven is "healthier" than any other, then, knowingly or not knowingly, this factor is meant.
In addition to the beneficial effect on health, the breathing of the stove gives another important consequence: with the medical and thermal engineering calculation at home, the lower temperature limits in it can be reduced to 18 degrees for comfort and up to 20 degrees for medicine, because the relative air humidity during the heating season will be close to optimal. In wooden and brick buildings can give super-economy: at 16-17 degrees in them, over 80% of physically healthy people do not feel discomfort, and the bed linen remains dry. And in a stone or concrete house, heated by batteries, it can be chilly even at 18 degrees.
When heating with water registers, the lower temperatures should be taken at 20 and 22 degrees, respectively, and when heating with IR emitters, electric or gas catalytic, another degree higher; Infrared devices dry the air a lot. Therefore, a brick heating stove with an efficiency (heat transfer coefficient) of 50% may turn out to be more economical in terms of heating costs than an ultra-modern metal composite with an efficiency of 70%, because the heat loss of a house strongly, according to a power law, depends on the difference between the internal and external temperatures (temperature gradient).
Note: a little breathing can be achieved by fencing it with a convection screen (see fig.) 30-40 mm thick made of plywood, seasoned hardwood or several layers of drywall. At the same time, uniform heating of the room in height will be ensured. But the breathing of such a furnace will not be deep and even. Here modern technologies do not reach the brick yet.

Furnace breathing combined with physiology gives an economic consequence of the second order: the heating season can start later and end earlier. In the middle zone of the Russian Federation, the difference per year can reach weeks, and in the Black Earth Region and further south - 2-3. For which you will not need to purchase fuel. And if you consider that a good brick stove works on everything that burns, including waste and cheap alternative fuels (pellets, etc.), then the savings increase even more.
Note: on a global scale, brick kilns do not fit well into the ecology so far - the extraction and production of materials for them causes damage environment greater than the savings from stove heating on losses in heating mains and power lines. But in this case, demand no longer creates, but dictates supply. Leading kiln companies are working quietly but hard to improve the technologies for the production of kiln materials and create brick kilns that can be transported ready-made and installed immediately at the point of use.
Those who want to fold the stove with their own hands are not decreasing. Professional stove-makers also do not break the price: their work is in demand, the competition is quite high, and, besides, most of them are enthusiasts of their business. But in order to take up the stove yourself or competently consider the proposed project, you need to know the basic principles of building stoves, which is what this article is about.
Is it only in the house?
A brick oven on the farm is useful not only for heating and cooking. A stationary can bring a very good income, as can a barbecue individual entrepreneur working in the catering industry.
In everyday life, it is important, first of all, to have a high heat capacity of a brick, which ensures long-term heat transfer after heating. Since the firebox is empty, you can sleep peacefully without fear of burnout. For industrial furnaces, the already low thermal conductivity of bricks comes to the fore, which makes it possible to create a high concentration of heat in the working area. In this case, the breathing of the stove becomes already a harmful factor, and it is most often suppressed by placing the stove in a gas-tight case.
Small businessmen specializing in artisanal industrial production, it is worth thinking about these types industrial ovens, which is quite possible to do yourself:
- Cupola - up to 50 kg of scrap metal can be melted in it at a time.
- - for hardening of metal products with simultaneous cementation.
- Firing kiln for ceramics, etc.
Note: brick ovens are not recommended for heating greenhouses, greenhouses, poultry houses, barnyards. A stove breathing with miasms will spoil the air, and it will soon spoil itself.
The fact is that factory samples of small industrial furnaces are designed for transportation in parts or assembled. Therefore, their prices are prohibitively high. But by laying out the oven on the spot, you can get not the worst, without getting into an unbearable loan, and deploy a profitable business. For now, we will dwell in more detail on: they were the first to appear in everyday life and the principles laid down in them are valid for others.
Note: ovens for a bath require a separate analysis. Here the brick also turns out to be at its best, but for slightly different reasons. A special section will be devoted further to the sauna stoves.
Oven in the house
It is not necessary to build a house from the stove, you can also choose a stove that is suitable for the house. But first, you need to carry out a heat engineering calculation of the building, taking into account the factors described above and determine the place for the stove in the house. You also need to know that insulating a house from the outside increases the efficiency of stove heating much more than heating with registers. And, in turn, house cladding with siding greatly simplifies and reduces the cost of insulation. That is, the optimal design of a house stove should initially be complex.

As for the layout, here are possible different variants, see fig. The house on the left on it is suitable, for example, for a hermit bachelor, but not an ascetic or a childless family of convinced sybarites, here a warm bed in the bedroom will be very useful. Furnace - heating and cooking. The Russian one does not fit into such a house, but the Swedish one (see below) is perfect. Option - budget housing for a small family, then the bedroom turns into a nursery or a zone in the penthouse is allocated for the children.
In the middle, the house is already bigger and more impressive. A fireplace stove with a finished cast iron firebox opens into the living room, see below; fire-chamber door made of heat-resistant glass. Here, too, different options are possible. If, for example, the kitchen with the bathroom is swapped, the heating flap (see below for more information) is rotated 90 degrees, and the veranda from the hallway is moved to the right side, then it is possible, by slightly reducing the living room, to fence off another 1-2 bedrooms. At the same time, a corridor will lead to the common areas.
The plan on the right is more suitable for a summer residence. In the summer, having opened the window in the kitchen-hallway, it will not be too hot to cook. Fireplace stove in the corner - for evening gatherings by the fire; in it it will be possible, in case of bad weather, to cook a barbecue or barbecue on a grill.
Already at the stage of planning a house with a stove, you need to consider the following:
- For a high stove with its own chimney, or for a stove with 500 or more bricks, a separate foundation is needed, which does not have a mechanical connection with the foundation of the building, even if they are designed and built together;
- Low and wide hob and a heating shield to it on the floor, made in accordance with the requirements of SNiP (i.e., capable of holding a load of at least 250 kg / sq. m), can be installed without a foundation, having made only thermal insulation; about her further. It is advisable to reinforce the flooring under the flap with additional logs;
- The chimney cut (also see below) must not come into contact with ceiling beams, it is very desirable that the distances from the groove to the floor beams nearest to it were approximately the same.
- The chimney should protrude at least 500 mm above the roof ridge and be at least 1500 mm away from it.
Clause 1 allows exceptions. If the kiln is made of 1000 or less bricks, and the foundation of the house is strip sectional, then the foundation of the kiln can be built at the intersection or T-shaped connection of belts under the inner walls. In this case, the distance from the furnace foundation to the nearest other strips of the building foundation must be at least 1.2 m.
Note: since Even a small Russian stove requires 1500 bricks, then all Russian stoves must be built on separate foundations. But here, too, there is an exception - Little Russian can be built on the guardianship of timber 150x150 mm, penetrating the floor to the buta in the foundation of the building or soil.
Furnace structure
The kiln itself is sometimes called the kiln body. The stove body is installed on the hydro and thermal insulation of the stove foundation or floor and ends with a chimney coming out through the attic and roof. All this together is called the structure of the furnace. The structure of a brick heating furnace is shown in Fig. on right:

- foundation;
- hydrothermal insulation;
- trenches are a kind of legs, they are made for lower heating and saving bricks;
- blew;
- the inlet of the strangler - the air channel, which ensures uniform heating of the room along the height;
- blower door;
- grate;
- firebox door - created - with fuel supply - rutting;
- firebox of a firebox, or just a firebox, or just a firebox;
- firebox arch;
- the mouth of the firebox, or its hailo. Sometimes only the vertical mouth of the firebox with a constriction (nozzle) is called a hail, and in a Russian stove hail is a nozzle at the beginning of the chimney;
- clean door or just cleaning;
- overflow (pass) - bend of the channel of the air convector of the strangler;
- strangle air convector;
- a valve for switching the furnace stroke (see below, shown conditionally);
- gas (smoke) convector, or convection oven system;
- vyushka - a valve, which is used to block the chimney after firing, so that the stove is not cooled by natural or wind draft;
- outlet of the strangler into the room with its door. In summer, the door of the strangler is closed, and the convection of air in it stops;
- chimney smoke channel;
- stove overlap;
- internal cutting of the chimney;
- ceiling slab;
- fire-fighting cutting;
- fluff, or otter - expansion of the mouth of the chimney.
Note: the side of the furnace with the creative (in the Russian oven, the creative is sometimes called the mouth) is called the brow of the furnace, and its side walls are called mirrors or cheeks.
Let's give some explanations. The foundation is solid-cast reinforced concrete; for the stove on the trenches - tape bundled. Removal of the foundation - at least 50 mm. Insulation - 2-3 layers of roofing material, on top of them - 4-6 mm of asbestos or basalt cardboard, then a sheet of roofing iron, and on it a litter for masonry - a sheet of felt or basalt cardboard, soaked in a very liquid masonry mortar for a furnace, see about it . Further. The litter is placed on the iron while wet and allowed to dry before laying.
The first rows of brickwork of the kiln body (oblique shading in the figure) are made of ordinary ceramic red bricks (not front!) On a cement-sand mortar; this is the underfloor part of the kiln. Next comes the furnace, or fire part (hatching in a box), it is laid from ceramic oven bricks in combination with fireclay, about bricks also further, on a clay-sand mortar.
In front of the blower door and the workpiece, a sheet of roofing iron is laid on the floor on an asbestos or basalt cardboard pillow of 4-6 mm, its root edge is walled up in the nearest upper seam of the masonry. Carrying out the sheet forward - not less than 300 mm, and to the sides of the brow - not less than 150 mm. The free edges of the sheet are folded up and nailed to the floor.
Clay masonry mortar does not set, but dries out. With an irregular firebox in the cold season, it gradually becomes limp from moisture. In this case, a part of the furnace body, in which the temperature does not rise above 200-250 degrees, is laid out of furnace bricks, but on a cement-sand mortar, which is much cheaper than clay, oblique shading with gray fill in Fig. The solution for this part of the masonry is Portland cement from M400 and mountain sand without inclusions. Replacement with decorative analogs is unacceptable!
The lower transitions from the channel to the gas convector channel (overflows) should be 30-50% higher in the height of the upper (passes). This will ensure the accumulation of soot at the bottom of the convector (on its hearth), from where it can be easily removed. For the same purpose, the edges of the passes are rounded.
Starting from 80 degrees in the chimney, the masonry is again made of simple bricks on an ordinary cement-sand mortar. Internal cutting of the chimney is necessary, it holds on itself a fire cut (at least 50 mm of asbestos or basalt cardboard in a metal cage) and, most importantly, in the event of soot ignition, it will take in heat for a time sufficient to take the necessary measures.
The role of the fluff (otter) is aerodynamic. It cuts the wind flow, forcing its upper part to jump over the chimney mouth, so the draft is not so dependent on the wind. The height of the fluff is at least 2 rows of bricks, the removal at the mouth edge is half a brick. Neglecting fluff is a very common cause of smoking stoves.
Choosing a furnace scheme
The main convection schemes for household brick ovens are shown in Fig. On the left is a duct oven with a sequential gas convector, the simplest design. Similar to them are built according to the sequential channel scheme. In addition to simplicity, the advantage of the channel scheme is that it is structurally very flexible. The convector with the firebox is mechanically connected only by the highlighter, so the channel stove can be designed for any ready-made room, see next. rice.
However, the efficiency of purely channel furnaces rarely exceeds 40%, and it is very difficult to build a water heater into them: a powerful internal heat flow circulates in the furnace body, and any violation of it leads to a decrease in efficiency and increased soot deposition.

In the center in Fig. with diagrams the most advanced brick heating and cooking stove -, its efficiency reaches 60%. It is a chamber oven (oven 1 plays the role of an air chamber streamlined by a stream of incandescent gases) and a duct convector stretched from floor to ceiling behind it. In the chamber part of the Swede, gases heat the hob in the cooking niche 2, and part of the heat from the convector goes to the dryer 3. Advantages of the Swedish oven:
- The convector and the oven do not have energy feedback with the combustion part, therefore, a U- or W-shaped heat exchanger of the DHW system with a storage tank can be built into the oven on the side, and the tank itself can be placed either in a drying niche or on the stove roof.
- Afterburning of flue gases occurs in the chamber part of the furnace. They go into the convector with a temperature below 800 degrees, so it can be made of ordinary brick on a cement-sand mortar.
- A tall, narrow convector gives an even heating of the room in height.
- Part of the flue gases from the chamber outlet can be bypassed, for example, into a stove bench, and then returned to the convector without deteriorating the parameters of the oven.
- The dimensions of the convector can be varied, moved and rotated relative to the chamber part, so the Swede also fits well into the finished house and can heat up to 3 rooms, see next. rice. (after channel furnaces).
- If you open the oven door, a powerful stream of heat radiation will go out of it, which will allow people who come from hard work in the cold to quickly warm up and dry themselves.

The main disadvantage of the Swedish stove is the high quality requirements for materials and work for the chamber part of the stove. In addition, a foundation is definitely needed for it; without it, a tall and narrow structure, parts of which are loaded in different ways due to thermal stresses, will turn out to be fragile and unstable. Only an experienced stove-maker can make a Swedish-style stove.

Finally, on the right in Fig. with diagrams - bell oven. Its efficiency can exceed 70%, because it is self-regulating: flue gases will not go into the chimney until they burn out under the dome of the bell and give off their heat to the body of the stove. In addition, the bell-type stove has the property of a gas view: if you forget to close the standard one, the hot gases under the bell will not let the heavy cold air from the high through the duct, and the stove will not get cold. This guarantees against burnout due to the untimely closed view.
However, the bell-type furnace looks simple only in the diagram, and in execution it is very complicated due to the high loads in the structure. Then, the bell-type stove is exclusively heating; it is impossible to build a hob into it. The extraction of heat for a hot water heater is possible only in two-bell furnaces, which are even more complex, therefore bell-type furnaces are not very common in everyday life. The exception is, but such talented stove-makers are rarely born.
Stove and shield

The development of the Swede's idea gave rise to a very promising design: an ordinary hob with a separate heating plate-convector, see fig. All that was required for this was to abandon the cooking and drying niches, this made it possible to mechanically separate the chamber and channel parts, i.e. build them separately; perhaps even one at a time.
What do we get in return? Less stress on the floor. In most cases, the slab can be built directly on a wooden floor, placing on it the same insulation as on the foundation for the stove. And under the flap, just a damping pillow made of basalt cardboard is enough. The problem of stability of a high narrow flap remains, but it is solved by creating its mechanical connection with the wall, even if it is a partition in a half-brick, see fig. left.

Further, the flap can be moved and deployed relative to the stove, then the stove can heat the kitchen with a bathroom, and the flap can be up to 4 rooms. To do this, insert a flexible link made of heat-resistant corrugation with good thermal insulation into the horizontal section of the chimney between them in order to avoid soot settling. In general, at the cost of abandoning niches that are almost unnecessary in our time, a fundamentally new and very practical design has turned out.
Seasonal oven strokes
In summer, when it is already hot, there is no need to heat the room. But it will not work to put scanty amounts of fuel into the furnace either: the limits of power adjustment by the fuel supply of all stoves are small. The heat from a small bookmark will fly into the pipe, the rest will not be enough for the fried eggs. But not everyone has an opportunity to acquire a summer kitchen with a stove.
In such a case, designs of stoves with switching the course from summer to winter have been invented. The easiest way is to switch the stroke in a parallel-circuit channel furnace, the two left-hand positions. in fig. below. However, the maximum efficiency of a duct-parallel furnace can be achieved only when its power exceeds 20 kW. Here the law of the square-cube works, and in a too small oven the heat "whistles" into the pipe, without having time to heat the convector. In addition, all two-pass furnaces are potentially dangerous: if both valves are accidentally closed, waste will go. Finally, during the summer run, the overlap and part of the cheeks of the stove still heat up.

Meanwhile, there is a two-way scheme, especially suitable for heating shields: a scheme with two chimneys, summer and winter, two pos. on the right in Fig. It only needs one bolt, so it is completely safe - there will be thrust in any position of the switch. The position of the valve out of season is immediately felt by the heat transfer, and you can switch the stroke during the firebox. And smoothly regulate the heating, partially sliding the damper.
During the summer run, gases in the winter run will not squeeze through in any way: the aerodynamic resistance of the convector's labyrinth is much greater than that of a straight pipe. And the complexity of the construction of chimneys is not at all double: the gases into the winter chimney go cooled down below 80 degrees, so the winter chimney can be lightened and simplified, for example. asbestos-cement. The only small disadvantage of a system with two chimneys is that for each pair of convector channels you need to clean it.
Special ovens
Before moving on to a more detailed analysis of conventional furnaces, let us dwell on several special, highly demanded designs.
BBQ oven

The present is an ancient open hearth, see fig. It is built either outdoors under a canopy or indoors under a smoke cap. Laying without any intricacies: in half a brick with a spoon bandage. 3-4 rows need to be laid out with pokes to make supports for the brazier and grates. However, for more details on masonry, see below.
The foundation for an outdoor barbecue is the simplest, slab made of ready-made concrete monoliths or stone blocks on a sand-crushed stone pillow. A room barbecue is built directly on the floor on the combined insulation described above.
The barbecue has one subtlety: the side of the brazier, it heats the cooking from the sides in the right hearth. Therefore, it is advisable to lay out the top 2-3 rows of fireclay bricks, it absorbs heat very well and slowly releases it. In order for the top of the brazier to warm up faster, you need to take faceted shaped bricks, as shown in Fig. below. Through the wedge-shaped depressions between them, heat will pass faster into the masonry. You can make shaped bricks for a barbecue yourself, but then you have to work with a grinder.

Bathhouse
How the oven is built in the usual way; here the main secret is the device of the heater. A closed stove through which flue gases pass (on the left in the figure) heats up quickly and gives the most useful dry steam. But you cannot "add" water or kvass to it; you will have to re-heat the stove. In addition, the slightest flaw - improperly selected stones, poor fuel, violation of the furnace regime - leads to the deposition of unburned organic matter in the stove, and dry steam can be toxic and carcinogenic.

An open heater (second from the left in the figure) is safe, but takes a long time to warm up. To take a steam bath with the "overdose", the stove needs to be heated all the time, so it must go into the dressing room: waste is especially dangerous at high air temperatures. Having poured too much, the stove can be chilled altogether, and the whole bath will go down the drain.
The third stove on the left with a closed side stove is more perfect: the bunker with stones is washed by hot gases from all sides except the front one, so the stove heats up faster and you can put more into it. But the most perfect sauna stove is the bell-type stove, on the far right. The stove is located on the dome of the hood, the temperature under which is very high, there is the main source of heat generation, and this heat has nowhere to go except in stones. Therefore, the heater heats up in a matter of minutes and can be inflated almost without restrictions. There is no need to reheat the stove, the “bell” itself will select the mode for itself, depending on the heat consumption, if only there is fuel in the firebox.
This oven has 3 drawbacks. First, the overall complexity and high cost, like bell-type furnaces in general. Secondly, a cap made of ordinary steel quickly burns out, and from a heat-resistant road. Finally, it is possible to add to the heater of this stove only from the built-in shower, and you cannot fill it with kvass.
Continuous furnaces
Flow-through furnaces do not have convectors, but they have only external resemblance to a fire in a pipe or a cave. Continuous flow ovens can be very effective. The most popular types are an English fireplace and a Russian stove.
Fireplace
The structure diagram is shown in Fig. To obtain the maximum efficiency, comparable to the efficiency of the Dutch woman, the fireplace insert should be tapered back from all sides, on the right in Fig.

The main proportions of the fireplace are as follows:
- Portal area - 2% of the area of the room.
- The height of the portal is from 2/3 to 3/4 of its width.
- The area of the furnace opening is 1.5-1.8% of the area of the room.
- Firebox hearth area - 70% of the portal area.
- The depth of the firebox is 1 / 2-2 / 3 of the height of the furnace opening.
- Fracture of the rear wall of the firebox - by 1/3 of its height.
- The angle of inclination of the rear wall "mirror" is 20-22 degrees from the vertical.
- The angle of convergence of the side walls is 45-60 degrees, i.e. 22.5-30 degrees each.
- If the fireplace is with a deaf hearth, then its rise back is 4-7 degrees.
- The height of the podium above the floor is about 50 cm.
- Chimney cross-sectional area - 7-13% of the furnace area. The lower value refers to a round chimney, a larger value to a rectangular one with sides 1: 2. For a square chimney - 10%
Russian stove
(diagram in the figure) with regular intensive heating gives an efficiency of up to 80%, has amazing decorative qualities, allows you to cook traditional Russian cuisine, which you cannot cook in any other way, and must be supplied with a stove bench. But the design of the Russian stove is very conservative; only a stove-maker with extensive experience in working on Russian stoves can make changes to it without risking ruining the stove.

From the point of view of structural mechanics, the Russian stove also stands out. It is not a solid, working as one, module (hollow column, wall), but almost a complete analogue of a building: a connected structure, the parts of which interact through the corners. Therefore, the corners of the Russian stove must be laid out according to all the rules. Reconciliation in order is not enough, you still need to constantly verify the plumb line. The key points of the masonry of the Russian stove are shown in the next fig.

Preliminary calculation of the furnace
Before choosing a furnace project, it is necessary to make a preliminary calculation for the room. Usually it is carried out on the basis of the heat transfer of the furnace in kcal / hour. In the process of cooling the furnace, heat transfer decreases, but the heat loss in the room also decreases, because it cools down too. The task of the calculation is to maintain the temperature in the room until the next furnace.
Such a calculation is theoretically difficult, but with ready-made coefficients and simplified formulas it requires a lot of experience. But for houses with good external insulation, quite reliable results are obtained by the method of calculation proposed by I.V. For a normal firebox, you can take 0.5 kW / sq. m, and for melting in severe frost- up to 0.76 kW / sq. m within 2 weeks.
With the use of TMEP, the approximate calculation of the furnace becomes quite simple. Let's say we have a stove 1.5x1.5 m in plan and 2.5 m high.The area of its walls is 3.75x4 = 15 sq. m, plus 2.25 sq. m overlap. Total 17.5 sq. m. This stove will be able to deliver from 8.75 to 13.3 kW of heat. Taking into account the peculiarities of stove heating, this is enough for a house of 80-100 sq. m.
Firebox
To calculate the firebox, you must first determine the maximum volume of fuel loading. It is found by the required thermal power, calorific value of the fuel, its specific gravity and the estimated efficiency of the furnace. The calculation is carried out for all types of fuel for which the furnace is intended, and the largest value is chosen. The volume of the fuel chamber of the firebox (combustion chamber) is taken 2-3 times more than the maximum volume of the fuel mass, based on overheating. In general, the maximum loading of fuel into the combustion chamber is 2/3 of its volume.
A complete calculation of the firebox is the lot of non-amateurs and not even any heating engineer. Take at least such a "trifle" as a grate. It will let in too much air - the fuel will burn faster than the furnace body will accept its heat, the remainder will fly out into the pipe. Not enough air - the fuel will not burn out completely, and the unreleased heat will go back into the pipe with smoke. And the soot, and the ash that clogs up the grates? And all this needs to be linked with other, no less significant units of the furnace, and for different types of fuel.
Fortunately, now on sale there are many ready-made stove inserts for different heat outputs, for different fuels, with a dull or transparent, for fireplace stoves, created. And the finished firebox will cost less than any homemade one. It is only necessary to pay attention to the following when choosing:
- The dimensions of the firebox and its fasteners (pins, whiskers) must be consistent with the dimensions of the brick. Furnace bricks are available in several standard sizes (see below), and the same firebox can be sold in several modifications for different bricks.
- For a long-term stove, the furnace must be cast iron. Welded from sheet - for stoves used occasionally.
- You also need to pay attention to the depth of the narrowing of the combustion chamber to the grates - an ash mine, an ash pit, or just an ash pan.
Let us explain the last point. If the furnace will be fired mainly with high-calorie low-ash fuel in large lumps (coal, peat briquettes), then the ash pan should be taken deeper, up to 1/3 of the combustion chamber height. In a shallow ash pan, such fuel will burn out too quickly. If the stove is fueled with low-calorie wood fuel, including pellets, then the depth of the ash pan should be no more than 1/5 of the combustion chamber height, otherwise the bottom of the fuel mass will quickly become clogged with ash, the air flow will be reduced, and the fuel will not burn out.
As you can see, the ash pan depth fork is large. Therefore, it is better to overpay a little and take a multi-fuel furnace. In such cases, the complete combustion of all types of fuel listed in the certificate is ensured by special design measures.
Note: raw firewood can be completely burned in a deep ash pan, and coal - on an even furnace bottom, having correctly selected the size of the fuel load. But this requires the experience of a stoker and intermediate flooding with sanding, which is no good at night.
Chimney
The calculation of the chimney is a separate topic, almost more complicated than the calculation of the entire stove. Even on a computer, you have to restart the CAD 2-3 times, manually adjusting the original data, before everything does not fit together properly. But for normal conditions (rectangular section, vertical stroke without kinks, height of the chimney mouth above the grate 4-12 m), you can immediately give ready-made values of transverse dimensions for furnaces of different power:
- Up to 3.50 kW - 140 × 140 mm.
- 3.50 to 5.20 kW - 140 × 200 mm.
- 5.20-7.20 kW - 140 × 270 mm.
- 7.20-10.5 kW - 200x200 mm.
- 10.5-14 kW - 200X270 mm.
These values are minimum. They are designed to avoid “whistling” when cold air flows back into the stove through a chimney that is too wide. "Prosvist" is fraught not only with heat loss, but also with a lot of other serious troubles.
If the stove smokes at least occasionally in the chimney chosen "offhand", it needs to be increased by only 0.25-0.5 m. than the chimney.
But the most The best way- do not be lazy and put another 2-4 rows of bricks, not forgetting to make a new fluff. Ever seen a pipe with two otters? This means that the initially short chimney was increased to normal according to the results of the firing.
Note: it is often necessary to build up the pipe when the aerodynamics of the terrain change. Let's say the forest has grown around or the high-rise buildings have been set up.
Furnace materials and appliances
Brick
Sources are often confused with refractory chamotte. They have only sizes in common: if a single building bricks they are 250x125x65 mm, then in ovens they are 230x114x40 mm (standard) or, sometimes, 230x114x65 mm. In general, the oven brick is a high-quality red M150. It is entirely possible to build a Dutch woman and a Russian stove from it. In terms of heat resistance (up to 800 degrees), it would go to the fireplace, but it absorbs little heat and cools quickly, therefore it will fit only for a fireplace in a summer cottage, where people only admire the fire.
Note: the dimensions of the kiln brick were formed historically in the old days, so that anyone could distinguish it from the building brick. Firing bricks then cost a lot of work and expense, there was no concrete, and deposits of good clay are rare. Therefore, the then wandering stove-makers often cheated, using weakly burnt bricks made of unimportant clay.
Fireclay bricks are used for laying the furnace parts of furnaces with a rather intense thermal regime: Swedish, bath, bell-type furnaces. Its main advantage for household stoves is not heat resistance, 1600 degrees does not exist in domestic stoves. More important here is the high thermal conductivity of chamotte in combination with high heat capacity: fireclay masonry- an excellent heat accumulator.
Due to the high thermal conductivity, it is impossible to build a furnace entirely from chamotte: at first it will inadmissibly heat up, and then it will give off heat too quickly by radiation. Outside, fireclay masonry should be lined with ceramic on all sides, at least half a brick.

It is not entirely correct to judge the quality of fireclay bricks only by the depth of its color. fireclay clay from different deposits is very different in appearance. Nearly black bricks can be bad, while light yellows are excellent. The main sign of quality is a fine-grained structure without many visible pores and inclusions (top left in the figure; next to it - suspicious). The next stage of testing is tapping with a light hammer. A good brick gives a sonorous or clear abrupt sound, and a bad brick gives a dull stretched sound. Finally, if the knock did not really clarify anything, they check for cleavage, or, in a modern way, conduct a crash test: a brick is broken or dropped from a height onto a hard floor. A good brick also has good cleavage; it splits into large pieces with a granular fracture. The bad one gives more dust and crumbs than large fragments.
The sides of fireclay bricks are called the same as building bricks, this is also shown in Fig. Like construction, fireclay is used full-length, 3/4 of the length (three-quarters), halves and quarters. How they are indicated on the masonry diagrams is shown in Fig. bottom left.
For the laying of internal critical parts of household stoves, clinker bricks are well suited, or just clinker (on the right in the figure). This is the same ceramic brick, fired at a high temperature. It looks unsightly, but its strength and heat resistance are increased. Clinker costs a little more than ordinary red brick, but much cheaper than chamotte.
Note: silicate brick absolutely unsuitable for any part of the ovens. It does not hold on to a clay solution, but from alternating heat loads it draws moisture into itself like a sponge.
Sand
Sand in oven mortar requires special consideration. For a stove designed for more than 10 years of regular use without repair, mountain sand without inclusions is needed. In other types, there is too much organic matter, due to which the seams of the masonry crumble and crack over time.
Clean mountain sand of the roads. But the main thing is that now on sale there is generally an ideal replacement for it: clay sand for ceramic masonry and chamotte sand for chamotte. Do not be surprised at the phrase "clay sand", it is, like fireclay, ground battle of the corresponding type of brick. Brick sand most often turns out to be cheaper than good mountain sand, and mortar-based masonry with it comes out of exceptional quality.
Masonry mortars
They are used for laying brick ovens. A lot of recipes are known, we will give the simplest and highest quality ones. For chamotte you need chamotte marl or white kaolin. For ceramic brick- any refractory ground clay; best kaolin gray, blue or Cambrian gray. And in fact, and in another case for 100 pieces. bricks need 40 kg of clay.
When buying, they immediately check the clay for smell: any clearly perceptible, pleasant or unpleasant, indicates an admixture of organic matter, such clay is not suitable for laying a stove. Next, you need to determine the required proportion of sand in the solution, because clay from different deposits of the same quality has a different fat content - a combination of adhesive ability with viscosity. For a sample, take 0.5-1 kg of clay powder, fill it with water in a bowl to the top of the filling and allow it to sour for a day, gain moisture. Chamotte marl completely sour in 1-2 hours, overexposure is not terrible.
Sour clay, adding a little water, is kneaded until the consistency of a very thick dough or plasticine. Then the batch is divided into 5 parts and sand is added to each: 10%, 25%, 50%, 75% and 100% by volume. All samples are thoroughly, until completely homogeneous, mixed again and dried for 3-4 hours.
Now the samples are rolled out into sausages with a diameter of 1-1.5 cm, at least 30 cm long.Each sausage is wrapped around any round object with a diameter of about 5 cm and the result is watched:
- The solution on the sample, which has settled down absolutely without cracks, is suitable for any furnace, including the fuel part.
- The dried crust broke, forming a network of small cracks - the solution is also suitable for all ovens, incl. for the Russian crucible and the Dutch furnace.
- The cracks went 1-2 mm deep - the solution is suitable for parts of the stove that are heated to no higher than 300 degrees, for a barbecue and a country fireplace.
- Deep cracks, breaks, breaks - there is too much sand, the solution is not suitable.
The main point of testing the proportion of sand is to reduce the cost of construction: brick sand is much cheaper than high-quality clay. Accordingly, the more it goes into the solution, the cheaper it will be.
Note: this test is only suitable for mortar on brick sand. For solutions on natural sand, other samples are used.
The working solution is prepared according to the same principle as the sample, but in the required volume:
- The clay is soaked for a day; fireclay marl - an hour.
- Knead the mass until the dough.
- Rub through a 3x3 mm sieve.
- Add sand according to the results of the sample.
- By adding water little by little, knead until sour cream is thick.
- Check the fat content of the solution in the usual way, by wetting the trowel.
- If necessary, add clay or sand (very little!), Knead and start laying.
Note: on average, 3-4 buckets of ready-made mortar come out of a sales package of clay.
Furnace appliances
Stove appliances (doors, latches) are attached to the body of the stove either with a mustache that falls on the seams of the masonry (on the left in the figure), or with a skirt made of heat-resistant steel, wrapped before installation with a 5-mm asbestos cord, on the right in the same place. The first, of course, are cheaper, but they are not suitable for creating fireboxes, ovens and heat dampers: during the operation of the oven they have to be changed several times, and breaking the masonry, tearing the mustache out of the seams, is bad. And, of course, the installation dimensions of the devices must be coordinated with the dimensions of the bricks, taking into account the thickness of the seam.

Laying and dressing
Brickwork can be spoon and bonded, depending on which side of the brick looks out. The bricks are laid on the bed. "Bed" masonry, when a brick is placed on a poke or spoons, is extremely fragile and SNiP is prohibited, but in exceptional cases it is used for external finishing of unloaded structures.
Laying is carried out with the dressing of the seams, i.e. the seams of individual bricks should have a gap (offset) in the masonry row (in one or two directions horizontally) and between the rows (vertically). In unbound masonry, any microcrack that cannot be avoided will inevitably creep further, destroying the structure.
There are dozens of methods for bandaging seams only in construction, but in the furnace business they also have to be changed in order to lay out complex smoke passages. However, you can check a finished furnace project or one developed independently, guided by fairly simple principles:
- Laying begins and ends with butt rows.
- Any brick must be supported by at least 2 others.
- Bricks in adjacent rows should overlap at least 1/4 in length or width.
- All vertical joints must be filled with mortar, otherwise the masonry will delaminate into vertical layers.
- The vertical seams of the butt and spoon rows should not overlap.
- Protruding thresholds, areas under beams and liners should be butted.
- The hewn parts of the bricks should not protrude outward. The exception is bricks processed with a grinder with a diamond wheel.
The normal joint width when laying the stove is 3 mm, the minimum is 2 mm. Widening up to 5 mm is permissible; on the underfloor rows and in the arch - up to 13 mm. In the places where chamotte and ceramic masonry are interfaced and around inserts made of any other material (stove appliances, concrete beams, pins for the hob, etc.), the masonry is carried out with a seam with a maximum width of 5 mm. The grates are placed dry in a nest on the hearth of the furnace so that they can be removed for cleaning.

All rows of masonry must be tied vertically. In the vast internal spaces of the rows, incomplete dressing in the row is allowed (see Fig.), Or laying by the backing method, i.e. filling them with bricks without bandaging. The dressing between similar rows (for example, underfloor) is conveniently done by the method of mirror reflection, similar to how fence posts are laid out, on the right in Fig.
Convector and shield masonry

When laying convector partitions, it is necessary to leave bypass windows at the top (passes) and below (overflows). There are no problems with the passes - it is enough not to report 2-3 bricks, and that's it. But the overflow cannot be laid like that, you get a hanging wall. The partitions above the crossflows are laid out, as shown in Fig. Supports from pokes alternate in 3-5 rows. The windows of the spoon row near the butts are closed with halves of bricks.
The walls of the convector of the oven are laid out in its order, and the walls of the heating shield are laid out with spoons with a simple spoon dressing. Her schemes for walls in half a brick, in a brick and one and a half bricks are shown on the trail. rice. In the latter, a dressing is used by the method of mirror reflection.

Laying of vaults
In household stoves, semicircular (in the form of a part of a cylinder) and flat vaults are used, see Fig. below. In the best Russian stoves, very experienced stove-makers sometimes make an oval four-center vault on special order, and in Pompeian stoves, the vault is domed, but both require high skill and experience. In a mechanically weakly loaded furnace semicircular vault, the extreme stones of the wings - the heels - and the central stone - the lock - do not differ from others.

The semicircular arch is laid out in the following order:
- Prepare a drawing of the vault on a scale of 1: 1.
- On it, thrust bearings are hung up - bricks on which the wings of the arch will rest.
- The thrust pads are placed on the mortar and the oven masonry is interrupted until the mortar is completely dry.
- According to the patterns - circles - spread the wings of the arch, observing the dressing between the rows.
- Apply the solution abundantly into the groove of the lock and insert the castle stones into it in turn, hammering in with a wooden sledgehammer or log. A sign of a properly executed masonry will be a uniform squeezing out of the mortar from the seams on the wings.
- They wait until the solution in the roof is completely dry, remove the circle, continue laying the furnace.
The vertical seams of the lock must not line up with the seams on the fenders. To do this, already at the drawing stage, the wings must be made in a mirror image, and not simply by shifting one to the other side. The maximum angle of divergence of bricks in the vault is 17 degrees. With bricks standard size, an inner seam of 2 mm, an outer seam of 13 mm, this angle will be maintained.
The flat vault is laid out on a flat pallet instead of a circle made of shaped bricks, ready-made purchased or made independently. The masonry technology is the same, but keep in mind - a flat vault does not tolerate the slightest asymmetry! The whole thing is slightly shifted to the side - it will go to collapse by itself. Therefore, even experienced craftsmen lay out a flat vault from shaped bricks according to a branded template pallet.
How many bricks do you need?
How many bricks do you need per kiln? After all, the amount of mortar is tied to it and, therefore, the main construction costs.
Once upon a time, the number of bricks was calculated using empirical coefficients for typical projects. The method gave up to 15% of the battle (and for theft), which is unacceptable at current prices.
Now the furnaces are calculated in computer-aided design (CAD) systems. The program immediately gives out how many full lengths, sectional and shaped bricks are needed. But, since a blast furnace or a kiln for the plant is not built at home, and mastering CAD requires a lot of work, time and special knowledge, the home-builder has no choice but to simply count the bricks in the order of the kiln. It will take an hour and a half for an average house stove, but then, counting carefully, you can reduce the battle to 2-3%
Note: a properly executed furnace project must be accompanied by a specification indicating the number of bricks, other materials and complete list devices with an indication of their type and variety.
Tool
The tool for furnace work is generally the same as for other masonry ones (see the figure below): a hammer-pick (butt) with a butt in the form of a wedge for splitting bricks, a trowel (trowel), cutting for convex and concave seams, mortar shovel. But order is also added. In this case, this is not a masonry scheme, spaced along its rows, but a tool for checking its correctness.

The fact is that the masonry of the stove with joints uneven in thickness will soon crack from temperature deformations. On the other hand, clay masonry dries for a long time, not less than a week, and even dried seams can be soaked and an unsuccessful structure can be rebuilt.
The ordering tool (on the right in the figure) is a flat wooden lath 50x50 mm, on the sides of which there are row numbers for different types of bricks, taking into account the thickness of the seam. The oven needs at least 4 orders, and one for each additional corner, internal or external. They use the ordering like this:
- The podtopochny rows are laid out in the formwork.
- In the corners, the orders are fixed, with 2 staples with pointed ends each. The staples are pressed into the seams of the masonry.
- A mooring cord is moored to the orders, along which the laying is carried out. For the Russian stove, the corners are additionally verified with plumb lines.
- As it is laid out, the upper bracket, shaking it, is taken out of the seam and inserted into the next one.
- The holes from the staple in the previous seam are sealed with masonry mortar.
Working principles
In all ovens, without exception, the mechanical connections are relatively weak and the loads are high. Therefore, "brick on brick - drive, grandma, mogorych!" here does not pass unambiguously. The stove, which has not yet been brought to shutdown, will most likely collapse, as described by Makarenko in his "Pedagogical Poem". When laying the stove, the following rules must be observed:
- Bricks are placed only one at a time. For beginners, it is advisable to lay out the next row on a dry one, level it, and then put stones on the solution.
- Each brick is mopped before laying (not to be confused with scraping!): Thoroughly cleaned of crumbs and dust with a hair brush.
- A ceramic brick is dipped in clean water for a second or two and shaken off thoroughly, then it will immediately stick to the solution.
- Fireclay brick is not "bathed" in any case!
- It is difficult to apply a layer of mortar exactly 3 mm with a trowel, so experienced craftsmen apply the mortar by hand. But this also requires a certain skill.
- The brick is put in place in one motion; you cannot push or tap!
- If the stone does not immediately lay down as it should, it is removed, the mortar is cleaned from the brick and its bed and put back.
- The removed solution is thrown away, it is no longer suitable for use!
Examples of constructions
As an example, consider a couple of constructs with which you can begin the transition from theory to practice. In fig. - scheme and order of the simplest brick oven: a hob that does not require a foundation. It will take no more than 130 ordinary red bricks, taking into account the fight at the hands of a novice master. A U- or W-shaped DHW heat exchanger with a storage tank made of a metal water pipe can be built into the descent from the pass of the gas channel to the outlet into the chimney (marked in red in the figure).

Despite its simplicity and small size, the heat transfer of this stove is about 650 kcal / hour, which allows flue gases to pass through heating plate heating 20-25 sq. m. living space. A standard size 1 hob fits loosely on a 3-4 mm steel mustache 2, embedded in the seam between the 11th and 12th rows of masonry. Its thickness is 6 mm.
On the trail. rice. - small ordering with a single-burner hob... It is also made of plain red brick M150. Taking into account the amateur fight, they will need 270-280 pieces.

The cast iron stove rests loosely on its mustache, as in the previous stove. It can be removed and inserted into its nest with a barbecue grill, or skewers with kebabs can be placed on the opening of the plate. With an open (or transparent) firebox door, the stove turns into a fireplace.
It is no longer possible to put this stove on the floor, it is too high and narrow. But on soils with sufficient bearing capacity (loam, sandy loam, forest land, etc. "summer cottage" soils), the foundation under it can be solid slab on a sand-crushed stone pillow, as for a barbecue hearth.
Video: an example of laying a simple brick oven
The most important principle
Finally, we will give the most main principle construction of brick household stoves: the stove and the house are closely interconnected, they can be friends and enmity. It is very simple to reconcile the stove with the house: any of them will show all their advantages only in a solid, well-insulated house.
Stove heating for homes in many regions of our country is the main one. Thick-walled furnaces are often installed, which have increased heat transfer in northern regions; v winter time they are drowned once a day. They are able to provide heat to several rooms. They are also used for cooking.
It is unprofitable to install several heating boilers in a house, because fuel consumption and the intensity of house pollution will increase. For the southern regions, a small stove would be the best option; if necessary, it is heated a couple of times a day. You can order this structure, but you can also build it yourself.
Choosing a design
Before choosing a boiler design (there are many of them), you must first determine its location in the house. The best placement option is the case when the firebox faces the corridor, and the surfaces are oriented towards the rooms. At the same time, the oven mirror should not be covered by furniture, partitions, etc. Its heat transfer with closed walls decreases by about 1/3.
Heat transfer is approximately proportional to the surface area of the entire furnace structure. When choosing a location, the user must find the type of stove that is suitable for the house and install it so that its largest side faces the most spacious room.
For example, if you need to heat two large adjacent rooms, then it is better to build a stove with a narrow rear side led out to the side of the corridor and wide side mirrors.
When building with your own hands, the foundation for the structure must have the same area as the masonry. When arranging it on weak soils under the furnace, special reinforced concrete belts with a thickness of 100-150 mm or reinforced seams with a thickness of 30-50 mm are installed.
The choice of the foundation is made during the laying: you need to draw up a plan in which it is determined what the base of the furnace will be. After arranging the foundation for the house, you can start producing the base for placing the heating furnace.

In this case, one must adhere to such simple rules... It is erected under the stove separately from the main foundation of the house. Broken crushed stone and bricks are placed in the pit in layers 15-20 cm thick. Each layer is tamped and poured with cement mortar. The last layer is also laid out. After that, two layers of bricks are laid, as when making walls with cement mortar.
The waterproofing is equipped with glassine, roofing felt or roofing material, as well as several layers of bricks installed on clay mortar. The top of this stove base should exceed the floor level by 1-2 cm. The boiler is placed on such a base.
Choosing a stove structure
Almost every owner can build any of the stoves. But at the same time, it is necessary to follow the main recommendations for the arrangement. We suggest that you familiarize yourself with them by examining the following information.
Choosing a brick
When building with your own hands, one of the primary tasks is the choice of bricks. The brick should be red and well baked. Well-burnt means that it has been processed at a specific temperature. This can be determined by the following criteria.

Burnt bricks are covered with a dark coating and a vitreous film. Unburned brick is pale pink, when tapped and dropped, a dull sound is emitted. When dropped on a hard surface, it shatters into small pieces. A brick, called normally fired, also splits when dropped, but into large pieces. It emits a metallic sound when tapped. This brick should be pricked easily during processing.
For stove inserts, red brick is "a little weak". The first chimney and the firebox are the components of the heating furnace, where the temperature is highest, therefore they require laying refractory refractory bricks. In this case, the brick is chosen depending on the fuel, which will mainly heat the dwelling. If peat burns in it, you need Borovichi, firewood - white Gzhel, coal - fireclay bricks.
Preparing the solution
The next step is the process of preparing the mortar for the brick heating furnace. High quality mortar guarantees the durability of the masonry. It is made from clay and sifted sand. Clay is placed in the trough and filled with water. After 3 days, it is necessary to strain the solution.

When the solution is ready, it is necessary to prepare the instrument in advance. To carry out construction work, we need:
- Master OK;
- hammer;
- pick;
- level;
- corner;
- sponge brush for grouting surfaces.
The work can be simplified by installing vertical racks around the perimeter of the stove. Having equipped such a simple structure, you will not need to check the masonry horizontally and vertically.
You need to know that the laying of the heating furnace is carried out only in warm weather, the best option would be if the temperature does not fall below 15 ° C.
When laying, regardless of the chosen design of the ordinal masonry, try so that the thickness of the seam is about 3-4 mm, it is possible less, but not more. For the foundation and pipes, seams are suitable and thicker - up to 1 cm. It is important that there are no cavities between the seams.
It is not necessary to coat the firebox and fuel channels with clay. The corners and turns in the channels must be rounded; all channels in the oven must be rounded and smooth. This is necessary in order to achieve minimal friction against the walls of the channels, to avoid impacts during movement against various obstacles as a result of sharp expansion and contraction of the channel openings. Therefore, it is impossible to lay the chipped or chipped part of the brick inside the channels.

Place the grates with a gap of about 0.7–1 cm from the masonry wall. They should have a slope towards the stove door so that the remnants of unburned fuel do not accumulate at the rear wall of the structure. Drying usually takes about 14 days if all views, valves and vents are completely closed. In order to speed up drying, the stove can be heated with small amounts of completely dry wood.
The size of the cross-section of the flue gas duct depends on the amount of gases that will flow through it. If its heat transfer for heating does not exceed 3000 Kcal per 1 hour, its cross section should be 14 * 14 cm or 0.5 * 0.5 bricks. If its level is higher than 3000 Kcal, then it should have dimensions of 14 * 27 cm or 0.5 * 1 brick.
The chimney heads are laid on cement mortar... The surface of the part of the outer pipe located in the attic of the house must be plastered, and then whitewashed. This is done to ensure fire safety. The pipe height is measured from the grate. In one-story buildings, it should not be less than 5 meters. In the places where it passes, they equip a fluff - they make a gradual overlap of bricks.
In the event that the thickness of the walls of the structure is not less than 1.5 bricks, then it can be equipped with a mounted chimney. In this case, the chimney must be installed directly on the stove. Unlike a root stacked chimney, a house does not need a foundation. The root pipe is installed in a house that has several stoves. In this case, the connection of structures that are located at different levels is unacceptable, since the lower one will take all the thrust from the upper one if they work simultaneously.
Regardless of the chosen pipe design, an otter is equipped over the roof of the house, which should hang over the roof. It does not allow water to enter the attic floors. The solution underneath is spread with a thick layer for a firm hold on the pipe. Often it is made in the form of a square, the size of which should exceed the pipe diameter by 20-30 cm. Often, the otter is built by pouring a reinforced concrete structure.

After the otter, the neck of the pipe is settled, and behind it is the expanding head. All these elements of the boiler - otter, head, neck - are plastered. To do this, you must first moisten the pipe with water. After that, a liquid layer of the solution is applied, and a thick solution is also laid in several layers. All layers are thoroughly crushed and the cracks that have appeared are grout, after which they are whitewashed with lime.
- 1 part clay;
- 1 part cement;
- 1 part lime dough;
- 2 parts sand or 1 part clay;
- 2 pieces of sand.
Stove heating of country houses is now taking on a second youth. And this is not surprising, given the special atmosphere and home warmth that a simple brick stove can create, even made with your own hands. Often it is installed even in the presence of more technologically advanced heating systems, trying to get a stylish, original element of the interior. Today we will tell you about the most popular models of brick ovens and share the secrets of the oven craft.
Features and secrets of the popularity of brick ovens

A brick stove is not only a functional heating device, but also a stylish interior element.
Probably, there is no such person who would not like a living hearth with crackling firewood and especially comfortable warmth. But the good old brick oven will be able to please not only with this, but also with the ability to create the most favorable atmosphere for health. It's all about the material from which this amazing unit is built. Being the closest relative of ceramics, brick, when heated, releases water vapor into the air, and when it cools, it absorbs them back. The stove seems to "breathe", due to which the optimum humidity is established in the room. It is also important that the heat becomes already at a temperature of 18–19 ° С, while when using other types of heating, the level of comfort starts from 20–21 ° С. In addition, being made from clay, bricks are environmentally friendly. pure material, which means that during the operation of the heating device, you do not have to worry about the release of compounds harmful to health.
Despite the fact that each type of brick heat generators has its own functional and design features, they are all similar to each other in terms of the arrangement of the combustion and heat exchange parts. So, any stationary oven of this type has:
- the foundation, which serves as the base of the heater and evenly distributes its weight over the entire area;
- a firebox that simultaneously acts as a firebox and a combustion chamber;
- grate, allowing to realize the bottom air supply to the combustion zone. Due to this, the performance of the heating unit increases and it becomes possible to adjust the intensity of fuel combustion;
- an ash chamber that makes cleaning the oven easier;
- chimney, which creates the necessary draft and releases exhaust gases into the atmosphere.

Channel type brick kiln design
In addition to their main purpose, wood-fired heat generators are also used for cooking, as well as arranging an additional resting place. The structure itself can be installed both indoors and in the yard, for example, in a recreation area with a barbecue, barbecue or cauldron. If we talk about fireplace stoves, then their heat-generating function is completely relegated to the background, giving way to a visual and image component.
The advantages of brick ovens include:
- rapid heating of the surface;
- the possibility of using several types of fuel;
- low operating costs;
- the risk of burns when touching the walls of the heater is excluded;
- especially soft, comfortable warmth;
- indoor air is not dehydrated;
- ample opportunities in terms of interior decoration.
The units under consideration also have disadvantages. The most significant of these is the potential danger of poisoning. carbon monoxide, which appears when used incorrectly. Another one is large size and weight. That, perhaps, is all. As you can see, equipment of this type has solid advantages and almost complete absence of negative aspects, which, however, determines its high popularity.
Classification of heating devices. Optimal design criteria
All existing models of brick ovens can be divided into several types:
- heating devices;
- cooking units;
- combined ovens;
Having decided on the required functionality, you need to choose the option that you can fold yourself. In order not to consider the whole variety of stationary units, we will focus on the most popular options:
- Dutch ovens. Thanks to the duct design, they have good heat dissipation and take up little space. Such heat generators operate in the mode of slow combustion or smoldering, which significantly reduces the requirements for the quality of building materials. And although the efficiency of Dutch women rarely exceeds 40%, they have found many fans, partly due to the low cost and ease of construction.

The classic "Dutch" is an extremely compact structure
- Swedish wood-burning stoves have a chamber-channel layout, which allows increasing the efficiency up to 50%. Just like the Dutch women, the Swedes take up little space, but require a more careful approach in the choice of materials and are a little more difficult to manufacture. Nevertheless, the labor and financial costs are fully justified by the increased productivity and expanded functionality of this type of heat generators.

The Swedish stove will delight its owner with high efficiency and functionality
- have a unique layout, due to which they carry an indescribable flavor and originality. Their efficiency exceeds 60%, but not everyone will like the features of their operation. In addition, not every beginner will be able to fold the stove. Most likely, you will have to hire a professional stove-maker, and this will entail additional costs, making the already not the cheapest structure more expensive.

The Russian stove is capable of completely transforming the interior, but it will require a lot of space for installation.
- Kuznetsov bell-type furnaces, famous for their thermal efficiency, have an efficiency of up to 90%. The secret of their success lies in a special device that contributes to the most complete combustion of fuel and maximum heat transfer. A feature of "blacksmiths" is the extremely clean "exhaust" and the absence of soot, thereby minimizing the time spent on caring for the heating device. As for the disadvantages, they include the complexity of the design and high requirements for materials. However, the last drawback is compensated by the fact that the brick required for the construction of the "hood" is much less than for any other furnace.

Unlike the canonical bell-type ovens, modified units can have a hob and an oven.
You can find step-by-step instructions for laying a Kuznetsov stove with orders in our next article:.
Having considered all possible options, we have come to the most crucial moment - the choice of a heating device that can meet all the requirements for it. The main criteria in this case are functionality and installation location. And if the first is not difficult, since it completely depends on the preferences and requirements of the owner, then the second point requires the most close attention. We will tell you more about how to choose a stove in accordance with the type of structure.
- House intended for permanent residence. If stove heating will be used as the main one, then there is no better option than "Swedish" or "cap". In addition to the fact that these units have excellent performance and do not take up much space, they are also easily supplemented with other elements - a hob, a water circuit, an oven, drying niches or a stove bench. If functionality is relegated to the background, and the main requirement is compactness, then a good option is "Dutch", which heats several adjacent rooms.
- Country house "weekend" or cottage. Since these buildings involve irregular living, it will be enough to install a small heating device equipped with a hob. The ideal option is fireplace stoves with an open hearth, since they can be used to heat the room in the shortest possible time. Such an advantage cannot be overestimated in winter, when the air temperature in the room drops to subzero temperatures.
- A stove in a country house with hot water or another type of heating. In this case, the heater serves to create a special atmosphere. If the area of the room allows, then you can install a full-fledged Russian stove or unit with a firebox, fireplace and stove bench.
- Heating device for a bath. For this case, a simple stove-heater is suitable, into which a container is built to receive hot water. If the bathhouse is attached to the house, then instead of a tank, you can install a full-fledged boiler designed for a liquid heating system.
- Outdoor ovens. Most often, such heating devices are installed on open verandas, v summer kitchens or gazebos and are used for cooking. For this purpose, the structure is additionally equipped with a hob, barbecue, barbecue, cauldron, etc.

The barbecue oven will decorate the site and fill the resting place with functionality
Having decided on the type and filling of the furnace, do not rush to start construction. In order for the heating device to meet all expectations, it is necessary to thoroughly understand the principles of its operation.
Calculation of basic parameters
Before choosing a working project for a heater, it is necessary to make a preliminary calculation according to the parameters of a particular room. The most accurate method is sizing based on the heat dissipation of the furnace. In order not to go into complicated calculations, a simplified calculation scheme proposed by I.V.Kuznetsov is used for well-insulated houses. This method uses the average heat output taken from one square meter of the unit surface (TMEP). For a conventional firebox, take a value of 0.5 kW / sq. m, and if necessary, intensive heating, which occurs during a strong cold snap - up to 0.76 kW / sq. m.
When determining the heat output of the furnace, only those surfaces that are involved in heat exchange processes are taken into account. For example, in the "Dutch" do not exclude from the calculations the sections of the walls located at the floor, below horizontal sections gas duct.
In principle, these values are already enough to select a suitable project from those that can be found in the public domain. If the available options are not suitable for any reason, then you will need to calculate the parameters of the main elements of the furnace and design your own design.
Drawings and diagrams of brick ovens
Sauna stove  Fireplace stove Classic "Dutch" Bell-type stove
Firebox
The dimensions of the furnace are determined based on the maximum volume of the fuel fill. In this case, the amount of combustible materials is calculated using their calorific value and specific gravity, focusing on the required power. The volume of the firebox should be 2–3 times larger than the obtained value, which will allow the stove to be reheated at extremely low temperatures.
When calculating the size of the combustion chamber, it is necessary to take into account that the maximum filling should not exceed 2/3 of the volume of the combustion chamber. In addition, the dimensions of the furnace and all its components must be adjusted to the size of the bricks used for laying the furnace. In your calculations, you can use special tables, developed taking into account the need to heat rooms of various sizes.

Calculation table for the main elements of a brick oven
Ash pan
The height of the ash pan depends on the type of fuel used. For low ash combustible materials such as coal or peat briquettes, this value is taken equal to 1/3 of the height of the firebox. If the stove is fired with wood or pellets, then the height of the ash chamber must be reduced to 1/5.
Chimney

When calculating the chimney, it should be borne in mind that the place of its installation must comply with SNiP
Unlike gas heating equipment, wood stoves do not require a lot of draft, so a rectangle would be the best shape of the flue duct. When calculating the chimney, it is taken into account that the section of the blower should not exceed the area of its gas duct, while all values are adjusted to the dimensions of a standard brick. Since accurate design requires a lot of data and parameters, it is best to use one of the special programs. Nevertheless, for the most common cases (absence of kinks in the smoke channel, vertical passage, rectangular section, height from 4 to 12 m), you can use the average values for furnaces up to 14 kW:
- Less than 3.5 kW - 140x140 mm.
- 5 - 5.2 kW - 140x200 mm.
- From 5.2 to 7.2 kW - 140x270 mm.
- From 7.2 to 10.5 kW - 200x200 kW.
- 5 - 14 kW - 200x270 mm.
The recommended sizes are the minimum. And yet there is no need to excessively increase the cross-section of the smoke channel, since cold air will descend into the stove through a too wide chimney. Backflow, or "whistle" in the language of professional stove-makers, threatens not only with a decrease in productivity, but also with more serious problems.
To calculate the amount of material required, it is best to use special tables. Below is one of them.

Calculating the number of bricks
You should not worry if the chimney, calculated "offhand", occasionally starts to smoke. If necessary, it can be extended with a piece of asbestos-cement pipe 0.5–1 m long, or you can put several more rows of bricks. Often, such events are carried out when the aerodynamics of the terrain have changed. For example, after growing trees or erecting higher buildings in the neighborhood.
Preparatory activities
Preparation for construction includes several stages:
- selection of tools and necessary materials;
- determination of the optimal place for mounting the heater;
- arrangement of the foundation and preparation of the construction site;
- production of oven bricks (if necessary) and preparation of masonry mortar.
Required materials and tools

Stove-maker's tools
For laying a brick oven you will need:
- Mason's hammer (with striker and pickaxe).
- Swab for mopping laid rows.
- Corner, plumb line and level to control the geometric parameters of the masonry.
- Pliers.
- Rubber hammer (mallet).
- Trowel (trowel).
- Rule and rammer for arranging the foundation.
- Lead scribe.
- A spatula or mixer for mixing the solution.
- Joining.
- Buckets and other containers for bulk solids and liquids.
- Sieve.
- Grinder (angle grinder) with a stone wheel.
Despite the fact that brick ovens differ significantly in design and size, the list of materials that will be needed for construction remains practically unchanged. The standard list of everything you need looks like this:
- Brick - red, silicate, refractory and facing (depending on the design of the solid fuel heat generator).
- Building mixture for masonry ovens. If it is necessary to reduce the cost of construction, it can be replaced with clay and sand.
- Furnace casting set - blower, furnace and cleaning doors, latches, stove, oven, etc.
- Grate.
- Wire for fastening cast iron.
- Asbestos or basalt cord.
- Steel strips and corners for arranging floors and niches.
- Heat-resistant boards for protective thermal insulation.

Fireclay brick ШБ №22
Any brick oven is a unit with an impressive weight, which requires a capital foundation. Therefore, it is necessary to prepare materials for the construction of the foundation:
- Sand.
- Crushed stone.
- Reinforcing mesh.
- Planks and nails for formwork construction.
- Cement.
- Waterproofing.
In addition, if the project provides for external wall decoration, then prepare the tools and materials that will be needed for these works.
Features of choosing a place for installing a heater
Most often, a brick oven is installed against one of the walls or in the corner of the room - this will make it possible to use the available area in the most rational way. If the unit is planned to be used to heat several rooms, then it is located in the center of the house, orienting the firebox and hob to the kitchen, and with other edges to the bedroom, hall or living room. The diagram clearly shows the benefits of choosing the right location.

The correct choice of place is able to solve the problem of heating all rooms of a country house
When installing the heater, you should not be guided by convenience alone. It is important not to forget about the minimum permissible distances to other surfaces, as well as the optimal clearances and distances, which are determined by the current SNiP:
- from brick chimney before wooden elements floor or roof must have at least 130 mm of free space. If you are using uninsulated ceramic or steel pipe, then the gap is increased to 250 mm;
- leave a gap of at least 100 mm between the wooden floor and the outer walls of the oven;
- the distance from the heated side surface of the heat generator to the combustible wall of the building depends on whether thermal insulation is to be used. With a protective screen, the minimum gap is 130 mm, and without it - at least 380 mm;
- a gap of at least 0.35 m should be left from the ceiling to the stove ceiling. When installing compact units with a low heat capacity, this distance can be increased to 0.7–1 m.
Foundation construction
It is best if the base of the brick oven is formed simultaneously with the common building foundation. In this case, both structures are performed separately, otherwise the subsidence of the walls of the building will inevitably lead to a violation of the geometry, or even damage to the heater. If the stove is erected in a finished house, then the first thing that is paid attention to is the distance of the chimney from the elements of the roof covering, which should be at least 15 cm. And only after that they begin to mark and build the foundation.

Considering the weight of the stove, a solid foundation must be used.
If the house has wooden floors, then they are cut out at the place of installation of the stove, stepping back from the outer contour of 10-15 cm. After that, a pit is dug, the depth of which depends on the characteristics of the soil and the depth of its freezing. For the middle strip, it is enough to dig a hole 0.7–0.8 m deep. After that, its bottom is covered with a 15-centimeter layer of sand and compacted, periodically spilling water. Then a layer of crushed stone 10-15 cm thick is poured, which is also carefully tamped. After that, wooden pegs are hammered in the corners of the structure, to which the sheathing boards are attached. To prevent the leakage of cement laitance through the cracks of the mold, its walls are covered with plastic wrap. At a distance of 5–10 cm from the floor, a reinforcing mesh is installed, for which both metal rods hammered into the bottom of the pit and fragments of bricks are used.

The foundation for a brick kiln is made of reinforced concrete
Mixing cement M-400, sand and crushed stone in a ratio of 1: 3: 4, concrete is prepared. Just enough water is added to obtain a solution of medium fluidity, otherwise the strength of the structure will be reduced. The mixture is poured into the formwork and compacted in any way, after which the surface of the foundation is leveled using a rule. Note that the upper level of the base of the furnace should be 15–20 cm below the floor. After several hours, necessary for the preliminary setting of the mortar, the structure is covered with a film and left for several weeks until it dries completely.
Before laying bricks, the foundation is necessarily waterproofed with roofing material or a special film. If the width of the material is not enough, then its strips are laid with an overlap of at least 10 cm.
Preparation of the solution
Now, when you can find ready-made building mixtures for laying fireplaces and stoves in the retail network, there are practically no problems with preparing a working solution. All that is required for this is to mix the components with water using a wooden spatula or a construction mixer. Nevertheless, you can make a masonry mortar yourself - this will allow you to save additional money. In addition, the owner will have complete confidence in the environmental friendliness of the structure.
It is possible to prepare a building mixture with your own hands from sand and clay, the ratio of which depends on the fat content of the last component. To choose the optimal composition, conduct a small experiment, mixing bulk materials in different proportions. After that, balls 5–6 cm in diameter are rolled from the solution, which, after preliminary drying, are squeezed between two planks. The best composition one is considered in which the sample begins to crack no earlier than it is deformed by one third.

There are several ways to check the quality of clay.
Another way to determine the correct ratio of components is to lower a spatula into the prepared mixture. Adhesion of a solution of less than 1 mm indicates its low plasticity - it is required to add clay. If the layer thickness is more than 2 mm, then this indicates the fat content of the mixture, which can be corrected by adding sand. The norm is from 1 to 2 mm.
Before use, clay must be soaked in water for a day. If it is required to increase its fat content, then the method of stirring is used, which consists in settling the clay solution and removing its middle part.
How to properly fold a brick oven. Workflow instructions
Determining the type of heating device, making preliminary calculations and preparing everything for the start of construction is only half the battle. In order to properly fold the stove, it is necessary to find layouts of bricks in each row, the so-called orders. We have prepared several of the most popular options that you can use as work projects. If for some reason they do not suit you, then you can search for ready-made solutions on the Web or order an individual layout on one of the special sites.
Furnace ordering diagrams in the photo
Order of the Swedish oven Order of the "Dutch" Order of the Russian oven  Heating and cooking oven orders
  Sauna stove orders
  Kuznetsov bell furnace orders
Today we propose to fold a compact, but very efficient and functional brick oven. Despite the apparent complexity, even a beginner can build it if he uses our instructions and follows all the recommendations. We, in turn, will share the secrets of experienced stove-makers and give the necessary recommendations for the construction process.

Ordering ovens with hob and drying niches
In the presented ordering diagram, you can see a heating unit equipped with a convenient hob and a drying niche, which gives a certain resemblance to the classic Swedish stove. We recommend laying the structure dry first, without using mortar. This will allow you to study in detail the features of each row and prepare the necessary elements of the structure. Further work is done in this order:
- To the floor level, bricks are laid out on a cement-sand mortar. At this stage, you should be especially careful about geometric accuracy, controlling the masonry in terms of level and plumb line. Careful performance of the work determines how even and stable the oven will be.
- The first row of the furnace body begins to form the blast chamber.

Installing the blower door
- Before starting the laying of the second row, install the blower door. To do this, a steel wire is threaded into specially cast ears on its body, which is placed in the masonry seams. To prevent the door from moving and tipping over, it is temporarily propped up with bricks.
- In the fourth row, two channels are brought out for cleaning the furnace from soot. A separate door is installed on each of them.

The grate is not fixed in any other way, except through very precise placement
- In the fifth row, a grate is installed. The indentations made in the bricks of the lower row will help to correctly lay the iron casting. Hereinafter, the combustion chamber is laid out exclusively with refractory bricks.

In the furnace, the grate is laid on refractory bricks
- Before laying the sixth row, a furnace door is installed, which is temporarily fixed with a pile of bricks laid on the grate. If necessary, a part with outside propped up with a metal corner or wooden lath.

Installation of the furnace door
- Starting from the seventh row, they begin to equip the gas ducts of the furnace. The vertical walls of the furnace are laid with fireclay bricks installed on the edge.
To ensure the durability of the structure, the external masonry is separated from the combustion chamber with a layer of basalt cardboard.

Laying of vertical channels
- Before starting the laying of the ninth row, a quarter is selected in the bricks that will overlap the furnace door. Thanks to this, the design will look smooth and aesthetically pleasing. Here, the cast-iron part is finally fixed, laying the wire into the seam of the ninth row.

For an accurate fit of the brick to the door, its edges are cut in place
- In the 11th row, a hob is placed on the upper opening of the fuel chamber. The same basalt cardboard or asbestos cord is used as a seal. The front of the cooking niche is framed with a steel corner.

The firebox is separated from outer walls basalt cardboard or other refractory material
- From the 12th to the 16th row, a chamber is built over a cast-iron plate.
- Before overlapping the cooking niche, steel strips are laid on its side walls, which will serve as a support for the bricks of the 17th row. The front of this row is decorated with a metal corner.
- The 18th and 19th row is laid out almost completely, only three vertical heat exchangers are being built up.
- In the 20th row, they equip a horizontal channel and a door for cleaning soot and carbon deposits, and also begin to form a drying chamber.
- The door is covered with masonry of the 22nd row.
- On the 23rd row, the horizontal gas duct is overlapped. Only the holes of the vertical channels are left open.
- Before laying the 24th row above drying chamber lay steel strips.
- From the 25th to the 28th row, another cleaning door is installed and the furnace niche is closed.
- In the 30th row, valves are installed on the two remaining vertical gas ducts. To do this, first mount their frames, and then insert the partitions themselves.

Installation of stove valves
- From the 31st to the 35th row, lay out the transition section of the chimney.
- From the 36th to the 38th row, a fluff is built.

In the place where chimney passes through the ceiling, it is isolated from overlapping with non-combustible materials. For this, both mineral insulation and expanded clay are used. He is poured into a box, which is knocked down around the chimney.

Such a beauty can be folded with your own hands.
Briefly about the installation of the oven and heat exchange register
Previously, we considered how the oven doors are mounted and secured. It is equally important to correctly install other functional elements.

Features of mounting the oven
If the design of the oven provides for the installation of an oven, then it is installed so that the flow of heated gases washes over as large a surface area as possible. Most often, these conditions correspond to the section of transition from the furnace to the heat exchanger. Preliminarily, metal corners are laid on the side walls of the horizontal flue, and the places of contact of the cabinet with the outer wall of the furnace are sealed with basalt cardboard or asbestos cord.
A water heating boiler or liquid heat exchanger is installed in the hottest zone of the furnace. Depending on the type of heat generator, this place can be located at the rear of the combustion chamber, at the beginning of the flue or under the hood of non-rotating units. If you plan to use the hob and the water heater at the same time, then its upper part is made in the form of transversely arranged metal pipes, which are welded into the side containers of furnace steel. An expansion gap of 5–15 mm is left between the water heating boiler and the walls of the furnace. Of course, it is necessary to provide for how the surface of the heat exchanger will be cleaned of soot. For channel and chamber furnaces, this can be done through the opening of the firebox, while in other cases it may be necessary to install an additional cleaning door.
Features of operation and cleaning of the oven
It is impossible to immediately test the oven at maximum modes, you must wait for the drying of its walls. That is why it is recommended to build a heating device in the warm season. During this period, it is enough to open all the openings of the brick unit and wait one to two weeks. If there is a need to dry the stove in cold weather, then its doors are closed, and a fan heater or a powerful incandescent lamp is turned on in the combustion chamber.
After the expiration of the specified period, the stove is heated for 5-7 days 2-3 times a day, each time using a small amount of firewood. The complete drying of the walls is evidenced by the absence of condensation on metal surfaces, which appears a few minutes after kindling. And even after that, the stove is not heated "to the fullest." Operation at maximum power is only checked after a few days of regular use.
If the unit is heated exclusively with wood, then every time it is not necessary to clean it from ash. In the case of using peat briquettes and coal, the furnace is freed from ash and ash at the beginning of each new cycle. As for cleaning the internal channels and the chimney from soot, this procedure is carried out at least once a season. For this purpose, various scrapers and brushes are used to remove carbon deposits from vertical surfaces. After that, the soot is scooped out of the gas ducts with a metal scoop and a poker.

Choosing the right fuel will help reduce soot formation. The best firewood is hardwood - oak, hornbeam, beech, etc. Birch firewood and aspen practically do not leave carbon deposits. By the way, experienced stove-makers recommend that every tenth firebox be carried out with aspen logs, claiming that this helps to remove soot from the channels and chimney.
It is not recommended to clean the stove by burning out using flammable liquids, black powder (yes, you can find such "useful" tips), naphthalene, etc. A good effect from this can hardly be achieved, but nearby buildings and own health can cause significant damage.
It is often difficult to light up the stove after prolonged cooling down, for example, in a cottage or in the country. This is due to the fact that cold air is lowered into the channels of the furnace, forming hard-to-remove gas plugs. A tried and tested method can help you resume cravings. To do this, take dry paper or rags moistened with kerosene or barbecue liquid, put it closer to the vertical flue and set it on fire. Intense combustion will instantly push out stagnant air masses and restore the heater to work.
You will also find useful material with instructions for cleaning and minor repairs of brick ovens:.
Video: Compact brick oven of the original design
A brick oven will be able to create in a room in a special way warm atmosphere, will become a highlight of the interior and a gathering place for friends and acquaintances. It is not only for experienced craftsmen to fold the unit, but also for green beginners. Of course, you have to be scrupulous and attentive as much as possible. And then the heating device will pay off not only with cozy warmth and comfort, but also safe work for many years of operation.
Thanks to my versatile hobbies, I write on various topics, but my favorites are engineering, technology and construction. Perhaps because I know a lot of nuances in these areas, not only theoretically, as a result of studying at a technical university and graduate school, but also from the practical side, since I try to do everything with my own hands.
This article contains an understandable, very detailed photographic instruction for laying a brick oven with your own hands, tips on how not to make a mistake when choosing the necessary materials and how to correctly place the stove in a private house for optimal heating of a larger area.
Options for installing the stove in the house
The placement of the stove depends entirely on what the owners expect from it. If it is installed in a small house and will be used as a fireplace for friendly gatherings, you can use the first scheme. Such a stove is a good option for grilling barbecue or kebabs.
Brick oven placement options
The second scheme is for a solid square house. In this case, the front side of the fireplace stove goes into the living room, the stove walls heat both bedrooms, and the heat in the rest of the rooms is maintained by means of heat exchange.
The third scheme with a stove for heating and cooking is a budget housing option for a bachelor or a small family. Pros - a warm bed and the possibility of placing a dryer in the hallway.
Important: it is worth taking care of external insulation at home, because it greatly increases the efficiency of stove heating.
Selection of bricks, sand, mortar
In order for the oven to serve for a long time, you need to correctly select all the materials. There are three types of bricks:
- Ceramic - can be used to build a furnace.
- Silicate - generally not suitable in this case, even double M150.
- Refractory - ideal, but they are often used only for the firebox and fireplaces, varieties: fireclay, refractory bricks, etc.

Advice: when choosing a brick for a stove, you need to completely abandon its hollow types.
The mortar is made from clay. Red clay is suitable if the stove is made of red brick; when using fireclay, special fireclay clay is required. Some stove-makers still, in the old-fashioned way, independently make a solution from river sand with a grain of 1-1.5 mm, clay (in a ratio of 2.5: 1) and water. At the same time, it is advisable to use angular quarry sand without foreign inclusions and the so-called oily clay. However, it is easier and more reliable to buy a ready-made oven mixture in a store, preparing it according to the instructions.
From fittings you need to purchase grates, blowers and furnace doors, soot cleaners, flaps or dampers.
Preparation, tool list
Before starting work, you need to determine and mark the place that the new stove will take.
The chimney pipe should be no closer than 15 cm from the roof rafters.
If the laying is done by you for the first time, professional stove-makers advise you to practice in advance by making a model of the future stove from the prepared brick. Naturally, no solution. This minimizes possible risks in real laying, allowing you to learn from your mistakes, which can still be corrected in the layout.
The stove foundation requires preliminary waterproofing, in terms of area it should exceed the area of the stove.
When laying a new row, you need to control the absolute verticality of the walls.

To build a brick oven, you need the following tools:
- plumb line;
- trowel;
- roulette;
- putty knife;
- Bulgarian;
- knitting wire;
- building level;
- metal strips, corners;
- containers for cement and clay mortar.
Step-by-step instructions with a photo on laying the stove
Different stove-makers have their own masonry technologies and their own secrets that have come from years of experience. Here is information about a fairly simple way to create a fireplace stove for heating two-story house, the process will not seem extremely difficult even for novice stove-makers.
Foundation laying
A basic row of brickwork will serve as the foundation. It is made with any brick, some stove-makers even cover this level with rubble.

When laying the base row, cement mortar is used.

The foundation is completely filled with mortar, the layer is leveled.

Erection of the furnace body
The first oven row is marked. The horizontal from which they are repelled when marking is the wall of the room.

Where the fireplace is planned to be placed, a grate is placed. From this row, bricks are already laid on the oven mortar.

An important stage of work is the scrupulous leveling of each new row.

Laying the second row. The stove wall, which is closest to the wall of the room, is reinforced with additional bricks to increase fire safety.
The place where it will be located in the 2nd row remains empty, the rest of the furnace is laid completely. A door is being mounted through which the owners will clean out the ash.

The door is installed on the mortar, leveled off. For a more reliable fixation, it is fixed with wire, which must be laid between the bricks.


The grating is not laid on a simple brick, but on a refractory brick. Holes are cut in the fireclay bricks so that it lies on the same level as the bricks.

The size of the brick can be easily adjusted - the excess is measured out and neatly cut off.

The large door is mounted next to the installed grille.

The large oven door is similarly secured with wire fasteners.

The first furnace row is placed exactly above the fireplace; it is reinforced with metal corners and a strip or thick sheet metal. So that the masonry can lie on them, it is cut through with a grinder, then the slots are manually adjusted to the desired size.

The next brick row is laid.

A fireplace grate is laid on the fire brick along with the brick row.

The door is fixed, the brick is strictly adjusted to fit it.

The firebox of the new stove with a fireplace is ready.

Fire-resistant fireclay bricks are placed over the furnace firebox.

The stove body is built.
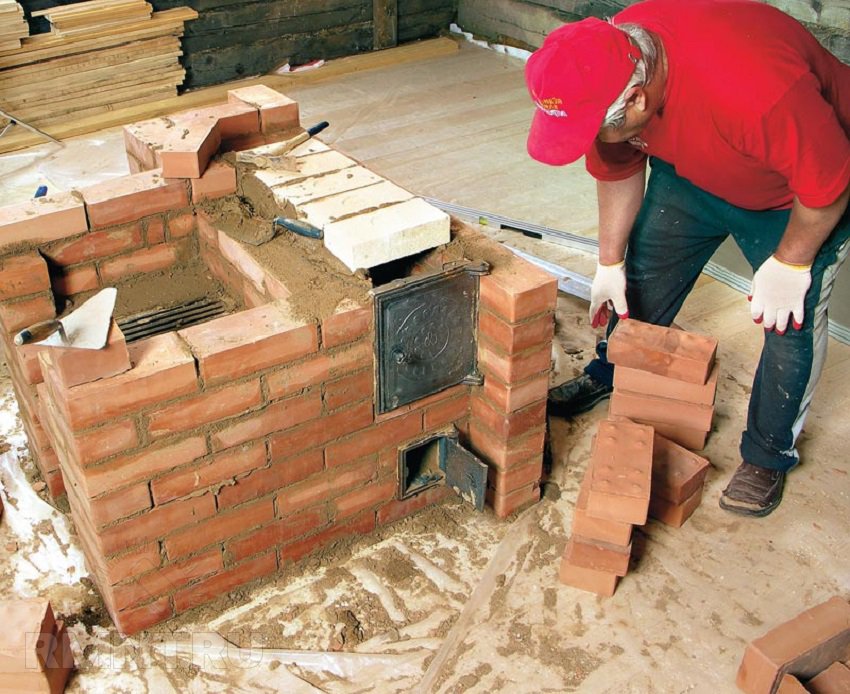
Chimney creation
The place left for the chimney is divided into wells. The design requires reinforcement with metal plates.

Brick chimney wells are being laid.

Soot cleaners are installed above the roof of the firebox.

The wells are again divided, the first rows of the walls should be reinforced with metal strips.

After strengthening, the ceiling of the furnace body is erected. The chimney space remains empty.

The cornice of the body is laid out, then the chimneys are laid.

The final stage of work on the ground floor. The stove is located at the bottom left, the smoke inside the chimneys moves in a spiral and comes out at the top left. The final division of the wells is covered with a tin sheet. In order to compensate for the pressure inside the fireplace, 2 brick rows are laid on the sheet metal.

Two chimneys stretch to the second floor of the house - from the fireplace and the stove itself, they are separated from each other. A separate damper is required for each chimney.

Floor level of the second floor. Waterproofing is installed here, the chimney is reinforced with metal corners again. To save money and not build a heating stove on the second floor, the chimney of the stove under construction is again divided. The smoke will go along it like a snake, having time to warm up the room. In order for the chimney to warm up much faster, it is placed in the area of the second floor with a thickness of 1/4 or 1/2 of a brick.

A hole for the chimney is carefully cut out in the roof.

Before removing the chimney to the roof, it is reinforced with metal corners.

If the chimney is located in the immediate vicinity of the roof ridge, it must be laid out above the ridge by at least 0.5 meters. If further, then the height of the chimney is allowed, equal to the height of the ridge, but not lower. In this case, the wind increases the draft of the stove, raising the smoke upward.

Even a small stove in the house is coziness and comfort. Larger stoves require increased dexterity and additional materials, but the principle of their construction is similar to the method described above.