What is the name of the mold for the chandelier. How to hang a chandelier with a plank on a hook in the ceiling
A man from the monkey did lazy. Tired of climbing the palm tree behind the banana - the monkey pounded a stick. Tired by the hostess forever paint and smear the cracks on the ceiling - ordered. No hassle - beautiful, smoothly, hygienic. There was only one small, but the urgent question: how to hang on the stretch ceiling? On the one hand, it seems like you should not worry yourself, it is easier to invite specially trained people for such work. But on the other, how to find out whether they did everything correctly and would not happen, God forbid, what trouble after such an installation? After reading this material, you can not only control the hired workers, but also independently install the lighting device.

Requirements for chandelier for stretch ceiling:
- the light stream must be directed down or aside, but not up;
- it is desirable that the plaffones have a closed form;
- the distance from the ceiling to the ceiling must be sufficient to prevent the material heating;
- for standard height Rooms Stretch design already lowers the ceiling, you should not install a cumbersome chandelier;
- the lighting device must have a long suspension, sufficient to fix it to the base for the stretched web.
Ceiling chandeliers for stretch ceilings can be equipped with different. Choosing one or another type, consider the features of the contract with PVC:
| Type of lamp | Description |
| Incandescent lamp | The cheap of these devices is hidden by high electricity consumption and high-temperature impact on the surrounding items. Such lamps are less suitable for synthetic ceilings. The minimum distance from the lamp to the PVC surface is 40 cm, and then provided that the device is not more powerful 60 W. The release of reflectors between the film and the lamp can be the output, but is there any sense to burn such a design if there are other options? |
| Excellent option for chandelier under the stretch ceiling. These devices differ in high coefficient useful action and long time Services. Such devices are very poorly sink and pose dangers for PVC films. Lighting can wear a warm or cold shade, depending on your preferences. | |
| Halogen | Halogen lamps are weakly heated, but when long work And this heat is enough to deform the stretched material. A 40 W lamp should not be closer to the ceiling than 40 cm. |
Designer Board! On the stretty ceiling The chandelier of contrasting color is best. On black - white or silver, on light, respectively, dark metal.

Basic requirements for fastening chandelier
The mounting chandelier to the stretch ceiling should be not only durable, but also aesthetic. For stretch ceilings fit suspended devicesfixed on the hook or mounting bar. Overhead chandeliers are not suitable, which are attached tightly to the ceiling on the overhead panel.
Important! The height of the chandelier must be sufficient, taking into account the distance between the base and stretched material.
As an option, you can consider the issue of a hook for fastening below the PVC film level, but then this moment should be provided in advance, even before the tensioning procedure.

A little about the correct location of the chandelier for stretch ceilings
The height of the chandelier depends on several factors:
- ceiling heights;
- ceiling coating;
- destination of the room.
How to hang a chandelier on the stretch ceiling in residential rooms? From the floor to the bottom of the instrument should be at least two meters. So you exclude a danger to accidentally hurt it when moving around the room. But it is better if this distance is more, especially when the ceilings in the room are low.

Compact in height devices are suitable and holls. This design will not create interference for opening doors. In addition, keep in mind that in the corridor, people often raise their hands to remove the headdress or adjust the hairstyle, close the umbrella. So, the higher the lamp is located, the better.
Compact placement is relevant and. There is a risk not just to touch the design with your hands, but also accidentally get a jet of water out of the shower.

If the ceilings indoors are above 3 meters, you are lucky: you can choose any form and place it anywhere, at least over. For example, it is logical to hang a lamp not in the center of the room, but above dining group. At the same time working area Organized.

Tip! Classic ceiling lamps Have a suspension in the form of a chain. You can adjust its length, removing and adding links.
The most difficult question is how to mount the chandelier to the stretch ceiling at the location and "second light". The feature of the location requires a powerful luminous flux capable of spreading to two, or even for three floors. In this case, look at the designs of several tiers or a lamps dropping cascade.

For your information! The rules of the device of electrical installations are recommended to choose for lighting the hooks capable of withstanding the five-time chandelier weight at least 10 minutes. After elimination of excessive load on the mounting should not be damaged.
Thus, the choice of chandeliers should respond not only to the requirements of the design, but also the safety and convenience rules.
Tools for work
The main tool in this matter is your self-confidence. Independent installation of chandeliers on the stretch ceiling - it's not so much complicated how much troublesome and requiring maximum accuracy. And there are tools for work in almost every home:
Drill
Anker
Tree bar
Selfless
Screwdriver
Indicator screwdriver
Insulating tape
Pliers
Terminals
Foundation for fasteners chandeliers
Between concrete or wooden ceiling and tension PVC. The material is the distance. It can be different, depending on the features of the room. If the originally ceilings have a defect, but using stretch design It is easy to fix it. It turns out that to secure the chandelier, the empty space is needed to fill something, create a rigid base.

If the distance is large, a fat bar cannot do, you have to make a frame. The place of perforation of the film is needed to increase the gasket, it will additionally protect PVC on the temperature effect of the lamp. Such gaskets are made in the form of rings, internal and external. They hide behind the decorative framework of wiring and are completely not noticeable.

Installation options chandeliers on the stretch ceiling with their own hands
If you have decided to take on the installation of the lamp, take care in advance to prepare the basis. After the ceiling is stretched, the ability to mount a stand, you will not have wiring. Usually the wizard asks in advance where you plan to hang a chandelier. You can also prepare the basis and bring the wire in advance in the right place.
Mounting the chandelier can be in several ways. Briefly consider the main of them.
With hook
The hook is the most familiar and common way to hang the chandelier. The only thing you have to do is adjust the length of the hook of the height stretch canvas. If the hook was installed earlier, most likely, it will have to be replaced, since the stretch ceiling "steals" at least 3 ÷ 5 centimeters.

For fastening in the concrete ceiling, a hole is drilled, a dowel is inserted and the hook with a thread on the leg is screwed into it. If the distance between the web and the ceiling is too large, the bar is attached to the ceiling and the hook is screwed into this base.
Tip! After installing the stretch ceiling, the entire wiring will be hidden from your eyes. For the sake of your own calm, place it in the protective cover.
When attaching a chandelier on a hook, make sure that the decorative cup fits tightly to the ceiling canvase

Using a mounting plank
Fastening using a plank is found on modern models of lamps. The plane itself is a metal plate with holes under the fasteners. This bar is fixed on the prepared base directly through the ceiling web. You will need to cut only a small opening for wiring.

Important! By screwing the bar to the bar, be careful and do not damage the wiring cord.
To facilitate the work and not damage the lighting device, it is disassembled before installation. It is necessary to remove the plaffones, lamps and mounted decorative elements.
With the help of a cross-shaped plank
Fastening on cross-shaped bar Not much different from hanging on the usual bar. Conducting fasteners are usually used for heavy chandeliers. The only nuance is in the preparation of the basis. For obvious reasons, the bar in this case does not fit.

In this platform, drill a hole for the wiring. To remove the platform under the height of the canvas, use metal "legs".
How to pick up a dowel for fastening chandeliers
For internal work Use plastic dowels. Given the possible external temperature effect of the lighting instrument, it is preferable to use nylon-polyamide inserts.
If the ceiling indoors is concrete - the spacer elements will be required. In the case when the ceilings are multilayer structures with emptiness it is better to use a dowel.
The thickness of the element depends on the intended load. The suspended construction seeks to pull out a dowel from the wall, so it is important that there are spacers and notches on it that additionally retaining in the skinny.

In order to secure the element in the hole, it is possible to use construction glue, the dowel is lubricated to them before climbing. Do not strive to screw the screws thoroughly, it can split the liner. The right is considered to use screws for spacer liners.
Tip! A chandelier weighing 5 ÷ 10 kilograms is fixed with a shock dowel with a diameter of 8 mm and a length of 80 mm. To perform the task, you will need at least 4 dowels.
Master class for self-timer: how to fix the lamp on the stretch ceiling
And now directly on how to fix the chandelier on the stretch ceiling. As already mentioned, it is necessary to follow a clear algorithm for action and in advance to pose a place for the location of the lighting device and the preparation of the foundation.
We offer you a small master class, how to attach chandeliers to the stretch ceiling:
| Photo | Description of work |
 | The first stage will be the markup of the location of the lamp and pulling the cord to indicate the height of the canvas. The cord is stretching from the frame through the entire room. |
 | The main ceiling at the location of the chandelier is mounted bar. To do this, the holes are drilled in the ceiling, dowels are inserted and the base is screwed by self-draws. |
 | Brucks can be somewhat - depending on the height that needs to withdraw fasteners or you can use metal "legs" that are easily adjustable in height. It is important to saber the surface of the bar, which will come into contact with the cloth. |
 | The wiring is passed under BRom or between two elements. So she will not dare in the event of an unexpected situation. |
 | To accurately output the surface of the base to the level of the dense, use the lining elements. After tensioning PVC material. |
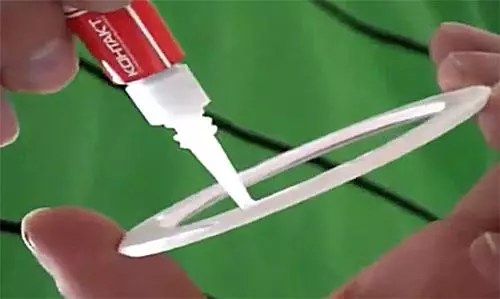 | A special glue for PVC is applied to the hole for the hole. |
 | Next, it should be fascinated by the base and put the ring in the center directly to the canvas. It will take time to glue dry. |
 | In the inner part of the ring is cut with a canvas. You should be extremely careful not to damage the wiring. After the hole is released wire for connecting. |
 | Speak the location of the bar and correctly place the mounting bar. |
 | Screw the mounting bar using screws. Do not forget to pre-insert the hairpins. |
 | Attach chandelier so that the studs entered the intended holes. Secure the lamp with decorative bolts. |
How to decorate the lamp fastening
If you have not forgotten using a thermocol, the place of fastening the chandelier will be without tearing carefully. Small hole Loads the base of the lighting device. But if the interior design requires creating some additional element, use light polyurethane sockets. They imitate
Each owner perfectly understands that the choice of ways to illuminate premises allows you to give effective view The room, emphasize the individual addiction of the owner, to create a favorable atmosphere of dwelling.
The original ways of illumination of the apartment characterize the image of the owner as a person possessing the designer taste capable of forming positive emotions from guests, a good mood.
Self-studying design, the master uses different kinds Lamps:
- chandeliers;
- point sources of local lighting;
- decorative lighting tapes and garlands.
Features of attachment of the first two types of lighting devices are disclosed in this article. For mounting the sconce and garlands, they are also well suited.
How to install a chandelier on the ceiling
Before starting any work in the wiring, always check on it. This will exclude the possibility of creating short circuits, will save your health, ensure security when working.
Method of installation depends on many factors. The choice affects:
- weight, dimensions and design of the lamp;
- material and ceiling type;
- the presence of fasteners mounted in construction.
Fastening chandeliers on concrete ceiling
Almost all apartments inside multi-storey buildings now have ceilings made of reinforced concrete plates Overlapping. During their installation, builders near the wire output places for lamps set special hooks or remove steel wire-tied to fittings.
Dedovsky way pendant chandeliers
In the houses of the old building, the fastener wire is most often used, which can be bent in the desired direction. It is able to withstand a rather large weight, but, to test the fastening strength, it is recommended to pull it with a certain effort.

On such a fastener, it is convenient to place light plastic chandeliers. For connecting electrical wires use a transitional terminal block.
The chandelier fastener and the connecting wires are hiding inside the decorative lid.
Modern attachment methods
Hooks for chandeliers
The main element that perceives the mechanical loads of the chandelier is a hook that can have a different design.
For fastening inside reinforced concrete ceilings, hooks are released:
- equipped at the opposite end of the thread screw-screw screwed into the plastic dowel, fixed in the drilled hole;
- having rotary mechanism With the stops.
In the second method, it can be used:
- moving paws with a locking mechanism;
- washer with a cut or without it;
- swivel plate;
- movable stops.

This method requires the creation of a through hole through the slab overlap with a diameter that ensures the passage of the rotary mechanism, but reliably holding the total weight of the lamp.
The varieties of such hooks are fastening elements made by the form of plates that can be surveyed into flat slits drilled by thin drills.

Fasteners
These mounting devices do not require creating through holes In the stove. For them, it is enough to knock out the perforator in the ceiling of the socket to install the dowels and then screw the screws through the bracket.
The fastening bar itself can be performed:
- form plate with slots for fixing in different convenient places;
- or in the form of a crosshair of two plates.

In the second method, you can create a larger number of places for fastening self-tapping plates in the ceiling. Therefore, heavier chandeliers are fixed on the cross plate.
All these brackets before their installation on the ceiling are screwed with threaded studs to fix the base of the chandelier chassis wrapped in nuts.

Before installing the lamp, pay attention to the state of the dielectric layer of wires. When it is weakened, it is enhanced by the winding of the insulating tape. However, now on sale there are more efficient heat shrink tubes that are easily put on the place to be insulated, and then under the heating of the flame of an industrial hair dryer, lighters or even matches are tightly plastered on the surfaces connected.
Fastening chandeliers on a wooden ceiling
Here the main fastening agent is the simplest hooks, made at the end of the sharp screw, which is simply screwed into the wood.

So that the tree does not crack, and the screw without unnecessary effort was recommended to pre-drill the hole with a smaller drill than the inner diameter of the thread on the self-tapping screw.
The fastening site should be chosen so that the hook holds not only in the boards, which will be covered with the ceiling, but also a significant part of it was reliably included in the beam.
Fastening chandeliers through suspended construction
Now the home masters in the interior of the rooms widely use various types of stretch ceilings:
- on film and motionable based on synthetic tissues of various color:
- suspended construction Based on drywall and similar dense materials.

Implementation of the owner's desire to have a beautiful chandelier for lighting similar room Requires the creation of an assembly adapter, the thickness of which is chosen by the size of the gap between the suspended structural and concrete base.
The adapter itself is fixed to the concrete in advance, before installing the suspension canvase, and then mounted decorative ceiling And through it to the fastening adapter, the chandelier is hung.

Through the plasterboard coating, you can simply screw the screws. When stretch ceilings are used, then adapters are mounted with glued rings, inside which the cloth tissue is made.
Through this slot stretch the wires and mount the chandelier suspension on the adapter.
Fixtures for suspension lamps
After the hook for hanging the chandelier is installed, a lighting device will be raised to the ceiling and connect the electrical wires at the height. Such work requires the simultaneous execution of two actions:
- reliable fixation of the lamp on the ceiling;
- installation of wiring.
Therefore, the master does not have enough hands and requires an assistant. For frequent execution of such works, you can make a simple device consisting of:
- hook for suspension chandeliers for fastening the ceiling;
- cable of dielectric material;
- tip with a rotary mechanism introduced into the hole of the lamp.

The principle of his work is illustrated by pictures.
Swivel fastening works on the same principle as Cukan at the fisherman. It is introduced into any hole on the housing, and the chandelier freely hangs on the cable. The master has loose hands, can connect wiring. When the swivel mechanism is derived from the engagement, the hook is removed and the lamp is hosted in its place.
Such a device facilitates installation. It is made for constant of the same type of work. But when the chandelier unit is performed, it can be simply tied with a solid cord.
The method of attaching a point lamp on a suspended ceiling
Designs made of plasterboard
This material has pretty good strength and is produced by sheets with different thickness. Directly in plasterboard it is customary to install spotlights.

For this, work in the next sequence:
- on the base ceiling, the wiring is mounted with a small margin along the length for connecting the cartridge;
- set the plasterboard design;
- special drills drill holes for the lamp;
- remove the wires;
- plug the cartridge;
- compress the mounting plates;
- the lamp is introduced into the hole until the springs for fixing the housing.
Protective decorative lid closes the cutting hole in a plasterboard plate.
Stretch ceiling
For attaching point lights, the same principle is used as for the chandelier - the use of an additional fastening adapter.

Usually they are manufactured at the factory with the possibility of adjusting the height of the interval between strained cloth and base surface. To this end, the stationary part is attached to the main ceiling, and the position of the adjusting brackets is set by screw clamps.
The cloth cloth also stick the mounting ring, as for the chandelier, and inside it makes a cut to pull the wires and the installation of the lamp. Between the casing of the light source and tension material There are transparent protector thermocole providing heat protection material.
Designs from PVC boards
In these ceilings, the installation of point luminaires is performed by the same technology as for plasterboard plates. PVC boards have good strength characteristics, capable of securely hold light spotlights.

Due to the fact that when replacing the blurred light bulbs, increased mechanical loads can be created, assembly adapters also use for attachment. It is convenient to make them from perforated tin tapes with a galvanized surface.
Such structures are easily created, well withstand the loads are intended for long-term operation.
After fixing the chandelier on the ceiling to it and the switch must be connected wires. This topic is set out
We offer watch a chandelier video clip.
If you know other ways to fasten the lamps, then tell us about them in the comments.
When dealing with a concrete ceiling, many people prefer to contact the specialists that they quickly hung up for a fee. Such people stop a large number of Bolts and fasteners, as well as the need to screw the hooks and connect all these items to each other. But in fact, there is nothing complicated in the mounting chandelier to the ceiling, and everyone can cope with it alone!
Before you start work, you need to get the entire necessary tool. There is nothing specific in this set, and all the devices will have in every home.
List of tools required for work:
- Screwdriver;
- Drill or perforator;
- Twelve key;
- Screwdriver with an indicator;
- Fasteners;
- Passatia;
- Terminal block;

The key for twelve will need you during the assembly of the chandelier itself. And using an indicator pumping, you define the place where the wires need to be connected. Standard dummy and passage will be needed during the mounting chandelier, and the terminal block when the wires are separated.
By the way, the light bulbs blinking when the diet is disabled is a problem as an incorrectly separated wires.
How to remove the chandelier from the ceiling
However, if you do repair, and do not exercise new apartment That is most likely the first with what you will encounter is an old chandelier that needs to be replaced.

Old chandelier can be removed from the ceiling in several stages:
- Disable electricity in the house;
- Cook terminal blocks, isolate and dumping indicator;
- If there is a luminaire additional elements (Flameniers, Plafones), then try to remove them in advance.
- Unscrew the hood behind which the chandelier is hidden;
- Now before you fastening: either a plank or hook.
- Disconnect the wires, bringing them out to the parties;
- Change the bare wires with a tape.
After that, you can already remove the chandelier itself and prepare for installing a new one. As you can see, nothing complicated here, and you can cope with everything yourself.
If your chandelier is attached to the bar, it may not be possible to immediately divorce the wires. In this case, it is necessary to relax a little bolts using a screwdriver.
Mount for chandelier to ceiling
As we have already mentioned above, fastenings for chandeliers are different species. And if you remove the chandelier with them - the task is almost the same way simple, then their installation on the contrary can be very different.
There are two main types of fastening chandeliers on the ceiling:
- Hook;
- Planck (bracket).
1.jpg)
The hook-shaped fastener was used since the very first chandeliers, and in the Soviet market it was generally the only mount for the chandelier. That is why the owners, buying a new chandelier, are surprised that there is no hook and is incomprehensible how to mount chandelier.
If you do not have a hook in your kit, then check the mounting bar somewhere. Fastening using such a plank (as well as the bracket) is modern and is considered more reliable in operation.
However, the hook did not come out of everybody, and many domestic firms still produce chandeliers only with hook-shaped fastening.
Fastening the chandelier to the ceiling on the hook
This method is considered more complex, rather than fixing on the bar. And you should be careful: if the chandelier is fixed enough, it can collapse at any time to the floor and break.
In addition, the hook-shaped fastening is divided into two types:
- With standard carvings;
- With anchor bolt.
The first option of the hook is suitable only for small chandeliers, whose weight does not exceed three kilograms, otherwise the mount may not withstand the load and the chandelier falls.

In case your chandelier is heavy, weigh four or more kilograms, a special anchor bolt should go to it, which is withstanding much more weight.
If you have a big chandelier, and the anchor bolts went to it, the installation will be a little harder. You also need to drill a hole in the ceiling, and then up to the stop screwed the anchor bolt to which the chandelier is already hung.
Please note that an anchor bolt must be inserted until it stops, only then there is a warranty that the design one day does not fall to the floor!
How to attach chandelier to the ceiling without hook
In the event that you did not find the hook with the chandelin, it means it is attached using a special mounting plank. Such a bar can be without much difficulty purchased in any construction store. The price will not surprise you, since such adaptations are very small.

If you change the chandelier to a new one, then the hook will remain from the old one you will remain in the ceiling. Be sure to delete it before installing the bar.
Fastening a chandelier chandelier to the ceiling
After you dismantled the hook from the old chandelier, you need to go to the installation of the metal strip.
You can install the bar in several steps:
- Drill two holes in the ceiling;
- Score a dowel into the holes;
- Insert the screws in the bar and tighten them into the dowel;

After that, the metal bar is fully fixed on the ceiling, but here further work On the installation, the chandeliers may require an assistant, since if you install the chandelier for the first time, you can not cope alone.
Do not neglect the use of high-quality dowels. Thanks to it, the fastening becomes stronger, which means there is higher safety in the room.
How to hang a chandelier to the ceiling
After you secured a hook or bar on the ceiling, figured out the device of your chandelier, perhaps even looked at the training video, it's time to go to the installation.
As we noted above, it is best to find an assistant, which during installation will hold the chandelier in your hands at a convenient distance for you, and then help move it to the wiring.

While the assistant holds a chandelier you need:
- Connect wire chandeliers to wiring;
- Install the protective cap;
- Firmly pinch the cap using a screwdriver.
Before you start attaching a chandelier, make sure that the wall switch is disabled again.
On this installation chandeliers is over.
Installation chandelier on the ceiling with your own hands (video)
As you can see, install chandeliers to the ceiling with your own hands - the process is simple, but it may require special tools and help from the side. The main thing is to follow the safety and install all the fasteners as much as possible.
After reading the title of the article, someone will surely say - "Why about something To write, with such a work, any owner of the apartment will be able to cope. " Yes, of course, the installation and the connection of the chandelier does not apply to the work of the highest category of complexity, however, these processes have specific nuances, from which, by the way, the safety of accommodation in the apartment depends on.
The chandelier connects to electricity, and all electrical appliances with their incorrect installation becomes A source of danger - electric shocks or even the emergence of a fire. In addition, this lighting device is often sufficiently massive, and can cause a lot of trouble with its unreliable fixing on the ceiling. Thus, the entire complex of the priest, associated with how to connect the chandelier with your own hands, is conditionally divided into two directions - provision proper connection Its to the power grid and reliable and the most beautiful placement on the ceiling plane.
find out useful information, from our new article.
What to take into account when choosing a chandelier
It is clear that the overwhelming majority of apartment owners choose this lighting device, relying, first of all, on its external designer execution, so that it corresponds to the overall interior design of the room. However, at the same time it is impossible to forget about some other aspects of choice.
- The total light power of the chandelier must correspond to the size and type of the room for which it is intended. There are certain lighting norms that can briefly be represented as follows:
- For premises where soft scattered, muted light is required (a typical example - sleeping) should be processed from 10 ÷ 12 W / m² area.
- for premises with an average level of general illumination (Kitchen, Bath, Bathroom) or where it is planned to install additional coverage of specific jobs (Cabinet or Children) Norma will be from 15 to 20 W / m².
- For rooms with bright illumination (living room) This indicator is taken equal to 20 W / m².
In accordance with the calculated power, select the lighting device with the desired number of horns. An important nuance - In no case cannot be raised overall illumination using more powerful lamps than the manufacturer is allowed. Material of plafones, cartridges, the internal wiring cross section may not be designed for increased loads, and this will damage the instrument or even a fire-hazardous situation.

- The dimensions of the lighting device must be harmonized with the total size of the room. A huge chandelier will look ridiculously in a fairly close room, or, on the contrary, too small will simply be lost on the plane of the ceiling of the extensive hall. Diseases are recommended to proceed from the following considerations:
- The optimal chandelier diameter can be approximately determined by the formula:
D \u003d ( L + S) × 10
D - chandelier diameter centimeters
L. and S - length and width of the room, respectively, in meters.
So, for example, for the room with dimensions 5 × 3 m optimal option There will be chandelier with a diameter of 80 cm.
- From the height of the room depends the type of chandelier selected. If the ceilings in the room are low, about 2.5 m, it is better to give preference to the ceiling variant of the lighting device, so that there are at least 2.0 ÷ 2.2 m from the floor to it. The suspension will be appropriate in a room with high ceilings, and here the suspension length will be determined only by considerations of aesthetic.
- Be sure to compare the type and material of the ceiling with weight of the chandelier and the way to hang it - this will be discussed below.
- Chandeliers most often sold unchanged, so special attention Completeness, compliance of the thread on all collapsible details, the integrity of decorative elements. Be sure to check for a clear and understandable instructions on the installation of the product.
- Unfortunately, the lighting market is literally oversaturated with cheap and low-quality goods and frank fakes under famous brands. On such products, amateur plastic cartridges can be installed, which is not designed for high temperatures. The contamination of the low-quality installation of the electrical part, the twist of the wires, the lack of terminal connections, etc. will be issued. It is often necessary to independently carry out the wires of the wires, their breaking and isolation in all the rules. In particular, it concerns the "cheap" chandeliers with LED additional contours, power units or current transformations, devices remote control etc . In order not to take these extra efforts, it is better to choose a product with a really high-quality cable and electrical "stuffing", to require an assembly and testing of the product.
Prices for chandeliers and ceiling lamps
Chandeliers and ceiling lamps
We designate with wires on the chandelier and the ceiling
We will not consider it in this article. complex options With chandeliers, stuffed electronics - their installation in most cases will definitely require the services of an appropriate qualified specialist. But the usual chandelier can be connected independently.
First of all, several theoretical questions of their area of \u200b\u200bhome wiring. As is known, the power supply in our parts is organized with a standard voltage of 220 V and a frequency of 50 Hz. Household wiring is carried out on two wires - phase and zero. If the house provides a grounding contour (in modern housing it becomes necessary and most often, in new buildings this question is provided in advance), then the third wire connected to the grounding bus is included in the wiring.
There is a generally accepted color marking of single-phase wires electrical network:

The characteristic nuance- if the zero wire always has a blue or blue color, and the grounding contact is yellow-green, then the colors of the phase wire can vary:

Often in one cable can be collected several phase wires One or more colors is used, including, when connecting lighting devices, to switch different modes of their operation:

Ideally, on the chandelier, such a color marking should be used on the house wiring. However, practice shows that in fact, and in another case, this rule is not always followed. For example, in the houses of the old building for wiring, aluminum or copper wires in one-color isolation. In this case, you will have to deal with them yourself.
Special attention when working with electrical wiring should be given to safety measures. It is strictly forbidden to touch the bare wires with unprotected hands, if the total nutrition network is not turned off. It is necessary to wear shoes on the rubber sole. To work under the ceiling, it is necessary to provide a reliable basis - an unstable stool or bedside table can lead to a loss of equilibrium, drop and injury. For these purposes, the best option will be a stepladder installed on a rubber rug.
1. So the easiest option is the cable with two wires from the hole on the ceiling. It is clear that one of them is phase, and another zero. According to the existing rules, zero should go directly on the junction box, and the phase is interrupted on the switch. Nevertheless, check does not interfere - very often electricians "do not bother".

- To check, you must have a special device - the phase indicator. Most often it is performed in the form of a screwdriver with a transparent case, although modern models There may be another execution, including even indicating the values \u200b\u200bof the phase voltage.
- First of all, you need to completely de-energize the room or the entire apartment on the distribution panel. This is necessary in order to thoroughly clean the wires from isolation and oxides for a length of 5 ÷ 8 mm. After stripping the wires are bred as much as possible to exclude their closure. After that, include automatic on the shield.
- Then, when the switch is turned off, both wires are sequentially checked. None should show the presence of a phase. If there is a phase on one wire - it means that the wiring in the house is incorrect - on the switch, apparently, "zero" is interrupted. To change in this case, something is very difficult - it is easy to keep in mind, showing special care with further work.

- The phase is checked in a similar way when the switch position is on. As a result, a phase wire is detected, which can be melted in a certain way (marker or colored tape).
2. If the room is installed in the room with two or more keys, then from the ceiling holes should like the appropriate number Phase wires. The check is carried out in the same way as described above, with the marking of each phase separately, according to the location of the switch keys.
Such a check should be carried out even if the wiring is installed with color marking - Just to eliminate the errors of the electrician, sometime it mounted.
3. Now - about the cable part of the chandelier itself.

- The easiest thing is when the chandelier of a single or two-three cargo, without splitting them into groups. All wires from the cartridges are assembled in two contact groups - zero and phase. If there is a ground wire, then it is usually attached to the metallic layer of the lamp.

- In the case when it takes the separation of horns with cartridges into two or more groups, then all the blue "zero" wires are connected to one bundle, and the phase are divided into several, by the number of keys on the switch.
Very often on chandeliers it can be seen enough, and this commutation will not be much difficult.
 The easiest case: all the wires - like on the palm
 - In fact, in another case, the ligament of the twist of the wires should be carefully supreme and placed in the terminal screw block or individual spring terminals.

- It is somewhat harder to figure out when the chandelier does not make it possible to visually understand its inner wiring. However, here you can figure out, calling the exiting wires with the help of multi-track. To do this, in the cartridges can be sequentially screwed into the incandescent lamp (energy-saving fluorescent will not help in this case), and experimentally find out which horny from which wire is powered. After that, it will be easy to distribute horns by groups.
 For "transk" hidden wires need a multitestrator
 There are other methods for determining the internal wiring chandeliers based on the calculation of the chain resistance with the lamps of one nominal into all the cartridges, but in practice it is still probably easier to simply ring each horn.
So, the result of checking chains chandeliers and stationary wiring in the room should be a clear understanding of the scheme prepared for switching and marked wires on the ceiling and a group of contacts on the lightweight device.
Video: Connection diagram five-zone chandelier to two-lying switch
Fastening chandeliers on the ceiling room
If everything has become clear from the electrical part, it is necessary to ensure reliable mounting chandelier on the ceiling. The work technology depends on the chandelier design, and on the type of ceiling coating.
Hanging chandeliers on the hook
It is an old and proven way of mounting a chandelier who have a special loop, a ring or hook for these purposes.
In older multi-storey houses The suspended hooks were installed in the ceiling holes at the construction stage. If he is standing, then the problem is less, however, it does not prevent anything to check it on strength. To do this, it is necessary to suspend the cargo with a common mass, twice the weight of the chandelier planned to be installed. If such a load is easily withstanding, there should be no particular concern.
And what if the old hook is unreliable or his condition does not inspire the confidence that it will endure the load? Nothing terrible, you can install it yourself.
With a wooden ceiling, there should be no problem in principle - the hook-screw-screw is easily screwed there.

FROM concrete slab Overlap can be various solutions:
- You can suspend the hook on the transverse steel rod, which is entered to the cable channel of the plate. In this case, care should be taken not to damage the rod passing posting there.

- Another option with the old hole in the ceiling is to insert a hook with a "butterfly" in it. Having passed into the cable-channel, the "wings" of this attachment straightened and create the necessary support, and it will only remain fix the entire suspension with a washer and nut.
 Hook with spring retainer- "Butterfly"
 - if this option is impossible, for example, in the case when there is no "regular" opening for the hook, you will need to drill in concrete overlap A hole for a plastic dowel, but better is still under a metal anchor with a ring or hook.
Before drilling, it will be necessary to evaluate the direction of wiring from distribution box To the outlet on the ceiling, so that the brought is not killed or disrupt its insulation.
If the inner cavity of the plate came across drilling, a special metallic is used dowel for wetting structures - with His screwing is formed "skirt", reliably holding the fastener element in the ceiling.

After installing any kind of hook, it should be tested on the load - as it was described above. Recommended after this protruding metallic part to be insulated by wrapping it with a heating tube or put on it with a thermoshrinkable tube of the corresponding diameter followed by heating.
If the hook is reliable, you can hang the chandelier for the regular mount. Be sure to turn off the overall power supply of the room in order to connect the contact part. Wires are connected by terminal connectors - twists are not allowed, since they may experience sparks with melting of insulation. Connection is carried out in full compliance with the layout scheme, which was written above.

The location of the contact connection of the wires and suspension on the hook is usually closed with a decorative glass (cap).
After installing the installation, turn on the power supply on the panel, then on the switch to immediately make sure that there are no short circuits. It will not hurt to check the indicator no phase on the metal chandelier housing. If everything is fine, then when the switches are turned off, the necessary lamps are screwed or inserted into the cartridge and the practical functionality of all chandeliers in all mode modes is checked.
After checking, you can proceed to the final installation of the chandelier - the installation of ceiling, suspension of all removable decorative parts, etc., according to the assembly instruction attached to the product.
Installation chandelier on the mounting bar
Many manufactured chandeliers, especially intended for low premises, are not suspended on the hooks, and are installed with screw mounting elements on a special mounting bar, fixed on the ceiling. This significantly improves the reliability of the general installation, since the load is evenly distributed across several points of attachment.

The design of the mounting plank may be different - it all depends on the specific model of the chandelier and its mass. The bar can be straight or curved, with brackets for fastening the illuminating device body or with protruding studs or screws.

The set with particularly passionist chandeliers may include a cross-shaped plank or in the form of a reinforced foreign profile.
The bar may be a hole with a coated insulating sleeve edges for passing wires overlooking the ceiling. You can position the bar and in the immediate vicinity of the location of the cable exit - the housing installed chandelier The hole in the ceiling and the switching of the wires will hide.

Fastening the mounting plank to the plane of the ceiling is produced different waysDepending on the specific conditions. In fact, it is described above, with the only difference that instead of a dowel with a ring or hook, usual, with a presser head "under putoy».
Just as when using a hook, the reliability of fastening under load is necessarily checked.
 Fastening necessarily checked under load - to prevent such situations here
 Quite often, the situation occurs when an overly close arrangement of the dowels from the old hole in the ceiling does not ensure the reliability of the installation - the edge of the concrete can crack or decavor. So the optimal choice of fasteners and the installation site still remains for the direct performer of the work.
Fastening the chandelier itself to the mounting bar can also have its own characteristics. Perhaps, in this case, assistance will be required - the lamp will have to hold on the weight while the cable part is switched. After the wires are attached, the chandelier housing is mounted on the strap with decorative nuts or screws.
The further work of working capacity control and final installation is no different from what was set out higher.
Features of fastening chandeliers to the ceiling of plasterboard
By and large, planning the placement of the chandelier on the montage should be installed. In this case, no problems are foreseen - one or more additional additional metal profiles for mounting the mounting plank or installed The hook, which is easy to increase with a chain or rod. IN plasterboard sheet immediately placed and dried in right place Hole to exit wires and hooks.
But what if this question is the chandelier already later?
- In the case when the lighting device is a suspended type, install the hook directly in the GWL can not - its strength is hardly enough for the point load. You can do the same as follows:
A hole with a diameter of smaller than the decorative cap of the lamp is drilled in the ceiling.
Exactly at the center of this opening, a long brown mounted in the perforator is drilled by a hole in the slab overlap by anchor mount.

An anchor with a long threaded stud is inserted and the limit is fixed in the well-done hole, so that the stud has outward, for the plaster of drywall.

On the protruding end of the hairpin is winding a rhy-nut, to which the chandelier itself will be tested. Excess the studs are neatly cut with hacksaw.
 Spring "Butterfly" with a hairpin
 If in the overlap of the emptiness or old hole - all same, as well as when working on a conventional ceiling, only the fasteners have no ring, but a long threaded part so that it goes out.
- If the chandelier of the console type, that is, it is installed on the mounting bar, then much depends on its mass.
- In the case when the total weight from the fighter does not exceed 3 - 5 kg, it is possible to fix the bar directly to list GVL. For this, special dowels for drywall are "butterflies" or snail.
 Dowel "Butterfly" and "Snail" for fastening parts on plasterboard
 The first is held as a result of plastic design Under the sheet of plasterboard when screwing the self-press. In the second principle of action other - very high and sharp thread with a large plane of contact with a sheet material creates a reliable connection when screwing. "Snail" is completely screwed, in the right place in the right place, and the opening remains in its center, which easily comes easily.
- If the chandelier is heavier, then for mounting the assembly plan, you will have to resort to the method with anchors with studs. - - as described above. The protruding threaded parts of two or more studs will become fasteners for the rush or cross-person console.
All further actions are no different from the edge of the chandelier on the usual ceiling.
Video: Erption of crosses of chandeliers to plasterboard ceiling
Prices for various types of anchor mounts
Anchor mounts
Fastening chandelier on a heavy ceiling
Nic practical Soviets by independent installation The chandeliers on the grieving ceiling will not be given - this should be done only by masters and exclusively before the suspension of the ceiling canvase.
Read detailed information, O what is important to know in our new article.
To install, the chandelier is prepared in advance and hangs to the slab overlap the mounting platform, the lower cut of which should have to be at the planned height of the tightened web. Based on the location of this mortgage platform, the master must be cut and properly handle the holes, strengthening their edges through which the wires and fastening parts will be held.

Attempts to cut hole holes independently in order to suspend the chandelier on the already installed tension ceiling, using the type of work on the type plasterboard ceilingNo good things will lead. With a probability close to 100%, they are doomed to failure. Weeping, but a natural result of such an amateuribility will be the need to fully replace the canvas.
After the masters, the "Celers" will finish the work, leaving the holes necessary for the chandelier and fasten the holes reinforced with special champs, the installation of the lamp is carried out with maximum accuracy so that in no case to allow a break or puncture of the surface.
On the heavy ceiling is preferable to use the suspension so that the lamps are not in the immediate vicinity of the canvas. In addition, conventional incandescent lamps, "halogens" or luminescent "housekeeping" for these purposes are not suitable - they will quickly spoil the decorative ceiling coating. It became for the ceiling as much as possible its attractiveness as long as possible, the LED models are needed.
Video: An example of mounting chandeliers on a heavy ceiling
Had a chandelier in principle is not difficult, but this work requires at least some experience in electrical work. When installing chandeliers, you need to remember the safety rules that require such work solely when the electricity is disconnected. In this case, you need to have an exposure and caution can not be hurried and you should do everything carefully, following our instructions. So, at first let's find out what we need from the tools for this type of work.

You'll need:
- indicator - screwdriver;
- ordinary screwdriver;
- knife;
- terminals;
- stable staircase;

Well, now we turn to step by step instructions of our installation:
First you need to disable the counter. If you have suspicion that a phase wire is a phase wire on the chandelier, you can simply turn off the switch. Then remove the old chandelier carefully, from the resulting hole there should be a hook with two (three) wires. The number of wires depends on the number of keys of your switch and the presence or absence of the conductor - the ground.

It is necessary to determine which of the available wires are precisely phase. To do this, it is necessary to turn on the power supply again and touch the indicator to the tip of each of the wires. If the light on the indicator lights up on some wiring, then this means that it has a phase. Now you need to remember these wires.
If you have a problem with memory, you need to remember their coloring: usually zero wires have a blue color, and the phase wires are found in red, white and brown. Wires earthing people have, as a rule, green or yellow green color. Very often in old houses, the wiring has an isolation of one color and here, of course, it is difficult to determine where which wire. Here you will have to recognize again using the wire indicator and celebrate them with markers different colors. After the phase wire you detect, the electricity can be turned off.

Very often, the installation of the lighting device depends on its design. Most often there are chandeliers that hang on the hook, after that all works are produced. But there are also such copies of the chandeliers that need to be screwed into the slab of the overlap. For such a case, it is necessary to substitute the base to the ceiling.

Be sure to make sure that it is located in the center of Rivne. When you will handle this work, mark the abolition point pencil. It is necessary that they are located at sufficient removal from the hole in the ceiling. Otherwise, during the drilling of concrete, the ceiling can simply be repaid and then the chandelier cannot be attached. After you make a markup, you can go directly to drill holes and install dowels in them.

Connecting wires to the chandelier is recommended using special clamps - terminals. If there are no chandeliers in the set of such clamps, then they must be bought. When you figure it out with the terminals - the wires must be cleared on one centimeter. On any terminals and wires, the chandeliers should be visible to the marking on which you can determine where to connect zero, phase wires and grounding. Be sure to follow these small prompts when connecting the wires.
Wires to delay in the terminals you need as stronger as possible to check the quality of the contact you can try to pull the wire. If it did not work, it means that the contact is securely fixed.

After that, the chandelier can be hooked on the hook or base. All unnecessary wires must be removed into the ceiling hole. At the very end of the installation on the chandelier, the plaffones hang, bulbs and decorative elements are screwed. That's all our installation chandeliers is over and you can turn on electricity and check your work.
Video
We offer you to watch a video that clearly shows the process of mounting chandeliers.