How to make a practical table from ordinary boards without being a “wood craftsman”. A detailed story on how to make a table for a summer cottage with your own hands with a choice of wood, step-by-step instructions and tips How to make a table for a summer residence
At the dacha there are items that are very important, but which you can do on your own so as not to overpay too much, so our today's topic is do-it-yourself table for summer cottages... You are free to make it any size you like, to get a small headset table, and a large one so that the whole family can fit behind it with guests, as well as folding models, functional, original, which are used as decor, and so on. Below we will give you examples of each of the above groups, and also see how difficult or simple it is to make this important item.
DIY wooden table for giving
Wood is relatively affordable and inexpensive, depending on what kind of material you want to use to create wooden table for giving with your own hands... In the overwhelming majority of examples, we are talking about wooden boards of one thickness or another, which make up the table top, and a wooden beam is used for the legs and supporting elements of the structure, ideally suitable material for this task.
You can talk about the advantages of boards for a very long time, but, first of all, it is the availability of the material, its cheapness, and, which is very important for home craftsmen and those for whom even a simple responsible task - you do not need a lot of complex, expensive tools to work with wood and knowledge of the technique of work is not required. In principle, collecting a stool has been a compulsory program for boys since school days, and we assure you that collecting table for giving with your own hands made of wood not much more difficult.

But before choosing among the models tables for giving with your own hands, drawings and schemes, you will need to decide which one you need, for what purposes. The degree of success of the design can very much depend on this, since the table itself will be good, but it will not be suitable for the task at hand. So, if you need a portable model, then you should not make it using logs or similar heavy material, since it will not be easy to move such a colossus. Round varieties look very interesting, but they are best used for filling, the same round shapes. After all, although the circle allows you to seat guests, there will still be noticeably less space on the surface of such a tabletop than on a round one. It is also important what the legs will stand on, if it is an absolutely flat concrete platform, then you can choose models with four straight legs. They look very elegant, and it is quite simple to make them. But if you want to arrange a feast on the lawn or you do not have confidence in the absolute evenness of the floor surface, then it is better to choose more stable options for legs, for example, oblique ones, which will allow you to maintain the stability of the structure in this situation.
Do-it-yourself outdoor table for summer cottages
Is wood the ideal material a table for giving a street do-it-yourself? Many doubt this, because in this case on his wooden surface water will constantly drip, both from rain and, for example, from irrigation, and this can negatively affect the wood. But, since all the positive aspects of this particular design are already very numerous, it is worth thinking about special formulations with which the tree is painted. They do not change its structure, on the contrary, they can emphasize it, make it even brighter, even more "expensive", but at the same time, they prevent the absorption of water into the surface and the appearance of all negative phenomena associated with this. Therefore, just after the end of manufacturing, do not be lazy and do not save - cover the finished product with a high-quality paint and varnish composition.

There may be several zones on the street where it will be appropriate wooden table for giving with your own hands, drawings which you may have seen above. First of all, it is summer terrace or a place to eat near summer kitchen... There you will need a large, wide table top, which ideally comes with benches or chairs of the exact same design so that it all looks like a single set. But not only for eating, we may need a table, but also for performing gardening works... For example, in a garden it is best to install it on some picturesque meadow, inscribe in landscape design... He is also needed on what has been done, because after him it will be possible to draw, and sculpt, and play board games.
We want to talk a little about special tables that are gaining more and more popularity among owners of summer cottages. The fact is that a new variety has been added to the traditional set - the bar counter. This is a tabletop of an unusual shape - it is located on very high legs so that the person who sits behind it and who stands behind it is the same height. Such entertainment as a summer cottage bar, decorated, for example, in a beach style, greatly decorates the site. In the photo you can see how this do-it-yourself wooden outdoor table for summer cottages.

In that, in the format of the bar, there are no special difficulties, you just need to understand what its size, height and width will be most comfortable for you. Another required design element will be the presence a large number shelves and drawers where you can put dishes and all other tools for creating cocktails. The material for the structure can be both boards and pallets - boxes, which are in great demand today, although you will have to work with it no less than when knocking down tables with boards for giving with your own hands... The fact is that in these boxes there is not only their expiration date, but also initially good or bad quality of wood, therefore, chasing the convenience of assembly, you can get a product of poor quality, crooked and with an uneven tabletop. And all because after one season of use, the board begins to "lead" in different directions, so it is worth not only buying high-quality pallets initially, but also letting them stand for some time before work.

Continuing the theme of the bar, we want to show you a few more high varieties. These are auxiliary tables-trolleys, mobile and easy to move within the entire site. They are equipped with small wheels, thanks to which they are convenient to carry, but also think about the material from which you will make them, so that in the end they turn out to be as light as possible. In addition, developing the idea of a bar counter, you can do something much more ambitious by making a circular countertop, for example, on the fence that frames the barbecue area. And the idea of decorating a round-shaped stand that bends around a tree is not only practical, but also very beautiful. Previously, we could only see the benches that were placed in a similar way, but it turned out that they could do the job just as well.
How to make a table for a summer residence with your own hands
To develop the topic of useful furniture, we will briefly show you the process of creating a side table. In this case, when solving the problem, how to make a table for a summer residence with your own hands, two main stages are used - these are the creation of the frame and the design of the table top.

To create a frame, an appropriate drawing is selected, the length of all the boards and beams that are part of it are marked out, and then they successively knock together. You see already finished, assembled frame, decorated with a pergola element on the high back. This will not only decorate the craft, but such a perforated plane can be used to store kitchen utensils. On top, in the recess, you need to lay a tabletop made of even material, for example, laminated wide board so that there are no gaps between the boards in the surface, since dirt will easily clog there. A technical hole is cut for a metal sink purchased at a plumbing store, as well as all the holes for communications, taps, pipes that you will need. When installing the sink, the edges of the hole are carefully sealed, this will fix the element in the countertop, and will not allow water to penetrate inside. It remains only to connect the structure to suburban system water supply, and drain the drain into a septic tank or a cesspool.

If you want to do everything yourself a table in a traditional shape, this will give you some advantages, as you can equip the tabletop with very useful functions. For example, make inside, center, small hole, where you can insert a large umbrella, if necessary, protecting everyone who will sit around it from the scorching sunlight.

And in the case when there are special requirements for the functionality, you can go even further towards creativity. For example, make a recess in the middle of the table, inside which there is a cooler bag. Ice is poured inside it and bottles of beer are installed - for a long summer feast. For those who do not like beer creativity, moss or unpretentious garden plants that will simply decorate appearance by their presence.
Do-it-yourself table for a summer residence photo
When we use pallets, as we have already talked about, it is best to use a combination of them with other materials, or non-standard shape for the finished product. How beautiful it can look to improve your country life, you can look at the example of creating tables for giving with your own hands, photo which is located below.

And also examples of more traditional tables with a "twist" - a folding element that makes such furniture extremely convenient to use. If they are not needed, then you can easily reduce their overall size by half or, in general, remove them further until the moment when they are needed.

Diy table and bench for a summer residence
Ideal if you feel you have a sufficient degree of mastery - this is a whole set consisting of tables and benches for giving with your own hands.


The examples above show that these kits can be different forms and sizes, but at the same time they look very stylish and expensive, precisely because they are made in the same style and their designs overlap with each other.
This piece of furniture is one of the most versatile in use. The table can be a dining room, utility table, installed in a living room, on a veranda, on the territory, in a workshop, and so on. In a word, it is impossible to do without it. But the purchased products do not suit many in a number of parameters - sizes, design features, form or for any other reason.
Considering that the tree is relatively easy to cut, grind, make a table out of it according to your own drawing, with your own hands for good master not a problem. And it will come out much cheaper. Plus - the satisfaction of such work.
Premises
Ideally, this is an extension, a shed, an empty garage, although a small covered area will do. Work with wood in the area under open air- means, completely depend on the vagaries of the weather. If there are suitable for the manufacture of furniture " square meters", Then you should worry about high-quality ventilation in advance. Natural is sometimes not enough (besides, it depends on the change in wind direction and pressure), and an exhaust hood is installed.

Arguments that if you use protective equipment, you can work in an enclosed space, do not stand up to scrutiny. Wood dust will immediately settle on everything, including on the sample with which some action is performed. Neither an accurate cut along the line, nor a high-quality surface treatment of wood (not to mention impregnation and finishing with a paint and varnish composition) can be obtained.
One cannot but take into account the fact that many preparations used for processing wood contain toxic components. For example, varnishes, paints, impregnations, if they are not natural, then harmful fumes are guaranteed.
Instruments
Their set depends on the extent to which it is planned to "refine" a simple structure of wood, what shape it should be given, and a number of other nuances. If the master does not claim the grace of a wooden table, does not aim to achieve its originality, then the usual carpentry set will be enough.

For more "delicate" work in the process of making a table of unusual shapes, external design, you will need special devices.
El / jigsaw. It will not be possible to make an inclined vertical cut with an ordinary saw, keeping the angle exactly. The canvas will "play", and therefore the quality of work will be extremely low. The electric jigsaw is versatile in use, moreover, it gives a high accuracy of cutting a tree or cutouts in it.


Many of the listed fixtures can be rented if making furniture is not a hobby, but a necessity.
Impregnating and other compositions
Rotting protection:
- Engine oil recovery is efficient and moreover free tool... But not for dining tables.
- Linseed oil. A natural and effective product that penetrates deeply into the structure of the tree and protects it from mold and mildew. The downside is the high cost. But if the table is intended for eating - a great option. The drug has no color, therefore, after processing lumber, it does not leave any traces in the form of darkening, stains, streaks, in contrast to working off.
- Water-polymer emulsion. It is characterized by long-term action and health safety.
- Acrylic varnishes. They have practically supplanted their predecessors of the "NC" category, since they are harmless and in many respects better than the compositions that are diluted with solvents.
- PVA, bone glue and a number of others. More detailed information about joinery -.

For decorating a tree:
- Colorless varnishes are used not only to protect materials from moisture. With their help, you can save the texture of the wood, shade it.
- Stains.
- Varnishes with a coloring effect (tinting).
- Paints (but only for wood!).
- Putties.
Using colorless varnish and pigments, you can make a coloring composition, and of any shade. It is enough only to correctly determine the proportion of the components. This is easy to do by experimenting with mixing and applying a sample to the rejected board. This will help you find an acceptable tone. It is more than advisable, since it is not always possible to buy exactly what you need on the market.
Fasteners
All advice on assembling a wooden table with nails (argumentation - simple, fast and cheap) is better to ignore. The reasons are as follows:
- The nail pricks easily dry wood(and this is exactly what is taken; more on that below).
- It is rather difficult to correctly direct its leg (strictly vertically). In some cases, it is even more difficult to redo your mistake.
- The tree, even the most protected from rot, succumbs to it over time. The maintainability of a table knocked down by nails is extremely low. Practice shows that it is rarely possible to remove such fasteners without damaging adjacent structural parts. As a result, instead of the planned replacement of one element, 2 - 3 will have to be changed.
- When assembling a wooden table, if glue alone is not enough, only self-tapping screws should be used.
- Sometimes its individual parts (at the joints) require reinforcement. Strengthening the strength with a hardware with a thicker and longer leg is impractical. The reason is the same - the likelihood of splitting the tree. For these purposes, metal strips, staples, corners are used.

Features of the choice of wood
Someone is guided by the cost of lumber, another is important the resistance of the tree to decay, for the third - its texture. What can you recommend for a novice furniture maker? Do not use for a table, unless it is intended to be installed somewhere in a utility room or garage, the same type of wood. This is exactly what many novice "craftsmen" do, picking up the same type of boards and bars from what is left of construction or repairs and gathering dust in the barn.
When making a wooden table for living quarters, verandas, and so on, you need to take into account the properties of individual species. Naturally, if you don't have enough experience in assembling furniture, you should pay attention to cheaper wood. The first table in life (chair, stool) is just a kind of training in making, gaining experience.
Table top. Here, strength and minimum moisture absorption are in the first place. It is on this part of the table that something is constantly spilled. Optimal choice- pine, larch, oak (although the latter is more expensive). Thickness - at least 3 cm.If the dimensions of the countertops are small, then wood-based panel products (, OSV and the like) can be used. But only with lamination to prevent swelling of the material when liquid hits the table surface. For example, laminated chipboard.

Low-grade sawn timber is not used in the furniture industry. This is not economically feasible, as pre-treatment of the wood increases the production cycle. But in the manufacture of something, wood of lower grades, substandard - just right. The same pallets left over after using stacks of foam blocks or bricks.
And not only because it's free or relatively cheap. With a competent approach, many disadvantages of such wood can be turned into advantages. For example, after coating with a colorless varnish, the tabletop takes on a unique original look.

The main thing is that the boards do not have obvious defects in the form of rot, cracks, knots falling out and wormholes.
If pine is chosen for the countertop (this also applies to many others conifers), then you need to pay attention to the location of the annual rings. These arcs are called humps. The cuts of the boards show how they are oriented, and this is taken into account in the process of laying them in a row. Samples obtained by the tangential sawing method are arranged alternately (the top is down, the next one is up); radial cutting - the same (arcs in one direction). The nuance is insignificant, but it is precisely the observance of this recommendation that eliminates the risk of warping and splitting of the boards.

For furniture, if you think about its durability, you should take only dry lumber. During wood shrinkage, it will deform; this is a natural process, and its consequences in the form of twisting, warping, bending are inevitable. Such a table will quickly become warped, and you will have to repair it. And here you need to decide - to purchase high drying wood or to rid it of moisture on your own. The first option is simpler, but such a tree is more expensive. The second is cheaper, but there are a number of purely technical difficulties.
- First, it is necessary to ensure a stable temperature regime in the place of storage of blanks. Changes in its value will lead to uneven moisture evaporation, which will negatively affect the strength of the tree.
- Secondly, there must be good ventilation.
- Thirdly, and, perhaps, this is the most unpleasant moment - you will have to wait, up to about six months, depending on the initial moisture content of the tree. But this is not a guarantee that the result will be expected; even in this case it takes practice.
This once again confirms the idea that when starting to make furniture out of wood for the first time, one should focus on simplest table for household needs from cheap lumber, without claims to its sophistication and originality of the design. For example, for a barn, garage and the like.
Variants and schemes of wooden tables
It should be noted right away that any work related to design and self-assembly is a creative process. In this case, stereotypes do not exist, so you can only take the model you like as a basis, and everything else - linear parameters, shape, specificity of manufacturing - depends on the purpose of the product and your own imagination. Here are just a few examples of what wood tables can be. For example, for summer cottages, small utility rooms, it is worth choosing structures whose geometry can be easily changed - folding, camping, suspended, garden, level, and so on.

Tables that are supposed to be used for eating, playing, as magazine tables for installation in living rooms intended purpose, are made stationary, that is, unchanged dimensions. These assemblies are more "solid", since all mating parts are rigidly fixed; no swivel joints.


Features of the assembly of wooden tables
If a person undertakes to make something, it means that he knows how to use the tool, read the drawings and work with lumber. Of such home master you do not need to learn the basics of carpentry. But a number of nuances in the manufacture of a wooden table will be worth noting. These notes will only help in the process.
Let's start with the types of connections. There are quite a few of them, but for a table that is assembled with your own hands, the following are quite enough.
On dowels
In this case, the fastening of the parts is done by landing on the adhesive (Fig. 1 - 3).

The nuance is that for the manufacture of "cylinders", which are inserted into pre-drilled "channels", a tree of a denser structure is taken than the elements of the table. This is what ensures the strength of the joints. Before installing them, chamfers are removed from the edges of the dowels and holes.
These round sticks are commercially available in any furniture showroom, several standard sizes. Grinding them, even having a carpentry machine, is a waste of time. It is not recommended to purchase plastic dowels for the table; they are used for dismountable connections. For example, frame furniture (walls, multi-level shelving, etc.).
It is not worth using nails to fix the table elements (Fig. 4). Metal and wood differ in the degree of thermal expansion. Such a connection will not last long - the "shuttle" will begin, especially if the table is intended for installation on the territory or in an unheated room.
On kings
It is advisable to make such connections if the table has to be disassembled either periodically, or without this it cannot be transferred through the doorway. Although not all drawers involve dismantling the structure. The most commonly used options are shown in the figures.


Bolted
Such connections are mainly used for garden furniture or furniture installed in outbuildings; for household tables. An example is shown in the figure.

The nuance of working with fasteners
To make the self-tapping screw easy to screw in and "go" in the desired direction, a hole is made at the point of its installation with a drill slightly smaller in diameter than the fastener leg. The main thing is to maintain the coincidence of the center lines, that is, to avoid skewing. In this case, you can do without a screwdriver to "land" the self-tapping screw.

Features of wood processing
Everyone knows that a plane is used first, an abrasive with a coarse grain, and then a fine one. But sometimes it turns out that the last step, grinding, you have to do it many times. Much depends on the type of wood and the degree of its drying. After applying the first layer of varnish, the villi can "stand up". Nothing wrong with that. Wait until the workpiece dries and repeat abrading it. The work is painstaking and takes time. But it is precisely by this technique that you can bring the "problem" wood to the ideal "smoothness".
To eliminate the risk of injury to a person, all edges and corners of the table should be slightly rounded.
Features of exterior decoration
- Small defects in the form of cracks, chips are eliminated with a putty compound.
- At the end of sanding, remove all wood dust. In this case, an ordinary household vacuum cleaner with an appropriate attachment will help out. After such cleaning, it is recommended to wipe the entire table with a slightly damp cloth, let it dry and repeat the cleaning of the remaining dust. After that, you can safely start applying stain or varnish - there will be no "pellets" on the wood.
- You can add originality to the table not only with the help of curly cutouts, the unusual shape of the table top or legs, the combination of the texture of different breeds, and so on. One of the good options is art painting.
And finally. The work on self-production of something from wood (the same table) is just the initial stage of mastering the skill of a "constructor-assembler". Having worked out technologies, methods on wood, having acquired the necessary skills, it is enough just to switch to other materials - metal, plastic, glass. So the benefits of a wooden table made from even the simplest drawing (besides the pleasure of work and the saved money) are obvious - not wasted time.
We will send the material to you by e-mail
Not everyone likes to buy finished products for home use. The soul of some people requires creative and practical self-realization. The editors of the online magazine, the site invites those who wish to find out how to make a table out of wood with their own hands, what is required for this, and whether there are pitfalls in such work.
Beautiful wood product for the kitchen or living room, made with love
Professional carpenters are unlikely to need our step by step recommendations, but for novice amateurs, advice will come in handy. To begin with, consider what products you can make with your own hands from wood.


Of course, the more skills a person has, the more difficult the model he can make. But in order to build a table with your own hands from wood, there are ready-made drawings and photos to help beginners.
How to choose material for self-production of a wooden table for home and summer cottages
What to make dinner table with your own hands? Best of all - wood. The most pliable for the newly-minted master will be a pine tree. Poplar products will look more solemn. For the street, you can take a mahogany.
If you want an option for home and easier, then you should consider laminated chipboard with an optimal thickness of 25-35 mm. On the countertop you can take wooden planks, birch plywood with a thickness of 35 mm. The legs can be made of metal or timber (about 50 mm thick).
In order not to be mistaken with the amount of material, they make a preliminary drawing of the future structure with exactly the specified dimensions.
Advice! Suitable product heights vary between 750-800 mm.
Related article:
DIY furniture made of wood: for a garden, a nursery, a kitchen, a bathhouse, a garden, a gazebo; how to restore pieces of furniture, useful tips and advice from specialists - read our publication.
What tools are needed to make a wooden table with your own hands
It doesn't matter what shape the future table will be: working with wood requires a certain set of tools. You cannot do without a jigsaw, and it will be much easier to work with electric model... To fix all structural elements, either a drill with a multistage drill for holes or confirmations is used. To polish the product to perfection, you need or special nozzle on the drill.

For greater strength of attachment, wood glue is included in the tools.
How to make a wooden table with your own hands - step by step instructions
We have selected four types of structures that you can make on your own, even with a minimum of carpentry skills. We invite you to find out about the stages of making a round and rectangular table, coffee table and models for garden gazebo.
Making a wooden round table
The easiest way to make a round table top and tie ring is from or in sizes 1500 x 1500 mm and 1280 x 1280 mm. You will also need two laminated chipboard strips (1110 × 120 × 25 mm). We will make the legs from four wooden blocks measuring 120 × 50 × 750 mm.

How to make a countertop
How to draw a circle perfectly straight? Place their own on the plywood sheet in the center. thumb hands with a string with a pencil tied to it. The length of the rope from the base to the top should match the radius of the future countertop. Holding your finger in one place, draw a circle around the full length of the rope. It remains to cut it out with a jigsaw.
The circle underframe is cut out in the same way.


Making legs
A round table made of wood or chipboard will look charming if you do everything consistently. You won't have to bother with the legs if there is no excessive originality in the plans. The bars are divided into 4 parts according to the desired size of the table height minus the thickness of the table top. First, one leg is cut off, and the other three are already aligned along it.
All processing with a grinder is carried out immediately.
Advice! You cannot rush to sanding, since the first varnish will reveal all the flaws.
Assembly of the structure and processing of the finished product
The assembly is carried out in stages. First, the strips are aligned groove into groove. Then the crosspiece of the slats is connected with the legs with confirmations, as in the figure below:

If you want to make the structure stronger, before connecting the legs to the table top, their upper base is coated with glue.
Advice! Nails are not used in such work: a self-tapping screw or confirmation can be unscrewed without problems, and the connections will be much stronger.
Making a rectangular wooden kitchen table
The rectangular design is classic and very useful in everyday life: it is convenient to cook on such a table and you can comfortably dine at it.

How to make a countertop
A wooden table top for a table is made either from a whole sheet of plywood, or from individual ones processed to perfect smoothness edged boards.

Having fastened the boards with screws and glue, they begin to make the frame.
Making wooden legs for the table and frame
At the heart of the quadrangular models is the wireframe. It serves to securely fix the legs, ensuring the stability of the entire structure. Turn the tabletop over, measure 3-4 cm deep on each side and transfer the measurements to the boards. As a result, you will need two boards of shorter length and two more.

The frame is made of four elements: according to an approximate ratio, these are two boards of X cm and two of 2X cm. They are connected to each other with an overlap alternately, building a rectangle. In order not to violate the angle of 90 °, any board is used while working with a screwdriver: they press the structure with it while tightening the screws.
As soon as the frame box is ready, they begin to make the legs. You can take ready-made balusters for the table, buy metal supports, or cut them out of bars according to the desired length according to the drawing.

Both the frame and the legs must be carefully polished!
Product installation and final finishing
The frame is screwed to the tabletop with glue or self-tapping screws. Then the product is turned over and the legs are attached.

Important! Better to make the screw holes well in advance. This eliminates the possibility of splitting the tree.
Why not use nails and a hammer? Not everyone knows the skills of working with a hammer - here it is dangerous not only to knock on the finger. Excessive zeal can easily damage wood by splitting it. Confirmates and self-tapping screws hold the tree much stronger.
As soon as the leg is fixed, the angle is immediately checked: there should be no deviation from 90 °. The operation is repeated with other legs. It is possible to attach the legs directly through the countertop, but this will affect the aesthetic component of the product.


Related article:
: Photo best ideas... What can be made from pallets for an apartment, office and summer cottage; rules for the selection and handling of pallets; master classes on making a table, sofa, bench, armchair and rack - read our publication.
DIY wood coffee table
Not only a beautiful element of the interior, but also a useful one. No need to look for where to put a book, gadget, glasses, TV remote control in a prominent place. Such required constructions made from different materials: metal, glass, plastic, laminated chipboard, wood. But let's leave the other materials alone and concentrate on working with wood.


The choice of a wooden table top for the table depends on the expectations of the owner of the product. Someone wants something massive, while others prefer light options. Let's dwell on a simple solution.
We buy five boards 30 × 150 mm and process them to perfect smoothness. We immediately saw off the desired length on the countertop: you should get 6 identical canvases. We take four bars on the legs, 6 sheets of shorter length on the lower tabletop, 4 narrow slats for the frame.
| Illustration | Description of action |
|---|---|
 | To brush wood, use a grinder with a brass brush head. The procedure will expose the structure of the wood, giving the product a special flavor. |
 | We go back and forth along each board from the side that will be the front. |
 | We process the tree with fire. The flame is gradually moved from place to place: the board will acquire a beautiful darkish tint. The procedure will permanently destroy unnecessary soft wood fibers. We actively wipe the entire surface with a felt boot or a piece of felt. |


We begin the process of assembling a small table with our own hands from wood.
- The lower and upper worktops are stacked on work surface seamy side to yourself. Boards are stacked tightly to each other, gluing them together. As soon as the boards grip, the slats are attached to the top tabletop. They will serve as a frame and fastening element. They can be glued or screwed on with self-tapping screws. A self-tapping screw is screwed in the center of the rail into each of the boards.
- The legs are screwed to both the tabletop and the slats. You can use the furniture corners.
Video: the process of making a coffee table from wood
Making a wooden table with benches in a gazebo with your own hands
It's time to set aside time and build a wooden garden table.


It is best to take boards standard sizes... Studs (suitable with a length of 16 cm), washers (24 pieces) are purchased at a hardware store. For a garden gazebo, long nails (8 cm) will do.

To paint a product or simply to varnish it is already a matter of taste.

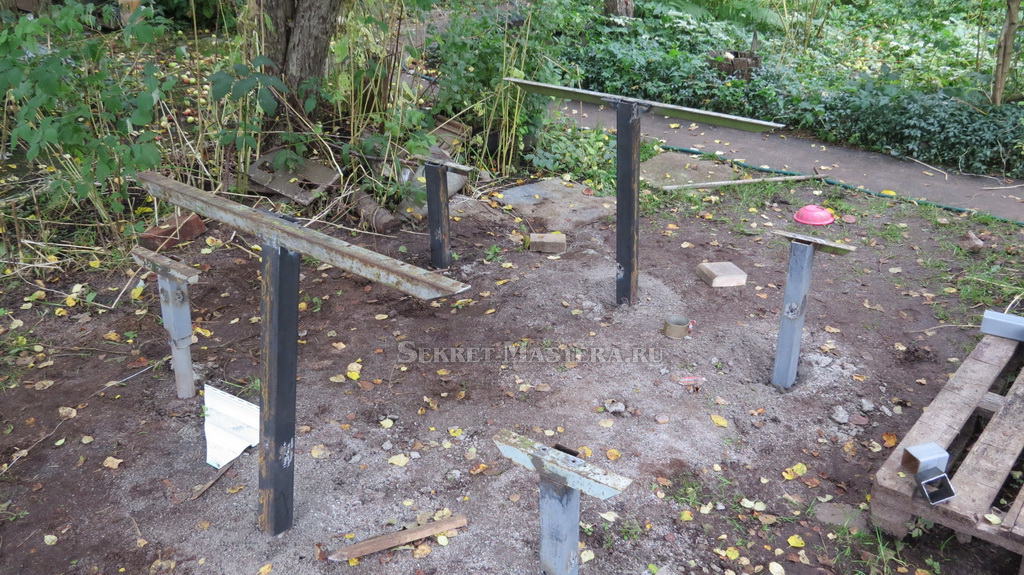
How to make a table for the country. Garden table and do-it-yourself benches. It will be about installing a new table with benches in the garden at the dacha. To unite the family, it was decided to carry out the installation of a new table by collective efforts. The old wooden table, according to the quickly erected scheme, ceased to suit, it had to be updated every 5-7 years. In the construction of the table and benches, new and traditional Construction Materials- metal and wood. The table turned out to be reliable and, in comparison with the previous versions, it will last a long time. There is a detailed step-by-step instruction with photos and videos.
How to make a table with benches with your own hands

The design of the table was developed by collective efforts, taking into account material capabilities, skills and the availability of tools. The table is made and probably the choice of a design option is no longer worth discussing. The old table was built of wood. Untreated pillars were buried in the ground under the open sky, and benches and table-tops were attached to them. The life of the pillars is 5-7 years, depending on the thickness, the boards could withstand up to 10-12 years. The table and benches were actively used from April to early October. Table and benches all year round exposed to precipitation in the form of snow and rain. The new table is placed on metal frame, and the flooring of the table and benches from boards. The boards are dismantled in October and removed to a protected place, and in the spring they are fixed back to the frame. In this way, the life of the flooring and the entire table is extended. For critics, I want to say that there is a resting place under a canopy in the garden ( ).

 Pile "Juventa"
Materials for building a table and benches:
- Six screw piles "Juventa" for the installation of a fence, 2400 mm long, head with a section of 50 × 50 mm;
- 10 - 12 edged boards 2000 mm long with a section of 150 × 50 mm, to speed up the work it is better to purchase planed ones, pay attention to the thickness of the boards - it should be the same;
- metal pipe of square section 60 × 60 mm, length 4 m;
- metal corner with a shelf 40-5о mm, length 3.5 m;
- paint for metal 1 liter;
- yacht varnish 1-4 liters;
- paint brush;
- solvent for paint and varnish 0.5-1 l;
- self-tapping screws for fixing boards 50 pieces;
- cement, sand
Tool for building table structure:
- Welding inverter;
- a circular saw;
- laser level, tape measure, bubble level;
- electric planer;
- grinder with cutting and grinding discs;
- screwdriver with a set of drills and bits.
Diy instructions for making a table with benches


A drawing was prepared to set up the table. See the photo. The width of the table is 1100 mm (6 boards 150 mm wide and one 200 mm wide). When changing the width of the table, pay attention to the distance between the uprights of the bench and the table.
- The place of installation of the table was chosen a long time ago, under the crowns of apple trees and next to artificial pond with fish. In place, pegs mark the pile installation locations.
- Installing Juventa piles. For this, a wrapping device was made from a piece of pipe 60 × 60 mm. See photos and videos. In view of the peculiarities of my area, which are detailed during construction on sandy soil, I had to make recesses for each pile. Without this deepening, the pile would have collapsed even before it was fully twisted. Deepening done gasoline hole
... The pile recesses of the bench are dug at right angles. And for two piles of the table at a certain angle towards each other. This was done deliberately to make the table more stable.

 Digging a hole with a motor drill
 Piles "Juventa" for the table
 - The twisting of the piles "Juventa" took place along standard scheme... Watch the video. Be sure to control your efforts so as not to destroy the pile until it is fully twisted. In my case, it was a collective effort. When twisting, one should try to comply with the designated points of the pile location and their slope. Small imperfections in accuracy can be compensated for during subsequent assembly. The subtleties of work, look at video example
.


 Pile "Juventa" twisted
 - After twisting the piles of the pit covered with sand layer by layer with humidification and ramming.
- For long service piles inner space piles are necessary, small mechanization was applied. After concreting, we close the heads from the effects of precipitation and let the concrete harden. Immediately it is necessary to clean the piles from contamination.

 Pile concreting
 - Chop square pipes 60 × 60 mm for 4 pieces of 550 mm and 2 pieces of 900 mm.
- We insert pipes into the pile heads at a distance of 10-20 mm from the ground.
- We weld pipes 60 × 60 mm to the heads, while using the mounting gap, we eliminate inaccuracies in the installation of piles. Try to install the racks of the benches strictly vertically, and the racks of the table are coaxial to each other. Welding was carried out at 6-8 points at the points of contact between the head and the stand. We immediately clean the welding places of scale.

 The posts are welded to the piles
 - mark the pipe cutting lines. Do it exactly. The level of trimming from the ground surface of the bench stands is 500 mm, the table stands are 760 mm.
- Grinder with cutting disc cut the racks according to the markings. You need to trim it carefully and accurately. The surface of each cut must be horizontal. Angles will be installed and welded to the ends of the racks.


- We cut the corners. The size of the corners for attaching the bench boards is 250-300 mm, only 4 pieces are needed. The table will require two corners 1000-1100 mm each (determined by the selected table width). The edges of the corners in the vertical plane are cut to a cone, and all the edges are rounded. The surface must be smooth and free from burrs.
- We weld the corners to our racks, controlling the horizontal plane of the shelf along two axes using bubble level... Just in case, gussets are welded to strengthen the place of welding to the rack. When welding the corners of the benches, the center of the welding of the corner can be slightly shifted to compensate for errors in the installation of the pile (the distance of the table post from the bench post).

 Welding corners
 The corners are welded to the uprights
 - I used boards for the table and benches from the remnants of construction frame house... The boards were not planed. Therefore, half a day was devoted to the partial planing and sanding of the boards.
- Trying on the boards, putting them on the corners. Bench boards should be parallel to the table boards. The boards are marked for later assembly. The position of the boards at the corners is also marked.

 Fitting boards
 - We mark holes on the corners for self-tapping screws for fixing the boards. A total of 14 holes for the corner of the table and 4 holes for the corner of the bench. We drill holes.

 Drilling holes in the corner
 Holes on the corner of the bench
 Holes in the corner of the table
 - The boards are impregnated with an antiseptic and, after drying, are covered with paint or varnish. I covered the boards with yacht varnish.


- Simultaneously with the varnishing of the boards, the racks and corners are painted protective paint... To prevent water from getting inside the racks, plugs are made ( polyurethane foam) to the ends of the pipes.
Many of the people who come with their families to country cottage area, first of all, they want to get together at a large table to relax and dine. Eating at the dacha, be it breakfast, lunch or dinner, is usually held outdoors. That is why there must be a special place on your garden plot, which plays the role of a kind of dining room. So that there is no need to take furniture out of your house every time, you can simply make do-it-yourself table for summer cottages from scrap materials. Naturally, it is necessary to take care not only of the construction of the table, but also of the chairs. Making a table for a summer residence is not such a difficult matter, for example, for an experienced summer resident, who is not the first time building structures on his site, it will take no more than one or two hours. Those who are engaged in construction for the first time will have to make some effort.
Pros of DIY furniture making
Choosing the right furniture for a summer residence is not so difficult, because manufacturers offer a fairly wide range of products for every taste and wallet. Nevertheless self-production country furniture is becoming more and more popular, which is not at all surprising. Thanks to such a solution to the issue of arranging a summer residence, you can not only save a significant part of the budget, but also get a lot of new impressions in the process of work, giving vent to your creative powers. The result of the work will be a thing that will not only perfectly fit the interior, but will also become the highlight of the whole house, attracting the eyes of guests.

Required tools
To build a table for a summer residence, you will need the following tools:
- hacksaw or circular saw;
- drill and a set of drills from 1 to 10 millimeters;
- hammer;
- spanner key (12 and 14);
- corner;
- tape measure.
Building materials required in construction:
- boards in the amount of 11 pieces (the length of the boards is 4 meters, the width is 100 millimeters, the thickness is 50 millimeters);
- boards in the amount of 8 pieces (the length of the boards is 6 meters, the width is 100 millimeters, the thickness is 50 millimeters);
- galvanized furniture bolts for fastening in the amount of 20 pieces;
- galvanized nails in the amount of 100-150 pieces (3.5 to 90).

Drawing
Before the start construction works it is necessary to pay special attention to drawing up a drawing of the future table. One similar example will be briefly analyzed below:
- table legs, in the amount of 4 pieces. The length of the legs is 830 mm;
- seat support elements in the amount of 2 pieces. The length of the elements is 1600 mm;
- countertop support elements in the amount of 2 pieces. The length of the elements is 80 millimeters;
- boards in the amount of 14 pieces. Length 2 meters. These elements are required for the table and seats;
- amplifier board. The length of the board is 800 millimeters;
- transverse boards in the amount of 2 pieces. Required for seat reinforcement;
- elements of the amplifier of the table structure. The length of the elements is 960 millimeters.
Attention ! It is necessary to strictly follow the dimensions listed below only if the work on the table is made of dried and planed wood.
Manufacturing technology
Sawing out elements of the future structure
To do this, you need a hacksaw or circular saw. Sawing parts is as follows: using a hacksaw or circular saw make required amount parts for a table made of boards measuring 4 meters and 6. Based on the above drawing, it is necessary to cut boards 2 meters long, which will be used for flooring the table and seating.

Attention ! In order to avoid mistakes when cutting out elements for the sidewalls, it is best to cut them according to a template that must be made in advance from strong cardboard.
Assembly
After all structural elements have been cut, it is necessary to start assembling them:
- first you need to install the side parts (sidewalls). In order to mount the parts evenly, it is recommended to use a measuring angle;
Attention ! The assembly of the table should be done on a perfectly flat surface. This will help prevent skewing of parts.
- after the installation of the sidewalls is completed, you can proceed with the installation of the table legs. To do this, we place the legs at the required angle and lay them on the transverse elements, grabbing the parts with nails. Then you need to use a pencil or marker to mark the surface in those places where the bolts will be installed. After marking with a drill, it is necessary to drill holes and fasten all parts with bolts;
- then you need to start connecting the side parts and the tabletop. This assembly step is best done with an assistant. An assistant holds the first side panel before it is secured. You hold the second sidewall yourself. On the upper part of the sidewalls it is necessary to hoist one of the boards intended for flooring the table and seats. We fix the board with nails. We repeat the same assembly moment: we place the board on the other side of the table and nail it down;
- then we proceed to the installation of the tabletop. Before installation, it is necessary to make a blank of small wedges, with which you can leave the same gaps between the elements. Then start bonding the countertop planks together. After the installation of the boards is completed, the wedges can be removed;
- the last stage in the assembly of the table is the installation of amplifiers. Turn the structure upside down and install transverse amplifiers. According to the drawing, according to which the assembly was carried out, the amplifiers are installed in the middle of the table top and bench, after which they are nailed. In order for the structure to be safe for health, the cuts must be sanded. Then it is necessary to install amplifiers that have a curly cutout and repeat the transverse part of the tabletop. Nail them to the countertop and sides.


Treatment
After the assembly of the table is completed, it is necessary to process it using special means... It is recommended to carry out processing before the start of the assembly process, so that it will be possible to more thoroughly coat all elements and protect them.
You can give a more attractive appearance to the country table with the help of a color scheme or varnish. The varnish will become an additional means of protecting furniture and increase its service life.
Tables for giving from scrap materials
In addition, you can make a table for a summer residence with your own hands, using simple materials at hand.
For example, what can you do with a regular tree stump? It can be easily made from it original table, which will become a decoration of your garden plot... Stumps can be decorated with mosaics, tiles, or other decorative items. It all depends on the creative imagination. You can also make seating stools (also from hemp), after decorating them with a mosaic.
If you find in the country old table, then do not rush to throw him out, because he can be given a second life. Remove from it old paint, decorate the tabletop with mosaics, and paint the legs again. Such a table will still serve long years and will delight the eye.

Tennis table for summer cottages
So that at the dacha you can occupy yourself with some active sports, you can build a tennis table. It is quite simple to make it, you just need to buy the necessary materials and prepare the tools.
Necessary materials:
- 2 sheets of plywood 20 mm thick;
- planed boards in the amount of 2 pieces (3 millimeters thick and 3 meters long);
- for the racks, you will need construction trestles with supports in the upper part.
The dimensions of the table should be 76 centimeters high, 152 centimeters wide, 274 centimeters long.

Then you need to choose a place to place the table 7 by 5 meters.
Installation process:
- construction racks must be installed horizontally at the same level;
- after installing the construction goats, it is necessary to lay two boards along the edges of the supports 3 millimeters thick (the boards are laid along the length tennis table). Boards are screwed with self-tapping screws;
- then plywood sheets are laid, which are subsequently fixed with rails.


After that, the tabletop must be sanded and covered with several layers of antiseptic.