Laying paving slabs with your own hands: workflow and step-by-step instructions, video. Options and technologies for the correct laying of tiles for the sidewalk, the necessary materials and tools How to properly lay garden tiles
Paving slabs are a product that is actively used today for cladding floors in a gazebo, on a porch or in another area. The main advantages of tiles are their durability. But this criterion is particularly influenced by the observance of technology during the arrangement of the base and the quality of the laying work.
Consider what is better to lay paving slabs on. This article will only touch on technical issues.
Laying methods
Paving slabs can be laid in three ways:
- on the sand;
- on concrete;
- on the ground.
How to lay tiles on a concrete base is detailed.
On concrete
It is advisable to use this method in the case when the site on which the laying will be carried out already has a concrete base. It should be simply cleaned of dust and dirt, moistened and applied with a layer of solution. After these works, paving slabs are laid. The laying technique is the same as with the sand bed.
On the sand
Dry laying occurs when the owner plans to make changes to the construction project in the future. In addition, this method is actively used by those who do not want to mess with cement mortar. Dry laying is a great solution for placing chaotic or random pavement patterns, with space between products.
On earthen ground
This type of laying, like on the ground, became widely known during the design summer cottages, as well as in the courtyard of a private house when laying tiles in the country and this is naturally the easiest way. In this case, use a large tile that imitates natural stone. The tiles are laid in prepared pits (preparation is required), and then the tamping process is carried out with a wooden hammer. The space between the tiles and the edges of the holes is eliminated with soil.
Laying technology for mortar
In this way, most of the types of products can be stacked. The process of laying on a concrete base begins with preparatory measures.
The technology for laying polymer sandy paving slabs has been described.

Action plan:
- Marking the area on which the track will be located.
- Remove from marked area upper layer soil.
- Make a 3-4 cm deepening.
- Tamp the bottom of the pit and fill it with rubble, the layer thickness of which is 10–20 cm and tamp it again.
- Install curbs.
Before preparing the mortar, it is necessary to lay the paving slabs on a layer of sand. It must be laid out in the sequence in which it will have to be operated.
To receive concrete mortar you need to prepare the following materials and tools:
- cement grade 500;
- quarry crushed stone of fraction 10-20, 20-50;
- paving slabs 50-60 mm thick;
- corresponding to the established;
- sand;
- water;
- vessel;
- shovel or electric drill.
For cooking in appropriate, you need to take cement and add to it the right amount water. Mix everything with an electric drill and add 4 parts of sand. Mix everything again and the solution is ready.
Laying process:
- Remove 4 tiles from the sand and apply mortar to the area.
- Reinstall the product. Do such manipulations with the rest of the tiles.
- This must be done until the entire sidewalk is laid out.
- It is imperative that there is space between the tiles. And this can be achieved if you install special wooden spacers.
Screening stacking technology
How to lay tiles for screening? This installation method is the most economical. At the same time, this will not affect the quality of the final coverage. 
The laying process and technique is carried out according to the following plan and subject to a specific rule:
- Mark the place and plan the water flow... Such measures are necessary so that water does not accumulate on the finished site. For effective removal water, you need to make a slope of 1-2%. You may also be interested in.
- Remove the top layer of soil... The depth of the removed layer depends on the intensity of use of the coating. As a rule, it is in the range of 15-50 cm. If the soil is weak, then you can additionally compact. Pour the screenings over the dug hole. If you want to make a high-quality base, then the minimum number of layers should be 3.
- Fill up the rubble and tamp it well... Its thickness can be 5–10 cm, as the crushed stone sits down during tamping, so make a reserve of 10–15%. spread the screenings up to 7 cm thick. Tamp well.
- One more time to lay down the dropouts, but adding cement to it in a ratio of 1: 4. make sure that this layer is 5 cm higher than the desired tile level.
- ... This process can be performed using a cord, which is stretched at the required height. The process of installing the side edging takes place on a concrete base, the width of which is 20 cm, and the height of the concrete castle is 15 cm.
- Laying material... During the execution of the process, you need to clearly follow the pattern. It is necessary to lay out the first row with special care. The installation of the tiles must be tight. If irregularities have formed, but they must be eliminated. The quality of the work performed can be checked using a marking thread when making rounds, pay attention to the fact that by outside the width of the gaps had minimum dimensions and did not exceed 8 mm. To trim tiles, you can use circular saw or grinder. For these purposes, a diamond disc is used.
- Grouting the surface. When the surface is laid out, it is necessary to fill it up river sand... Then, using a hard-bristled mop, grout. You can also buy for these purposes special formulations but their cost is high.
- Compact the surface... At the end of all work, it is advisable to take a vibrating plate (vibrator) and with a rubber gasket and seal the entire surface. If such a tool is absent, then there is nothing to worry about, since such an operation is optional. It’s just that the tile will be firmly and securely fixed.
A vibrating plate is a tool necessary for compacting and leveling a mixture of concrete when paving slabs are being laid. The design of the equipment assumes the presence metal beam and a vibrator of the IV series.
Read how to lubricate forms for paving slabs.
In the video: how to properly lay paving slabs for screening (instructions):
Laying granite paving slabs
Granite paving slabs are construction material, which is actively used when laying areas. But today I am actively using it for other purposes as well. The main advantages of granite tiles are high strength and reliability.
The order of work / stage by stage:
- Carry out the marking of the territory.
- Lay the base in the form of geotextiles. He will tell you why geotextiles are laid under paving slabs.
- Lay a layer of rubble on top of the base, the thickness of which is 15-25 cm (preparation of the base)
- Using a rake, form the required slope.
- Tamp the laid out layers.
- Using sand and geotextiles in the process, perform a secondary foundation device.
- Treat the second layer with water and install the side edging around the perimeter. For the base, you can use lean concrete. Fixing the edging is carried out using a cement-sand mortar.
- When all preparatory activities completed, you can proceed to laying the granite paving slabs. To prevent the tiles from falling out at the time of operation, the gaps between the products must be eliminated with sand.
- It is imperative to compact each stacked row using a rubber mallet.
- Upon completion of the work, treat the finished surface with a weak stream of water.
On the video - laying granite paving slabs
Laying tiles in various weather conditions
Today, the question remains about whether it is possible to lay paving slabs in the rain? No one can forbid this, since before laying even the sand, the craftsmen are slightly moistened with water. If you want to get a high-quality coating, then all work must be done in dry and warm weather.
Do not install during the rain, which immediately begins to freeze. V otherwise in the spring you will have to do all the work again. The reason is that frozen water expands. Therefore, when the tiles are laid on the level and everything is fine, but after frost it will be warm, the water will melt, reduce its volume, and the tiles will shrink.
How the material is laid in the gazebo, on the porch
Today, many owners use paving slabs to lay out the floor in the gazebo or on the porch. This procedure is very simple to follow.
First you need to stock up on the following materials and inventory:
- quarry sand;
- fine gravel;
- cement grade 500;

- paving slabs;
- rubber hammer.
The action plan is as follows:
- Remove the top layer of soil, its depth should not be less than 20 cm.
- Apply a layer of sand and gravel. The thickness of each layer should be 3 cm. Thoroughly compact everything and pour out a layer of sand with cement.
- Replacing two the last layers an ordinary solution may appear, for the preparation of which sand, cement and water are used. The laying out of the solution should not be carried out immediately, as the material is laid.
- You can level the laid tile surface with a rubber or wooden mallet. If you use any other tool, it will damage the product. The main difficulties that arise during the execution of this process depend on the shape of the selected product. Not everyone can cope with this work. As a rule, the laying of all the material is carried out according to the principle of assembly of puzzles. The same can be done with large stove 300x300x30
You will find out what plastic tiles are for paths in the country.
On the video - a video tutorial: laying paving slabs yourself and with your own hands (crisis option):
Cost of work
If you decide to use the services of an experienced specialist, then you need to know the price / rates for laying 1 m2. the cost may vary, since it depends on the chosen method of installation (how much the work on laying paving slabs costs must be found out in advance
- Turnkey laying of tiles on a concrete base for square meter- 2100 rubles, for crushed stone - 1650 rubles.
- Laying on a finished base - 400 rubles.
- Laying the material on the sand - 1400 rubles.
- Laying granite tiles - 1400 rubles.
- Laying a product with a picture - 450 rubles.
Laying paving slabs is a process due to which you can get a durable, reliable and practical cover... It is actively used to equip gazebos, squares, courtyard territory. Lifetime finished surface depends not only on the quality of the product, but also on the exact observance of the laying technology.
How to lay paving slabs with your own hands. Step by step instructions, video.
It is well known that with the development of mini-productions, paving slabs are becoming more and more affordable. a large number population. More and more owners country cottages and summer cottages equip paths with ready-made cement-sand tiles.
Paving slabs will last more than a dozen years
If you choose a thicker option, you can lay them out the entrance and the parking lot. And you can simply lay out the courtyard and pedestrian paths with them in an original way. Perhaps it would even occur to you to lay out your dacha with paving slabs?
But is it possible to do it yourself. We will give you some tips on how to properly lay paving slabs.
Laying paving slabs
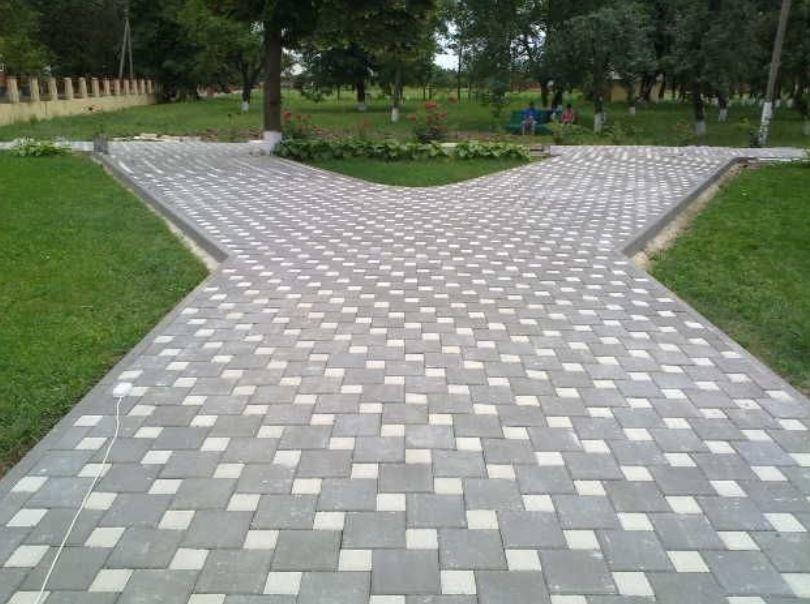
Currently, tiles, otherwise called paving stones, have become widespread. Paving stones are rectangular or any other form of tiles. Most often, rectangular tiles are found in sizes 20x10xh cm. Such tiles can be laid using many schemes. The simplest and most popular are “ brickwork"," Herringbone "and" column ". Why are paving stones attractive? It is very easy to install and is well suited for arranging any type of path. There are schemes with a paired arrangement of tiles. In such paths, it is better to use two or more tile colors. Such schemes are most suitable for parking lots and areas.
Laying paving slabs is not an easy task that requires serious attention and a certain amount of skill. The service life of paving slabs is quite long and depends on the quality of the work performed. Therefore, if you want to save on tiles, you should not save on laying them. The basis for laying tiles is always a mixture or a cushion of rubble and sand. This is done regardless of what you plan to put the tile on in the dry mix or mortar. In some cases, to strengthen the sand and gravel base, a concrete screed is arranged.
How to lay tiles. Paving slab laying technology
Paving slabs are laid along next technology... As already mentioned, paving slabs are laid on a concrete sandy or crushed stone base. The type of substrate depends on the requirements for the tiles and the thickness of the tiles.
Consider the general case of paving slabs laying technology.
- The sod is removed to a 15-centimeter depth. At the same time, there should be no roots or seeds of plants, debris at the bottom.
- It is necessary to carry out a longitudinal and transverse leveling of the bottom of the trench with the calculation of the slope for water flow. It is desirable that the bottom of the trench has a slight slope. With excessively clayey soil, drainage must be done in the part where the trench is deeper.
- The next step is to tamp the bottom of the trench. Rolling and vibration compaction can be done, if available necessary equipment... The rammer can be made with a regular piece of a small log by nailing a handle from the end to it, which will serve as a handle.
- If a geometric path is made, grooves are dug for a side stone or curb.
- The bottom of the ditch is tamped and a five-centimeter layer of sand is poured onto the bottom.
- The side stone is installed in the groove on the concrete pad. A small amount of liquid concrete is also poured into the bottom of the trench and a stone is laid.
- To avoid deformation roadway, we cover the subgrade with geotextile. Basically, this method is used if the soil is slightly heaving. As a geotextile, 2 layers of black mulching material Agril, Spandbond or Agrotex are used.
- We fall asleep at the bottom of the trench crushed stone, a small fraction from 5 to 20 mm thick, take a layer of 20 cm, taking into account the arrival of the transport. Then pour water directly onto the surface and ram it. If the soil is non-porous, the bottom of the trench can be covered with coarse sand slightly moistened with coarse sand, a layer thickness of 15 cm can be applied in 3 ways:
- backfilling of moistened sand with a thickness of 5 cm onto a compacted layer of crushed stone and leveling it with a lath;
- We moisten the surface of the sand, roll it, level it and cover it with a reinforcing mesh 50 x 50 mm without a binder. Filling dry mix with a thickness of 3-4 cm and moistening with a watering can.
- the tile is laid on a mortar with a thickness of 2-3 cm, not directly rammed gravel, without falling asleep with sand. The mortar is prepared from M150 cement (cement: sand, 1: 3). There is an option with the use of tile glue, so of course it will come out a little more expensive, but it will also be more reliable. But in this case, the glue is applied to the concrete screed 5-10 cm thick.
- Paving slabs are laid on the prepared layer and rammed with a vibrating plate or heavy wood or rubber mallet... It is necessary to carefully monitor the level of laying paving slabs or immediately give the track the required profile. Mainly with a slight slope from the center to the edges for water drainage.
- A dry mixture of cement and sand is scattered on the surface of the laid tiles and distributed along the seams between the tiles.
- The surface of the laid tiles is carefully and thoroughly swept with a brush, cleaned of the remnants of the dry mixture and poured with water so that it penetrates into the cracks. It takes some time for the mixture to harden.
Little tricks when laying paving slabs
When purchasing paving slabs, calculate in such a way as to take into account the waste that will be generated when laying and trimming the tiles. The amount of waste depends on the shape and size of the surface, as well as on the method of installation. If the installation is carried out diagonally, there will be more waste than if the installation is carried out in parallel.
It will be easier to split the paving slabs if it is pre-cut with a grinder. In this case, it should be borne in mind that a large amount of dust is emitted during the notch. It is in order to avoid dust that you only need to cut the tile, and then break it.
A walkway of paving slabs laid on a dry mix or mortar on a crushed stone pad can support the weight passenger car... The slabs laid on a concrete base and a pad reinforced 1.5 times will withstand the load from a truck. The most important thing to remember when laying paving slabs is to lay the tiles strictly according to the technology and prepare the base with high quality. The service life of the tiles depends on these factors.
High quality paving slabs, laid in compliance with all recommendations and rules, with arranged drainage will serve you faithfully for several decades without losing their aesthetic qualities. Enjoy your walks on the beautiful and durable paving slabs!
Country path with your own hands
In the indicator of the livability of the suburban area or country house An important role is played by beautifully designed paths connecting the house with other buildings or places for recreation. The path not only provides ease of movement, but also becomes one of the most colorful decorative elements of the backyard landscape.
In order to lay out paths on your site, you can invite specialists who will do their job competently and competently, but the sidewalks made with their own hands and by their own idea will always delight your eyes and remind you how diligently and with heart you have taken this work ...
- To create a straight path, it is easy to mark its boundaries with a stretched rope. If you have planned a winding path that runs between plantings or trees, then you can use a rake with a marker strip attached to it, the selected path. The nails leave an even mark that will be used as a scribe line.
- You make the width of the sidewalk according to your idea and desire, but usually about 70 centimeters wide is enough. Land is removed from the markings of the future path and a trench is made 30 centimeters deep, while maintaining the relief drop of the site.
- For the construction of drainage necessary for the outflow of water during rains, the bottom of the trench is slightly compacted and covered with rubble. It is best to use coarse gravel that can easily pass moisture and filter the soil. Instead of rubble, you can drainage from construction waste, such as: stone, expanded clay, concrete residues, paying attention to the fact that these waste should not absorb moisture, but easily pass it through, and also have increased strength.
- Having finished the arrangement of the drainage, you can begin to cover the path. In this work, you can include all your Creative skills, or see samples in building catalogs. Material for country paths can be very diverse. This can be a popular rubble stone or paving slabs. A mosaic of various solid materials can be laid out, or it can be simply filled with concrete.
Anyway sidewalk paths on your site, hand-made, will delight your eyes for a long time and even become a source of pride in your own creation.
Pebbles in the garden

These days, you will not surprise anyone with paving slab paths on summer cottage... Another thing is decorative pebbles, which look very beautiful and original. When working with such material, you will reveal your talent as a designer. Pebbles allows you to lay out non-standard ornaments and does not hold back your creative impulses.
In addition, to make your site even more attractive, it is possible to use stone elements with a variety of patterns. So with what procedures should you start laying pebbles? First, it is necessary to select the necessary material with all responsibility. There are two types of pebbles on the market: river and sea pebbles. It can be rough, polished, processed, or natural. Natural stone is an alternative to pebbles and is artificially polished for a rounded shape.
When selecting colors it is worth opting for contrasting shades. Typically, pebbles are white, black and brown. You can also find burgundy, gray and red-orange shades. It is necessary to follow some rules in order to correctly line up the fragments of the ornament. For laying out simple drawing You will need: rope, wood pegs and tape measure.
Ornaments more complicated need to be drawn in advance on a sheet of paper on a one-to-one scale, and then transfer this drawing to the garden plot. After these actions, work is carried out on the site itself. It remains to determine what will be needed for them:
- Neat marking of the perimeter of the tracks;
- Prepared walking paths with a depth of three hundred millimeters;
- Thoroughly spilled and compacted soil;
- Waterproofing;
- A compacted layer of sand of one hundred millimeters on the surface of the soil;
- A layer of crushed stone in two hundred millimeters, and the fraction of crushed stone from granite should be from twenty to forty millimeters;
- After falling asleep, the crushed stone must be tamped taking into account the slope for the outflow of precipitation;
- The final layer is covered with a pre-prepared mortar of cement and sand in a ratio of 1: 3.
After that, we proceed to leveling using a level of great length, taking into account that a certain amount of the prepared composition should penetrate into the gaps between the granite stones, and the rest should protrude above the surface by about half a millimeter. It is intended for attaching pebbles to it, taking into account the selected ornament. During installation, you should pay special attention to keeping neat rows, and the size of the pebbles should be the same.
After you finish paving the path, sprinkle it thoroughly with water and let it rest for about three to four days until the pebbles are completely settled. Now one has only to check whether the ornament is securely fixed. If this is not the case, and you find loose stones, then the procedure must be done again.
Paving slabs are produced today in large quantities, which is facilitated by the development of mini-productions. Thanks to this, paving slabs are becoming more and more affordable and popular: today, most of the paths on personal plots and sidewalks near the cottages are laid with it. But before starting the improvement of the territory adjacent to the house, you need to figure out how to properly lay paving slabs.
Laying paving slabs
 Paving slabs are also called paving stones. She most often has rectangular shape... There are many styling schemes. Most often, the most traditional ones are used: a column, a herringbone, a brickwork.
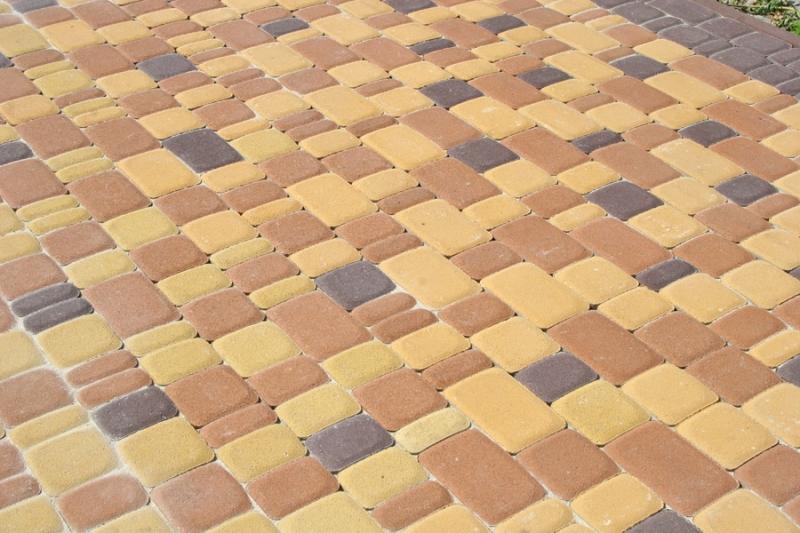
Paving stones are attractive because they are easy to lay, so they are used for the improvement of paths of any type. Areas where several colors of the material are used look especially good.
The tile can serve for a very long time provided correct styling... The basis for the paving stones should be a cushion of sand and gravel. It is arranged in any case, regardless of the chosen method of installation: on a solution or on a dry mixture.
In order to further strengthen the base, a concrete screed.
Paving slab laying technology
The type of base (crushed stone or concrete) depends on the thickness of the tiles and the requirements for the material. First of all, sod is removed from the site to a depth of at least 15 cm. The site is cleared of roots, debris and plant seeds. After that, the site is subjected to longitudinal and transverse planning, taking into account the slope necessary for the drainage of rain and melt water. If necessary (for example, in the case of clayey soil).
 The next step is tamping or rolling the site: any of the known methods is suitable for this. Grooves are dug to lay the curb. After that, a five-centimeter sand pillow... A side stone (curb) is installed in the grooves, and it is also poured liquid concrete in small quantities.
In order to avoid deformation of the paved area during operation, the subgrade is covered with geotextiles, which are 2 layers of black mulching material such as Agrotex, Spandbond or Agril. This is especially important in slightly heaving soils.
At the bottom of the site, crushed stone of the middle fraction (5 ... 20 mm) is poured in a layer of 20 cm: this is necessary wherever vehicles can enter. Water is poured directly from above and compaction is performed. Not heaving ground it is enough to cover it with a 15 cm layer of moistened coarse sand. The following options are possible here.
- Backfilling of moistened sand with its further leveling using a lath.
- Moistening sand, rolling it, leveling and laying reinforcement mesh with a cell of 50 × 50 (the bundle is not used in this case). Then a dry mixture 3 ... 4 cm thick is poured over the mesh with further moistening.
- Lay out on gravel without tamping cement mortar 2… 3 cm thick. At the same time, sand is not poured. The mortar is prepared from cement grade M150 in the proportion: 1 part of cement to 3 parts of sand. In some cases, tile adhesive can be used: the rise in price is justified by greater strength and reliability. In this case, the glue is applied to a concrete screed with a thickness of 5 ... 10 cm.
 The paving stones are laid on ready-made pillow, after which it is rammed using a vibrating plate or mallet. It is required to observe the level of laying the tiles and form the profile of the track immediately. A slight slope to the edges from the center is necessary: this is necessary for the drainage of water. After that, the dry cement-sand mixture is poured onto the tiles and distributed along its seams. Then the excess mixture is swept out with a brush and the paving slabs are poured with water, which must necessarily penetrate all cracks and seams. After a while, the mixture will harden.
Some nuances and tricks
When purchasing paving stones, you should take into account the waste generated during pruning. The amount of waste depends on the method of laying paving slabs, as well as on its shape. For example, laying diagonally increases waste compared to parallel laying.
 If it is necessary to split a tile, it must be pre-cut with a grinder. That is, only cut it, not cut it completely. This method helps to prevent the formation of a large number dust generated during cutting.
The tiles, laid on a concrete base with a reinforced cushion, are capable of supporting the weight of a heavy vehicle (including a truck). It is necessary to select the thickness of the tile depending on the conditions of its use: the thinner one is intended for walking paths, and the thick one - for the roadway (entrance to the garage, parking lot). However, in any case, the preparation of the base should be taken seriously, and the tile laying technology should be strictly observed: the service life of your path or site depends on it.
Video with site preparation.
Paving slabs - reliable, quality material, comparing favorably with its direct competitors - asphalt and paving stones - in ease of installation, dismantling, environmental friendliness and price.
A variety of laying options and a wide range of paving slabs will allow you to design the site to your taste, fully preserving its individuality through the use of various patterns and color schemes. High-quality laying of paving slabs largely determines not only the architectural appearance of the site, but also the durability of the paved surfaces. The technology of laying in a small area is not particularly difficult, therefore, having familiarized yourself with the progress of work and preparing everything necessary materials, you can safely proceed to self-styling.
What tools and materials will be needed for masonry
Trowel, metal or wooden stakes, cord, building level, rubber hammer, wooden mallet, watering hose with diffuser, rake, broom, profile, manual rammer, channel, sand, crushed stone of fraction 10-20, 20-50 or gravel, cement M400, M500 or dry plaster mix, geotextile, paving slabs for paths 50-60 mm thick, for parking lots - 70-80, curb.

Paving slab laying technology step by step
Planning
At this stage, you should decide on the future site for laying paving slabs with your own hands and create its drawing plan. We choose from the existing assortment required types curly paving elements, we select the laying scheme and color mosaic. On the created plan-drawing, we put the dimensions of the site and, based on this, we calculate required amount paving slabs and the volume of materials for the base: sand, crushed stone or gravel, cement.
Marking tracks and pads
Using a tape measure, wooden or metal pegs, a cord or construction twine, we mark paths and areas for laying tiles. Be sure to walk through the marked area to check the ease of location and use. If necessary, we make the appropriate adjustments.

Preparation of the base
It is a carefully prepared base that guarantees the quality of laying paving slabs, therefore, this stage of work should be approached with special attention... Conscientiously, the foundation made will not allow the track or platform to sag over time, thereby ensuring the durability of the coating.

First of all, we remove the old covering, if there was one, and remove the sod to a depth of 15-20 cm. We make sure that there are no roots or flown seeds of plants. Although water can seep into crevices, it will still be better to plan the flow of the water. If the soil is very clayey, it is advisable to arrange drainage in the deepest part of the trench. In order for the water to flow down to the edges, we make transverse and longitudinal slopes. Whether the tiles are laid on mortar, dry mix or sand, a crushed stone or sand cushion is always used as a base. In order to strengthen the base, in some cases, a concrete screed can be made on the sand and gravel mixture.

First of all, at the same level and at the same height, we lay and tamp crushed stone or gravel. On a tamped base, we construct an intermediate layer of sand, in a compacted state, the thickness of which should be 3-5 cm and be such that the paving slabs before tamping rise from the desired pavement height by about 1 cm. Between the layer of crushed stone and sand, geotextiles can be laid, which free flow of water, but at the same time will not allow sand to wake up into the layer of rubble, making the base more solid and durable. In non-rocky soil, without the arrival of vehicles, it is permissible to fill the covered surface with slightly moistened coarse sand 10-15 cm thick, without the use of crushed stone. The sand layer is abundantly wetted with water. Tamping on a sunny day is done in about two to three hours, and on cloudy weather the next day.
As the top laying layer, you can use a ready-made dry mixture or a self-prepared cement-sand mixture in a ratio of 1 to 3. Fill in the mixture with a layer of 3-4 cm. To make it easier to maintain the same thickness throughout the entire area, you can use the guides from the tubes. Using a rake, distribute the mixture evenly over the marked area. We make a screed with a channel to a flat surface.


Laying tiles
The tiles should be laid away from you so as not to disturb the prepared surface. It is advisable to lay diagonally, each new tiles laying in such a way that it adjoins the previous one as tightly as possible, which will help to avoid an increase in the thickness of the seams. A 1-2 mm gap between the tiles for subsequent filling with dry mix or sand is quite enough to create a durable and reliable coating. We tamp the laid tiles with a wooden mallet. If the tile is not quite even, carefully put sand under it with a trowel and level it again with a tamper. After finishing the installation, align the protruding paving elements rubber hammer under the building level.

If the planned paths and platforms have uneven shapes or curly elements are used, the tiles will have to be cut, but this should only be started after the entire whole tile has been laid. Paving slabs are cut with a special knife or a conventional grinder with a concrete disc. Before cutting, be sure to apply the tiles to the future installation site and draw a line along which we will cut off the excess parts. The installation of a pedestrian curb will help to give the site or path an exact geometric shape and evenly fill the unfinished areas with the tiles cut in shape. To install the curb along the edges of the tiled site along a stretched cord, we dig a trench of the required size and depth so that the top of the tile is higher than the top of the curb by the height of the chamfer. We expose the border to the M100 liquid solution. Spill the sides of the curb with M100 mortar and fill it with sand.


Having laid the tiles, we check the site for bulges and irregularities. Having eliminated the defects, we sprinkle all the seams with dry cement-sand mixture, sweep away the excess and moisten the mixture well in the gaps from a hose with a spray. If the mixture in the seams has sagged a lot, add a little more mixture into the gaps between the paving slabs. This is very important point, since sand that is correctly distributed over the joints will take on the loads that fall on the surface of the adjacent tiles, making the coating harder and more reliable. The sand that is used to prepare the dry mix to fill the gaps between the plates must be clean, without organic impurities and salts that can provoke the appearance of vegetation. It is advisable to walk on the paved path not earlier than 2-3 days after laying the tiles.

Like any other coating, paving slabs require proper care. To make it pleasing to the eye, it should be cleaned regularly. Gray tiles are less whimsical to maintain, but colored tiles will have to be washed from time to time. V winter time metal tools should not be used to remove snow and ice from tiles. Metal crowbars and shovels can damage the glossy surface of the tiles. To prevent erosion of the tile surface, it is strictly forbidden to sprinkle the paths with salty abrasive mixtures. You can replace them with clean river sand. Also, paving slabs are not friendly with varnishes, paints and other chemicals.
How to lay paving slabs: laying methods
How the paths and areas laid out with paving slabs on the site will look like depends solely on your imagination and skill, because even the same elements can be used in different variations.


Paving slabs are an aesthetic and functional decor personal plot... It allows you to give a well-groomed appearance to the garden space and facilitates the movement of people and equipment. The attractive price, ease of use and ease of installation have made it a popular material among developers. Such paths and platforms look very attractive. The market provides a wide range of types of paving slabs from various materials, various forms and color solutions... A variety of textures will allow you to choose a material for any design and landscape.
Paving slabs are very popular because they have a number of positive qualities... In addition to the low price and ease of installation, it is environmentally friendly and has strong properties. If necessary, you can always replace the damaged area without violating the integrity of the entire coating.
Main advantages:
- You can lay tracks and platforms of any shape and configuration;
- It is possible to remove the cover and transfer to another place;
- Environmentally friendly material;
- Does not injure tree roots, allowing moisture and air to pass through;
- No fumes occur in hot weather;
- Resistance to sharp drops temperatures;
- Strength and wear resistance.
The disadvantages include slipping on the tile during frost. To avoid an undesirable effect, they acquire a material with a rough surface. When choosing a coating, it is necessary to decide for what purpose the tiles will be used. There are 2 types of material, differing in the method of production: vibropressed and vibrocast. The first option is purchased for sites with increased load. Vibrocasting is suitable for laying paved paths in the garden.
Depending on the design imagination and preferences of the owners, the tiles can be laid in several ways:
- Staggered;
- Herringbone styling;
- Braid;
- In the circle version;
- Chaotic pattern.
A beautifully laid project will add zest to the site and emphasize the individuality of the owners.
What is better to put paving slabs on
Paving slabs can be laid on a pad of wet sand, a mixture of sand and cement, on a concrete base. The first 2 options involve easy dismantling of the paving stones. Placing the material on concrete will make the site stationary.
The lightest and most popular styling option in summer cottages and garden plots considered sand.
The advantage of this paving is the passage of moisture into the ground through layers of sand. It is sometimes mixed with gravel and bricks to compact the substrate. Any paving stones, ceramics or bricks can be placed on such a layer. A mixture of cement and sand is pre-prepared based on the proportions of 1: 5, and distributed over the prepared surface. Then they spill it with water and start laying the tiles. This method allows you to firmly strengthen the coating and, if necessary, easily dismantle it. It is recommended to lay the material on a concrete base in cases of heavy loads on the surface. Such a coating is used in parking lots and as a garage area.
The pluses of the screed include:
- Strength;
- Evenness of styling;
- No shrinkage during operation.
In a concrete mixer, cement, sand and water are mixed, then the mixture is poured and tamped. It is necessary to take care of the drainage of water before laying, after hardening it will be problematic to remove the stationary coating. Depending on the purpose of exploitation, the owner of the personal plot chooses suitable option bases for tiles.
The device of paving slabs: technology of work
There are various ways of laying tiles, but experts recommend adhering to a general sequence.

Stages of work:
- Clearing the site. Stumps are uprooted, plants are removed, soil is removed from 15 to 20 cm.
- The surface of the earth is treated with herbicide.
- Along the length of the track or the perimeter of the site, markings are made using pegs and beacons.
- Form slopes for water drainage.
- Install curbs.
- Fill the work surface with a tile layer.
- Tamp and level the mixture.
- Laying tiles.
- Close up the seams.
These principles apply during installation, regardless of what the source material will be laid on. Consistent steps will help you lay the pavement properly.
Tools for laying paving slabs
To lay out beautiful track it will not be difficult even for a beginner, the main thing is to have the desire, patience and accuracy. To proceed with construction works, you need to prepare materials and tools. A drawing is drawn up with a plan of sidewalks, then the required number of tiles is calculated, depending on its size and configuration.
Necessary materials:
- Tiles or paving stones;
- Side stones;
- Crushed stone;
- Sand;
- Cement;
- Waterproofing film.

Tools for work: grinder for cutting tiles, shovel, rammer, trowel, mallet, hammer, broom, building level, tape measure, pegs, cord or rope. For work, it is advisable to have gloves and special knee pads. Access to water and electricity must be ensured.
How to lay out sand-based paving slabs
You can lay out the track yourself by following the step-by-step instructions. The main thing is that during its arrangement a good drainage system is provided. This will prevent water from stagnating and destroying the structure. To do this, make a slight slope of 5 mm every 1 - 1.5 meters.
The first step is preparation work surface... Remove unnecessary plants and remove the soil layer, clearing the area for future installation. The ground is leveled with a rake and pegs are set at the nodal marks, between which the cord is pulled. The markings should go every 1 - 1.5 meters. The distance between the ground and the markings should be equal to the thickness of 2 tiles stacked together. Further, they provide a slight slope for water flow towards the street.
On the sides of the paths, trenches must be made to install the curbstone.
The second stage of work will be the preparation of the interlayer. To do this, you need to lay geotextiles, which will prevent the growth of grass through the tiles and will not allow the coating to sag. Crushed stone is poured on top over the entire surface of the track and tamped so that the layer does not exceed 15 cm.

The third stage is the installation of the side stone. Pre-dug trenches are filled with cement mortar, then a curb is installed. Its height can be flush with the track or protrude slightly. This design will allow you to keep the entire array and emphasize geometric shapes... Next, a wet sand pillow is poured, leveled with a rake and tamped again. If the owner wants to additionally strengthen the structure, at the next stage a mixture of cement and sand is applied, equalized and tamped.
They begin to lay the tiles from the curb, according to the scheme. In order not to damage the leveled surface, work is carried out from oneself, moving gradually forward. The intermediate distance between tiles should not exceed 3 mm. Beginners can use special crosses. With the help of a mallet, they sink each element, focusing on the level.
First, the main area is laid, then all the other parts that need to be adjusted to size. After paving the path, you can additionally walk with a vibrating plate, for perfect compaction and an even surface. Next, the seams are filled with wet sand and passed with a broom to fill all the holes. Laying the path yourself is not a difficult and exciting process that will make the owner proud and create the necessary aesthetic look for the personal plot.
How to make a paving slab site on a concrete base
Arrange a stationary site on concrete base under a car or for other significant loads, you can independently. So that the water does not stagnate concrete pavement sites will need to be made with a slight slope.
Step-by-step instruction:
- Prepare the surface for the site, remove debris and plants.
- Select its borders with pegs and pull the twine between them.
- Remove the top soil 20 cm, spill with water and tamp the designated area.
- Dig a trench in width and length for the curbstone, fill in with cement and place the curbstone.
- Put on the ground waterproofing film, which will not allow moisture to rise to the top.
- Pour rubble on top of the film and fill the voids between it with sand. Tamp everything well.
- Fasten the prepared reinforcement or mesh between each other and the side rods.
- Do cement mix in a ratio of 1: 3: 2 cement, sand, crushed stone. Then mix it with water until smooth and pour onto the prepared surface. Level up, not forgetting the slope, and leave to dry for a few days.

Laying the tiles is carried out only after the cement base has completely dried. Its installation is carried out using a cement-sand mortar, some craftsmen use glue. Concrete base moisten, apply a solution with a trowel in a small layer of 2-3 cm and begin to lay the tiles.
Laying of paving slabs
If a decision is made to independently pave the coating on the site, then you need to know what technology will do better for the chosen option. Competent device sidewalks, constructive schemes and some instructions reflect routing for laying paving slabs.

Regardless of which installation method is chosen, you must adhere to general rules paving:
- Laying is done in dry, better cloudy weather;
- Sawdust is not used for filling the seams;
- If heavy loads are expected on the laid surface, the pillow is made of reinforced concrete;
- Soils with a complex structure require reinforcement with concrete 80 cm, and then a mixture of cement with sand 40 cm, in order to prevent the site from shifting;
- At the porch, it is better to lay the tiles on cement base, since the daily load is increased;
- It is imperative to make a slope of 5 o, for the outflow of water.
Correct laying of paving slabs (video)
High-quality construction of paths and sidewalk areas with proper drainage and drain, will allow the structure to serve long years while maintaining the original aesthetic appearance.