Leveling floor beams in a wooden house. Rules and subtleties of leveling a wooden floor
One of the main methods that can be applied to make a flat surface of the floor is to floor a board or sheet materials on a previously created lathing, where as load-bearing elements - logs. One of the primary tasks, the implementation of which directly affects the final quality of the floor surface, is the alignment of the lags in the horizontal plane, their reliable fixation, as well as processing protective compounds and waterproofing. You can find out how the position of wooden beams is adjusted, as well as some of the nuances of the process of installing the frame under the flooring of the horizontal floor surface, you can find out by reading this article... The thematic video lessons offered for viewing will help to consolidate the information received.
Features of the floor on the lags

There was a period when from the technology of flooring subfloor to wooden blocks developers began to retreat. This was due to the fact that in this way it was difficult to achieve a perfectly flat surface, which was necessary for laying modern floor coverings... The preference was given to screeds made with cement-based mortars.
Now modern technologies production of lumber allows the production of wood products, which differ in the correct geometric shapes, a special impregnations make wooden beams durable and prevent their deformation. Better materials have also emerged at a reasonable price for decking, such as plywood and OSB boards... This made it possible to return to the technology of flooring by logs, bringing it to a higher quality level.

The massive use of this method for arranging the floor surface is also explained by the popularization of wooden construction, when houses are erected from logs or beams. In such a building, floors other than wood would look irregular. However, logs as a frame for flooring are used not only in wooden houses. This floor leveling technology is used everywhere. In private houses, including on the second floor, in city apartments and even in office premises... To explain such popularity of this technology, its advantages will help, such, for example:
- the relatively low price of the material / work complex, especially when it comes to overlapping on the second floor of the house;
- the ability to qualitatively insulate floor surface by laying a thick layer of insulation;
- the created surface is immediately ready for installation finishing materials(does not need to be dried and cured like concrete);
- it is convenient to lay communications under the flooring;
- the frame made of bars, as well as the flooring, have a relatively low weight, due to which the load on the floors and supporting structures is noticeably reduced;
- the workflow is quite simple, thanks to which it is accessible to many home craftsmen.
This floor also has some disadvantages:
- despite the use of fire retardants, wood remains a combustible material;
- the use of a lag, for example, in an apartment, provides for a decrease in the useful volume;
- impossibility to make underfloor heating.
Basic surfaces for installing lag

A horizontal frame made of wooden beams can be made in any room. But the base surface that supports the lag is different. If the floor structure is assembled on the first floor of a private house with a ventilated underground, pillars poured with concrete or lined with bricks are used as supporting elements. In apartments, and in some houses on the second floor, where it is filled in as an interstorey partition reinforced concrete slab, the latter is the basis for the installation of load-bearing beams. When the floor is made on the ground floor of the house on the ground, it is prepared to install the bars rough screed... Let's take a look at the installation rules and methods for aligning the load-bearing beams in each of the options.
Important! If the interfloor overlap in the house is made of timber, its surface is the basis for plywood, OSB or boards on the second floor. Alignment of beams takes place at the stage of building construction.
How to align the load-bearing beams on a reinforced concrete slab?
You can install logs on the stove using several devices, such as:
- screw adjustable supports;
- support brackets;
- anchoring.
Screw supports and metal brackets are used when it is necessary to raise the floor surface relative to base surface for the purpose of laying insulation between the logs. With the help of these devices, it is convenient to attach the bars and adjust their position relative to the horizontal. Another plus of such devices is the absence of contact of wooden beams with a concrete surface, which eliminates the need for waterproofing the lag.

Anchors are used when the timber is laid directly on concrete surface, and its position is regulated by all kinds of pads. This is done when the thickness of the thermal insulation layer of great importance does not have, at the same time there is a desire to minimize the useful space.
To align the logs and install them in the same plane, you need to use a hydro level and a long (1.5-2 m) spirit level. Using the water level, marks are made on two opposite walls that correspond to the horizontal in which the supporting beams should be located.
The first to be installed and aligned are the extreme joists, which are located about 10 cm from the wall. First, one edge of the timber is set according to the mark that determines the desired horizontal level. Then adjust the position of the other edge so that the floor support is horizontal. The same should be done with the block against the other wall.
When the extreme logs are exposed and secured in a given position, strong twines are pulled between them so that their sag is minimal. The stretched threads, located in the same horizontal plane, will be a guide for adjusting the position of the intermediate lags. To mark the horizontal, if possible, you can use a laser level. This will speed up the process and possibly improve accuracy somewhat. How the installation of the logs on metal brackets is carried out, as well as their alignment, you can watch in the video below, which shows the whole process of installing the subfloor from plywood along the supporting beams on the loggia.
Lags on columnar supports
In this case, in order to avoid problems with the alignment of the lag, the supports themselves should be made for them so that their upper platforms are in the same plane. The principle is the same - a horizontal line is marked, in which the top points of the columns will be located and the threads are pulled. If the supports are made of reinforced concrete, formwork elements are set along the threads. When the columns are laid out of bricks, the masonry is adjusted according to the guidelines.

The bars are installed on the supports made after 2-3 layers of the roll waterproofing have been laid on them and are fixed with metal squares or anchors through the log body to the column surface. The load-bearing wooden cross-members are leveled by placing wooden or plastic wedges.
Important! It is necessary to lay waterproofing material not only between the surface of the post and the log, but also between the support and the ground, so that moisture does not destroy the supporting structure.
There are two options for arrangement wooden floors floor: along beams and logs. The choice of this or that method of performing work depends on the individual characteristics of the premises and the preferences of its owners. Among the advantages of floors made on beams, it should be noted high level their strength and low cost of work. How to build floors on wooden beams, we will consider further.
Timber Beam Floor Construction: Performing Calculations
Usage wooden beams, in comparison with reinforced concrete, is distinguished primarily by a more affordable cost and ease of work. In addition, the floor has practically the same strength characteristics. Usage wooden structures helps to reduce the total weight of the house and its load on the base of the foundation.
Among the advantages of floor beams in wooden house, note:
- high durability and rigidity before stress;
- light weight compared to concrete beams;
- affordable cost;
- possibility self-assembly, without specialized technical equipment.

For arranging the floor on wooden beams, no specialized equipment is required, since several people are enough to lay the balls. The main supporting element of the structure is a wooden beam. It has the form timber, whose height is from ten to thirty centimeters, and the thickness is from seven to twenty centimeters. Optimal step laying beams ranges from 65-100 cm. individual characteristics premises, load and weight of the building, span length and other important factors. Interconnected wooden boards installed on the edge will help to replace the timber. The use of a hewn log will be the most economical option arrangement of floor overlap.
In order to determine the cross-section of a beam installed in a particular house, one should first of all determine the level of load that affects it. For determining total load the weight of the floor, the load from people and fittings that will be installed on it are taken into account. Total value the total load is four hundred kilograms per square meter. In relation to this value, the cross-section and size of the beam is determined from the table:

If the length of the span is about 4 m, then with an installation step of 65 cm, you will need a 10x20 cm timber. Please note that the length of the timber should be 15 cm longer on each side to ensure its installation into the wall. That is, to determine the length of the timber, add 30 cm to 400 cm, you get 4.3 m.
Correct execution of the calculation of wooden beams allows you to select optimal size materials with which it will be possible to correctly distribute the load in the building.
Wooden beams are laid in a direction parallel to each other. At the same time, the interval between the beams should be maintained in almost all areas, with the exception of chimneys and others. structural elements overlap. The interval for laying beams in a house made of wood is about one meter. If the house is made according to frame technology, then this distance is reduced to 50 cm.If this value increases, in relation to design features buildings, then between the beams is installed additional element, which improves their bearing capacity.

In the event that there is no place for fastening the beam in the area close to the staircase, an additional structure in the form of a wooden crossbar should be equipped here. It will become the place to install the beams. In this case, the beams can be installed directly on the girder or into it. In order for the beams to easily withstand the loads assigned to them, the following requirements should be observed:
- the optimal value of the height of the beams will be at least one twenty-fourth of its length;
- the width of the beam should be at least half of its height;
- if the beam is installed in the attic, then a width of one third of its height is sufficient.

Using this relation, it is possible to choose the best option beams for arranging floors. If the installation of the beams is carried out in a section of the fastening grooves, then the size of the beams should increase slightly. In order to reduce the thickness of the beam, in the event that the overlap is rather long, support pillars are installed between them.
If the installation of beams is carried out in outbuildings, garages, cabins or other non-residential premises, the level of average load decreases and ranges from 100 to 300 kg per one square meter... In this case, the cross-section of the beams should also be reduced.
If you could not find the specified size of the beams, then their option is possible independent construction using ordinary boards. At the same time, they fit in a checkerboard pattern, connecting with each other with nails.
With the further construction of the stove and chimney in the house, one should take into account the fact that the distance between it and the beam should not be less than thirty centimeters.

Overlapping the floor on wooden beams: features of the installation of beams
The fixing of wooden beams is carried out directly on the wall. If the ceiling is arranged in the attic, then the beams are installed on the last crown of a wall made of timber or logs.
A hole should be made in the wall that is comparable in size to the beam. Before installation, the beam should be overlaid with tow. If there are too thin beams, they are installed into the wall by 10-15 cm. In this case, a special cut method is used. It is possible to attach the beam using a connection called a dovetail.
This option is suitable for houses, which are also made of timber. A trapezoidal connection is used to fix the beam in a house made of wood, and a clamp is installed for additional strength. In this case, the girder and the beam will be at the same level. The most in a simple way installation of floor beams is the installation of cranial bars and fixing the beams on them. In this case, the size of the bars will be about 5x5 cm.

If the house is made of a shield, then for laying the beam, a hole in the form of a nest should be equipped in the wall. Each of the ends of the beam is installed inside the holes. In this case, each slot for the beam must be at the same level. The optimum depth of the nest is about 15-20 cm, and the width between the beam and the wall is about 1 cm. Each end that is installed in the nest is lined with tow. This is followed by the process of processing the beam using an antiseptic solution. Thus, it will be possible to extend its service life and protect the coating from mold and mildew.
The option of fixing tow with steel anchors is possible. One end of the anchor is installed in the socket, and the other is fixed on the beam using screws, while the length of the beam is calculated so that it does not enter the wall and is the value different length overlap.
If the house is made of bricks, then nesting will also be required to install wooden beams. They are the supporting elements for supporting the beams. Try to build the nests as level as possible. In order to install the beams at the same level, you will need to align the bottom of the nests with concrete mortar... After the concrete solution is completely dry, roofing material or roofing felt is installed on its surface, which protects the tree from moisture.

In this case, the size of the nest is 6-10 cm more than the thickness of the beam. The gap between the wall and the timber beam should be about three centimeters. In this case, the depth of the nest is about 20-25 cm, while the beam is installed inward by only 15 cm. The sections of wooden beams that are placed in the nest should be smeared with hot bitumen.
Then they are wrapped with roofing material or glassine in two layers. After that, the rest of the beam is covered with an antiseptic solution. After laying the beams in the nests, they should be poured with concrete mortar, for which crushed stone is used as an aggregate. The alignment of the beams is carried out flush with the wall.

Overlapping the floor on wooden beams: features of the floor device
The rolling part of the ceiling is the ceiling on the rolling floor. There are several ways to lay out flooring. Most often, cranial bars are installed on the beam, the cross-section of which is 4x4 or 5x5 cm. The installation of the cranial bars is carried out in such a way that they are on the same level with the beam. Next, a wooden roll is laid on the surface of the bars in the form wooden planks, the thickness of which is from 10 to 20 cm. At the same time, there should be no gaps between the boards. A ready-made wood panel or ordinary plywood will help to replace the boards. In order to equip flat ceiling on the lower floor, on top of the roll-up set drywall sheets or plywood.
With the help of another method of installing the roll, it is possible to significantly increase the ceiling area, if it is not large enough. Bars are installed on a wooden beam, with a section of 4x4 cm. The roll is laid on them, while its installation is carried out perpendicular to the beams. This is followed by the installation of the filing in the form of boards, the thickness of which is the same as that of the previously installed bars.

In addition, for the manufacture of a roll, a bar is also used, the thickness of which is from 6 cm.Cranial bars are installed on the beam, the cross-section of which is 4x4 or 5x5 cm.Then follows the process of laying the bar.In this case, they are connected by the fourth method using a cut groove in the bar ... The thickness of the timber depends on the height of the beams, they must be located at the same level. In this case, the timber performs the function of both rolling and filing. In addition, the manufacture of a fastening groove inside the beam will help to replace the cranial bars. In some cases, the bottom of the beams is left open and untreated. This method relevant when used indoors in country style.
Floor device on wooden beams: work technology
This is followed by the process of arranging the floor on wooden beams. To begin with, bars are installed on each of the beams, in relation to which the flooring surface is formed. This stage involves the implementation of the fitting of the floor and the construction of a rough covering. Therefore, in the work it is allowed to use a non-planed board, however, it must be covered with protective materials and impregnations.

This is followed by work on the waterproofing of the flooring. The best option is to use a clay-sand mortar, which has the consistency of a putty. Another option to perform waterproofing works, is the use of roofing material. With its help, it is possible to provide high-quality waterproofing, which does not take up much space. After this, the process of providing thermal insulation follows. The most popular materials for carrying out these works are the use of:
- slag poured between the beams;
- mineral wool;
- foam;
- non-polystyrene;
- sawdust or expanded clay.

The most popular insulation for timber flooring is mineral wool... It has high thermal insulation properties, has long term operation, rodent-resistant and quite antiseptic.
Mineral wool is installed in such a way that it fits snugly to the floor surface. After that, a vapor barrier is installed, since this material not resistant to moisture that can get on it through the wooden floor.
Further actions are related to the arrangement of the finishing flooring. It is possible to install it directly on the beams, but it is best to pre-install the system from the log. Thus, firstly, additional space and ventilation will be provided under the flooring, and secondly, the noise level emitted by a wooden floor will be significantly reduced.
In addition, it is possible to construct a floating type wooden floor. Underfloor heating on wooden beams is characterized by the presence of rigid fixation to the wall surface. In addition, it has excellent sound insulation characteristics and a low level of squeak. As the finish finishing material for arranging a concrete floor on wooden beams, a planed batten, Chipboard, laminate, parquet board or linoleum.
Another problem was observed in the wooden part of the house: the ceiling beams sagged by 10-15 centimeters. Probably, a similar problem did not form immediately and the logs holding the ceiling boards sagged with decades of life at home. While in the space of four walls were present interior partitions, the curvature of the logs was not very striking, and it is possible that these partitions supported the beams.
Another problem was noticeable while walking in the attic. The entire ceiling deck swayed and sagged noticeably under the weight of the person.
One way or another, something had to be done about it, and in fact, there are several ways to level the ceiling.
Leveling with metal profiles and drywall
A neighbor told about the first method (they did it). The logs of the beam remain as they are, and the curvature is leveled by sheets of drywall and metal profiles. The profile is fixed strictly horizontally below the beams, and plasterboard sewn onto it forms a flat surface of the ceiling.
With this method, of course, the level of the ceiling decreases noticeably, and we did not like this method. The ceiling in old wooden houses is already lower than the usual two to fifty modern apartments, and then another 15-20 centimeters minus. It will turn out to be a dugout. In addition, drywall does not solve the problem of bending beams when walking in the attic.
Leveling with floor supports
The second method is to install supports under the beams in the middle of the span. That is, the ceiling is raised with a jack, and in the middle, with an emphasis on the floor, pillars from a wooden bar or round timber are installed. Subsequently, these pillars are hidden in the partition walls.
The disadvantages of this method are the mandatory presence of partitions and the additional load on the flooring.
When installing the partitions, I will still raise the beams, but basically the third method was used in my reconstruction.
Aligning the ceiling with reference to the rafter beams
The third and fourth options are suitable for those whose rafter system is made in the same way as mine. In my house, there are five logs just above the four ceiling beams. rafter system... Over the years of loading on their edges, they also bent a little, but in the opposite direction. Actually, these logs were used as a support.
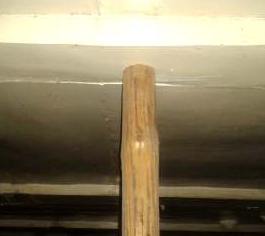
Round timber spacers with a diameter of 8-10 centimeters were installed between the rafter beams. The ends were cut obliquely so that the round timber exactly and flush rested against roof beams... The spacers were nailed to the logs of the beams.

Photo of fastening the spacers to the rafter beams.
The clamps were made of a 20x4 mm steel strip 60-80 cm long. 12 mm holes were drilled at both ends for screws. Each beam had two clamps and two spacers.

After installing the spacers, the actual lifting was carried out. From below, a hydraulic jack was installed on a stand made of a bar. On top of it, with an emphasis on the ceiling beam, a pillar made of a circle was attached. Then the work of the jack went on and the ceiling was raised.

This system is insecure. When lifting, the wooden post can be turned to the side (I have 2 cases for 4 lifts) so that the helmet will not be superfluous here. It is advisable to cut the pillar as high as possible, and not pick up pads under the bottom. It is advisable to put the jack itself as low as possible, more stable, and it is better not on a timber, but on a steel plate. The load on it is less than when lifting the entire log house, and a six-tonne is quite enough, but nevertheless ...
At the top, the end of the post in the ceiling beam can leave a noticeable dent, and if important appearance logs, then it is worth putting a board there.
The beam rises to the curvature in the opposite direction, taking into account the fact that even when it is fixed, it will sag after lowering the jack. The raised log is fixed in the attic to two spacers with clamps and screws (10x120 mm).

Photo of the clamped clamp.

Animated drawing of a ceiling rise.

Photo of what ended up in the attic.
It was not possible to completely eliminate the sagging, from 10-15 one or two centimeters still remained. Moreover, the beams were bent with a jack with a margin, but in the end the rafter logs sagged. We'll have to correct this matter even during the installation of partitions.
Nevertheless, the swinging of the ceiling during the passage through the attic stopped
Lifting ceiling beams with studs
The fourth method was used to level the same beam in tristen. The same spacers were used in the rafter beams, but instead of clamps there were steel studs with M10 threads. The ceiling beam and spacers were drilled through. And the lifting was carried out not with a jack, but by tightening the nuts on these hairpins.
Here it is advisable not to overdo it with the clamping of these nuts. You can rip off the thread, you can even break off the hairpin. It is better to tighten the nuts at once, two on each side.


Lifting beams with a hairpin
The photo was taken during the partial disassembly of the attic for pouring a concrete beam
This method has two drawbacks. The first is that the nut with the washer and the trimmed hairpin are in the room, it is noticeable, and you need to mask it with something. The second is in a cold bridge running along a steel rod. After all, one end of the hairpin is in the attic and in winter there is frost, and the second in the room and on it condensation will collect.
We had such hairpins were temporarily and removed after ceiling beam lay down on a concrete beam.
The main element of attic and interfloor floors in many private houses is a wooden beam. The service life of wooden floors is limited due to the properties of the wood, especially if it has been poorly processed or has been exposed to stress and moisture.
As a result of such factors, the beam ceases to cope with the function assigned to it (possibly sagging, deflection, curvature) and strengthening of the wooden floor beams will be required.
In addition to damage and loss of bearing capacity of floor and ceiling beams (logs, girders), strengthening can be dictated by an increase in the load on the floor.
When you need to reinforce wooden floor beams
- poor condition of the beam structure... Damage to wood is a consequence. High humidity, temperature changes, the activity of various pests (bark beetles), cracking - all this leads to deformation of the floor beams;
- reduction in bearing capacity... Floor beams can bend under their own weight, constant and variable loads. According to the standards, if the deflection is within 1: 300, then there is nothing to worry about. For example, if the beam is 2500 mm long. bent 10 mm. this corresponds to the normal deflection value. If the deflection index is greater, it should be strengthened;
- the need to increase the bearing capacity of the beam... Associated, for example, with the rebuilding of an attic into an attic or living quarters. Such a restructuring will lead to an increase in permanent and variable loads on the floors of the second floor, which automatically requires a change in the section of the installed wooden beams.
Within the framework of the article, several common methods of strengthening the overlap (, reconstruction) will be given. But, only a professional can accurately answer the question of how to strengthen wooden floor beams and only after analyzing the state of the structure. Indeed, in each case, the decision will be individual.
Using the table, you can get an idea of what section the beam should have under a certain load.
Material prepared for the site site
Methods for strengthening wooden floor beams
The main types and methods of strengthening wooden floors are given in order of increasing labor costs and duration of work.
Amplification type without changing operating conditions
Reinforcement with wooden plates
The method is used when the tree is damaged. The overlays are installed on both sides of the beam from a bar (on the sides or above and below), as tightly as possible to it and fastened (tightened) with a bolt through and through. In this case, it is important to treat the damaged area and onlays with an antifungal solution. In a critical case, if the area is badly damaged, it is better to remove it. To strengthen the beam, you need to attach the trim along its entire length.

Reinforcement of spans with metal plates (plates) or bar prostheses
Steel plates are used instead of the wooden ones described above. The metal must also be treated with an anti-corrosion solution. The diagram of the device is shown in the figure.

Reinforcement of the overlap with carbon fiber (CFRP)
State-of-the-art reinforcement technology (carbon fiber reinforcement). Carbon fiber (tapes, sheets, plates, threads, fabric) is glued in several layers until the required stiffness of the beam is achieved. Convenience of work and lightness of the material lead to the fact that CFRP is gaining popularity as effective remedy for the restoration of beams and building structures.
Below is a diagram of the reinforcement (reinforcement) of the floor beams with carbon fiber.


Reinforcement at the ends with wooden or metal prostheses
The technology makes it possible to strengthen the beam at the joints with the load-bearing wall. This is exactly the place where, due to temperature changes, wood damage occurs faster.


The diagram below shows the technology of strengthening with prostheses from a channel, a rolled profile


Installation of a bar prosthesis
The bar prosthesis of the Daidbekov system is made of two paired trusses, which are made from scraps of reinforcing steel with a section (diameter) of 10-25 mm. The length of the prosthesis should be 10% more than the double length of the decayed end of the beam, but not more than 1.2 m.

- Install temporary supports under the floor at a distance of 1-1.5 m from the load-bearing wall, consisting of racks and a purlin.
- Dismantle the ceiling from the bottom to a width of 75 cm and from the top - 1.5 m from the wall.
- Cut off the damaged section of the beam (0.5m)
- Insert the prosthesis blank vertically in interfloor overlap and turn to a horizontal position, first pushing it onto the beam, then, in the opposite direction, pushing it into the wall niche.
- Move and nail the sliding bar.


Amplification type with changing operating conditions
Strengthening wooden floors in such ways provides for a significant restructuring supporting structure beam spans.


Non-standard solutions
If it is not possible to reinforce the wooden floor beams, you can try to relieve them, i.e., distribute the load from the existing beams to the additionally installed elements.
Reinforcement of slabs by installing supports under load-bearing beams
Supports supporting the beams from below are a good way to transfer the load from the beam to the support.

Reinforcement of slabs by installing additional beams
If the existing lags are safe and sound, increase them bearing capacity it is possible by increasing their number. Installing additional timber beams will increase the load on the structure. When installing new logs, it is imperative to protect their ends with roofing material to avoid damage.

We hope that from the above methods of strengthening wooden floor beams, you will choose the one that will solve your problem in the best way and at the lowest cost.
Aligning wooden ceilings with your own hands will help you significantly save money on hiring outside workers. However, in order for the result of the work to turn out a really flat and durable ceiling, it is necessary to follow the technological process precisely.
The content of the article:
Leveling Technological Process wooden ceiling includes several stages: preparatory work (cleaning the surface, laying wiring, insulation), treating wood from pests, applying a primer to improve the quality of the starting material and increasing adhesion, marking a new ceiling plane, installing auxiliary elements, leveling the wooden ceiling. Let's consider the features of each of them.
Methods for leveling a wooden ceiling

Ceiling alignment can be done in two ways. They are called "dry" and "wet". The first is leveling with profiles and drywall, the second is plastering. Each option has its own advantages and disadvantages, as well as conditions of use.
It is advisable to use plastering if the depth of irregularities does not exceed 3-5 cm. Too thick layer of plaster makes the ceiling heavier, increasing the risk of delamination. With the "wet" method of leveling the ceiling, areas with sufficiently deep drops must be covered with shingles. To level the wooden ceiling better, use beacons.
Preparatory work before leveling a wooden ceiling

Preparing a wooden ceiling for leveling includes several stages:
- Check the ceiling for imperfections, such as damage to planks and beams from pests, mildew, and fungus. Replace heavily damaged parts of the structure and fasteners with new ones to avoid serious damage in the future.
- Delete old plaster... Areas that hold tight and do not interfere further work, you can leave.
- If the ceiling was previously painted water-based paint, to remove, use a solution consisting of water with the addition of iodine.
- Water-dispersion paint is washed off with special solutions, for example, Docker S4 quick-action gel solution (retail price - from 260 rubles per 1 kg). This product is acid-free.
- Cut off small protrusions with a planer.
- If the boards are smooth enough, make notches on them for better adhesion of the mortar to the wood surface.
- The preparatory stage is the most the best time for preventive treatment wood from fungus and mold.
- Lay electrical wiring.
- If necessary, lay insulation, vapor barrier.
- Large cracks between the boards can be repaired with roughing putty and tow. The tow is thoroughly mixed with the putty and hammered into the cracks.
Fighting mold and mildew on a wooden ceiling

Fungus is a fairly common occurrence. It occurs when excessive moisture and poor air ventilation, as well as inadequate heating of the room during the cold season. It affects any surface, including wood products.
The fungus most commonly found on wood surfaces has a bluish tinge. This species is just as dangerous as the others: mold and rotting fungi, as well as actinomycetes.
The bluish fungus destroys the structure of the wood, due to which moisture penetrates into it and remains there. Due to this, mold and rotting fungus develop. The process of destruction of a wooden ceiling occurs quickly enough. That is why it is impossible to neglect the processing of wood with antiseptic agents.
It is known that fungus can penetrate 1 cm or more into wood. If there are such areas, it is better to remove them by replacing them with new boards. If the thickness of the boards allows, use a sharp knife or ax to carve out the affected areas. Waste containing the fungus should be burned to prevent the spread of fungal spores.
Treat the entire surface of the ceiling with a brush or roller with an antiseptic, for example, Nortex-Doctor (from 100 rubles per 1 kg) or Nortex-Disinfector (from 170 rubles per 1 kg). Nortex-Disinfector is highly effective for serious damage to wood by fungus, woodworm beetle and termites. When buying an antiseptic, read the rules of use (material to which the agent is applicable, its consumption), precautions.
Pay special attention to fighting the fungus. Spores of the fungus enter the respiratory and digestive systems, on the skin, causing harm to the entire body in the form of allergies, digestive disorders, sinusitis, pneumonia and other equally dangerous diseases.
Marking a wooden ceiling before leveling
Markup - important stage in aligning the ceiling. The final result depends on its accuracy, as well as the choice of the alignment method that will be most acceptable in a particular situation.
Rules for marking a wooden ceiling

A laser or bubble level is used to mark the ceiling. The laser level provides high accuracy with the least effort and time, in contrast to the bubble instrument. DEFORT DLL-9 is one of the cheapest manual laser levels(cost - from 440 rubles). Bubble level used in tandem with a long rule, it is best to connect them together with duct tape.
- To accurately mark the new position of the ceiling plane, focus on the lowest areas.
- As you measure, mark the walls around the entire perimeter. Drive nails into them and pull tight thread, tying it to the nails.
- If, as a result, the level differences of the plane are small - up to 3 cm, then the “wet” leveling method can be used, ie. applying plaster.
Using shingles when leveling a wooden ceiling

If there is a second floor or an attic above the room in which it is necessary to align the wooden ceiling, then shingles should be equipped over the entire surface of the ceiling.
Shingles - mesh from wooden slats 3-5 mm thick. Reiki is stuffed on wooden surface in two rows. The size of the cells is 5 by 10 cm. The second row is packed in a parallel plane at right angles to the first.
The application of shingles reduces the cost of plaster mortar, and also reduces the likelihood of a thick layer collapse.
Installation of beacons for applying plaster on a wooden ceiling

The lighthouse is a special guiding profile. Its task is to regulate the final level of plastering.
The rules for installing beacons are as follows:
- The lighthouses are fixed to the ceiling parallel to each other.
- The distance between them should be less than the length of the rule that will stretch the solution. If the width of the room is 3 meters, then fix the first lighthouse 50 cm from the wall parallel to it, the second - 150 cm, the third - 250 cm.With this option, the rule should be 160 cm, so that when pulling the solution from the wall to the first lighthouse, the rule also relied on the second lighthouse.
- Install beacons in deeper areas so that the level of the new plane does not decrease. Then the layer of plaster will be less, because the new plane will run along the most protruding section of the ceiling. If the lighthouse is installed in the most protruding part, then the level of the ceiling will drop to the height of the lighthouse.
- Beacons should not be too flexible, otherwise they will sag when pressed by the rule.
- The best option for fastening the beacon profile is "eared".
"Ushastik" is a fastener for beacons, consisting of a screw and a fastener. Installation of "eared": a screw is screwed into the surface to be leveled (it is possible to use a dowel), to which it is attached plastic mount with a plug that holds the beacon firmly. With the use of such fasteners, you can easily adjust the level of the beacon by screwing in a screw. "Ears" are set at the required level. Then beacons are attached to them.
Priming a wooden ceiling before leveling
Before plastering, be sure to prime the entire wood surface of the ceiling. The purpose of applying the primer is to deeply impregnate the wood. The solution fills microcracks, strengthens the structure, and prevents moisture penetration. The primer is designed to improve the adhesion of plaster to wood.
Rules for working with a primer:
- Use gloves and a hat when working.
- Wash all equipment immediately after finishing work with the primer.
- Apply the primer in several steps. The time specified in the instructions should elapse between applications.
- Apply a primer with any in a convenient way: brush, roller, spray.
Exists big choice primers. They can be classified by composition, by the type of surface to be treated, by purpose. In order to purchase the most suitable primer, correctly explain to the seller what material will be processed, what kind of coating will be applied.
Universal primer, in addition to increasing adhesion, improving material strength, increasing resistance external influence designed to fight pests, fungi and mold.
Leveling the wooden ceiling with plaster
As a plaster of a wooden ceiling, you can use cement mortar self-made or other mixtures that are more plastic, for example, Rotband plaster. Rotband Knauf is a universal gypsum-based mixture with good binding properties (retail price - from 400 rubles).
- The solution for leveling a wooden ceiling should be mixed in a small amount. The mixture containing gypsum dries quickly enough.
- The prepared solution should be applied immediately.
- The solution should not be too liquid or hard. A liquid solution tends to spread during operation, and a solid solution does not adhere well to the surface.
- Using a construction mixer will shorten the mixing time of the mortar, while the mortar will be the most homogeneous.
The plaster should be applied after the primer has completely dried.
- Apply the prepared solution with a spatula, starting with inside rooms, moving gradually towards the window opening.
- Apply the solution to small areas- up to 80 cm in length.
- Stretch the rule towards you. Press the rule moderately against the beacons.
- In those areas where the level beacon is located at a certain distance from the ceiling surface, i.e. there is a gap, it is better to apply the plaster in two layers. The first layer is applied before fixing the lighthouse, immediately overlaid with a paint net. In this case, the mesh should be slightly pressed into the applied solution by 3-4 mm. Then the lighthouse is attached, and the final layer of plaster is applied, leveled along the lighthouses.
- Reinforcing mesh must be used over the entire ceiling area if the plaster layer exceeds 1 cm.
- When the solution has already been applied to the entire surface of the wooden ceiling, remove the beacons. If the lighthouse is made of a material that is resistant to oxidation, then it can be left without fear of rust.
- The grooves from the lighthouses should be covered with the same solution.
The starter putty has a medium grain size and is used for the initial leveling of the surface. The finishing putty has the smallest grain, which is why it is suitable for the final smoothing of the surface.
Watch the video about wooden ceilings: